Who hasn’t come across an error while doing an update in Ubuntu? Update errors are common and plenty in Ubuntu and other Linux distributions based on Ubuntu. Here are some common Ubuntu update errors and their fixes.
This article is part of Ubuntu beginner series that explains the know-how of Ubuntu so that a new user could understand the things better.
In an earlier article, I discussed how to update Ubuntu. In this tutorial, I’ll discuss some common errors you may encounter while updating Ubuntu. It usually happens because you tried to add software or repositories on your own and that probably caused an issue.
There is no need to panic if you see the errors while updating your system.The errors are common and the fix is easy. You’ll learn how to fix those common update errors.
Before you begin, I highly advise reading these two articles to have a better understanding of the repository concept in Ubuntu.

Understand Ubuntu repositories
Learn what are various repositories in Ubuntu and how they enable you to install software in your system.

Understanding PPA in Ubuntu
Further improve your concept of repositories and package handling in Ubuntu with this detailed guide on PPA.
Error 0: Failed to download repository information
Many Ubuntu desktop users update their system through the graphical software updater tool. You are notified that updates are available for your system and you can click one button to start downloading and installing the updates.
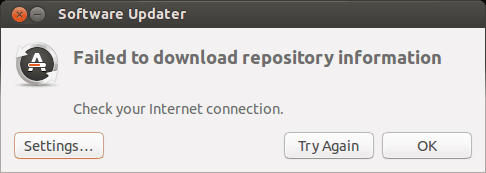
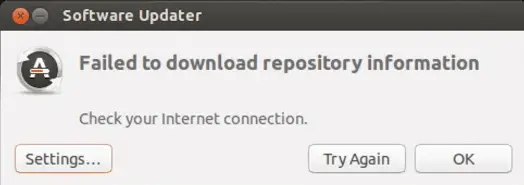
Well, that’s what usually happens. But sometimes you’ll see an error like this:

Failed to download repository information. Check your internet connection.
That’s a weird error because your internet connection is most likely working just fine and it still says to check the internet connection.
Did you note that I called it ‘error 0’? It’s because it’s not an error in itself. I mean, most probably, it has nothing to do with the internet connection. But there is no useful information other than this misleading error message.
If you see this error message and your internet connection is working fine, it’s time to put on your detective hat and use your grey cells (as Hercule Poirot would say).
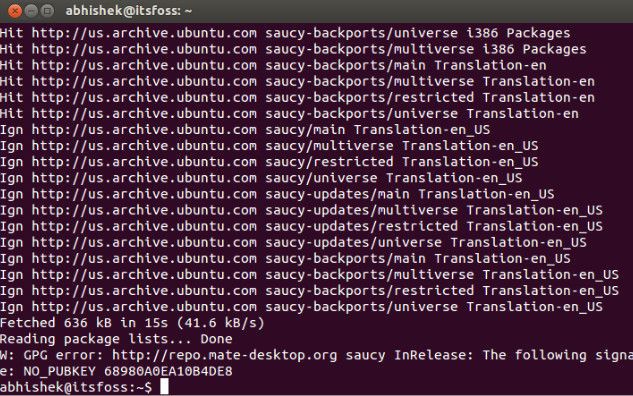
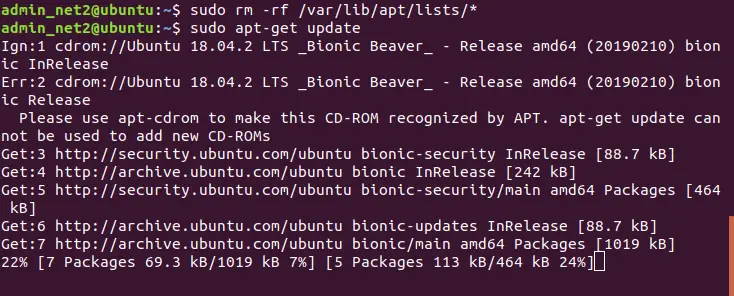
You’ll have to use the command line here. You can use Ctrl+Alt+T keyboard shortcut to open the terminal in Ubuntu. In the terminal, use this command:
sudo apt updateLet the command finish. Observe the last three-four lines of its output. That will give you the real reason why sudo apt-get update fails. Here’s an example:
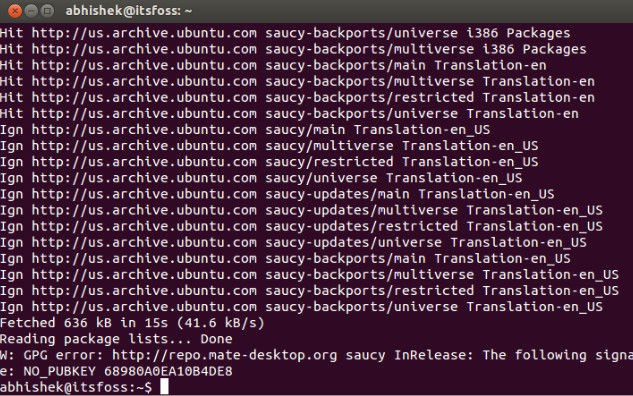
Rest of the tutorial here shows how to handle the errors that you just saw in the last few lines of the update command output.
Error 1: Problem With MergeList
When you run update in terminal, you may see an error “problem with MergeList” like below:
E:Encountered a section with no Package: header,
E:Problem with MergeList /var/lib/apt/lists/archive.ubuntu.com_ubuntu_dists_precise_universe_binary-i386_Packages,
E:The package lists or status file could not be parsed or opened.’
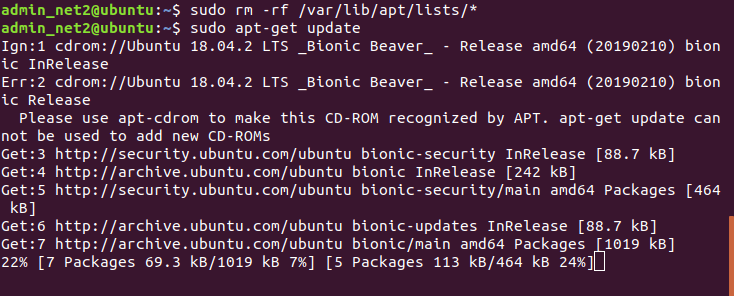
For some reasons, the file in /var/lib/apt/lists directory got corrupted. You can delete all the files in this directory and run the update again to regenerate everything afresh. Use the following commands one by one:
sudo rm -r /var/lib/apt/lists/*
sudo apt-get clean && sudo apt-get update
Your problem should be fixed.
Error 2: Hash Sum mismatch
If you find an error that talks about Hash Sum mismatch, the fix is the same as the one in the previous error.
W:Failed to fetch bzip2:/var/lib/apt/lists/partial/in.archive.ubuntu.com_ubuntu_dists_oneiric_restricted_binary-i386_Packages Hash Sum mismatch,
W:Failed to fetch bzip2:/var/lib/apt/lists/partial/in.archive.ubuntu.com_ubuntu_dists_oneiric_multiverse_binary-i386_Packages Hash Sum mismatch,
E:Some index files failed to download. They have been ignored, or old ones used instead
The error occurs possibly because of a mismatched metadata cache between the server and your system. You can use the following commands to fix it:
sudo rm -rf /var/lib/apt/lists/*
sudo apt update
Error 3: Failed to fetch with error 404 not found
If you try adding a PPA repository that is not available for your current Ubuntu version, you’ll see that it throws a 404 not found error.
W: Failed to fetch http://ppa.launchpad.net/venerix/pkg/ubuntu/dists/raring/main/binary-i386/Packages  404  Not Found
E: Some index files failed to download. They have been ignored, or old ones used instead.
You added a PPA hoping to install an application but it is not available for your Ubuntu version and you are now stuck with the update error. This is why you should check beforehand if a PPA is available for your Ubuntu version or not. I have discussed how to check the PPA availability in the detailed PPA guide.
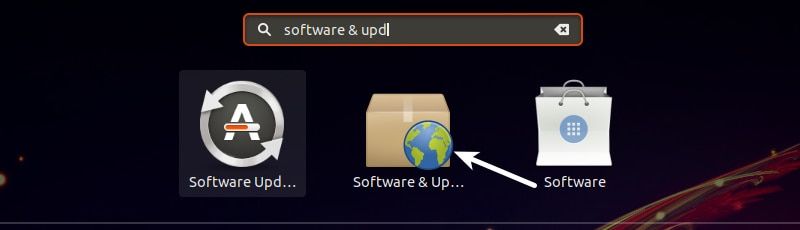
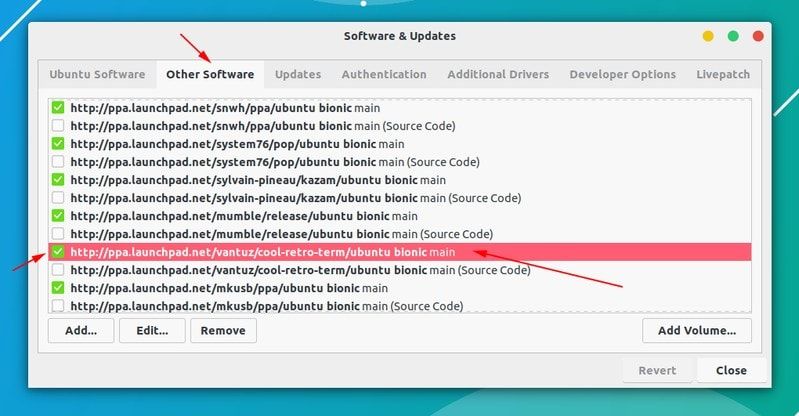
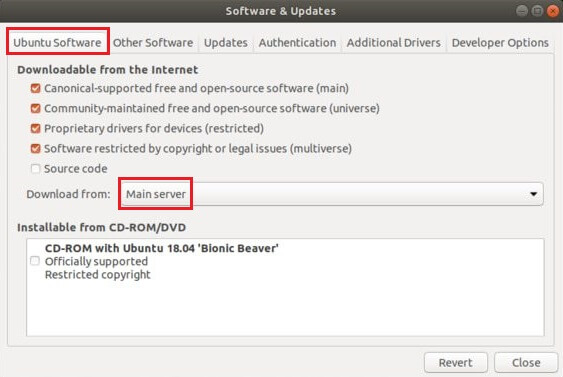
Anyway, the fix here is that you remove the troublesome PPA from your list of repositories. Note the PPA name from the error message. Go to Software & Updates tool:

In here, move to Other Software tab and look for that PPA. Uncheck the box to remove the PPA from your system.
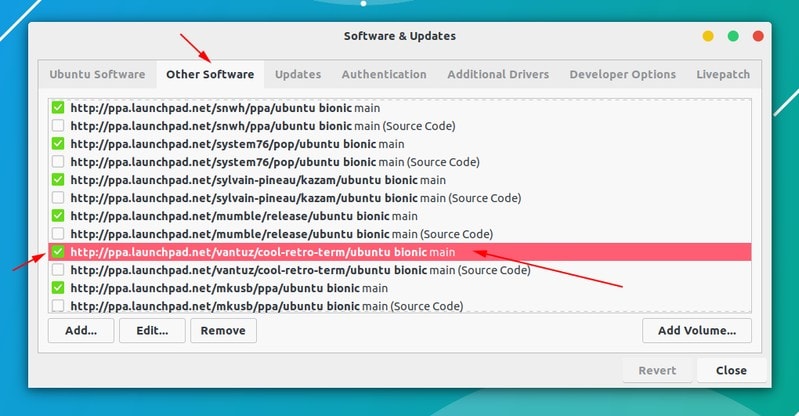
Your software list will be updated when you do that. Now if you run the update again, you shouldn’t see the error.
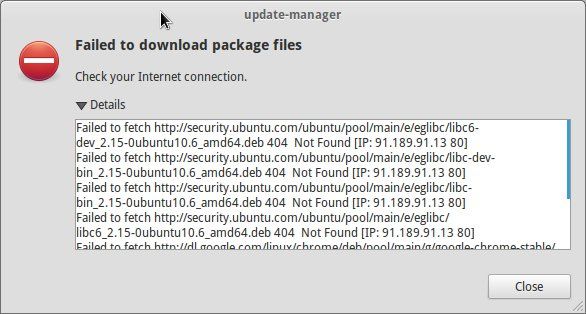
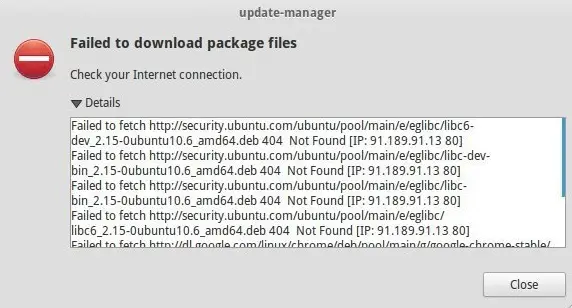
Error 4: Failed to download package files error
A similar error is failed to download package files error like this:
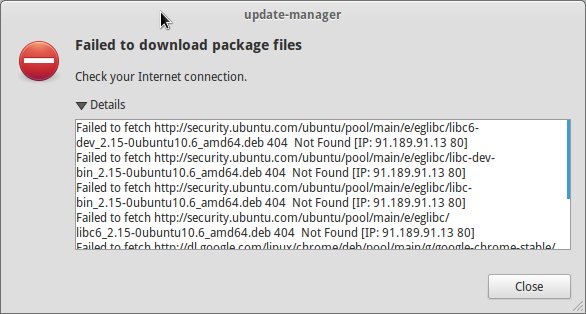
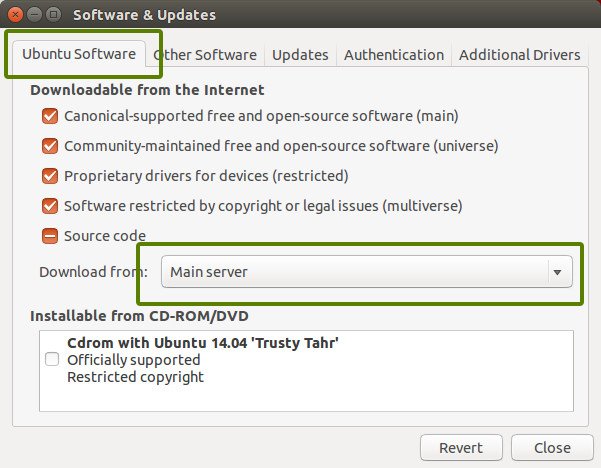
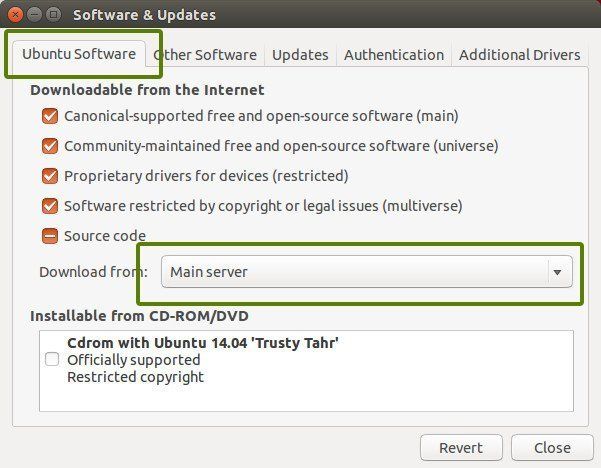
In this case, a newer version of the software is available but it’s not propagated to all the mirrors. If you are not using a mirror, easily fixed by changing the software sources to Main server. Please read this article for more details on failed to download package error.
Go to Software & Updates and in there changed the download server to Main server:
Error 5: GPG error: The following signatures couldn’t be verified
Adding a PPA may also result in the following GPG error: The following signatures couldn’t be verified when you try to run an update in terminal:
W: GPG error: http://repo.mate-desktop.org saucy InRelease: The following signatures couldn’t be verified because the public key is not available: NO_PUBKEY 68980A0EA10B4DE8
All you need to do is to fetch this public key in the system. Get the key number from the message. In the above message, the key is 68980A0EA10B4DE8.
This key can be used in the following manner:
sudo apt-key adv --keyserver keyserver.ubuntu.com --recv-keys 68980A0EA10B4DE8
Once the key has been added, run the update again and it should be fine.
Error 6: BADSIG error
Another signature related Ubuntu update error is BADSIG error which looks something like this:
W: A error occurred during the signature verification. The repository is not updated and the previous index files will be used. GPG error: http://extras.ubuntu.com precise Release: The following signatures were invalid: BADSIG 16126D3A3E5C1192 Ubuntu Extras Archive Automatic Signing Key
W: GPG error: http://ppa.launchpad.net precise Release:
The following signatures were invalid: BADSIG 4C1CBC1B69B0E2F4 Launchpad PPA for Jonathan French W: Failed to fetch http://extras.ubuntu.com/ubuntu/dists/precise/Release
All the repositories are signed with the GPG and for some reason, your system finds them invalid. You’ll need to update the signature keys. The easiest way to do that is by regenerating the apt packages list (with their signature keys) and it should have the correct key.
Use the following commands one by one in the terminal:
cd /var/lib/apt
sudo mv lists oldlist
sudo mkdir -p lists/partial
sudo apt-get clean
sudo apt-get update
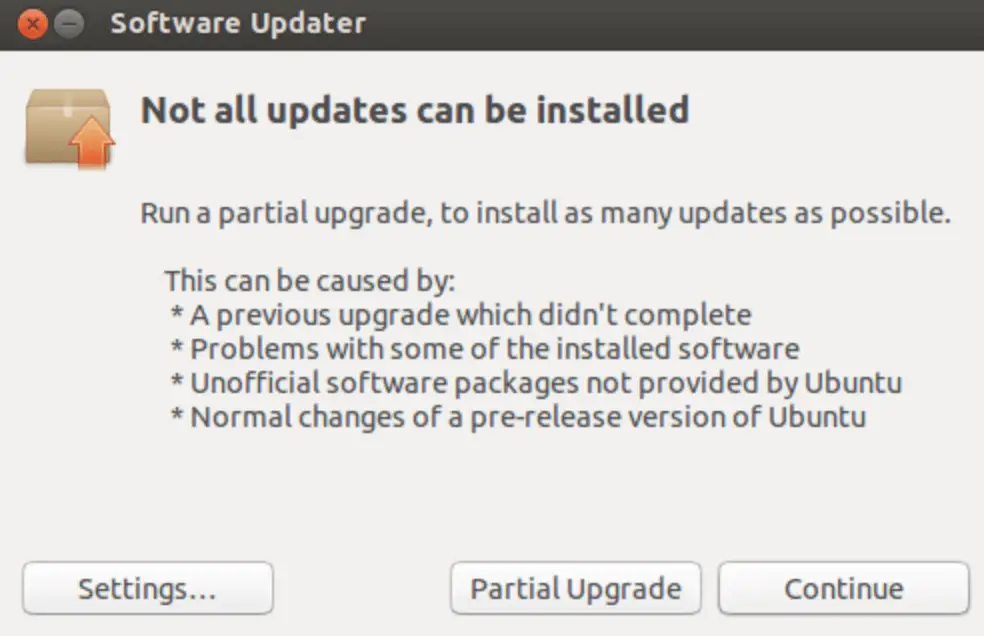
Error 7: Partial upgrade error
Running updates in terminal may throw this partial upgrade error:

Not all updates can be installed
Run a partial upgrade, to install as many updates as possible
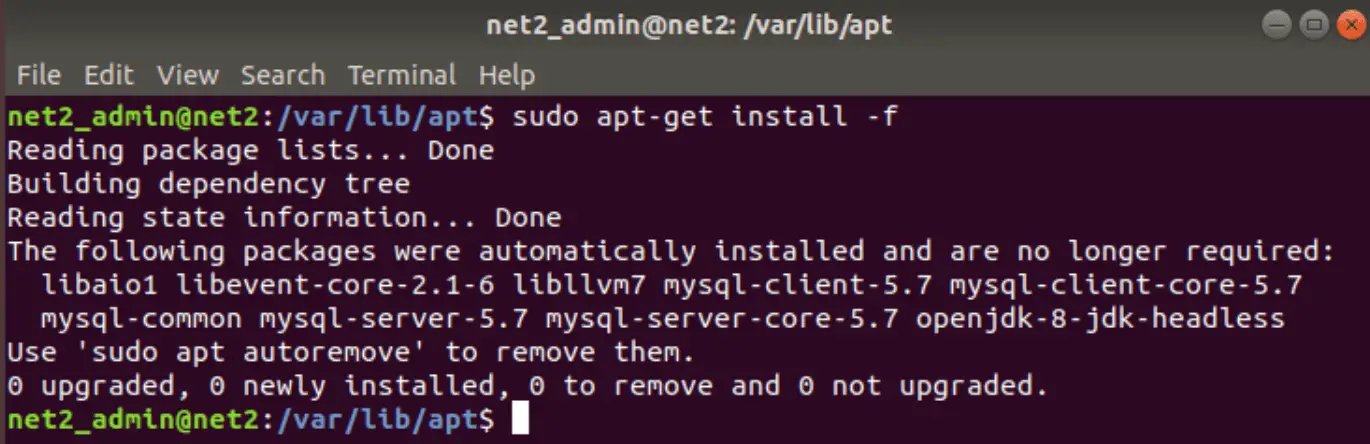
Run the following command in terminal to fix this error:
sudo apt-get install -f
Error 8: Could not get lock /var/cache/apt/archives/lock
This error happens when another program is using APT. Suppose you are installing some thing in Ubuntu Software Center and at the same time, trying to run apt in terminal.
E: Could not get lock /var/cache/apt/archives/lock – open (11: Resource temporarily unavailable)
E: Unable to lock directory /var/cache/apt/archives/
Check if some other program might be using apt. It could be a command running terminal, Software Center, Software Updater, Software & Updates or any other software that deals with installing and removing applications.
If you can close other such programs, close them. If there is a process in progress, wait for it to finish.
If you cannot find any such programs, use the following command to kill all such running processes:
sudo killall apt apt-get
This is a tricky problem and if the problem still persists, please read this detailed tutorial on fixing the unable to lock the administration directory error in Ubuntu.
Any other update error you encountered?
That compiles the list of frequent Ubuntu update errors you may encounter. I hope this helps you to get rid of these errors.
Have you encountered any other update error in Ubuntu recently that hasn’t been covered here? Do mention it in comments and I’ll try to do a quick tutorial on it.
Кто не встречал ошибок в процессе обновления Ubuntu? Ошибки обновления в Ubuntu и иных дистрибутивах Linux встречаются часто и не вызывают удивления. В статье описан ряд часто встречающихся ошибок и способы их решения.
Данная статья является частью серии, посвященной новичкам в Ubuntu, и она призвана помочь лучше понять работу с дистрибутивом.
В данном туториале мы рассмотрим часто встречающиеся ошибки, которые можно встретить при обновлении Ubuntu. Они зачастую происходят тогда, когда пытаешься добавить софт или репозитории самостоятельно.
Если во время обновления системы появляются ошибки, паниковать не стоит. Ошибки случаются часто и решения есть. Вы научитесь как решить часто встречающиеся ошибки.
Ошибка 0: Failed to download repository information
Многие пользователи Ubuntu обновляют систему через графическую программное средство обновления. Вам приходит оповещения, что стали доступными обновления для вашей системы и теперь можно нажать на кнопку для начала скачивания и установки.
Обычно так и происходит, но иногда можно увидеть подобную ошибку:
Скорее всего ошибка покажется странной, так как интернет работает, но вас все равно просят его проверить.
Заметили, что я назвал ее “Ошибка 0”? Это потому что это по сути не ошибка. То есть, скорее всего, она не связана с подключением к интернету. Тем не менее помимо этого путающего сообщения больше информации нет.
Если вы видите данное сообщение, а подключение к интернету в порядке, то значит пришло время надевать шляпу детектива и пошевелить мозгами.
Нам придется использовать командную строку. Для того чтобы ее быстро открыть можете воспользоваться сочетанием клавиш ctrl+alt+T. Исполните в ней данную команду:
sudo apt update
Дождитесь завершения процесса. Рассмотрите последние 3-4 строки вывода. Они покажут действительные причины ошибки sudo apt-get update. Вот пример:
Дальше туториал будет посвящен способам решения ошибок, указанных в нескольких последних строчках вывода командной строки.
Ошибка 1: Problem With MergeList
Когда вы запустите обновление в терминале, то можете увидеть ошибку “Problem With MergeList”:
E:Encountered a section with no Package: header,
E:Problem with MergeList /var/lib/apt/lists/archive.ubuntu.com_ubuntu_dists_precise_universe_binary-i386_Packages,
E:The package lists or status file could not be parsed or opened.’
По какой-то причине файл в директории /var/lib/apt/lists сломался. Вы можете удалить все файлы в указанной директории и запустить обновление снова. Исполните указанные команды одна за другое:
sudo rm -r /var/lib/apt/lists/*
sudo apt-get clean && sudo apt-get update
Проблемы должны исчезнуть
Ошибка 2: Hash Sum mismatch
Вы можете встретиться с ошибкой “Hash Sum mismatch”. Ее решение аналогично тому, что мы написали выше.
W:Failed to fetch bzip2:/var/lib/apt/lists/partial/in.archive.ubuntu.com_ubuntu_dists_oneiric_restricted_binary-i386_Packages Hash Sum mismatch,
W:Failed to fetch bzip2:/var/lib/apt/lists/partial/in.archive.ubuntu.com_ubuntu_dists_oneiric_multiverse_binary-i386_Packages Hash Sum mismatch,
E:Some index files failed to download. They have been ignored, or old ones used instead
Скорее всего ошибка происходит из-за несовпадения на серверах кэша метаданных. Для исправления ситуации используйте данные команды:
sudo rm -rf /var/lib/apt/lists/*
sudo apt update
Ошибка 3: Failed to fetch with error 404 not found
Если вы попытаетесь добавить репозиторий, который недоступен в вашей текущей версии Ubuntu, то увидите ошибку 404 not found:
W: Failed to fetch http://ppa.launchpad.net/venerix/pkg/ubuntu/dists/raring/main/binary-i386/Packages  404  Not Found
E: Some index files failed to download. They have been ignored, or old ones used instead.
Вы добавили PPA в надежде установить приложение, но оно недоступно для вашей версии Ubuntu, и появилась ошибка. Вот почему следует заранее проверять доступно ли PPA для вашей версии Ubuntu или нет. Как удостовериться, что для вашей версии есть PPA, можно посмотреть здесь.
Так или иначе решением данной проблемы является удаление проблемной PPA из списка репозиториев. Название PPA вы найдете в сообщении об ошибке. Зайдите в средство Software & Updates:
Здесь пройдите во вкладку Other Software и поищите PPA. Уберите галочку, чтобы PPA удалилась из системы.
Ваш список программ после этого обновится. Теперь, если вы снова запустите обновление, ошибка исчезнет.
Ошибка 4: Failed to download package files
В данной ситуации доступна новая версия программы, но эта версия не распространена на все зеркала. Если вы не используете зеркало, то решить эту проблему просто — сделайте источником программы основной сервер.
Пройдите в Software & Updates там измените сменить сервер с которого происходит скачивание на main (основной):
Ошибка 5: GPG error: The following signatures couldn’t be verified
Добавление PPA может также привести к оповещению “GPG error: The following signatures couldn’t be verified” во время обновления:
W: GPG error: http://repo.mate-desktop.org saucy InRelease: The following signatures couldn’t be verified because the public key is not available: NO_PUBKEY 68980A0EA10B4DE8
Все что надо в данном случае сделать, так это добавить публичный код в систему. Возьмите ключ из сообщения. В сообщении выше это 68980A0EA10B4DE8.
Данный ключ можно использовать так:
sudo apt-key adv --keyserver keyserver.ubuntu.com --recv-keys 68980A0EA10B4DE8
Как только ключ будет добавлен, запустите обновление и все должны быть в порядке.
Ошибка 6: BADSIG error
Еще одна знаковая ошибка при обновлении Ubuntu — это “BADSIG error”, которая выглядит примерно так:
W: A error occurred during the signature verification. The repository is not updated and the previous index files will be used. GPG error: http://extras.ubuntu.com precise Release: The following signatures were invalid: BADSIG 16126D3A3E5C1192 Ubuntu Extras Archive Automatic Signing Key
W: GPG error: http://ppa.launchpad.net precise Release:
The following signatures were invalid: BADSIG 4C1CBC1B69B0E2F4 Launchpad PPA for Jonathan French W: Failed to fetch http://extras.ubuntu.com/ubuntu/dists/precise/Release
Все репозитории подписаны GPG, и по какой-то причине система считает их неверными. Необходимо обновить ключи подписей. Проще всего это сделать путем повторной генерации списка apt get (с ключами подписей) и он должен иметь верный ключ.
Используйте следующие команды одну за другой:
cd /var/lib/apt
sudo mv lists oldlist
sudo mkdir -p lists/partial
sudo apt-get clean
sudo apt-get update
Ошибка 7: Partial upgrade error
Обновление через терминал может привести к такому:

Not all updates can be installed
Run a partial upgrade, to install as many updates as possible
Для исправления ошибки исполните в терминале данную команду:
sudo apt-get install -f
Ошибка 8: Could not get lock /var/cache/apt/archives/lock
Данная ошибка происходит, когда еще одна программа использует APT. Допустим вы устанавливаете что-то через Ubuntu Software Center и в одновременно пытается запустить apt в терминале.
E: Could not get lock /var/cache/apt/archives/lock – open (11: Resource temporarily unavailable)
E: Unable to lock directory /var/cache/apt/archives/
Проверьте не использует ли apt другая программа. Это может быть команда в терминале, Software Center, Software Updater, Software & Updates или иной другой соф, который занимается установкой и удалением приложений.
Если можете такие программы закрыть, закрывайте. Если что-то в процессе, то дождитесь завершения.
Если ничего найти не можете, используйте данную команду для того, чтобы прекратить все подобные процессы:
sudo killall apt apt-get
Это хитрая проблема, так что придется попотеть. Если это не поможет, то рекомендуем эту статью.
Встречали ли вы другие ошибки при обновлении?
Так завершается обзор часто встречающихся ошибок при обновлении Ubuntu. Надеюсь данная статья поможет вам с ними справится.
Вы не встречали других ошибок при обновлении Ubuntu недавно, о которых здесь не говорится? Расскажите в комментариях.
In this article, you will learn how to fix some common update errors that occur frequently when you try to update your Ubuntu version.
Ubuntu is a popular and reliable operating system, but occasionally updates can fail or produce errors. These errors can range from minor issues that can be easily resolved, to more serious problems that may require more extensive troubleshooting. In this tutorial, we will discuss some common methods for fixing Ubuntu update errors, including an introduction to some of the tools and techniques that you can use to troubleshoot and resolve update issues.
Before diving into the specific steps for fixing update errors, it is important to understand a few key concepts and tools that will be useful in troubleshooting and resolving update issues on Ubuntu. These include:
The “apt” package manager: Ubuntu uses the “apt” package manager to install, update, and manage packages on the system. Apt is a powerful and flexible tool, but can also be a source of update errors if there are issues with the package repository or with the packages themselves.
The “apt-get” command: The “apt-get” command is a command-line tool for interacting with the apt package manager. You can use apt-get to install, update, and remove packages, as well as to troubleshoot and resolve update issues.
The “apt-cache” command: The “apt-cache” command is a command-line tool that allows you to view information about packages in the package repository, such as their dependencies, files, and descriptions. You can use apt-cache to investigate issues with specific packages and their dependencies.
The “apt-config” command: The “apt-config” command is a command-line tool that allows you to view and modify the configuration options for the apt package manager. You can use apt-config to investigate issues with the package repository or with the configuration of apt itself.
With these concepts and tools in mind, we can now move on to discussing some common methods for fixing update errors on Ubuntu.
Error with “Hash sum Mismatch” :
When checking for updates, you might end up getting a “Failed To Download Repository Information” error.

This problem affects particularly rapidly changing repositories, such as the development release.
In order to fix this issue, you would just need to remove all the content of the directory /var/lib/apt/lists. Run the following command in the terminal :
sudo rm -rf /var/lib/apt/lists/*
then run:
sudo apt-get update
Read: What you need to do to secure Ubuntu
Problem with MergeList error :
It is one of the most frequently occurring errors during an Ubuntu update (sudo apt-get update not working|sudo apt update not working for instance ). It can happen when using both the sudo apt-get update in terminal and Ubuntu Update Manager. The error text might look similar to the following:
E:Encountered a section with no Package: header,
E:Problem with MergeList /var/lib/apt/lists/archive.ubuntu.com_ubuntu_dists_precise_universe_binary-i386_Packages,
E:The package lists or status file could not be parsed or opened.
Issue the following commands to fix the problem:
sudo rm -r /var/lib/apt/lists/*

sudo apt-get clean && sudo apt-get update

“Failed to Download Repository Information” Error :
This is a rather generic error that can pop up for any kind of error during an Ubuntu update. You might have added a PPA which is not responding or is no longer available. It might look like the following :
E:Unable to parse package file /var/lib/apt/lists/partial/archive.ubuntu.com_ubuntu_dists_precise_multiverse_i18n_Index (1)
If this a PPA problem, you would just need to identify the PPA that is failing and remove it from sources file.
Read: How to speed up Linux
To fix this, just issue the commands below like you did above:
sudo rm -rf /var/lib/apt/lists/*
then run:
sudo apt-get update
Error “Failed to download package files error”
This can be solved easily by modifying the software sources to Main server.
Read: How to install and uninstall applications in Ubuntu ? A Beginner’s guide
It’s simple: just open : Software & Updates, go to download from and change download server to main server .
This change will make future downloads slightly slower, due to the fact the main server is busier than a local server. This should provide more stability and a longer up-time.
Could not get lock /var/cache/apt/archives/lock
This error occurs when APT is being used by another program. In case an installation from Ubuntu Software Center is ongoing and at the same time you are running apt in the terminal, this error can pop up and might look similar to the output below:
E: Could not get lock /var/cache/apt/archives/lock – open (11: Resource temporarily unavailable)
E: Unable to lock directory /var/cache/apt/archives/
Since you can close the software update once it completed so that the lock gets released. If the problem persists however, issue the following commands:
sudo rm /var/lib/apt/lists/lock

Read: How to fix ‘E: Could not get lock /var/lib/dpkg/lock’ Error in Ubuntu
If the command above did not solve this problem, try the command:
sudo killall apt-get

Partial upgrade error
When installing updates in the terminal, you might encounter this upgrade error :
You may want to execute the command below to try to fix this error:
sudo apt-get install -f
Error while loading shared libraries
This is rather an installation error and not an update error. In case you are trying to install a program directly from the source code, this error might pop up:
Read: How to fix high memory usage in Linux
error while loading shared libraries:
cannot open shared object file: No such file or directory
To fix this issue, try to issue the following command:
sudo /sbin/ldconfig -v

GPG error: The following signatures couldn’t be verified
This isn’t much of an error but rather a small configuration issue. It used to occur quite frequently with IGD( Intel Graphics Drivers ) when trying to add the PPA. The error might look similar to the output below :
W: GPG error: http://repo.mate-desktop.org saucy InRelease: The following signatures couldn’t be verified because the public key is not available: NO_PUBKEY 68980A0EA10B4DE8
The solution would be is to look up the public key that was not available from the remote server. Copy the key from the message and run the following command:
sudo apt-key adv –keyserver keyserver.ubuntu.com –recv-keys 68980A0EA10B4DE8
Once the key has been retrieved and added, issue an update again and you should be good to go.
Read: How to use the APT command on Ubuntu/Debian Linux systems
BADSIG error
The BADSIG error might resemble the output below :
W: GPG error: http://download.virtualbox.org lucid Release: The following signatures were invalid: BADSIG 54422A4B98AB5139 Oracle Corporation (VirtualBox archive signing key)
To fix this error, run the following commands in the terminal:
sudo apt-get clean
cd /var/lib/apt
sudo mv lists oldlist
sudo mkdir -p lists/partial
sudo apt-get clean
sudo apt-get update
If the issue occurs again however, open Nautilus as root and navigate to var/lib/apt then delete the “lists.old” directory. Afterwards, open the “lists” folder and remove the “partial” directory. Finally, run the above commands again.
If this does not work, copy the character shown in bold in the error message above and then issue the command below like you did in the previous section :
sudo apt-key adv –recv-keys –keyserver keyserver.ubuntu.com 54422A4B98AB5139
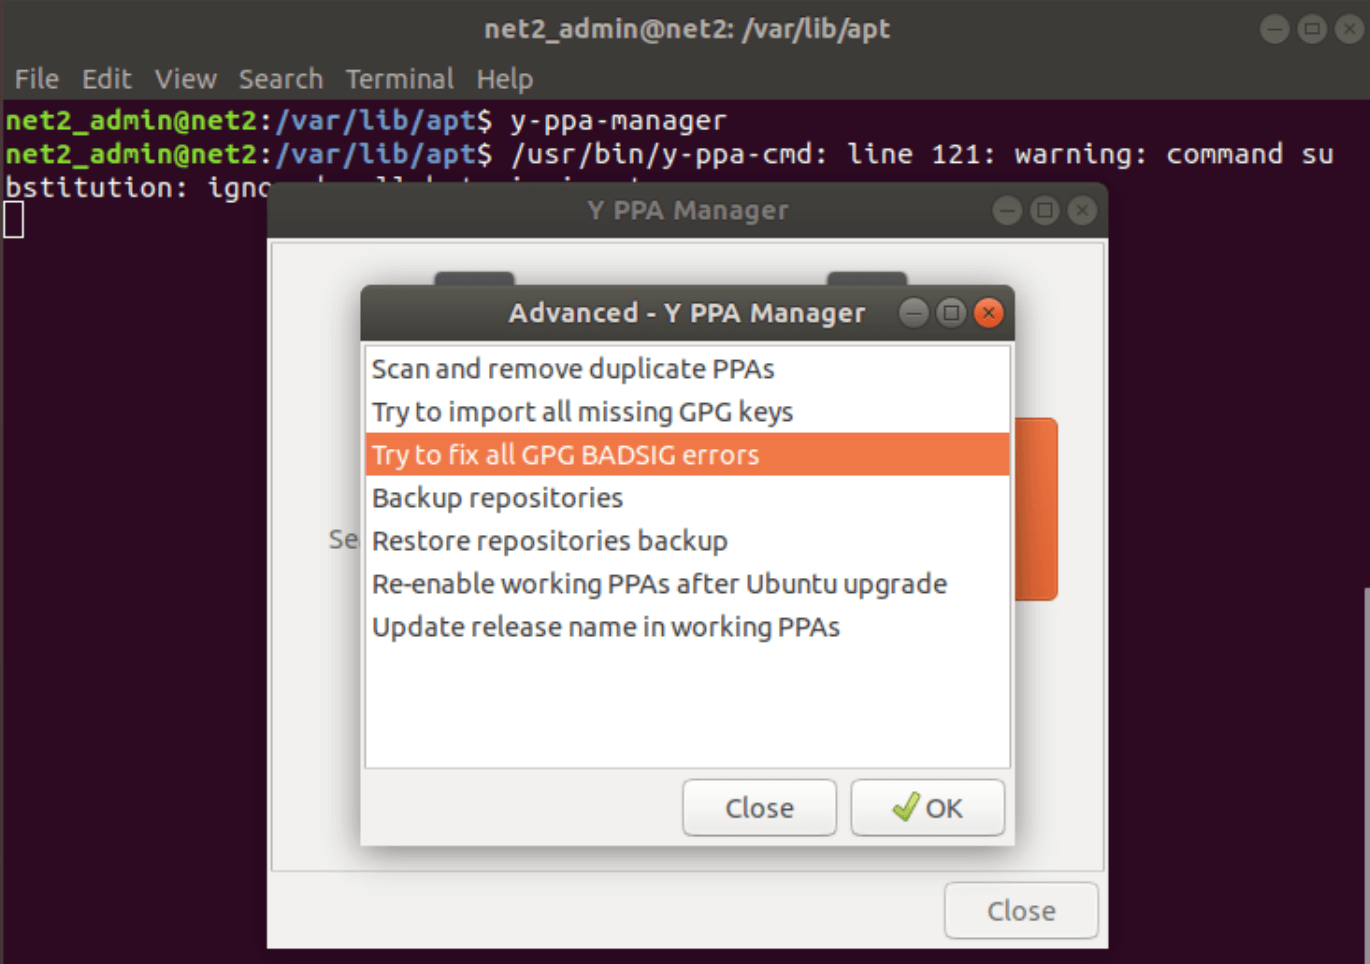
Another simpler way to fix the BADSIG GPG errors is via Y PPA manager.
First you would need to install it via the following commands :
sudo add-apt-repository ppa:webupd8team/y-ppa-manager
sudo apt-get update
sudo apt-get install y-ppa-manager
Then open it up by invoking :
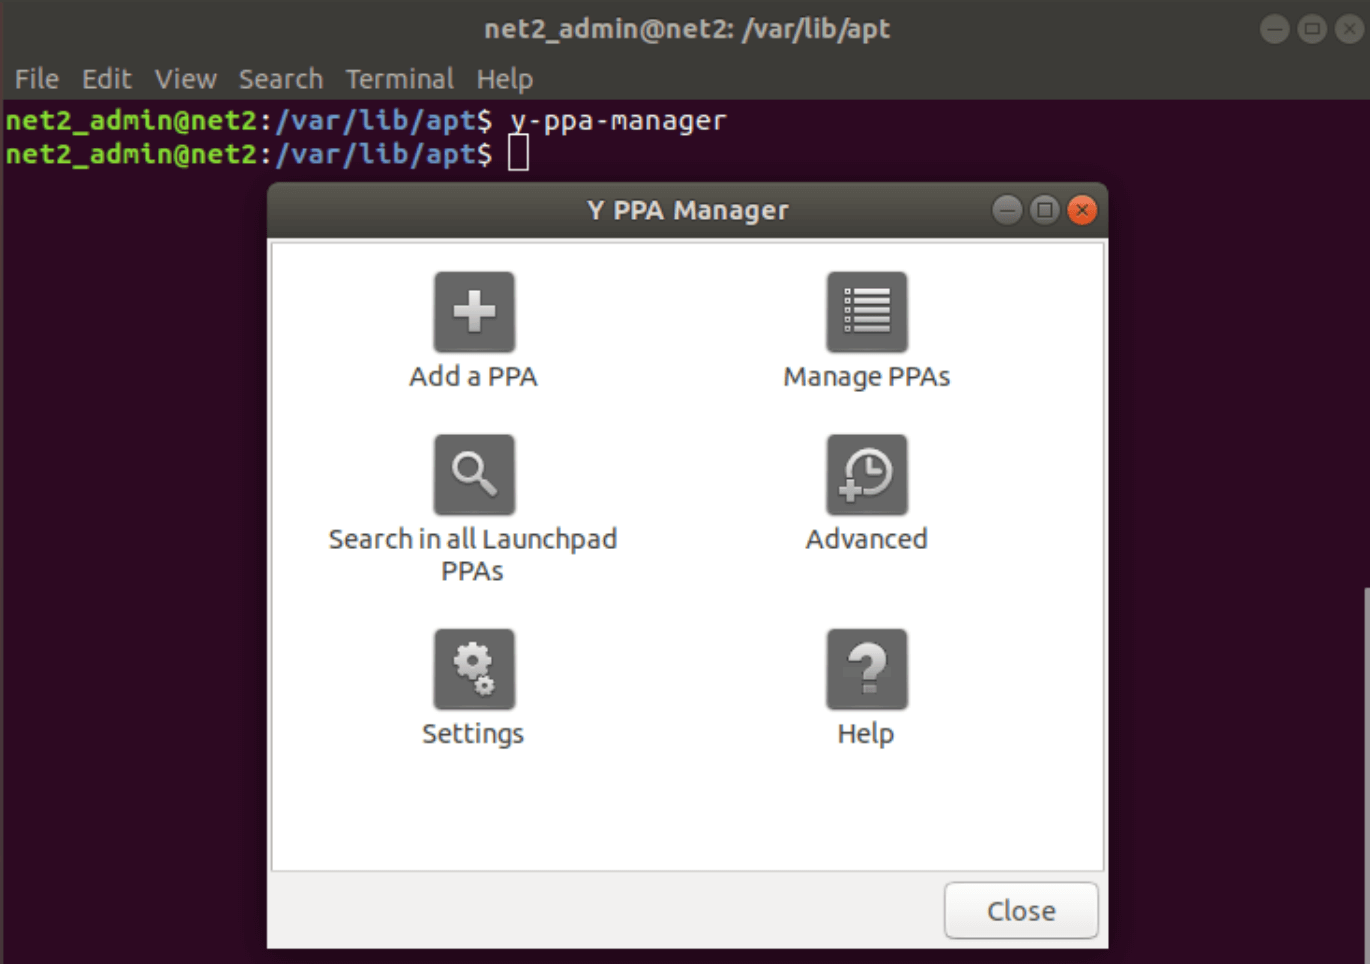
And click on Advanced and then select Fix all GPG Badsig errors:
If you like the content, we would appreciate your support by buying us a coffee. Thank you so much for your visit and support.
For all its benefits, occasionally Ubuntu can throw some errors when updating the system that can confuse and even worry a new user. I recall the first time I had “broken packages” with a lack of experience – I ended up nuking the OS and reinstalling, vowing never to use the command line again. The reality is far less dramatic, especially now that Ubuntu has matured from the days of 8.04 when I first installed it.
What follows are common error messages and how to fix them with minimal fuss.
Package Hash Mismatch
As common as this sounds, Ubuntu will unfortunately produce this error generically, meaning it gives little information about the problem, should there not be an Internet issue. In order to diagnose this, return to the Terminal and type:
A long series of text will scroll across the screen, but within this will be the following line or similar:
W:Failed to fetch package:/var/lib/apt/lists/partial/in.archive.ubuntu.com_ubuntu_dists_oneiric_restricted_binary-i386_Packages Hash Sum mismatch
W:Failed to fetch package:/var/lib/apt/lists/partial/in.archive.ubuntu.com_ubuntu_dists_oneiric_multiverse_binary-i386_Packages Hash Sum mismatch
E:Some index files failed to download. They have been ignored, or old ones used instead
In order to fix this, you can enter this into the Terminal:
sudo rm -rf /var/lib/apt/lists/*
sudo apt-get update
This will remove all the cached packages and force the system to re-download them again.
Failed to Download Repository Information
This error is more straightforward and usually due to a PPA that you have added which is no longer available or simply not responding.

If this a PPA issue, then simply identify which of the PPAs is failing and remove it from sources. Do this as above by entering:
Failed to Download Package Information
This is another straightforward package error. Simply go to the sources and change the source to the Main Server.


Changing this means that future downloads might be slightly slower, due to the main server being busier than a local one, but it should be more stable and have a longer up-time than local servers which can be occasionally patchy.
Partial Upgrade Error
When running an update within the Terminal, users can be presented with the following error:
Not all updates can be installed
Run a partial upgrade, to install as many updates as possible
Run this command to fix the problem:
Could Not Get Lock /var/cache/apt/archives/lock
When another package is using apt, then this error will appear. To explain, perhaps you are installing a .deb package like Google Chrome and then decide to use the Terminal to install something else, like Chromium or Firefox, at the same time.
E: Could not get lock /var/cache/apt/archives/lock – open (11: Resource temporarily unavailable)
E: Unable to lock directory /var/cache/apt/archives/
Usually you can wait for the .deb package to finish installing and simply close the Software Center or gdebi if you use this. However, if the problem continues, you can resolve it by entering the following within the Terminal:
sudo rm /var/lib/apt/lists/lock
If this should fail, you can kill the process via:
GPG Error: The Following Signatures Cannot Be Verified
This isn’t really an error as such, just a small matter of configuration. It used to happen a lot with Intel Graphics Drivers when adding the PPA. Trying to update via the Terminal will give:
W: GPG error: http://repo.mate-desktop.org saucy InRelease: The following signatures couldn’t be verified because the public key is not available: NO_PUBKEY 68980A0EA10B4DE8
The solution is to get the public key in the system. Take the key from the message above and enter the following:
sudo apt-key adv --keyserver keyserver.ubuntu.com --recv-keys 68980A0EA10B4DE8
Inevitably, this will change based on what you are trying to verify and trying to import, so use the above as a guide.
Hopefully, this will resolve a lot of errors that users experience and will help avoid dramatic re-installations. How do you solve errors within Ubuntu? Let us know in the comments section, especially if you have other methods.
Matthew Muller
Matt has worked in the tech industry for many years and is now a freelance writer. His experience is within Windows, Linux, Privacy and Android.
Subscribe to our newsletter!
Our latest tutorials delivered straight to your inbox
overview
There are two parts to your question:
- fixing temporary resolve messages
- fixing the package management issues
Temporary resolve
It is likely that this issue is either:
- temporary due to your Internet Service Provider not correctly forwarding internet naming (DNS) to either its or external DNS servers, or
- due to a change in your network has similarly blocked this naming — for example, new router/modem, reconfiguring a switch with a new configuration.
Lets look at the possible DNS resolving issues.
First, temporarily add a known DNS server to your system.
echo "nameserver 8.8.8.8" | sudo tee /etc/resolv.conf > /dev/null
Then run sudo apt-get update.
If this fixes your temporary resolving messages then either wait for 24 hours to see if your ISP fixes the issue for you (or just contact your ISP) — or you can permanently add a DNS server to your system:
echo "nameserver 8.8.8.8" | sudo tee /etc/resolvconf/resolv.conf.d/base > /dev/null
8.8.8.8 is Google’s own DNS server.
source
Another example DNS server you could use is OpenDNS — for example:
echo "nameserver 208.67.222.222" | sudo tee /etc/resolvconf/resolv.conf.d/base > /dev/null
package-management issues
In addition to the temporary resolve issues — you have a few package management issues that need to be corrected — I’m assuming you have tried recently to upgrade from one Ubuntu version to the next recommended version — in your case from Natty (11.04) to Oneiric (11.10)
Open a terminal and type
sudo nano /etc/apt/sources.list
Look for lines that have your a different distribution name in the list than you were expecting — in your case — you have upgraded to oneiric but you have another release name natty
For example, look for lines that look like deb http:/archive.canonical.com/ natty backports
Add a # to the beginning of the line to comment it out — for example
#deb http:/archive.canonical.com/ natty backports
Save and re-run:
sudo apt-get update && sudo apt-get upgrade
You should not have any more release naming errors.
At the time of writing this, possible common release names include lucid, maverick, natty, oneiric, precise, quantal, raring, saucy, trusty, utopic and vivid.
- Печать
Страницы: [1] Вниз

Тема: не работает apt update (Прочитано 3276 раз)
0 Пользователей и 1 Гость просматривают эту тему.

rober29

После выполнения «apt update» получаю ситуацию:
Пол:1 http://mirror.yandex.ru/ubuntu focal InRelease [265 kB]
Пол:2 http://mirror.yandex.ru/ubuntu focal-updates InRelease [114 kB]
Пол:3 http://repo.yandex.ru/yandex-disk/deb stable InRelease [3 900 B]
Пол:4 http://mirror.yandex.ru/ubuntu focal-security InRelease [109 kB]
Пол:5 http://mirror.yandex.ru/ubuntu focal-backports InRelease [101 kB]
Ошб:1 http://mirror.yandex.ru/ubuntu focal InRelease
  Неизвестная ошибка при выполнении apt-key
Ошб:3 http://repo.yandex.ru/yandex-disk/deb stable InRelease
  Неизвестная ошибка при выполнении apt-key
Ошб:2 http://mirror.yandex.ru/ubuntu focal-updates InRelease
  Неизвестная ошибка при выполнении apt-key
Ошб:4 http://mirror.yandex.ru/ubuntu focal-security InRelease
  Неизвестная ошибка при выполнении apt-key
Ошб:5 http://mirror.yandex.ru/ubuntu focal-backports InRelease
  Неизвестная ошибка при выполнении apt-key
Пол:6 http://ppa.launchpad.net/ondrej/nginx-mainline/ubuntu focal InRelease [23,8 kB]
Ошб:6 http://ppa.launchpad.net/ondrej/nginx-mainline/ubuntu focal InRelease
  Неизвестная ошибка при выполнении apt-key
Пол:7 http://ppa.launchpad.net/ondrej/php/ubuntu focal InRelease [23,9 kB]
Ошб:7 http://ppa.launchpad.net/ondrej/php/ubuntu focal InRelease
  Неизвестная ошибка при выполнении apt-key
Чтение списков пакетов… Готово
W: Ошибка GPG: http://mirror.yandex.ru/ubuntu focal InRelease: Неизвестная ошибка при выполнении apt-key
E: Репозиторий «http://mirror.yandex.ru/ubuntu focal InRelease» не подписан.
N: Обновление из этого репозитория нельзя выполнить безопасным способом, поэтому по умолчанию он отключён.
N: Информацию о создании репозитория и настройках пользователя смотрите в справочной странице apt-secure(8).
W: Ошибка GPG: http://repo.yandex.ru/yandex-disk/deb stable InRelease: Неизвестная ошибка при выполнении apt-key
E: Репозиторий «http://repo.yandex.ru/yandex-disk/deb stable InRelease» не подписан.
N: Обновление из этого репозитория нельзя выполнить безопасным способом, поэтому по умолчанию он отключён.
N: Информацию о создании репозитория и настройках пользователя смотрите в справочной странице apt-secure(8).
W: Ошибка GPG: http://mirror.yandex.ru/ubuntu focal-updates InRelease: Неизвестная ошибка при выполнении apt-key
E: Репозиторий «http://mirror.yandex.ru/ubuntu focal-updates InRelease» не подписан.
N: Обновление из этого репозитория нельзя выполнить безопасным способом, поэтому по умолчанию он отключён.
N: Информацию о создании репозитория и настройках пользователя смотрите в справочной странице apt-secure(8).
W: Ошибка GPG: http://mirror.yandex.ru/ubuntu focal-security InRelease: Неизвестная ошибка при выполнении apt-key
E: Репозиторий «http://mirror.yandex.ru/ubuntu focal-security InRelease» не подписан.
N: Обновление из этого репозитория нельзя выполнить безопасным способом, поэтому по умолчанию он отключён.
N: Информацию о создании репозитория и настройках пользователя смотрите в справочной странице apt-secure(8).
W: Ошибка GPG: http://mirror.yandex.ru/ubuntu focal-backports InRelease: Неизвестная ошибка при выполнении apt-key
E: Репозиторий «http://mirror.yandex.ru/ubuntu focal-backports InRelease» не подписан.
N: Обновление из этого репозитория нельзя выполнить безопасным способом, поэтому по умолчанию он отключён.
N: Информацию о создании репозитория и настройках пользователя смотрите в справочной странице apt-secure(8).
W: Ошибка GPG: http://ppa.launchpad.net/ondrej/nginx-mainline/ubuntu focal InRelease: Неизвестная ошибка при выполнении apt-key
E: Репозиторий «http://ppa.launchpad.net/ondrej/nginx-mainline/ubuntu focal InRelease» не подписан.
N: Обновление из этого репозитория нельзя выполнить безопасным способом, поэтому по умолчанию он отключён.
N: Информацию о создании репозитория и настройках пользователя смотрите в справочной странице apt-secure(8).
W: Ошибка GPG: http://ppa.launchpad.net/ondrej/php/ubuntu focal InRelease: Неизвестная ошибка при выполнении apt-key
E: Репозиторий «http://ppa.launchpad.net/ondrej/php/ubuntu focal InRelease» не подписан.
N: Обновление из этого репозитория нельзя выполнить безопасным способом, поэтому по умолчанию он отключён.
N: Информацию о создании репозитория и настройках пользователя смотрите в справочной странице apt-secure(8).
Plastikman
В источнике приложений выберете другие репозитории.
rober29
В источнике приложений выберете другие репозитории.
Какие, к примеру, можно выбрать?
andytux
Самое банальное, стандартные убунтовские.
Domitory
Такие ошибки бывают когда недоступен сервер с репозиториями по какой либо причине.
Проверьте работает или нет подключение к сети.
Пингуется или нет сервер по имени.
rober29
Самое банальное, стандартные убунтовские.
Пол:1 http://repo.yandex.ru/yandex-disk/deb stable InRelease [3 900 B]
Игн:2 http://ru.archive.ubuntu.com/ubuntu jaunty InRelease
Ошб:1 http://repo.yandex.ru/yandex-disk/deb stable InRelease
  Неизвестная ошибка при выполнении apt-key
Игн:3 http://ru.archive.ubuntu.com/ubuntu jaunty-updates InRelease
Ошб:4 http://ru.archive.ubuntu.com/ubuntu jaunty Release
  404  Not Found [IP: 213.180.204.183 80]
Ошб:5 http://ru.archive.ubuntu.com/ubuntu jaunty-updates Release
  404  Not Found [IP: 213.180.204.183 80]
Игн:6 http://archive.ubuntu.com/ubuntu jaunty InRelease
Игн:7 http://security.ubuntu.com/ubuntu jaunty-security InRelease
Ошб:8 http://archive.ubuntu.com/ubuntu jaunty Release
  404  Not Found [IP: 91.189.88.142 80]
Ошб:9 http://security.ubuntu.com/ubuntu jaunty-security Release
  404  Not Found [IP: 91.189.88.152 80]
Ошб:10 http://my.cool.repo.ubu/ubuntu jaunty InRelease
  Не удалось разрешить «my.cool.repo.ubu»
Пол:11 http://ppa.launchpad.net/ondrej/nginx-mainline/ubuntu focal InRelease [23,8 kB]
Ошб:11 http://ppa.launchpad.net/ondrej/nginx-mainline/ubuntu focal InRelease
  Неизвестная ошибка при выполнении apt-key
Пол:12 http://ppa.launchpad.net/ondrej/php/ubuntu focal InRelease [23,9 kB]
Ошб:12 http://ppa.launchpad.net/ondrej/php/ubuntu focal InRelease
  Неизвестная ошибка при выполнении apt-key
Чтение списков пакетов… Готово
W: Ошибка GPG: http://repo.yandex.ru/yandex-disk/deb stable InRelease: Неизвестная ошибка при выполнении apt-key
E: Репозиторий «http://repo.yandex.ru/yandex-disk/deb stable InRelease» не подписан.
N: Обновление из этого репозитория нельзя выполнить безопасным способом, поэтому по умолчанию он отключён.
N: Информацию о создании репозитория и настройках пользователя смотрите в справочной странице apt-secure(8).
E: Репозиторий «http://ru.archive.ubuntu.com/ubuntu jaunty Release» не содержит файла Release.
N: Обновление из этого репозитория нельзя выполнить безопасным способом, поэтому по умолчанию он отключён.
N: Информацию о создании репозитория и настройках пользователя смотрите в справочной странице apt-secure(8).
E: Репозиторий «http://ru.archive.ubuntu.com/ubuntu jaunty-updates Release» не содержит файла Release.
N: Обновление из этого репозитория нельзя выполнить безопасным способом, поэтому по умолчанию он отключён.
N: Информацию о создании репозитория и настройках пользователя смотрите в справочной странице apt-secure(8).
E: Репозиторий «http://archive.ubuntu.com/ubuntu jaunty Release» не содержит файла Release.
N: Обновление из этого репозитория нельзя выполнить безопасным способом, поэтому по умолчанию он отключён.
N: Информацию о создании репозитория и настройках пользователя смотрите в справочной странице apt-secure(8).
E: Репозиторий «http://security.ubuntu.com/ubuntu jaunty-security Release» не содержит файла Release.
N: Обновление из этого репозитория нельзя выполнить безопасным способом, поэтому по умолчанию он отключён.
N: Информацию о создании репозитория и настройках пользователя смотрите в справочной странице apt-secure(8).
W: Ошибка GPG: http://ppa.launchpad.net/ondrej/nginx-mainline/ubuntu focal InRelease: Неизвестная ошибка при выполнении apt-key
E: Репозиторий «http://ppa.launchpad.net/ondrej/nginx-mainline/ubuntu focal InRelease» не подписан.
N: Обновление из этого репозитория нельзя выполнить безопасным способом, поэтому по умолчанию он отключён.
N: Информацию о создании репозитория и настройках пользователя смотрите в справочной странице apt-secure(8).
W: Ошибка GPG: http://ppa.launchpad.net/ondrej/php/ubuntu focal InRelease: Неизвестная ошибка при выполнении apt-key
E: Репозиторий «http://ppa.launchpad.net/ondrej/php/ubuntu focal InRelease» не подписан.
N: Обновление из этого репозитория нельзя выполнить безопасным способом, поэтому по умолчанию он отключён.
N: Информацию о создании репозитория и настройках пользователя смотрите в справочной странице apt-secure(8).
Пользователь добавил сообщение 08 Апреля 2021, 15:14:34:
Такие ошибки бывают когда недоступен сервер с репозиториями по какой либо причине.
Проверьте работает или нет подключение к сети.
Пингуется или нет сервер по имени.
пингует, изменял репозитории, изменял DNS. Не помогло
« Последнее редактирование: 08 Апреля 2021, 15:14:34 от rober29 »
mahinist
Что за интернет, может блокирует провайдер .
Пользователь добавил сообщение 08 Апреля 2021, 15:31:35:
пингует
Что пингует? Логи покажи.
« Последнее редактирование: 08 Апреля 2021, 15:31:35 от mahinist »
31-регион
andytux
Игн:3 http://ru.archive.ubuntu.com/ubuntu jaunty-updates InRelease
Во-первых. ru.archive не сильно «стандартнее» яндекса.
Во-вторых. Jaunty — ты издеваешься? Где ты его только взял.
Вытряси весь этот мусор и внимательно, правильно, впиши актуальные репозитории.
rober29
Игн:3 http://ru.archive.ubuntu.com/ubuntu jaunty-updates InRelease
Во-первых. ru.archive не сильно «стандартнее» яндекса.
Во-вторых. Jaunty — ты издеваешься? Где ты его только взял.
Вытряси весь этот мусор и внимательно, правильно, впиши актуальные репозитории.
можно сразу скинуть «нормальные» репозитории?
shamanhuev
можно сразу скинуть «нормальные» репозитории?
В sources.list при установке прописываются стандартные репозитории , а вот откуда появились репы Ubuntu 9.04 — тебе должно быть виднее. Почисть sources.list , или по крайней мере покажи его здесь.
EvangelionDeath
можно сразу скинуть «нормальные» репозитории?
В sources.list при установке прописываются стандартные репозитории , а вот откуда появились репы Ubuntu 9.04 — тебе должно быть виднее. Почисть sources.list , или по крайней мере покажи его здесь.
как откуда? почитал человек «умный» ресурс и прописал фигню =((( Ему сказали изменить сорс в менеджере на мейн, но он пошел и отредактировал сами файлы руками прочитав умные рекомендации)
HP Pro 840 G3: Intel i5-6300U, 32GB DDR4 2133MHz, Intel 520, Intel Pro 2500 180GB/Ubuntu 22.04
Dell Latitude 5590: Intel i5-8350U, 16GB DDR4 2400MHz, Intel 620, Samsung 1TB/Ubuntu 22.04
c47
у меня Ubuntu 20.04.2 LTS (Focal Fossa)
а именно Kubuntu 20.04
вот тебе мой /etc/apt/source.list
Могут не обновляться специализированные пакеты из других дистрибутивов *buntu (Ubuntu,lubuntu и пр.), но это уже сам, я не знаю что установлено, но в целом должно работать
Soobrazitelnyy
После выполнения «apt update» получаю ситуацию:
Давайте точно определим какой у Вас дистрибутив. Если это окажется Kubuntu то ответ уже есть и тему закроют. Лучший способ определить имя и версию дистрибутива Linux — использовать команду:
cat /etc/os-release
ALiEN175
Давайте точно определим какой у Вас дистрибутив.
Репозитории для всего официального семейства ubuntu — одни и те же. Набор репозиториев по-умолчанию, допустим, в Lubuntu 20.04 и Kubuntu 20.04 — абсолютно одинаков.
ASUS P5K-C :: Intel Xeon E5450 @ 3.00GHz :: 8 GB DDR2 :: Radeon R7 260X :: XFCE
ACER 5750G :: Intel Core i5-2450M @ 2.50GHz :: 6 GB DDR3 :: GeForce GT 630M :: XFCE
- Печать
Страницы: [1] Вверх
Problem: error 404 code status http://archive.ubuntu.com/ubuntu cosmic InRelease
Ubuntu 18.10 cosmic end of life
since yesterday, apt install commands no longer work,
I tried to upgrade my system version but i got the same error of apt-get update command
$ apt update
Ign:1 http://archive.ubuntu.com/ubuntu cosmic InRelease
Ign:2 http://security.ubuntu.com/ubuntu cosmic-security InRelease
Ign:3 http://archive.ubuntu.com/ubuntu cosmic-updates InRelease
Ign:4 http://archive.ubuntu.com/ubuntu cosmic-backports InRelease
Err:5 http://security.ubuntu.com/ubuntu cosmic-security Release
  404  Not Found [IP: 91.189.88.173 80]
Err:6 http://archive.ubuntu.com/ubuntu cosmic Release
  404  Not Found [IP: 91.189.88.31 80]
Err:7 http://archive.ubuntu.com/ubuntu cosmic-updates Release
  404  Not Found [IP: 91.189.88.31 80]
Err:8 http://archive.ubuntu.com/ubuntu cosmic-backports Release
  404  Not Found [IP: 91.189.88.31 80]
Reading package lists... Done
E: The repository 'http://security.ubuntu.com/ubuntu cosmic-security Release' does not have a Release file.
N: Updating from such a repository can't be done securely, and is therefore disabled by default.
N: See apt-secure(8) manpage for repository creation and user configuration details.
E: The repository 'http://archive.ubuntu.com/ubuntu cosmic Release' does not have a Release file.
N: Updating from such a repository can't be done securely, and is therefore disabled by default.
N: See apt-secure(8) manpage for repository creation and user configuration details.
E: The repository 'http://archive.ubuntu.com/ubuntu cosmic-updates Release' does not have a Release file.
N: Updating from such a repository can't be done securely, and is therefore disabled by default.
N: See apt-secure(8) manpage for repository creation and user configuration details.
E: The repository 'http://archive.ubuntu.com/ubuntu cosmic-backports Release' does not have a Release file.
N: Updating from such a repository can't be done securely, and is therefore disabled by default.
N: See apt-secure(8) manpage for repository creation and user configuration details.
I keep getting this error whenever I run sudo apt update:
E: The repository 'http://archive.ubuntu.com/ubuntu wily Release' does not have a Release file.
N: Updating from such a repository can't be done securely, and is therefore disabled by default.
N: See apt-secure(8) manpage for repository creation and user configuration details.
I’m running Ubuntu 16.04.
lsb_release -a
Distributor ID: Ubuntu
Description:    Ubuntu 16.04.3 LTS
Release:    16.04
Codename:   xenial
Contents of /etc/apt/sources.list:
# deb cdrom:[Ubuntu 16.04.1 LTS _Xenial Xerus_ - Release amd64 (20160719)]/ xenial main restricted

# See http://help.ubuntu.com/community/UpgradeNotes for how to upgrade to
# newer versions of the distribution.
deb http://dz.archive.ubuntu.com/ubuntu/ xenial main restricted
# deb-src http://dz.archive.ubuntu.com/ubuntu/ xenial main restricted

## Major bug fix updates produced after the final release of the
## distribution.
deb http://dz.archive.ubuntu.com/ubuntu/ xenial-updates main restricted
# deb-src http://dz.archive.ubuntu.com/ubuntu/ xenial-updates main restricted

## N.B. software from this repository is ENTIRELY UNSUPPORTED by the Ubuntu
## team, and may not be under a free licence. Please satisfy yourself as to
## your rights to use the software. Also, please note that software in
## universe WILL NOT receive any review or updates from the Ubuntu security
## team.
deb http://dz.archive.ubuntu.com/ubuntu/ xenial universe
# deb-src http://dz.archive.ubuntu.com/ubuntu/ xenial universe
deb http://dz.archive.ubuntu.com/ubuntu/ xenial-updates universe
# deb-src http://dz.archive.ubuntu.com/ubuntu/ xenial-updates universe

## N.B. software from this repository is ENTIRELY UNSUPPORTED by the Ubuntu
## team, and may not be under a free licence. Please satisfy yourself as to
## your rights to use the software. Also, please note that software in
## multiverse WILL NOT receive any review or updates from the Ubuntu
## security team.
deb http://dz.archive.ubuntu.com/ubuntu/ xenial multiverse
# deb-src http://dz.archive.ubuntu.com/ubuntu/ xenial multiverse
deb http://dz.archive.ubuntu.com/ubuntu/ xenial-updates multiverse
# deb-src http://dz.archive.ubuntu.com/ubuntu/ xenial-updates multiverse

## N.B. software from this repository may not have been tested as
## extensively as that contained in the main release, although it includes
## newer versions of some applications which may provide useful features.
## Also, please note that software in backports WILL NOT receive any review
## or updates from the Ubuntu security team.
deb http://dz.archive.ubuntu.com/ubuntu/ xenial-backports main restricted universe multiverse
# deb-src http://dz.archive.ubuntu.com/ubuntu/ xenial-backports main restricted universe multiverse

## Uncomment the following two lines to add software from Canonical's
## 'partner' repository.
## This software is not part of Ubuntu, but is offered by Canonical and the
## respective vendors as a service to Ubuntu users.
# deb http://archive.canonical.com/ubuntu xenial partner
deb-src http://archive.canonical.com/ubuntu xenial partner

deb http://security.ubuntu.com/ubuntu xenial-security main restricted
# deb-src http://security.ubuntu.com/ubuntu xenial-security main restricted
deb http://security.ubuntu.com/ubuntu xenial-security universe
# deb-src http://security.ubuntu.com/ubuntu xenial-security universe
deb http://security.ubuntu.com/ubuntu xenial-security multiverse
# deb-src http://security.ubuntu.com/ubuntu xenial-security multiverse
deb [arch=amd64] https://download.docker.com/linux/ubuntu xenial stable
# deb-src [arch=amd64] https://download.docker.com/linux/ubuntu xenial stable

deb http://deb.torproject.org/torproject.org stretch main
deb-src http://deb.torproject.org/torproject.org stretch main
Contents of /etc/apt/sources.list.d/*:
### THIS FILE IS AUTOMATICALLY CONFIGURED ###
# You may comment out this entry, but any other modifications may be lost.
deb [arch=amd64] http://dl.google.com/linux/chrome/deb/ stable main
### THIS FILE IS AUTOMATICALLY CONFIGURED ###
# You may comment out this entry, but any other modifications may be lost.
deb [arch=amd64] http://dl.google.com/linux/chrome/deb/ stable main
deb http://ppa.launchpad.net/js-reynaud/kicad-4/ubuntu xenial main
# deb-src http://ppa.launchpad.net/js-reynaud/kicad-4/ubuntu xenial main
deb http://ppa.launchpad.net/js-reynaud/kicad-4/ubuntu xenial main
# deb-src http://ppa.launchpad.net/js-reynaud/kicad-4/ubuntu xenial main
deb http://ppa.launchpad.net/kivy-team/kivy/ubuntu xenial main
# deb-src http://ppa.launchpad.net/kivy-team/kivy/ubuntu xenial main
# deb-src http://ppa.launchpad.net/kivy-team/kivy/ubuntu xenial main
deb http://ppa.launchpad.net/kivy-team/kivy/ubuntu xenial main
# deb-src http://ppa.launchpad.net/kivy-team/kivy/ubuntu xenial main
# deb-src http://ppa.launchpad.net/kivy-team/kivy/ubuntu xenial main
deb http://ppa.launchpad.net/linuxgndu/sqlitebrowser-testing/ubuntu xenial main
# deb-src http://ppa.launchpad.net/linuxgndu/sqlitebrowser-testing/ubuntu xenial main
deb http://ppa.launchpad.net/linuxgndu/sqlitebrowser-testing/ubuntu xenial main
# deb-src http://ppa.launchpad.net/linuxgndu/sqlitebrowser-testing/ubuntu xenial main
deb http://ppa.launchpad.net/overcoder/hexchat/ubuntu xenial main
# deb-src http://ppa.launchpad.net/overcoder/hexchat/ubuntu xenial main
deb http://ppa.launchpad.net/overcoder/hexchat/ubuntu xenial main
# deb-src http://ppa.launchpad.net/overcoder/hexchat/ubuntu xenial main
deb https://dl.bintray.com/sbt/debian /
deb https://dl.bintray.com/sbt/debian /
deb [arch=amd64] https://repo.skype.com/deb stable main
###   TeamViewer DEB repository list

### NOTE: Manual changes to this file
###        - prevent it from being updated by TeamViewer package updates
###        - will be lost after using the 'teamviewer repo' command
###       The original file can be restored with this command:
###       cp /opt/teamviewer/tv_bin/script/teamviewer.list /etc/apt/sources.list.d/teamviewer.list
###       which has the same effect as 'teamviewer repo default'

### NOTE: It is preferred to use the following commands to edit this file:
###       teamviewer repo                - show current repository configuration
###       teamviewer repo default        - restore default configuration
###       teamviewer repo disable        - disable the repository
###       teamviewer repo main [stable]  - make all TeamViewer packages available (default)
###       teamviewer repo tv13 [stable]  - make TeamViewer 13 packages available
###                             stable     omit preview and beta releases


### Choose stable main to receive updates for TeamViewer 13 and upcoming major releases
### Choose preview main to receive early updates for TeamViewer 13 and to receive major beta releases

### Choose stable tv13 to receive updates for TeamViewer 13
### Choose preview tv13 to receive early updates for TeamViewer 13

deb http://linux.teamviewer.com/deb stable main
deb http://linux.teamviewer.com/deb preview main

# deb http://linux.teamviewer.com/deb stable tv13
# deb http://linux.teamviewer.com/deb preview tv13
deb http://ppa.launchpad.net/webupd8team/tor-browser/ubuntu xenial main
# deb-src http://ppa.launchpad.net/webupd8team/tor-browser/ubuntu xenial main
deb http://ppa.launchpad.net/webupd8team/tor-browser/ubuntu xenial main
# deb-src http://ppa.launchpad.net/webupd8team/tor-browser/ubuntu xenial main
deb http://archive.ubuntu.com/ubuntu wily main universe
deb http://archive.ubuntu.com/ubuntu wily main universe
deb http://ppa.launchpad.net/wireshark-dev/stable/ubuntu xenial main
# deb-src http://ppa.launchpad.net/wireshark-dev/stable/ubuntu xenial main
deb http://ppa.launchpad.net/wireshark-dev/stable/ubuntu xenial main
# deb-src http://ppa.launchpad.net/wireshark-dev/stable/ubuntu xenial main
# channel for the xenial (16.04) partner channel
#
#:description:This channel contains the partner software for xenial
deb http://archive.canonical.com/ubuntu xenial partner
# channel for the xenial (16.04) partner channel
#
#:description:This channel contains the partner software for xenial
deb http://archive.canonical.com/ubuntu xenial partner