Содержание
-
Проблемы и их устранение
- Неподходящая модель
- Не поддерживает данный формат видео
- Старое программное обеспечение
- Другие причины
- Советы
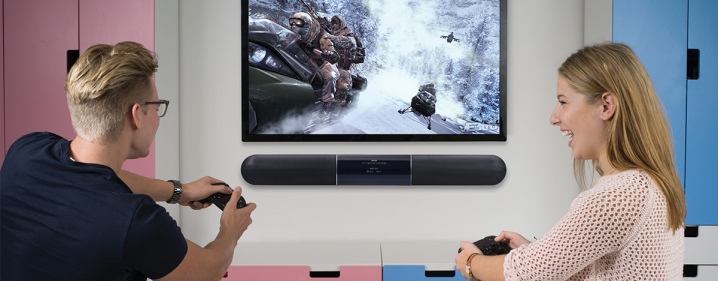
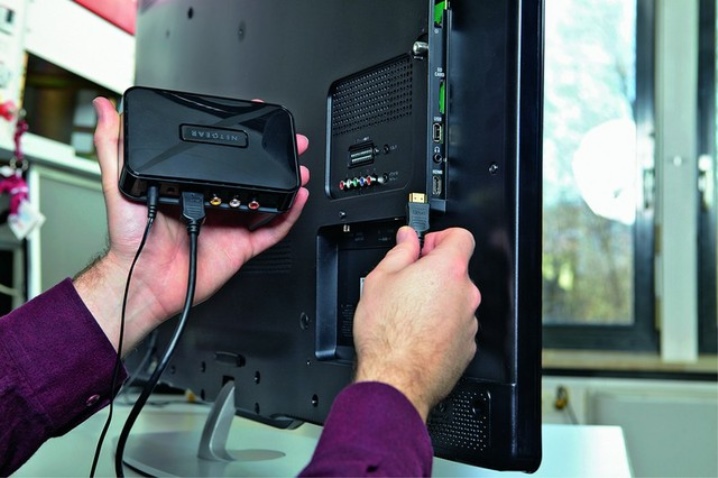
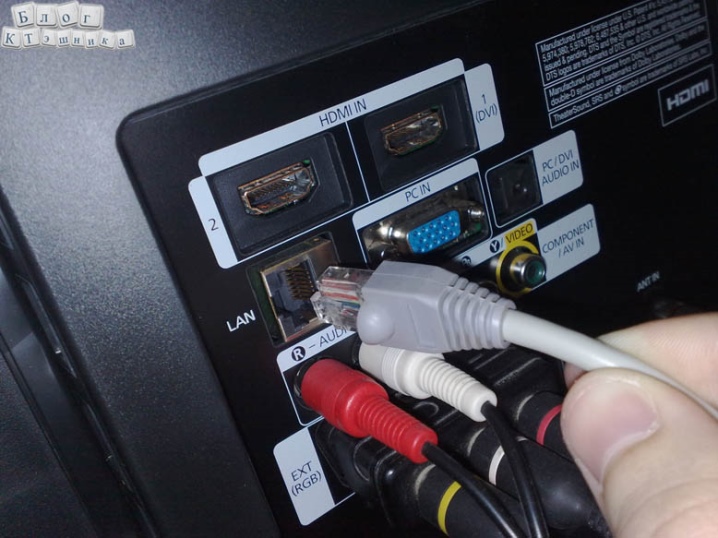
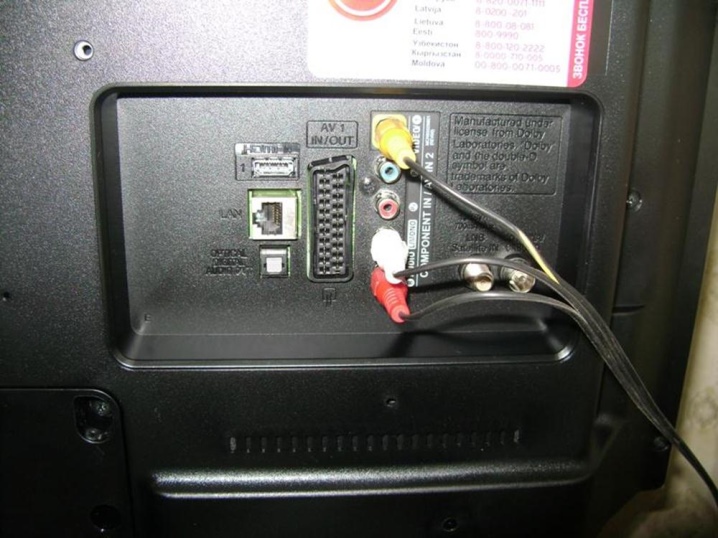
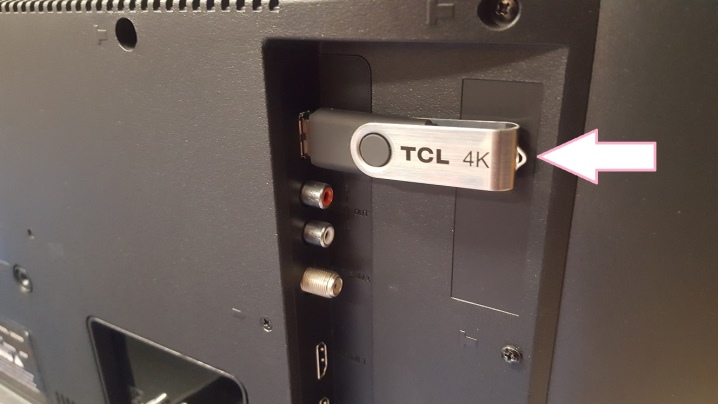
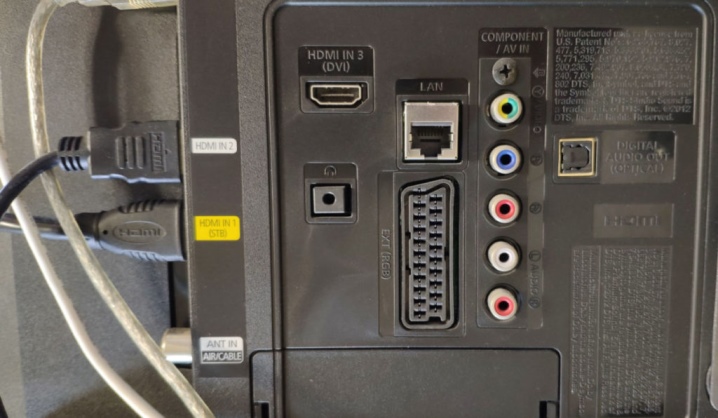
Записали видео на флеш-карту с USB-портом, вставили ее в соответствующий разъем на телевизоре, но программа показывает, что видео нет. Или просто не воспроизводит видео конкретно на телевизоре. Такая проблема – случай не редкий. Есть несколько возможных тому причин.
Проблемы и их устранение
Один из самых популярных и, к сожалению, неразрешимых вариантов – USB-вход просто не предусмотрен для обслуживания флеш-карты. В это трудно поверить, но такое бывает. Такой вход в телевизоре делают строго для обновления программного обеспечения устройства.
Неподходящая модель
Если телевизор не воспроизводит видео с флешки, скорее всего, вход для флеш-карты действительно не предназначен для этой цели. Модель телевизора не предусматривает такие функции. Чем новее устройство, тем меньше шансов, что именно такая причина объясняет невозможность просмотреть видео. Но выход все равно есть.
- Можно перепрошить прибор. Правда, не каждый телевизор подходит для такого апгрейда, безусловно, сам пользователь вряд ли с этим справится. А вот мастер может взяться за дело и превратить на первый взгляд безнадежный случай в разрешимую ситуацию. Самим в перепрошивку лучше не лезть, последствия могут быть необратимыми.
- Обратиться к инженерному меню. Но и это не очень просто, потому как сделать такой шаг можно только с помощью специального сервисного пункта. На форумах можно прочитать «хакерский» совет: выполнить вход с помощью двух инфракрасных диодов. Но это очень опасный шаг. Инженерное меню следует доверить профессионалам. Если сам пользователь случайно выберет не ту функцию, он может случайно сбить все настройки.
Потому вмешиваться в работу техники стоит только тем, кто имеет в этом солидный опыт и четко понимает, что он делает. Остальным лучше обратиться к опытному мастеру.
Не поддерживает данный формат видео
Еще один вариант объяснения проблемы, когда телевизор просто не видит видео и в итоге не показывает фильм или другой видеоролик. В такой ситуации попробовать исправить ситуацию можно так.
- Видеофайл следует обработать на компьютере специальной программой, т. е. подвергнуть его конвертации. То есть сам ролик нужно перевести в тот формат, который телевизор поддерживает.
- Можно использовать HDMI-кабель, подключающийся к компьютеру. Так можно добиться того, что телевизор будет выполнять функцию монитора. Важно при этом грамотно настроить видеокарту, проверив установки на устройстве.

Наконец, стоит начать с инструкции – прочитать, какие форматы телевизор поддерживает, и скачивать видео только этих форматов. Либо предварительно конвертировать видео в нужный файл, чтобы трудностей с просмотром не возникало.

Старое программное обеспечение
Тут варианта, кроме как обновить программное обеспечение, нет. Если телевизор имеет функцию выхода в интернет, то сделать это можно самостоятельно, быстро и без проблем. Но есть и другой вариант: скачать с сайта производителя официальную инструкцию и установить ПО вручную, сверяясь с предписаниями инструкции.
Если и тут возникли проблемы, нужно позвонить в сервисный центр, и специалисты-операторы объяснят, как решить вопрос. Очень часто телевизор не проигрывает видео на флешке именно из-за необновленного ПО, потому стоит просто сделать полезной привычкой регулярно проверять обновления. Бывает, что пользователь просто скидывает сервисные предложения об обновлении ПО и не знает, что телевизор готов работать в более комфортном режиме.
Другие причины
Есть современные ЖК-телевизоры, которые принципиально сохраняют параметры ограничения размеров воспроизведения видео. Например, и LG, и Samsung, и Sony, и Philips работают с ограниченным количеством размеров видео. И обойти такие рамки невозможно. Потому обладатели таких моделей телевизоров чаще всего приобретают HDMI-кабель и подключают компьютер к телевизору напрямую.
Что еще может быть причиной отказа воспроизведения видео?
- Может быть, имя файла неправильно указано. Некоторые телевизоры не «понимают» кириллицу, а потому файлы стоит именовать цифрами или латиницей.
- Случаются ошибки файловой системы. Например, если ранее телевизор без проблем читал флешку, но внезапно перестал ее распознавать, это указывает на ошибки на самом накопителе. Следует подключить флешку к компьютеру, вызвать контекстное меню, нажать правую кнопку мыши и пройти по такой цепочке: «Свойства – Сервис – Проверка диска – Выполнить проверку». Далее нужно будет поставить «птички» в строку «Автоматически исправлять системные ошибки».
- USB-порт неисправен. Может быть, с проверки работы порта и стоит начать. Если он не видит никакой флешки, кабеля, возможно, нужно обращаться в сервисный центр для исправления неполадки.
Бывает, что телевизор не распознает аудиодорожки видеофайлов (не поддерживает определенные кодаки). В этом случае также нужно переконвертировать видео или скачать тот же фильм в другом формате.
Советы
Обязательно следует проверять, сколько весит фильм. Если на флешке видео, которое весит 20,30 и даже 40 Гб, не все телевизоры смогут поддержать такой размер видео. Старые модели редко снабжены такими возможностями. Файлы от 4 до 10 Гб наиболее удобны в этом отношении.
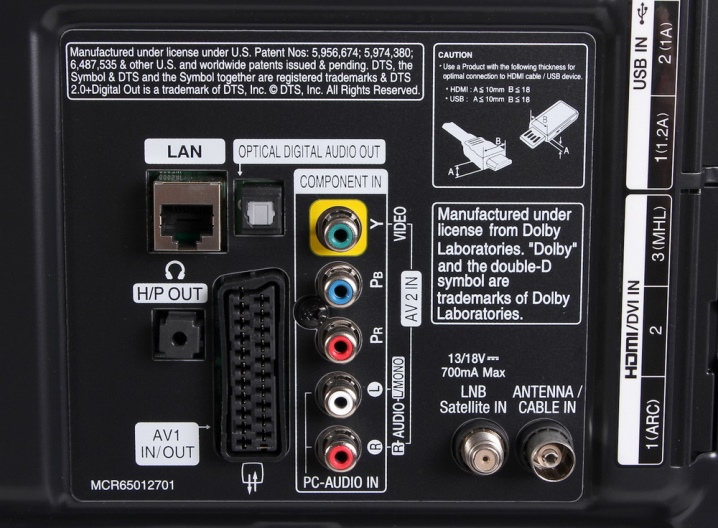
Если же на телевизоре нет вовсе USB-порта, можно взять старый DVD-проигрыватель либо цифровую приставку. На них обычно есть нужный вход. Чтобы подключиться, достаточно сделать переключение на приставку или DVD. А потом, взяв пульт от этого устройства, выбрать USB-подключение. То есть запуск будет фактически таким же, как на телевизоре.
На видео ниже рассмотрены причины не воспроизведения видео с USB- флеш-накопителя и способы их устранения.
This thread is locked.
mmasiewicz
•
Senior Member
•
Posts: 1,902
Help with ViewNX — «Unsupported File Type»
Jun 7, 2009
Can someone tell me how to resolve an «unsupported file type» error in ViewNX? Occasionally while using ViewNX it will simply stop recognizing my NEF Raw files, and I’ll have to reboot my PC to fix it. Any ideas? I’m using Windows Vista (64 bit).
Thanks,
Michael
jp34med3
•
Contributing Member
•
Posts: 884
Re: Help with ViewNX — «Unsupported File Type»
I had it happen a couple times — used Control Panel to uninstall then reinstalled — that worked for me — might try that 1st and see if it works —.
OP
mmasiewicz
•
Senior Member
•
Posts: 1,902
Re: Help with ViewNX — «Unsupported File Type»
In reply to jp34med3
•
Jun 7, 2009
![]()
Re: Help with ViewNX — «Unsupported File Type»
You might also try clearing the cache files (NX menu item).
Nikon D80
Nikon D200
Nikon D300
Nikon D700
Nikon 1 V1
+45 more
OP
mmasiewicz
•
Senior Member
•
Posts: 1,902
Re: Help with ViewNX — «Unsupported File Type»
PHXAZCRAIG
wrote:You might also try clearing the cache files (NX menu item).
—
Thanks.
![]()
Re: Help with ViewNX — «Unsupported File Type»
You’re sure it is giving the error on image files? I get that error when I hit a dust ref photo.
Nikon D80
Nikon D200
Nikon D300
Nikon D700
Nikon 1 V1
+45 more
OP
mmasiewicz
•
Senior Member
•
Posts: 1,902
Re: Help with ViewNX — «Unsupported File Type»
PHXAZCRAIG
wrote:You’re sure it is giving the error on image files? I get that error
when I hit a dust ref photo.
—
I’ve never created a dust ref photo. I cleared the cache as you suggested, and it appears to be working normally again… for the moment anyways.
(unknown member)
•
Senior Member
•
Posts: 1,908
Re: Help with ViewNX — «Unsupported File Type»
I’ve been getting this error lately too. Seems to occur most for me when viewing images on the Compact Flash card. I also require a reboot to straighten it out. BTW, I’m running an HP desktop with Vista 64-bit OS.
Mike
—
Give the gift of life — donate blood
![]()
Re: Help with ViewNX — «Unsupported File Type»
Same here.
The suggested solutions, like clear the cache folder, or restart the program seems to resolve the issue for a few minutes and then suddenly, while browsing through my NEF files, I get «unsupported file type» message again.
One of the additional effects of this error is that when you try to apply some quick adjustments you will get an additional error: «Failed to save the effects fo Quick Adjustment. You cannot apply this operation to unsupported files»
Although, the first selected file DID show up in the view window.
???
Anyone already found a REAL solution and/or contacted Nikon support?
![]()
I had a similar problem when I scanned b&w negatives with my Nikon Coolscan V scanner. I saved as NEF files, and neither NX2 nor CS2 said that they supported that format. I sent a message to Nikon support and waited for a reply. It came, and they asked if their solution solved the problem. My problem now was that I had never received the solution that they said they sent. However this was a string of emails, and included their answer, which didn’t solve the problem. They never got back to them when they asked if I was happy with the help that I had received.
In my case, I had to pay no attention to the directions of how to scan a b&w negative. The directions say that the scanner should be set to neg (mono) and the color space (greyscale). This didn’t work. What did was to set the neg to mono but the color space to calabrated RGB. That did work. But I saved as jpg and not NEF. I was able to work in both NX2 and CS2. The scanner is a few years old, and I believe the problem is in the software.
Fujifilm X-Pro2
Fujifilm XF 27mm F2.8
Fujifilm XF 35mm F2 R WR
Fujifilm XF 23mm F2 R WR
![]()
Problem with D100, D200 NEF files.
I did some testing/browsing through my collection of NEF files.
Some additional info I just found out:
It happens with especially my D100 NEF files and some of the D200 NEF files, but never with my D700 NEF files.
But never with the same files, and after manual deleting the ViewNX cache directory and starting ViewNX the problem is gone… for 5 minutes, and then it starts again.
Strange isn’t it?
![]()
Nikon Support is working on it…
FYI
I’ve have submitted a support case with Nikon Support and there are currently investigating the issue with one of my ‘failing’ NEF files as an example.
What I have found out sofar:
-D100 and D200 NEF files are likely to give the ‘unsupported file’ error message. No problems with D700 NEF files.
-Once a NEF file is modified by ViewNX (e.g. WB and/or sharpness, etc) the problem is gone. But the issues stays with NEF files which are not ‘touched’ by ViewNX.
-I reinstalled an old version of NikonView 6. This software works without errors on the files with which ViewNX has problems. But NikonView 6 crashes when you browse to a D700 NEF file.
-Stop/starting the program resolves the issue for a few minutes… But then it starts again with the error message.
-Native english version or localized doesn’t matter.
-Reinstalling MX .net doesn’t matter.
-Changing the cache directory doesn’t matter.
-Clearing the cache directory does help, for a few minutes…
Anyone else?
![]()
Re: Help with ViewNX — «Unsupported File Type»
It all ways happens to me when I try an open a .tiff file
Nikon D200
Olympus E-M5 II
Olympus E-M1 II
Panasonic Lumix G 20mm F1.7 ASPH
Olympus Zuiko Digital 1.4x Teleconverter EC-14
+8 more
Re: Problem with D100, D200 NEF files.
After reading previous posts and advice about this issue I not only manually deleted my cache file I also also followed directions by not nominating any file cache. Since then (3 weeks) everything works fine and both View NX and Capture NX2 are faster.
Fujifilm X-Pro1
Fujifilm X-E1
Fujifilm X-T2
Fujifilm X-H1
Fujifilm XF 35mm F1.4 R
+11 more
![]()
Vic Chapman
wrote:After reading previous posts and advice about this issue I not only
manually deleted my cache file I also also followed directions by not
nominating any file cache.
How did you do that? Because the program (ViewNX) does not allow me to blank out the cache folder and/or set an option not to use it…
![]()
I have this nifty program called Bracketeer ($30 download) which is an HDR-like blending program. It loads the NEF files, blends them, and saves the output file as a TIFF. I can never get CaptureNX2 or View NX (bot are the latest versions, running on a MacBook Pro, using Leopard OS) to open these TIFFS. They open just fine in Photoshop Elements and any other program I use. If anyone has a suggestion on how to fix this, i’d love to hear it.
Thanks.
—
My Art, Your Pleasure

Sorry for the late reply.
Have a look at the original post which caught my attention here.
http://www.dpreview.com/forums/read.asp?forum=1039&message=31990916
Read all the replies some of which do not appear at first to be relevant — even veering of towards email settings — but all will be of benefit.
Fujifilm X-Pro1
Fujifilm X-E1
Fujifilm X-T2
Fujifilm X-H1
Fujifilm XF 35mm F1.4 R
+11 more
![]()
Vic Chapman
wrote:Sorry for the late reply.
Have a look at the original post which caught my attention here.
http://www.dpreview.com/forums/read.asp?forum=1039&message=31990916
Read all the replies some of which do not appear at first to be
relevant — even veering of towards email settings — but all will be
of benefit.
I’ve read them all, tried them all, but no luck.
Still, I couldn’t find an answer to my question HOW to turn off cache in ViewNX???
Because I can’t find the setting in ViewNX to turn it off, only to change the directory where it is pointing towards.
They all speak of CaptureNX, not of ViewNX…?
![]()
To be continued…
Captain Hook
wrote:FYI
I’ve have submitted a support case with Nikon Support and there are
currently investigating the issue with one of my ‘failing’ NEF files
as an example.
Nikon support has now changed my support case status into «escalated» Whatever that may mean exactly…
I was referring to Nikon Capture NX2.
In View NX go to Edit>
options>
general. Here you can clear the cache or take note of its location then go and delete it which I did in Capture NX2, or perhaps better just send it to the recycle bin until you see what happens, then you can restore it if necessary.
I haven’t touched my View NX cache but generally cleaning up my PC seems to have made the difference.
You would think that View NX and Capture NX2 would share the same cache wouldn’t you.
Fujifilm X-Pro1
Fujifilm X-E1
Fujifilm X-T2
Fujifilm X-H1
Fujifilm XF 35mm F1.4 R
+11 more
Keyboard shortcuts:
FForum
MMy threads
Latest sample galleries
Latest in-depth reviews

The OM System M.Zuiko Digital ED 90mm F3.5 Macro IS PRO is finally here! Chris has opinions.

The Canon EOS R8 is the company’s latest mid-level full-frame mirrorless camera. It brings the sensor and autofocus from the EOS R6 II and combines them in a smaller, more affordable body.

The Canon EOS R50 is an entry-level, compact APS-C mirrorless camera. A 24MP RF-mount camera aiming to attract smartphone users and, perhaps, vloggers.

See what Chris and Jordan think of the Canon EOS R8 after shooting in Charleston, South Carolina.

The Canon EOS R50 is inexpensive. It’s tiny. Is it good? Jordan and Chris dodged alligators in South Carolina to find out.
Latest buying guides

Above $2500 cameras tend to become increasingly specialized, making it difficult to select a ‘best’ option. We case our eye over the options costing more than $2500 but less than $4000, to find the best all-rounder.

There are a lot of photo/video cameras that have found a role as B-cameras on professional film productions or even A-cameras for amateur and independent productions. We’ve combed through the options and selected our two favorite cameras in this class.

What’s the best camera for around $2000? These capable cameras should be solid and well-built, have both the speed and focus to capture fast action and offer professional-level image quality. In this buying guide we’ve rounded up all the current interchangeable lens cameras costing around $2000 and recommended the best.

Family moments are precious and sometimes you want to capture that time spent with loved ones or friends in better quality than your phone can manage. We’ve selected a group of cameras that are easy to keep with you, and that can adapt to take photos wherever and whenever something memorable happens.

What’s the best camera for shooting sports and action? Fast continuous shooting, reliable autofocus and great battery life are just three of the most important factors. In this buying guide we’ve rounded-up several great cameras for shooting sports and action, and recommended the best.
Исправляем ошибки

8. Не импортируется HEVC видео с экшен камеры GoPro Hero 7, 8 и 9. Появляются следующие сообщения об ошибках: File Import Failure. Error Message: Unsupported format or damaged file.

Или: File Import Failure. Error Message: This file has on unsupported compression type.
File importer detected inconsistency in the file structure of xxx.MP4. Reading and writing this file’s metadata (XMP) has been disabled.


Если не открывается, то пробуем найти клип через панель Media Browser, нажать правую кнопку мыши на нём и выбрать из списка пункт: Import.
Чистим медиа кэш, меняем директорию файла и его имя.
Такие файлы могут не открывать даже MPC-HC и другие плеера (на Mac OS работает переконвертация через QuickTime), а Media Info показывать только такую информацию:

9. Рассинхрон видео и звука. Смартфон Xiaomi Redmi 5 Plus пишет видео с переменной частотой кадров (VFR). Но, есть отличия, если писать видео на фронтальную камеру, то при установке 1080p30, минимальная частота кадров может опускаться до 23 кадров в секунду. И даже на версии программы Adobe Premiere Pro CC 2020, получаем на таймлайне рассинхрон видео и звука. С основной камеры, частота кадров также переменная но не опускается ниже 1-2 кадров, поэтому нет такой проблемы.

10. Не импортируется HEVC видео. На примере видео с дрона DJI Mavic 2 PRO. При импорте получаем следующую ошибку: A low-level exception occurred in: ImporterMPEG (Importer:37).

Это ошибка появляется в сборке Adobe Premiere Pro 2020 (v14.3) Repack by Diakov и некоторых сборках от Кролика (KpoJIuK).
При использовании патча Gen-P данное видео корректно импортируется: 10-бит HEVC.

Картинка в окне Программа, обращаем внимание на PF:


Метки: нет поддержки hevc видео, mme device internal error что делать, mme device internal error, mme device internal error adobe premiere pro, mme device internal error adobe audition, mme device internal error premiere, mme device internal error premiere pro, mme device internal error adobe premiere, mme device internal error do you want to open the audio hardware preference, mme device internal, mme device internal error как исправить, внутренняя ошибка устройства mme premiere, внутренняя ошибка устройства mme adobe premiere, adobe premiere внутренняя ошибка mme, внутренняя ошибка устройства mme premiere pro, mme device internal error ошибка, the device settings could not be applied because the following error occurred mme, adobe premiere pro audio setup issue.
Источник
Экспорт в ProRes
Как вывести видео в формат ProRes из программы Adobe Premiere Pro CC 2018 на платформе Windows? Нам поможет бесплатный на данный момент плагин: Voukoder for Premiere Pro.
Качаем его здесь:
https://github.com/Vouk/voukoder/releases

Открываем скачанный архив:

И плагин Voukoder.prm из открытого архива, копируем (для Adobe Premiere Pro CC) в следующую директорию:
C:Program FilesAdobeCommonPlug-ins7.0MediaCore
Для более старых программ:
C:Program FilesAdobeCommonPlug-insCS6MediaCore
Для Adobe Premiere Elements:
C:Program FilesAdobeAdobe Premiere Elements 15Plug-InsCommon


Идем в закладку: Видео и в разделе Video Settings для кодека x264 (формат по-умолчанию) видим следующие настройки.

В выпадающем списке Video Codec, можно выбрать следующие варианты: x264 (libx264 H.264 / AVC / MPEG-4 AVC / MPEG-4 part 10), x265 (libx265 H.265 / HEVC), Apple ProRes (iCodec Pro) и при наличии в системе видеокарты с поддержкой NVENC, доступны еще два варинта: NVIDIA NVENC H.264 encoder и NVIDIA NVENC hevc encoder.

В наличии галка: Use full color range, для вывода видео с полным диапазоном 0-255.

Раздел: Encoder Options.

Там можно выбрать Preset (подробнее о них читаем здесь).

Выпадающий список Profile:

Выпадающий список Tuning:

Доступные уровни Levels:

Выпадающий список Strategy:

Все дополнительные настройки спрятались в закладке: Advanced.

Video Settings > Video Encoder: libx265 H.265 / HEVC.


Выпадающий список Preset:

Выпадающий список Strategy:

Video Settings > Video Encoder: Apple ProRes (iCodec Pro).

Раздел: Encoder Options. Выбираем Profile: HQ.


Нажимаем на кнопку: Экспорт (Экспорт с текущими настройками).

И получаем ошибку: Средство импорта файлов обнаружило несоответствие в структуре файла. Чтение и запись метаданных (XMP) этого файла отключены (File importer detected an inconsistency in the file structure of xxx.mp4. Reading and writing this file’s metadata (XMP) has been disabled).


В новом обновлении плагина Voukoder for Premiere Pro v0.6.1 добавлена поддержка Unicode для кириллицы и соответственно решена проблема с ошибкой: Средство импорта файлов обнаружило несоответствие в структуре файла.
При кодировании Full HD видео в кодек Apple ProRes (iCodec Pro), загрузка четырехъядерного процессора: 100%.

Процесс Adobe Premiere Pro.exe грузит центральный процессор на 99% и утилизирует 1.4 Гбайта оперативной памяти.

На 100% у нас рендеринг зависает, так как ProRes тяжелое видео, и после рендеринга, запускается процесс Multiplexer.

Монитор ресурсов, 100% загрузка диска на котором происходит процесс мультиплекса, еще и активно работает и файл подкачки.

На этом скрине, видим цифру в 85Мб/с, и это для файла длительностью 53 секунды и объемом 1.4Гбайта.

Информация о полученном после экспорта видео, от Media Info:
Источник
How to Fix “File importer detected an inconsistency in the file structure.Reading and writing this files metadata (XMP) has been disabled.” Error in Adobe Premiere Pro?
Hi Guys, Today I am Going to tell you How to Fix “File importer detected an inconsistency in the file structure.Reading and writing this files metadata (XMP) has been disabled.” Error in Adobe Premiere Pro?
Are you Looking for “How to Fix “File importer detected an inconsistency in the file structure” Error in Adobe Premiere Pro? (or) “How to Fix “Reading and writing this files metadata (XMP) has been disabled” Error in Adobe Premiere Pro?
You are at the Right Place to Get Your Answers & Solve the Issue/Error.
Steps For How to Fix “File importer detected an inconsistency in the file structure.Reading and writing this files metadata (XMP) has been disabled.” Error in Adobe Premiere Pro?
Step 1: Goto Your System Local Disk and Check Your Disk Space Whether it has Proper Free Space or Not.
*Note – This Error Often Occurs Due to Low Disk Space.
Step 2: Now Try to Free Some Spaces By Deleting the Unnecessary Folders & Files Like Temp Folders, Windows Previous Installation (Windows.old) Folders.
Step 3: Now Export the File Again With the Proper Amount of Disk Space.
Leave the Comments Below.
That’s It. You’re Done. Have a Nice Day.
@@@ Leave Comments @@@
## Stay Safe Guys And Live Happily ##
Basically an Instrumentation Engineer But Very much Interested in Blogging. I’m a Passionate Blogger and an Intermediate in the Search Engine Optimization Process. I’ll always try to Fix those Common Issues Which was Faced By Most of the users in the World.
Источник