Version
![]()
![]()
Validation
- Introduction
-
Validation Quickstart
- Defining The Routes
- Creating The Controller
- Writing The Validation Logic
- Displaying The Validation Errors
- Repopulating Forms
- A Note On Optional Fields
- Validation Error Response Format
-
Form Request Validation
- Creating Form Requests
- Authorizing Form Requests
- Customizing The Error Messages
- Preparing Input For Validation
-
Manually Creating Validators
- Automatic Redirection
- Named Error Bags
- Customizing The Error Messages
- After Validation Hook
- Working With Validated Input
-
Working With Error Messages
- Specifying Custom Messages In Language Files
- Specifying Attributes In Language Files
- Specifying Values In Language Files
- Available Validation Rules
- Conditionally Adding Rules
-
Validating Arrays
- Validating Nested Array Input
- Error Message Indexes & Positions
- Validating Files
- Validating Passwords
-
Custom Validation Rules
- Using Rule Objects
- Using Closures
- Implicit Rules
Introduction
Laravel provides several different approaches to validate your application’s incoming data. It is most common to use the validate method available on all incoming HTTP requests. However, we will discuss other approaches to validation as well.
Laravel includes a wide variety of convenient validation rules that you may apply to data, even providing the ability to validate if values are unique in a given database table. We’ll cover each of these validation rules in detail so that you are familiar with all of Laravel’s validation features.
Validation Quickstart
To learn about Laravel’s powerful validation features, let’s look at a complete example of validating a form and displaying the error messages back to the user. By reading this high-level overview, you’ll be able to gain a good general understanding of how to validate incoming request data using Laravel:
Defining The Routes
First, let’s assume we have the following routes defined in our routes/web.php file:
use AppHttpControllersPostController;
Route::get('/post/create', [PostController::class, 'create']);
Route::post('/post', [PostController::class, 'store']);
The GET route will display a form for the user to create a new blog post, while the POST route will store the new blog post in the database.
Creating The Controller
Next, let’s take a look at a simple controller that handles incoming requests to these routes. We’ll leave the store method empty for now:
<?php
namespace AppHttpControllers;
use AppHttpControllersController;
use IlluminateHttpRequest;
class PostController extends Controller
{
/**
* Show the form to create a new blog post.
*
* @return IlluminateViewView
*/
public function create()
{
return view('post.create');
}
/**
* Store a new blog post.
*
* @param IlluminateHttpRequest $request
* @return IlluminateHttpResponse
*/
public function store(Request $request)
{
// Validate and store the blog post...
}
}
Writing The Validation Logic
Now we are ready to fill in our store method with the logic to validate the new blog post. To do this, we will use the validate method provided by the IlluminateHttpRequest object. If the validation rules pass, your code will keep executing normally; however, if validation fails, an IlluminateValidationValidationException exception will be thrown and the proper error response will automatically be sent back to the user.
If validation fails during a traditional HTTP request, a redirect response to the previous URL will be generated. If the incoming request is an XHR request, a JSON response containing the validation error messages will be returned.
To get a better understanding of the validate method, let’s jump back into the store method:
/**
* Store a new blog post.
*
* @param IlluminateHttpRequest $request
* @return IlluminateHttpResponse
*/
public function store(Request $request)
{
$validated = $request->validate([
'title' => 'required|unique:posts|max:255',
'body' => 'required',
]);
// The blog post is valid...
}
As you can see, the validation rules are passed into the validate method. Don’t worry — all available validation rules are documented. Again, if the validation fails, the proper response will automatically be generated. If the validation passes, our controller will continue executing normally.
Alternatively, validation rules may be specified as arrays of rules instead of a single | delimited string:
$validatedData = $request->validate([
'title' => ['required', 'unique:posts', 'max:255'],
'body' => ['required'],
]);
In addition, you may use the validateWithBag method to validate a request and store any error messages within a named error bag:
$validatedData = $request->validateWithBag('post', [
'title' => ['required', 'unique:posts', 'max:255'],
'body' => ['required'],
]);
Stopping On First Validation Failure
Sometimes you may wish to stop running validation rules on an attribute after the first validation failure. To do so, assign the bail rule to the attribute:
$request->validate([
'title' => 'bail|required|unique:posts|max:255',
'body' => 'required',
]);
In this example, if the unique rule on the title attribute fails, the max rule will not be checked. Rules will be validated in the order they are assigned.
A Note On Nested Attributes
If the incoming HTTP request contains «nested» field data, you may specify these fields in your validation rules using «dot» syntax:
$request->validate([
'title' => 'required|unique:posts|max:255',
'author.name' => 'required',
'author.description' => 'required',
]);
On the other hand, if your field name contains a literal period, you can explicitly prevent this from being interpreted as «dot» syntax by escaping the period with a backslash:
$request->validate([
'title' => 'required|unique:posts|max:255',
'v1.0' => 'required',
]);
Displaying The Validation Errors
So, what if the incoming request fields do not pass the given validation rules? As mentioned previously, Laravel will automatically redirect the user back to their previous location. In addition, all of the validation errors and request input will automatically be flashed to the session.
An $errors variable is shared with all of your application’s views by the IlluminateViewMiddlewareShareErrorsFromSession middleware, which is provided by the web middleware group. When this middleware is applied an $errors variable will always be available in your views, allowing you to conveniently assume the $errors variable is always defined and can be safely used. The $errors variable will be an instance of IlluminateSupportMessageBag. For more information on working with this object, check out its documentation.
So, in our example, the user will be redirected to our controller’s create method when validation fails, allowing us to display the error messages in the view:
<!-- /resources/views/post/create.blade.php -->
<h1>Create Post</h1>
@if ($errors->any())
<div class="alert alert-danger">
<ul>
@foreach ($errors->all() as $error)
<li>{{ $error }}</li>
@endforeach
</ul>
</div>
@endif
<!-- Create Post Form -->
Customizing The Error Messages
Laravel’s built-in validation rules each have an error message that is located in your application’s lang/en/validation.php file. Within this file, you will find a translation entry for each validation rule. You are free to change or modify these messages based on the needs of your application.
In addition, you may copy this file to another translation language directory to translate the messages for your application’s language. To learn more about Laravel localization, check out the complete localization documentation.
XHR Requests & Validation
In this example, we used a traditional form to send data to the application. However, many applications receive XHR requests from a JavaScript powered frontend. When using the validate method during an XHR request, Laravel will not generate a redirect response. Instead, Laravel generates a JSON response containing all of the validation errors. This JSON response will be sent with a 422 HTTP status code.
The @error Directive
You may use the @error Blade directive to quickly determine if validation error messages exist for a given attribute. Within an @error directive, you may echo the $message variable to display the error message:
<!-- /resources/views/post/create.blade.php -->
<label for="title">Post Title</label>
<input id="title"
type="text"
name="title"
class="@error('title') is-invalid @enderror">
@error('title')
<div class="alert alert-danger">{{ $message }}</div>
@enderror
If you are using named error bags, you may pass the name of the error bag as the second argument to the @error directive:
<input ... class="@error('title', 'post') is-invalid @enderror">
Repopulating Forms
When Laravel generates a redirect response due to a validation error, the framework will automatically flash all of the request’s input to the session. This is done so that you may conveniently access the input during the next request and repopulate the form that the user attempted to submit.
To retrieve flashed input from the previous request, invoke the old method on an instance of IlluminateHttpRequest. The old method will pull the previously flashed input data from the session:
$title = $request->old('title');
Laravel also provides a global old helper. If you are displaying old input within a Blade template, it is more convenient to use the old helper to repopulate the form. If no old input exists for the given field, null will be returned:
<input type="text" name="title" value="{{ old('title') }}">
A Note On Optional Fields
By default, Laravel includes the TrimStrings and ConvertEmptyStringsToNull middleware in your application’s global middleware stack. These middleware are listed in the stack by the AppHttpKernel class. Because of this, you will often need to mark your «optional» request fields as nullable if you do not want the validator to consider null values as invalid. For example:
$request->validate([
'title' => 'required|unique:posts|max:255',
'body' => 'required',
'publish_at' => 'nullable|date',
]);
In this example, we are specifying that the publish_at field may be either null or a valid date representation. If the nullable modifier is not added to the rule definition, the validator would consider null an invalid date.
Validation Error Response Format
When your application throws a IlluminateValidationValidationException exception and the incoming HTTP request is expecting a JSON response, Laravel will automatically format the error messages for you and return a 422 Unprocessable Entity HTTP response.
Below, you can review an example of the JSON response format for validation errors. Note that nested error keys are flattened into «dot» notation format:
{
"message": "The team name must be a string. (and 4 more errors)",
"errors": {
"team_name": [
"The team name must be a string.",
"The team name must be at least 1 characters."
],
"authorization.role": [
"The selected authorization.role is invalid."
],
"users.0.email": [
"The users.0.email field is required."
],
"users.2.email": [
"The users.2.email must be a valid email address."
]
}
}
Form Request Validation
Creating Form Requests
For more complex validation scenarios, you may wish to create a «form request». Form requests are custom request classes that encapsulate their own validation and authorization logic. To create a form request class, you may use the make:request Artisan CLI command:
php artisan make:request StorePostRequest
The generated form request class will be placed in the app/Http/Requests directory. If this directory does not exist, it will be created when you run the make:request command. Each form request generated by Laravel has two methods: authorize and rules.
As you might have guessed, the authorize method is responsible for determining if the currently authenticated user can perform the action represented by the request, while the rules method returns the validation rules that should apply to the request’s data:
/**
* Get the validation rules that apply to the request.
*
* @return array
*/
public function rules()
{
return [
'title' => 'required|unique:posts|max:255',
'body' => 'required',
];
}
Note
You may type-hint any dependencies you require within therulesmethod’s signature. They will automatically be resolved via the Laravel service container.
So, how are the validation rules evaluated? All you need to do is type-hint the request on your controller method. The incoming form request is validated before the controller method is called, meaning you do not need to clutter your controller with any validation logic:
/**
* Store a new blog post.
*
* @param AppHttpRequestsStorePostRequest $request
* @return IlluminateHttpResponse
*/
public function store(StorePostRequest $request)
{
// The incoming request is valid...
// Retrieve the validated input data...
$validated = $request->validated();
// Retrieve a portion of the validated input data...
$validated = $request->safe()->only(['name', 'email']);
$validated = $request->safe()->except(['name', 'email']);
}
If validation fails, a redirect response will be generated to send the user back to their previous location. The errors will also be flashed to the session so they are available for display. If the request was an XHR request, an HTTP response with a 422 status code will be returned to the user including a JSON representation of the validation errors.
Adding After Hooks To Form Requests
If you would like to add an «after» validation hook to a form request, you may use the withValidator method. This method receives the fully constructed validator, allowing you to call any of its methods before the validation rules are actually evaluated:
/**
* Configure the validator instance.
*
* @param IlluminateValidationValidator $validator
* @return void
*/
public function withValidator($validator)
{
$validator->after(function ($validator) {
if ($this->somethingElseIsInvalid()) {
$validator->errors()->add('field', 'Something is wrong with this field!');
}
});
}
Stopping On First Validation Failure Attribute
By adding a stopOnFirstFailure property to your request class, you may inform the validator that it should stop validating all attributes once a single validation failure has occurred:
/**
* Indicates if the validator should stop on the first rule failure.
*
* @var bool
*/
protected $stopOnFirstFailure = true;
Customizing The Redirect Location
As previously discussed, a redirect response will be generated to send the user back to their previous location when form request validation fails. However, you are free to customize this behavior. To do so, define a $redirect property on your form request:
/**
* The URI that users should be redirected to if validation fails.
*
* @var string
*/
protected $redirect = '/dashboard';
Or, if you would like to redirect users to a named route, you may define a $redirectRoute property instead:
/**
* The route that users should be redirected to if validation fails.
*
* @var string
*/
protected $redirectRoute = 'dashboard';
Authorizing Form Requests
The form request class also contains an authorize method. Within this method, you may determine if the authenticated user actually has the authority to update a given resource. For example, you may determine if a user actually owns a blog comment they are attempting to update. Most likely, you will interact with your authorization gates and policies within this method:
use AppModelsComment;
/**
* Determine if the user is authorized to make this request.
*
* @return bool
*/
public function authorize()
{
$comment = Comment::find($this->route('comment'));
return $comment && $this->user()->can('update', $comment);
}
Since all form requests extend the base Laravel request class, we may use the user method to access the currently authenticated user. Also, note the call to the route method in the example above. This method grants you access to the URI parameters defined on the route being called, such as the {comment} parameter in the example below:
Route::post('/comment/{comment}');
Therefore, if your application is taking advantage of route model binding, your code may be made even more succinct by accessing the resolved model as a property of the request:
return $this->user()->can('update', $this->comment);
If the authorize method returns false, an HTTP response with a 403 status code will automatically be returned and your controller method will not execute.
If you plan to handle authorization logic for the request in another part of your application, you may simply return true from the authorize method:
/**
* Determine if the user is authorized to make this request.
*
* @return bool
*/
public function authorize()
{
return true;
}
Note
You may type-hint any dependencies you need within theauthorizemethod’s signature. They will automatically be resolved via the Laravel service container.
Customizing The Error Messages
You may customize the error messages used by the form request by overriding the messages method. This method should return an array of attribute / rule pairs and their corresponding error messages:
/**
* Get the error messages for the defined validation rules.
*
* @return array
*/
public function messages()
{
return [
'title.required' => 'A title is required',
'body.required' => 'A message is required',
];
}
Customizing The Validation Attributes
Many of Laravel’s built-in validation rule error messages contain an :attribute placeholder. If you would like the :attribute placeholder of your validation message to be replaced with a custom attribute name, you may specify the custom names by overriding the attributes method. This method should return an array of attribute / name pairs:
/**
* Get custom attributes for validator errors.
*
* @return array
*/
public function attributes()
{
return [
'email' => 'email address',
];
}
Preparing Input For Validation
If you need to prepare or sanitize any data from the request before you apply your validation rules, you may use the prepareForValidation method:
use IlluminateSupportStr;
/**
* Prepare the data for validation.
*
* @return void
*/
protected function prepareForValidation()
{
$this->merge([
'slug' => Str::slug($this->slug),
]);
}
Likewise, if you need to normalize any request data after validation is complete, you may use the passedValidation method:
use IlluminateSupportStr;
/**
* Handle a passed validation attempt.
*
* @return void
*/
protected function passedValidation()
{
$this->replace(['name' => 'Taylor']);
}
Manually Creating Validators
If you do not want to use the validate method on the request, you may create a validator instance manually using the Validator facade. The make method on the facade generates a new validator instance:
<?php
namespace AppHttpControllers;
use AppHttpControllersController;
use IlluminateHttpRequest;
use IlluminateSupportFacadesValidator;
class PostController extends Controller
{
/**
* Store a new blog post.
*
* @param Request $request
* @return Response
*/
public function store(Request $request)
{
$validator = Validator::make($request->all(), [
'title' => 'required|unique:posts|max:255',
'body' => 'required',
]);
if ($validator->fails()) {
return redirect('post/create')
->withErrors($validator)
->withInput();
}
// Retrieve the validated input...
$validated = $validator->validated();
// Retrieve a portion of the validated input...
$validated = $validator->safe()->only(['name', 'email']);
$validated = $validator->safe()->except(['name', 'email']);
// Store the blog post...
}
}
The first argument passed to the make method is the data under validation. The second argument is an array of the validation rules that should be applied to the data.
After determining whether the request validation failed, you may use the withErrors method to flash the error messages to the session. When using this method, the $errors variable will automatically be shared with your views after redirection, allowing you to easily display them back to the user. The withErrors method accepts a validator, a MessageBag, or a PHP array.
Stopping On First Validation Failure
The stopOnFirstFailure method will inform the validator that it should stop validating all attributes once a single validation failure has occurred:
if ($validator->stopOnFirstFailure()->fails()) {
// ...
}
Automatic Redirection
If you would like to create a validator instance manually but still take advantage of the automatic redirection offered by the HTTP request’s validate method, you may call the validate method on an existing validator instance. If validation fails, the user will automatically be redirected or, in the case of an XHR request, a JSON response will be returned:
Validator::make($request->all(), [
'title' => 'required|unique:posts|max:255',
'body' => 'required',
])->validate();
You may use the validateWithBag method to store the error messages in a named error bag if validation fails:
Validator::make($request->all(), [
'title' => 'required|unique:posts|max:255',
'body' => 'required',
])->validateWithBag('post');
Named Error Bags
If you have multiple forms on a single page, you may wish to name the MessageBag containing the validation errors, allowing you to retrieve the error messages for a specific form. To achieve this, pass a name as the second argument to withErrors:
return redirect('register')->withErrors($validator, 'login');
You may then access the named MessageBag instance from the $errors variable:
{{ $errors->login->first('email') }}
Customizing The Error Messages
If needed, you may provide custom error messages that a validator instance should use instead of the default error messages provided by Laravel. There are several ways to specify custom messages. First, you may pass the custom messages as the third argument to the Validator::make method:
$validator = Validator::make($input, $rules, $messages = [
'required' => 'The :attribute field is required.',
]);
In this example, the :attribute placeholder will be replaced by the actual name of the field under validation. You may also utilize other placeholders in validation messages. For example:
$messages = [
'same' => 'The :attribute and :other must match.',
'size' => 'The :attribute must be exactly :size.',
'between' => 'The :attribute value :input is not between :min - :max.',
'in' => 'The :attribute must be one of the following types: :values',
];
Specifying A Custom Message For A Given Attribute
Sometimes you may wish to specify a custom error message only for a specific attribute. You may do so using «dot» notation. Specify the attribute’s name first, followed by the rule:
$messages = [
'email.required' => 'We need to know your email address!',
];
Specifying Custom Attribute Values
Many of Laravel’s built-in error messages include an :attribute placeholder that is replaced with the name of the field or attribute under validation. To customize the values used to replace these placeholders for specific fields, you may pass an array of custom attributes as the fourth argument to the Validator::make method:
$validator = Validator::make($input, $rules, $messages, [
'email' => 'email address',
]);
After Validation Hook
You may also attach callbacks to be run after validation is completed. This allows you to easily perform further validation and even add more error messages to the message collection. To get started, call the after method on a validator instance:
$validator = Validator::make(/* ... */);
$validator->after(function ($validator) {
if ($this->somethingElseIsInvalid()) {
$validator->errors()->add(
'field', 'Something is wrong with this field!'
);
}
});
if ($validator->fails()) {
//
}
Working With Validated Input
After validating incoming request data using a form request or a manually created validator instance, you may wish to retrieve the incoming request data that actually underwent validation. This can be accomplished in several ways. First, you may call the validated method on a form request or validator instance. This method returns an array of the data that was validated:
$validated = $request->validated();
$validated = $validator->validated();
Alternatively, you may call the safe method on a form request or validator instance. This method returns an instance of IlluminateSupportValidatedInput. This object exposes only, except, and all methods to retrieve a subset of the validated data or the entire array of validated data:
$validated = $request->safe()->only(['name', 'email']);
$validated = $request->safe()->except(['name', 'email']);
$validated = $request->safe()->all();
In addition, the IlluminateSupportValidatedInput instance may be iterated over and accessed like an array:
// Validated data may be iterated...
foreach ($request->safe() as $key => $value) {
//
}
// Validated data may be accessed as an array...
$validated = $request->safe();
$email = $validated['email'];
If you would like to add additional fields to the validated data, you may call the merge method:
$validated = $request->safe()->merge(['name' => 'Taylor Otwell']);
If you would like to retrieve the validated data as a collection instance, you may call the collect method:
$collection = $request->safe()->collect();
Working With Error Messages
After calling the errors method on a Validator instance, you will receive an IlluminateSupportMessageBag instance, which has a variety of convenient methods for working with error messages. The $errors variable that is automatically made available to all views is also an instance of the MessageBag class.
Retrieving The First Error Message For A Field
To retrieve the first error message for a given field, use the first method:
$errors = $validator->errors();
echo $errors->first('email');
Retrieving All Error Messages For A Field
If you need to retrieve an array of all the messages for a given field, use the get method:
foreach ($errors->get('email') as $message) {
//
}
If you are validating an array form field, you may retrieve all of the messages for each of the array elements using the * character:
foreach ($errors->get('attachments.*') as $message) {
//
}
Retrieving All Error Messages For All Fields
To retrieve an array of all messages for all fields, use the all method:
foreach ($errors->all() as $message) {
//
}
Determining If Messages Exist For A Field
The has method may be used to determine if any error messages exist for a given field:
if ($errors->has('email')) {
//
}
Specifying Custom Messages In Language Files
Laravel’s built-in validation rules each have an error message that is located in your application’s lang/en/validation.php file. Within this file, you will find a translation entry for each validation rule. You are free to change or modify these messages based on the needs of your application.
In addition, you may copy this file to another translation language directory to translate the messages for your application’s language. To learn more about Laravel localization, check out the complete localization documentation.
Custom Messages For Specific Attributes
You may customize the error messages used for specified attribute and rule combinations within your application’s validation language files. To do so, add your message customizations to the custom array of your application’s lang/xx/validation.php language file:
'custom' => [
'email' => [
'required' => 'We need to know your email address!',
'max' => 'Your email address is too long!'
],
],
Specifying Attributes In Language Files
Many of Laravel’s built-in error messages include an :attribute placeholder that is replaced with the name of the field or attribute under validation. If you would like the :attribute portion of your validation message to be replaced with a custom value, you may specify the custom attribute name in the attributes array of your lang/xx/validation.php language file:
'attributes' => [
'email' => 'email address',
],
Specifying Values In Language Files
Some of Laravel’s built-in validation rule error messages contain a :value placeholder that is replaced with the current value of the request attribute. However, you may occasionally need the :value portion of your validation message to be replaced with a custom representation of the value. For example, consider the following rule that specifies that a credit card number is required if the payment_type has a value of cc:
Validator::make($request->all(), [
'credit_card_number' => 'required_if:payment_type,cc'
]);
If this validation rule fails, it will produce the following error message:
The credit card number field is required when payment type is cc.
Instead of displaying cc as the payment type value, you may specify a more user-friendly value representation in your lang/xx/validation.php language file by defining a values array:
'values' => [
'payment_type' => [
'cc' => 'credit card'
],
],
After defining this value, the validation rule will produce the following error message:
The credit card number field is required when payment type is credit card.
Available Validation Rules
Below is a list of all available validation rules and their function:
accepted
The field under validation must be "yes", "on", 1, or true. This is useful for validating «Terms of Service» acceptance or similar fields.
accepted_if:anotherfield,value,…
The field under validation must be "yes", "on", 1, or true if another field under validation is equal to a specified value. This is useful for validating «Terms of Service» acceptance or similar fields.
active_url
The field under validation must have a valid A or AAAA record according to the dns_get_record PHP function. The hostname of the provided URL is extracted using the parse_url PHP function before being passed to dns_get_record.
after:date
The field under validation must be a value after a given date. The dates will be passed into the strtotime PHP function in order to be converted to a valid DateTime instance:
'start_date' => 'required|date|after:tomorrow'
Instead of passing a date string to be evaluated by strtotime, you may specify another field to compare against the date:
'finish_date' => 'required|date|after:start_date'
after_or_equal:date
The field under validation must be a value after or equal to the given date. For more information, see the after rule.
alpha
The field under validation must be entirely Unicode alphabetic characters contained in p{L} and p{M}.
To restrict this validation rule to characters in the ASCII range (a-z and A-Z), you may provide the ascii option to the validation rule:
'username' => 'alpha:ascii',
alpha_dash
The field under validation must be entirely Unicode alpha-numeric characters contained in p{L}, p{M}, p{N}, as well as ASCII dashes (-) and ASCII underscores (_).
To restrict this validation rule to characters in the ASCII range (a-z and A-Z), you may provide the ascii option to the validation rule:
'username' => 'alpha_dash:ascii',
alpha_num
The field under validation must be entirely Unicode alpha-numeric characters contained in p{L}, p{M}, and p{N}.
To restrict this validation rule to characters in the ASCII range (a-z and A-Z), you may provide the ascii option to the validation rule:
'username' => 'alpha_num:ascii',
array
The field under validation must be a PHP array.
When additional values are provided to the array rule, each key in the input array must be present within the list of values provided to the rule. In the following example, the admin key in the input array is invalid since it is not contained in the list of values provided to the array rule:
use IlluminateSupportFacadesValidator;
$input = [
'user' => [
'name' => 'Taylor Otwell',
'username' => 'taylorotwell',
'admin' => true,
],
];
Validator::make($input, [
'user' => 'array:name,username',
]);
In general, you should always specify the array keys that are allowed to be present within your array.
ascii
The field under validation must be entirely 7-bit ASCII characters.
bail
Stop running validation rules for the field after the first validation failure.
While the bail rule will only stop validating a specific field when it encounters a validation failure, the stopOnFirstFailure method will inform the validator that it should stop validating all attributes once a single validation failure has occurred:
if ($validator->stopOnFirstFailure()->fails()) {
// ...
}
before:date
The field under validation must be a value preceding the given date. The dates will be passed into the PHP strtotime function in order to be converted into a valid DateTime instance. In addition, like the after rule, the name of another field under validation may be supplied as the value of date.
before_or_equal:date
The field under validation must be a value preceding or equal to the given date. The dates will be passed into the PHP strtotime function in order to be converted into a valid DateTime instance. In addition, like the after rule, the name of another field under validation may be supplied as the value of date.
between:min,max
The field under validation must have a size between the given min and max (inclusive). Strings, numerics, arrays, and files are evaluated in the same fashion as the size rule.
boolean
The field under validation must be able to be cast as a boolean. Accepted input are true, false, 1, 0, "1", and "0".
confirmed
The field under validation must have a matching field of {field}_confirmation. For example, if the field under validation is password, a matching password_confirmation field must be present in the input.
current_password
The field under validation must match the authenticated user’s password. You may specify an authentication guard using the rule’s first parameter:
'password' => 'current_password:api'
date
The field under validation must be a valid, non-relative date according to the strtotime PHP function.
date_equals:date
The field under validation must be equal to the given date. The dates will be passed into the PHP strtotime function in order to be converted into a valid DateTime instance.
date_format:format,…
The field under validation must match one of the given formats. You should use either date or date_format when validating a field, not both. This validation rule supports all formats supported by PHP’s DateTime class.
decimal:min,max
The field under validation must be numeric and must contain the specified number of decimal places:
// Must have exactly two decimal places (9.99)...
'price' => 'decimal:2'
// Must have between 2 and 4 decimal places...
'price' => 'decimal:2,4'
declined
The field under validation must be "no", "off", 0, or false.
declined_if:anotherfield,value,…
The field under validation must be "no", "off", 0, or false if another field under validation is equal to a specified value.
different:field
The field under validation must have a different value than field.
digits:value
The integer under validation must have an exact length of value.
digits_between:min,max
The integer validation must have a length between the given min and max.
dimensions
The file under validation must be an image meeting the dimension constraints as specified by the rule’s parameters:
'avatar' => 'dimensions:min_width=100,min_height=200'
Available constraints are: min_width, max_width, min_height, max_height, width, height, ratio.
A ratio constraint should be represented as width divided by height. This can be specified either by a fraction like 3/2 or a float like 1.5:
'avatar' => 'dimensions:ratio=3/2'
Since this rule requires several arguments, you may use the Rule::dimensions method to fluently construct the rule:
use IlluminateSupportFacadesValidator;
use IlluminateValidationRule;
Validator::make($data, [
'avatar' => [
'required',
Rule::dimensions()->maxWidth(1000)->maxHeight(500)->ratio(3 / 2),
],
]);
distinct
When validating arrays, the field under validation must not have any duplicate values:
'foo.*.id' => 'distinct'
Distinct uses loose variable comparisons by default. To use strict comparisons, you may add the strict parameter to your validation rule definition:
'foo.*.id' => 'distinct:strict'
You may add ignore_case to the validation rule’s arguments to make the rule ignore capitalization differences:
'foo.*.id' => 'distinct:ignore_case'
doesnt_start_with:foo,bar,…
The field under validation must not start with one of the given values.
doesnt_end_with:foo,bar,…
The field under validation must not end with one of the given values.
The field under validation must be formatted as an email address. This validation rule utilizes the egulias/email-validator package for validating the email address. By default, the RFCValidation validator is applied, but you can apply other validation styles as well:
'email' => 'email:rfc,dns'
The example above will apply the RFCValidation and DNSCheckValidation validations. Here’s a full list of validation styles you can apply:
-
rfc:RFCValidation -
strict:NoRFCWarningsValidation -
dns:DNSCheckValidation -
spoof:SpoofCheckValidation -
filter:FilterEmailValidation -
filter_unicode:FilterEmailValidation::unicode()
The filter validator, which uses PHP’s filter_var function, ships with Laravel and was Laravel’s default email validation behavior prior to Laravel version 5.8.
Warning
Thednsandspoofvalidators require the PHPintlextension.
ends_with:foo,bar,…
The field under validation must end with one of the given values.
enum
The Enum rule is a class based rule that validates whether the field under validation contains a valid enum value. The Enum rule accepts the name of the enum as its only constructor argument:
use AppEnumsServerStatus;
use IlluminateValidationRulesEnum;
$request->validate([
'status' => [new Enum(ServerStatus::class)],
]);
Warning
Enums are only available on PHP 8.1+.
exclude
The field under validation will be excluded from the request data returned by the validate and validated methods.
exclude_if:anotherfield,value
The field under validation will be excluded from the request data returned by the validate and validated methods if the anotherfield field is equal to value.
If complex conditional exclusion logic is required, you may utilize the Rule::excludeIf method. This method accepts a boolean or a closure. When given a closure, the closure should return true or false to indicate if the field under validation should be excluded:
use IlluminateSupportFacadesValidator;
use IlluminateValidationRule;
Validator::make($request->all(), [
'role_id' => Rule::excludeIf($request->user()->is_admin),
]);
Validator::make($request->all(), [
'role_id' => Rule::excludeIf(fn () => $request->user()->is_admin),
]);
exclude_unless:anotherfield,value
The field under validation will be excluded from the request data returned by the validate and validated methods unless anotherfield‘s field is equal to value. If value is null (exclude_unless:name,null), the field under validation will be excluded unless the comparison field is null or the comparison field is missing from the request data.
exclude_with:anotherfield
The field under validation will be excluded from the request data returned by the validate and validated methods if the anotherfield field is present.
exclude_without:anotherfield
The field under validation will be excluded from the request data returned by the validate and validated methods if the anotherfield field is not present.
exists:table,column
The field under validation must exist in a given database table.
Basic Usage Of Exists Rule
'state' => 'exists:states'
If the column option is not specified, the field name will be used. So, in this case, the rule will validate that the states database table contains a record with a state column value matching the request’s state attribute value.
Specifying A Custom Column Name
You may explicitly specify the database column name that should be used by the validation rule by placing it after the database table name:
'state' => 'exists:states,abbreviation'
Occasionally, you may need to specify a specific database connection to be used for the exists query. You can accomplish this by prepending the connection name to the table name:
'email' => 'exists:connection.staff,email'
Instead of specifying the table name directly, you may specify the Eloquent model which should be used to determine the table name:
'user_id' => 'exists:AppModelsUser,id'
If you would like to customize the query executed by the validation rule, you may use the Rule class to fluently define the rule. In this example, we’ll also specify the validation rules as an array instead of using the | character to delimit them:
use IlluminateSupportFacadesValidator;
use IlluminateValidationRule;
Validator::make($data, [
'email' => [
'required',
Rule::exists('staff')->where(function ($query) {
return $query->where('account_id', 1);
}),
],
]);
You may explicitly specify the database column name that should be used by the exists rule generated by the Rule::exists method by providing the column name as the second argument to the exists method:
'state' => Rule::exists('states', 'abbreviation'),
file
The field under validation must be a successfully uploaded file.
filled
The field under validation must not be empty when it is present.
gt:field
The field under validation must be greater than the given field. The two fields must be of the same type. Strings, numerics, arrays, and files are evaluated using the same conventions as the size rule.
gte:field
The field under validation must be greater than or equal to the given field. The two fields must be of the same type. Strings, numerics, arrays, and files are evaluated using the same conventions as the size rule.
image
The file under validation must be an image (jpg, jpeg, png, bmp, gif, svg, or webp).
in:foo,bar,…
The field under validation must be included in the given list of values. Since this rule often requires you to implode an array, the Rule::in method may be used to fluently construct the rule:
use IlluminateSupportFacadesValidator;
use IlluminateValidationRule;
Validator::make($data, [
'zones' => [
'required',
Rule::in(['first-zone', 'second-zone']),
],
]);
When the in rule is combined with the array rule, each value in the input array must be present within the list of values provided to the in rule. In the following example, the LAS airport code in the input array is invalid since it is not contained in the list of airports provided to the in rule:
use IlluminateSupportFacadesValidator;
use IlluminateValidationRule;
$input = [
'airports' => ['NYC', 'LAS'],
];
Validator::make($input, [
'airports' => [
'required',
'array',
],
'airports.*' => Rule::in(['NYC', 'LIT']),
]);
in_array:anotherfield.*
The field under validation must exist in anotherfield‘s values.
integer
The field under validation must be an integer.
Warning
This validation rule does not verify that the input is of the «integer» variable type, only that the input is of a type accepted by PHP’sFILTER_VALIDATE_INTrule. If you need to validate the input as being a number please use this rule in combination with thenumericvalidation rule.
ip
The field under validation must be an IP address.
ipv4
The field under validation must be an IPv4 address.
ipv6
The field under validation must be an IPv6 address.
json
The field under validation must be a valid JSON string.
lt:field
The field under validation must be less than the given field. The two fields must be of the same type. Strings, numerics, arrays, and files are evaluated using the same conventions as the size rule.
lte:field
The field under validation must be less than or equal to the given field. The two fields must be of the same type. Strings, numerics, arrays, and files are evaluated using the same conventions as the size rule.
lowercase
The field under validation must be lowercase.
mac_address
The field under validation must be a MAC address.
max:value
The field under validation must be less than or equal to a maximum value. Strings, numerics, arrays, and files are evaluated in the same fashion as the size rule.
max_digits:value
The integer under validation must have a maximum length of value.
mimetypes:text/plain,…
The file under validation must match one of the given MIME types:
'video' => 'mimetypes:video/avi,video/mpeg,video/quicktime'
To determine the MIME type of the uploaded file, the file’s contents will be read and the framework will attempt to guess the MIME type, which may be different from the client’s provided MIME type.
mimes:foo,bar,…
The file under validation must have a MIME type corresponding to one of the listed extensions.
Basic Usage Of MIME Rule
'photo' => 'mimes:jpg,bmp,png'
Even though you only need to specify the extensions, this rule actually validates the MIME type of the file by reading the file’s contents and guessing its MIME type. A full listing of MIME types and their corresponding extensions may be found at the following location:
https://svn.apache.org/repos/asf/httpd/httpd/trunk/docs/conf/mime.types
min:value
The field under validation must have a minimum value. Strings, numerics, arrays, and files are evaluated in the same fashion as the size rule.
min_digits:value
The integer under validation must have a minimum length of value.
multiple_of:value
The field under validation must be a multiple of value.
missing
The field under validation must not be present in the input data.
missing_if:anotherfield,value,…
The field under validation must not be present if the anotherfield field is equal to any value.
missing_unless:anotherfield,value
The field under validation must not be present unless the anotherfield field is equal to any value.
missing_with:foo,bar,…
The field under validation must not be present only if any of the other specified fields are present.
missing_with_all:foo,bar,…
The field under validation must not be present only if all of the other specified fields are present.
not_in:foo,bar,…
The field under validation must not be included in the given list of values. The Rule::notIn method may be used to fluently construct the rule:
use IlluminateValidationRule;
Validator::make($data, [
'toppings' => [
'required',
Rule::notIn(['sprinkles', 'cherries']),
],
]);
not_regex:pattern
The field under validation must not match the given regular expression.
Internally, this rule uses the PHP preg_match function. The pattern specified should obey the same formatting required by preg_match and thus also include valid delimiters. For example: 'email' => 'not_regex:/^.+$/i'.
Warning
When using theregex/not_regexpatterns, it may be necessary to specify your validation rules using an array instead of using|delimiters, especially if the regular expression contains a|character.
nullable
The field under validation may be null.
numeric
The field under validation must be numeric.
password
The field under validation must match the authenticated user’s password.
Warning
This rule was renamed tocurrent_passwordwith the intention of removing it in Laravel 9. Please use the Current Password rule instead.
present
The field under validation must exist in the input data.
prohibited
The field under validation must be missing or empty. A field is «empty» if it meets one of the following criteria:
- The value is
null. - The value is an empty string.
- The value is an empty array or empty
Countableobject. - The value is an uploaded file with an empty path.
prohibited_if:anotherfield,value,…
The field under validation must be missing or empty if the anotherfield field is equal to any value. A field is «empty» if it meets one of the following criteria:
- The value is
null. - The value is an empty string.
- The value is an empty array or empty
Countableobject. - The value is an uploaded file with an empty path.
If complex conditional prohibition logic is required, you may utilize the Rule::prohibitedIf method. This method accepts a boolean or a closure. When given a closure, the closure should return true or false to indicate if the field under validation should be prohibited:
use IlluminateSupportFacadesValidator;
use IlluminateValidationRule;
Validator::make($request->all(), [
'role_id' => Rule::prohibitedIf($request->user()->is_admin),
]);
Validator::make($request->all(), [
'role_id' => Rule::prohibitedIf(fn () => $request->user()->is_admin),
]);
prohibited_unless:anotherfield,value,…
The field under validation must be missing or empty unless the anotherfield field is equal to any value. A field is «empty» if it meets one of the following criteria:
- The value is
null. - The value is an empty string.
- The value is an empty array or empty
Countableobject. - The value is an uploaded file with an empty path.
prohibits:anotherfield,…
If the field under validation is not missing or empty, all fields in anotherfield must be missing or empty. A field is «empty» if it meets one of the following criteria:
- The value is
null. - The value is an empty string.
- The value is an empty array or empty
Countableobject. - The value is an uploaded file with an empty path.
regex:pattern
The field under validation must match the given regular expression.
Internally, this rule uses the PHP preg_match function. The pattern specified should obey the same formatting required by preg_match and thus also include valid delimiters. For example: 'email' => 'regex:/^[email protected]+$/i'.
Warning
When using theregex/not_regexpatterns, it may be necessary to specify rules in an array instead of using|delimiters, especially if the regular expression contains a|character.
required
The field under validation must be present in the input data and not empty. A field is «empty» if it meets one of the following criteria:
- The value is
null. - The value is an empty string.
- The value is an empty array or empty
Countableobject. - The value is an uploaded file with no path.
required_if:anotherfield,value,…
The field under validation must be present and not empty if the anotherfield field is equal to any value.
If you would like to construct a more complex condition for the required_if rule, you may use the Rule::requiredIf method. This method accepts a boolean or a closure. When passed a closure, the closure should return true or false to indicate if the field under validation is required:
use IlluminateSupportFacadesValidator;
use IlluminateValidationRule;
Validator::make($request->all(), [
'role_id' => Rule::requiredIf($request->user()->is_admin),
]);
Validator::make($request->all(), [
'role_id' => Rule::requiredIf(fn () => $request->user()->is_admin),
]);
required_unless:anotherfield,value,…
The field under validation must be present and not empty unless the anotherfield field is equal to any value. This also means anotherfield must be present in the request data unless value is null. If value is null (required_unless:name,null), the field under validation will be required unless the comparison field is null or the comparison field is missing from the request data.
required_with:foo,bar,…
The field under validation must be present and not empty only if any of the other specified fields are present and not empty.
required_with_all:foo,bar,…
The field under validation must be present and not empty only if all of the other specified fields are present and not empty.
required_without:foo,bar,…
The field under validation must be present and not empty only when any of the other specified fields are empty or not present.
required_without_all:foo,bar,…
The field under validation must be present and not empty only when all of the other specified fields are empty or not present.
required_array_keys:foo,bar,…
The field under validation must be an array and must contain at least the specified keys.
same:field
The given field must match the field under validation.
size:value
The field under validation must have a size matching the given value. For string data, value corresponds to the number of characters. For numeric data, value corresponds to a given integer value (the attribute must also have the numeric or integer rule). For an array, size corresponds to the count of the array. For files, size corresponds to the file size in kilobytes. Let’s look at some examples:
// Validate that a string is exactly 12 characters long...
'title' => 'size:12';
// Validate that a provided integer equals 10...
'seats' => 'integer|size:10';
// Validate that an array has exactly 5 elements...
'tags' => 'array|size:5';
// Validate that an uploaded file is exactly 512 kilobytes...
'image' => 'file|size:512';
starts_with:foo,bar,…
The field under validation must start with one of the given values.
string
The field under validation must be a string. If you would like to allow the field to also be null, you should assign the nullable rule to the field.
timezone
The field under validation must be a valid timezone identifier according to the timezone_identifiers_list PHP function.
unique:table,column
The field under validation must not exist within the given database table.
Specifying A Custom Table / Column Name:
Instead of specifying the table name directly, you may specify the Eloquent model which should be used to determine the table name:
'email' => 'unique:AppModelsUser,email_address'
The column option may be used to specify the field’s corresponding database column. If the column option is not specified, the name of the field under validation will be used.
'email' => 'unique:users,email_address'
Specifying A Custom Database Connection
Occasionally, you may need to set a custom connection for database queries made by the Validator. To accomplish this, you may prepend the connection name to the table name:
'email' => 'unique:connection.users,email_address'
Forcing A Unique Rule To Ignore A Given ID:
Sometimes, you may wish to ignore a given ID during unique validation. For example, consider an «update profile» screen that includes the user’s name, email address, and location. You will probably want to verify that the email address is unique. However, if the user only changes the name field and not the email field, you do not want a validation error to be thrown because the user is already the owner of the email address in question.
To instruct the validator to ignore the user’s ID, we’ll use the Rule class to fluently define the rule. In this example, we’ll also specify the validation rules as an array instead of using the | character to delimit the rules:
use IlluminateSupportFacadesValidator;
use IlluminateValidationRule;
Validator::make($data, [
'email' => [
'required',
Rule::unique('users')->ignore($user->id),
],
]);
Warning
You should never pass any user controlled request input into theignoremethod. Instead, you should only pass a system generated unique ID such as an auto-incrementing ID or UUID from an Eloquent model instance. Otherwise, your application will be vulnerable to an SQL injection attack.
Instead of passing the model key’s value to the ignore method, you may also pass the entire model instance. Laravel will automatically extract the key from the model:
Rule::unique('users')->ignore($user)
If your table uses a primary key column name other than id, you may specify the name of the column when calling the ignore method:
Rule::unique('users')->ignore($user->id, 'user_id')
By default, the unique rule will check the uniqueness of the column matching the name of the attribute being validated. However, you may pass a different column name as the second argument to the unique method:
Rule::unique('users', 'email_address')->ignore($user->id),
Adding Additional Where Clauses:
You may specify additional query conditions by customizing the query using the where method. For example, let’s add a query condition that scopes the query to only search records that have an account_id column value of 1:
'email' => Rule::unique('users')->where(fn ($query) => $query->where('account_id', 1))
uppercase
The field under validation must be uppercase.
url
The field under validation must be a valid URL.
ulid
The field under validation must be a valid Universally Unique Lexicographically Sortable Identifier (ULID).
uuid
The field under validation must be a valid RFC 4122 (version 1, 3, 4, or 5) universally unique identifier (UUID).
Conditionally Adding Rules
Skipping Validation When Fields Have Certain Values
You may occasionally wish to not validate a given field if another field has a given value. You may accomplish this using the exclude_if validation rule. In this example, the appointment_date and doctor_name fields will not be validated if the has_appointment field has a value of false:
use IlluminateSupportFacadesValidator;
$validator = Validator::make($data, [
'has_appointment' => 'required|boolean',
'appointment_date' => 'exclude_if:has_appointment,false|required|date',
'doctor_name' => 'exclude_if:has_appointment,false|required|string',
]);
Alternatively, you may use the exclude_unless rule to not validate a given field unless another field has a given value:
$validator = Validator::make($data, [
'has_appointment' => 'required|boolean',
'appointment_date' => 'exclude_unless:has_appointment,true|required|date',
'doctor_name' => 'exclude_unless:has_appointment,true|required|string',
]);
Validating When Present
In some situations, you may wish to run validation checks against a field only if that field is present in the data being validated. To quickly accomplish this, add the sometimes rule to your rule list:
$v = Validator::make($data, [
'email' => 'sometimes|required|email',
]);
In the example above, the email field will only be validated if it is present in the $data array.
Note
If you are attempting to validate a field that should always be present but may be empty, check out this note on optional fields.
Complex Conditional Validation
Sometimes you may wish to add validation rules based on more complex conditional logic. For example, you may wish to require a given field only if another field has a greater value than 100. Or, you may need two fields to have a given value only when another field is present. Adding these validation rules doesn’t have to be a pain. First, create a Validator instance with your static rules that never change:
use IlluminateSupportFacadesValidator;
$validator = Validator::make($request->all(), [
'email' => 'required|email',
'games' => 'required|numeric',
]);
Let’s assume our web application is for game collectors. If a game collector registers with our application and they own more than 100 games, we want them to explain why they own so many games. For example, perhaps they run a game resale shop, or maybe they just enjoy collecting games. To conditionally add this requirement, we can use the sometimes method on the Validator instance.
$validator->sometimes('reason', 'required|max:500', function ($input) {
return $input->games >= 100;
});
The first argument passed to the sometimes method is the name of the field we are conditionally validating. The second argument is a list of the rules we want to add. If the closure passed as the third argument returns true, the rules will be added. This method makes it a breeze to build complex conditional validations. You may even add conditional validations for several fields at once:
$validator->sometimes(['reason', 'cost'], 'required', function ($input) {
return $input->games >= 100;
});
Note
The$inputparameter passed to your closure will be an instance ofIlluminateSupportFluentand may be used to access your input and files under validation.
Complex Conditional Array Validation
Sometimes you may want to validate a field based on another field in the same nested array whose index you do not know. In these situations, you may allow your closure to receive a second argument which will be the current individual item in the array being validated:
$input = [
'channels' => [
[
'type' => 'email',
'address' => '[email protected]',
],
[
'type' => 'url',
'address' => 'https://example.com',
],
],
];
$validator->sometimes('channels.*.address', 'email', function ($input, $item) {
return $item->type === 'email';
});
$validator->sometimes('channels.*.address', 'url', function ($input, $item) {
return $item->type !== 'email';
});
Like the $input parameter passed to the closure, the $item parameter is an instance of IlluminateSupportFluent when the attribute data is an array; otherwise, it is a string.
Validating Arrays
As discussed in the array validation rule documentation, the array rule accepts a list of allowed array keys. If any additional keys are present within the array, validation will fail:
use IlluminateSupportFacadesValidator;
$input = [
'user' => [
'name' => 'Taylor Otwell',
'username' => 'taylorotwell',
'admin' => true,
],
];
Validator::make($input, [
'user' => 'array:username,locale',
]);
In general, you should always specify the array keys that are allowed to be present within your array. Otherwise, the validator’s validate and validated methods will return all of the validated data, including the array and all of its keys, even if those keys were not validated by other nested array validation rules.
Validating Nested Array Input
Validating nested array based form input fields doesn’t have to be a pain. You may use «dot notation» to validate attributes within an array. For example, if the incoming HTTP request contains a photos[profile] field, you may validate it like so:
use IlluminateSupportFacadesValidator;
$validator = Validator::make($request->all(), [
'photos.profile' => 'required|image',
]);
You may also validate each element of an array. For example, to validate that each email in a given array input field is unique, you may do the following:
$validator = Validator::make($request->all(), [
'person.*.email' => 'email|unique:users',
'person.*.first_name' => 'required_with:person.*.last_name',
]);
Likewise, you may use the * character when specifying custom validation messages in your language files, making it a breeze to use a single validation message for array based fields:
'custom' => [
'person.*.email' => [
'unique' => 'Each person must have a unique email address',
]
],
Accessing Nested Array Data
Sometimes you may need to access the value for a given nested array element when assigning validation rules to the attribute. You may accomplish this using the Rule::forEach method. The forEach method accepts a closure that will be invoked for each iteration of the array attribute under validation and will receive the attribute’s value and explicit, fully-expanded attribute name. The closure should return an array of rules to assign to the array element:
use AppRulesHasPermission;
use IlluminateSupportFacadesValidator;
use IlluminateValidationRule;
$validator = Validator::make($request->all(), [
'companies.*.id' => Rule::forEach(function ($value, $attribute) {
return [
Rule::exists(Company::class, 'id'),
new HasPermission('manage-company', $value),
];
}),
]);
Error Message Indexes & Positions
When validating arrays, you may want to reference the index or position of a particular item that failed validation within the error message displayed by your application. To accomplish this, you may include the :index (starts from 0) and :position (starts from 1) placeholders within your custom validation message:
use IlluminateSupportFacadesValidator;
$input = [
'photos' => [
[
'name' => 'BeachVacation.jpg',
'description' => 'A photo of my beach vacation!',
],
[
'name' => 'GrandCanyon.jpg',
'description' => '',
],
],
];
Validator::validate($input, [
'photos.*.description' => 'required',
], [
'photos.*.description.required' => 'Please describe photo #:position.',
]);
Given the example above, validation will fail and the user will be presented with the following error of «Please describe photo #2.»
Validating Files
Laravel provides a variety of validation rules that may be used to validate uploaded files, such as mimes, image, min, and max. While you are free to specify these rules individually when validating files, Laravel also offers a fluent file validation rule builder that you may find convenient:
use IlluminateSupportFacadesValidator;
use IlluminateValidationRulesFile;
Validator::validate($input, [
'attachment' => [
'required',
File::types(['mp3', 'wav'])
->min(1024)
->max(12 * 1024),
],
]);
If your application accepts images uploaded by your users, you may use the File rule’s image constructor method to indicate that the uploaded file should be an image. In addition, the dimensions rule may be used to limit the dimensions of the image:
use IlluminateSupportFacadesValidator;
use IlluminateValidationRulesFile;
Validator::validate($input, [
'photo' => [
'required',
File::image()
->min(1024)
->max(12 * 1024)
->dimensions(Rule::dimensions()->maxWidth(1000)->maxHeight(500)),
],
]);
Note
More information regarding validating image dimensions may be found in the dimension rule documentation.
File Types
Even though you only need to specify the extensions when invoking the types method, this method actually validates the MIME type of the file by reading the file’s contents and guessing its MIME type. A full listing of MIME types and their corresponding extensions may be found at the following location:
https://svn.apache.org/repos/asf/httpd/httpd/trunk/docs/conf/mime.types
Validating Passwords
To ensure that passwords have an adequate level of complexity, you may use Laravel’s Password rule object:
use IlluminateSupportFacadesValidator;
use IlluminateValidationRulesPassword;
$validator = Validator::make($request->all(), [
'password' => ['required', 'confirmed', Password::min(8)],
]);
The Password rule object allows you to easily customize the password complexity requirements for your application, such as specifying that passwords require at least one letter, number, symbol, or characters with mixed casing:
// Require at least 8 characters...
Password::min(8)
// Require at least one letter...
Password::min(8)->letters()
// Require at least one uppercase and one lowercase letter...
Password::min(8)->mixedCase()
// Require at least one number...
Password::min(8)->numbers()
// Require at least one symbol...
Password::min(8)->symbols()
In addition, you may ensure that a password has not been compromised in a public password data breach leak using the uncompromised method:
Password::min(8)->uncompromised()
Internally, the Password rule object uses the k-Anonymity model to determine if a password has been leaked via the haveibeenpwned.com service without sacrificing the user’s privacy or security.
By default, if a password appears at least once in a data leak, it will be considered compromised. You can customize this threshold using the first argument of the uncompromised method:
// Ensure the password appears less than 3 times in the same data leak...
Password::min(8)->uncompromised(3);
Of course, you may chain all the methods in the examples above:
Password::min(8)
->letters()
->mixedCase()
->numbers()
->symbols()
->uncompromised()
Defining Default Password Rules
You may find it convenient to specify the default validation rules for passwords in a single location of your application. You can easily accomplish this using the Password::defaults method, which accepts a closure. The closure given to the defaults method should return the default configuration of the Password rule. Typically, the defaults rule should be called within the boot method of one of your application’s service providers:
use IlluminateValidationRulesPassword;
/**
* Bootstrap any application services.
*
* @return void
*/
public function boot()
{
Password::defaults(function () {
$rule = Password::min(8);
return $this->app->isProduction()
? $rule->mixedCase()->uncompromised()
: $rule;
});
}
Then, when you would like to apply the default rules to a particular password undergoing validation, you may invoke the defaults method with no arguments:
'password' => ['required', Password::defaults()],
Occasionally, you may want to attach additional validation rules to your default password validation rules. You may use the rules method to accomplish this:
use AppRulesZxcvbnRule;
Password::defaults(function () {
$rule = Password::min(8)->rules([new ZxcvbnRule]);
// ...
});
Custom Validation Rules
Using Rule Objects
Laravel provides a variety of helpful validation rules; however, you may wish to specify some of your own. One method of registering custom validation rules is using rule objects. To generate a new rule object, you may use the make:rule Artisan command. Let’s use this command to generate a rule that verifies a string is uppercase. Laravel will place the new rule in the app/Rules directory. If this directory does not exist, Laravel will create it when you execute the Artisan command to create your rule:
php artisan make:rule Uppercase --invokable
Once the rule has been created, we are ready to define its behavior. A rule object contains a single method: __invoke. This method receives the attribute name, its value, and a callback that should be invoked on failure with the validation error message:
<?php
namespace AppRules;
use IlluminateContractsValidationInvokableRule;
class Uppercase implements InvokableRule
{
/**
* Run the validation rule.
*
* @param string $attribute
* @param mixed $value
* @param Closure $fail
* @return void
*/
public function __invoke($attribute, $value, $fail)
{
if (strtoupper($value) !== $value) {
$fail('The :attribute must be uppercase.');
}
}
}
Once the rule has been defined, you may attach it to a validator by passing an instance of the rule object with your other validation rules:
use AppRulesUppercase;
$request->validate([
'name' => ['required', 'string', new Uppercase],
]);
Translating Validation Messages
Instead of providing a literal error message to the $fail closure, you may also provide a translation string key and instruct Laravel to translate the error message:
if (strtoupper($value) !== $value) {
$fail('validation.uppercase')->translate();
}
If necessary, you may provide placeholder replacements and the preferred language as the first and second arguments to the translate method:
$fail('validation.location')->translate([
'value' => $this->value,
], 'fr')
Accessing Additional Data
If your custom validation rule class needs to access all of the other data undergoing validation, your rule class may implement the IlluminateContractsValidationDataAwareRule interface. This interface requires your class to define a setData method. This method will automatically be invoked by Laravel (before validation proceeds) with all of the data under validation:
<?php
namespace AppRules;
use IlluminateContractsValidationDataAwareRule;
use IlluminateContractsValidationInvokableRule;
class Uppercase implements DataAwareRule, InvokableRule
{
/**
* All of the data under validation.
*
* @var array
*/
protected $data = [];
// ...
/**
* Set the data under validation.
*
* @param array $data
* @return $this
*/
public function setData($data)
{
$this->data = $data;
return $this;
}
}
Or, if your validation rule requires access to the validator instance performing the validation, you may implement the ValidatorAwareRule interface:
<?php
namespace AppRules;
use IlluminateContractsValidationInvokableRule;
use IlluminateContractsValidationValidatorAwareRule;
class Uppercase implements InvokableRule, ValidatorAwareRule
{
/**
* The validator instance.
*
* @var IlluminateValidationValidator
*/
protected $validator;
// ...
/**
* Set the current validator.
*
* @param IlluminateValidationValidator $validator
* @return $this
*/
public function setValidator($validator)
{
$this->validator = $validator;
return $this;
}
}
Using Closures
If you only need the functionality of a custom rule once throughout your application, you may use a closure instead of a rule object. The closure receives the attribute’s name, the attribute’s value, and a $fail callback that should be called if validation fails:
use IlluminateSupportFacadesValidator;
$validator = Validator::make($request->all(), [
'title' => [
'required',
'max:255',
function ($attribute, $value, $fail) {
if ($value === 'foo') {
$fail('The '.$attribute.' is invalid.');
}
},
],
]);
Implicit Rules
By default, when an attribute being validated is not present or contains an empty string, normal validation rules, including custom rules, are not run. For example, the unique rule will not be run against an empty string:
use IlluminateSupportFacadesValidator;
$rules = ['name' => 'unique:users,name'];
$input = ['name' => ''];
Validator::make($input, $rules)->passes(); // true
For a custom rule to run even when an attribute is empty, the rule must imply that the attribute is required. To quickly generate a new implicit rule object, you may use the make:rule Artisan command with the --implicit option:
php artisan make:rule Uppercase --invokable --implicit
Warning
An «implicit» rule only implies that the attribute is required. Whether it actually invalidates a missing or empty attribute is up to you.
- Previous
- Overview: Forms
- Next
Before submitting data to the server, it is important to ensure all required form controls are filled out, in the correct format.
This is called client-side form validation, and helps ensure data submitted matches the requirements set forth in the various form controls.
This article leads you through basic concepts and examples of client-side form validation.
| Prerequisites: |
Computer literacy, a reasonable understanding of HTML, CSS, and JavaScript. |
|---|---|
| Objective: |
To understand what client-side form validation is, why it’s important, and how to apply various techniques to implement it. |
Client-side validation is an initial check and an important feature of good user experience; by catching invalid data on the client-side, the user can fix it straight away.
If it gets to the server and is then rejected, a noticeable delay is caused by a round trip to the server and then back to the client-side to tell the user to fix their data.
However, client-side validation should not be considered an exhaustive security measure! Your apps should always perform security checks on any form-submitted data on the server-side as well as the client-side, because client-side validation is too easy to bypass, so malicious users can still easily send bad data through to your server.
Read Website security for an idea of what could happen; implementing server-side validation is somewhat beyond the scope of this module, but you should bear it in mind.
What is form validation?
Go to any popular site with a registration form, and you will notice that they provide feedback when you don’t enter your data in the format they are expecting.
You’ll get messages such as:
- «This field is required» (You can’t leave this field blank).
- «Please enter your phone number in the format xxx-xxxx» (A specific data format is required for it to be considered valid).
- «Please enter a valid email address» (the data you entered is not in the right format).
- «Your password needs to be between 8 and 30 characters long and contain one uppercase letter, one symbol, and a number.» (A very specific data format is required for your data).
This is called form validation.
When you enter data, the browser and/or the web server will check to see that the data is in the correct format and within the constraints set by the application. Validation done in the browser is called client-side validation, while validation done on the server is called server-side validation.
In this chapter we are focusing on client-side validation.
If the information is correctly formatted, the application allows the data to be submitted to the server and (usually) saved in a database; if the information isn’t correctly formatted, it gives the user an error message explaining what needs to be corrected, and lets them try again.
We want to make filling out web forms as easy as possible. So why do we insist on validating our forms?
There are three main reasons:
- We want to get the right data, in the right format. Our applications won’t work properly if our users’ data is stored in the wrong format, is incorrect, or is omitted altogether.
- We want to protect our users’ data. Forcing our users to enter secure passwords makes it easier to protect their account information.
- We want to protect ourselves. There are many ways that malicious users can misuse unprotected forms to damage the application. See Website security.
Warning: Never trust data passed to your server from the client. Even if your form is validating correctly and preventing malformed input on the client-side, a malicious user can still alter the network request.
Different types of client-side validation
There are two different types of client-side validation that you’ll encounter on the web:
-
Built-in form validation uses HTML form validation features, which we’ve discussed in many places throughout this module.
This validation generally doesn’t require much JavaScript. Built-in form validation has better performance than JavaScript, but it is not as customizable as JavaScript validation. -
JavaScript validation is coded using JavaScript.
This validation is completely customizable, but you need to create it all (or use a library).
Using built-in form validation
One of the most significant features of modern form controls is the ability to validate most user data without relying on JavaScript.
This is done by using validation attributes on form elements.
We’ve seen many of these earlier in the course, but to recap:
required: Specifies whether a form field needs to be filled in before the form can be submitted.minlengthandmaxlength: Specifies the minimum and maximum length of textual data (strings).minandmax: Specifies the minimum and maximum values of numerical input types.type: Specifies whether the data needs to be a number, an email address, or some other specific preset type.pattern: Specifies a regular expression that defines a pattern the entered data needs to follow.
If the data entered in a form field follows all of the rules specified by the above attributes, it is considered valid.
If not, it is considered invalid.
When an element is valid, the following things are true:
- The element matches the
:validCSS pseudo-class, which lets you apply a specific style to valid elements. - If the user tries to send the data, the browser will submit the form, provided there is nothing else stopping it from doing so (e.g., JavaScript).
When an element is invalid, the following things are true:
- The element matches the
:invalidCSS pseudo-class, and sometimes other UI pseudo-classes (e.g.,:out-of-range) depending on the error, which lets you apply a specific style to invalid elements. - If the user tries to send the data, the browser will block the form and display an error message.
Built-in form validation examples
In this section, we’ll test out some of the attributes that we discussed above.
Simple start file
Let’s start with a simple example: an input that allows you to choose whether you prefer a banana or a cherry.
This example involves a simple text <input> with an associated <label> and a submit <button>.
Find the source code on GitHub at fruit-start.html and a live example below.
<form>
  <label for="choose">Would you prefer a banana or cherry?</label>
  <input id="choose" name="i-like" />
  <button>Submit</button>
</form>
input:invalid {
  border: 2px dashed red;
}

input:valid {
  border: 2px solid black;
}
To begin, make a copy of fruit-start.html in a new directory on your hard drive.
The required attribute
The simplest HTML validation feature is the required attribute.
To make an input mandatory, add this attribute to the element.
When this attribute is set, the element matches the :required UI pseudo-class and the form won’t submit, displaying an error message on submission when the input is empty.
While empty, the input will also be considered invalid, matching the :invalid UI pseudo-class.
Add a required attribute to your input, as shown below.
<form>
  <label for="choose">Would you prefer a banana or cherry? (required)</label>
  <input id="choose" name="i-like" required />
  <button>Submit</button>
</form>
Note the CSS that is included in the example file:
input:invalid {
  border: 2px dashed red;
}

input:invalid:required {
  background-image: linear-gradient(to right, pink, lightgreen);
}

input:valid {
  border: 2px solid black;
}
This CSS causes the input to have a red dashed border when it is invalid and a more subtle solid black border when valid.
We also added a background gradient when the input is required and invalid. Try out the new behavior in the example below:
Try submitting the form without a value.
Note how the invalid input gets focus, a default error message («Please fill out this field») appears, and the form is prevented from being sent.
The presence of the required attribute on any element that supports this attribute means the element matches the :required pseudo-class whether it has a value or not. If the <input> has no value, the input will match the :invalid pseudo-class.
Note: For good user experience, indicate to the user when form fields are required.
It isn’t only good user experience, it is required by WCAG accessibility guidelines.
Also, only require users to input data you actually need: For example, why do you really need to know someone’s gender or title?
Validating against a regular expression
Another useful validation feature is the pattern attribute, which expects a Regular Expression as its value.
A regular expression (regex) is a pattern that can be used to match character combinations in text strings, so regexps are ideal for form validation and serve a variety of other uses in JavaScript.
Regexps are quite complex, and we don’t intend to teach you them exhaustively in this article.
Below are some examples to give you a basic idea of how they work.
a— Matches one character that isa(notb, notaa, and so on).abc— Matchesa, followed byb, followed byc.ab?c— Matchesa, optionally followed by a singleb, followed byc. (acorabc)ab*c— Matchesa, optionally followed by any number ofbs, followed byc. (ac,abc,abbbbbc, and so on).a|b— Matches one character that isaorb.abc|xyz— Matches exactlyabcor exactlyxyz(but notabcxyzoraory, and so on).
There are many more possibilities that we don’t cover here.
For a complete list and many examples, consult our Regular expressions documentation.
Let’s implement an example.
Update your HTML to add a pattern attribute like this:
<form>
  <label for="choose">Would you prefer a banana or a cherry?</label>
  <input id="choose" name="i-like" required pattern="[Bb]anana|[Cc]herry" />
  <button>Submit</button>
</form>
input:invalid {
  border: 2px dashed red;
}

input:valid {
  border: 2px solid black;
}
This gives us the following update — try it out:
In this example, the <input> element accepts one of four possible values: the strings «banana», «Banana», «cherry», or «Cherry». Regular expressions are case-sensitive, but we’ve made it support capitalized as well as lower-case versions using an extra «Aa» pattern nested inside square brackets.
At this point, try changing the value inside the pattern attribute to equal some of the examples you saw earlier, and look at how that affects the values you can enter to make the input value valid.
Try writing some of your own, and see how it goes.
Make them fruit-related where possible so that your examples make sense!
If a non-empty value of the <input> doesn’t match the regular expression’s pattern, the input will match the :invalid pseudo-class.
Note: Some <input> element types don’t need a pattern attribute to be validated against a regular expression. Specifying the email type, for example, validates the inputs value against a well-formed email address pattern or a pattern matching a comma-separated list of email addresses if it has the multiple attribute.
Constraining the length of your entries
You can constrain the character length of all text fields created by <input> or <textarea> by using the minlength and maxlength attributes.
A field is invalid if it has a value and that value has fewer characters than the minlength value or more than the maxlength value.
Browsers often don’t let the user type a longer value than expected into text fields. A better user experience than just using maxlength is to also provide character count feedback in an accessible manner and let them edit their content down to size.
An example of this is the character limit seen on Twitter when Tweeting. JavaScript, including solutions using maxlength, can be used to provide this.
Constraining the values of your entries
For number fields (i.e. <input type="number">), the min and max attributes can be used to provide a range of valid values.
If the field contains a value outside this range, it will be invalid.
Let’s look at another example.
Create a new copy of the fruit-start.html file.
Now delete the contents of the <body> element, and replace it with the following:
<form>
  <div>
    <label for="choose">Would you prefer a banana or a cherry?</label>
    <input
      type="text"
      id="choose"
      name="i-like"
      required
      minlength="6"
      maxlength="6" />
  </div>
  <div>
    <label for="number">How many would you like?</label>
    <input type="number" id="number" name="amount" value="1" min="1" max="10" />
  </div>
  <div>
    <button>Submit</button>
  </div>
</form>
- Here you’ll see that we’ve given the
textfield aminlengthandmaxlengthof six, which is the same length as banana and cherry. -
We’ve also given the
numberfield aminof one and amaxof ten.
Entered numbers outside this range will show as invalid; users won’t be able to use the increment/decrement arrows to move the value outside of this range.
If the user manually enters a number outside of this range, the data is invalid.
The number is not required, so removing the value will still result in a valid value.
input:invalid {
  border: 2px dashed red;
}

input:valid {
  border: 2px solid black;
}

div {
  margin-bottom: 10px;
}
Here is the example running live:
Note: <input type="number"> (and other types, such as range and date) can also take a step attribute, which specifies what increment the value will go up or down by when the input controls are used (such as the up and down number buttons).
In the above example we’ve not included a step attribute, so the value defaults to 1. This means that floats, like 3.2, will also show as invalid.
Full example
Here is a full example to show usage of HTML’s built-in validation features.
First, some HTML:
<form>
  <p>
    <fieldset>
      <legend>Do you have a driver's license?<span aria-label="required">*</span></legend>
      <!-- While only one radio button in a same-named group can be selected at a time,
           and therefore only one radio button in a same-named group having the "required"
           attribute suffices in making a selection a requirement -->
      <input type="radio" required name="driver" id="r1" value="yes"><label for="r1">Yes</label>
      <input type="radio" required name="driver" id="r2" value="no"><label for="r2">No</label>
    </fieldset>
  </p>
  <p>
    <label for="n1">How old are you?</label>
    <!-- The pattern attribute can act as a fallback for browsers which
         don't implement the number input type but support the pattern attribute.
         Please note that browsers that support the pattern attribute will make it
         fail silently when used with a number field.
         Its usage here acts only as a fallback -->
    <input type="number" min="12" max="120" step="1" id="n1" name="age"
           pattern="d+">
  </p>
  <p>
    <label for="t1">What's your favorite fruit?<span aria-label="required">*</span></label>
    <input type="text" id="t1" name="fruit" list="l1" required
           pattern="[Bb]anana|[Cc]herry|[Aa]pple|[Ss]trawberry|[Ll]emon|[Oo]range">
    <datalist id="l1">
      <option>Banana</option>
      <option>Cherry</option>
      <option>Apple</option>
      <option>Strawberry</option>
      <option>Lemon</option>
      <option>Orange</option>
    </datalist>
  </p>
  <p>
    <label for="t2">What's your email address?</label>
    <input type="email" id="t2" name="email">
  </p>
  <p>
    <label for="t3">Leave a short message</label>
    <textarea id="t3" name="msg" maxlength="140" rows="5"></textarea>
  </p>
  <p>
    <button>Submit</button>
  </p>
</form>
And now some CSS to style the HTML:
form {
  font: 1em sans-serif;
  max-width: 320px;
}

p > label {
  display: block;
}

input[type="text"],
input[type="email"],
input[type="number"],
textarea,
fieldset {
  width: 100%;
  border: 1px solid #333;
  box-sizing: border-box;
}

input:invalid {
  box-shadow: 0 0 5px 1px red;
}

input:focus:invalid {
  box-shadow: none;
}
This renders as follows:
See Validation-related attributes for a complete list of attributes that can be used to constrain input values and the input types that support them.
Validating forms using JavaScript
You must use JavaScript if you want to take control over the look and feel of native error messages.
In this section we will look at the different ways to do this.
The Constraint Validation API
The Constraint Validation API consists of a set of methods and properties available on the following form element DOM interfaces:
HTMLButtonElement(represents a<button>element)HTMLFieldSetElement(represents a<fieldset>element)HTMLInputElement(represents an<input>element)HTMLOutputElement(represents an<output>element)HTMLSelectElement(represents a<select>element)HTMLTextAreaElement(represents a<textarea>element)
The Constraint Validation API makes the following properties available on the above elements.
validationMessage: Returns a localized message describing the validation constraints that the control doesn’t satisfy (if any). If the control is not a candidate for constraint validation (willValidateisfalse) or the element’s value satisfies its constraints (is valid), this will return an empty string.validity: Returns aValidityStateobject that contains several properties describing the validity state of the element. You can find full details of all the available properties in theValidityStatereference page; below is listed a few of the more common ones:patternMismatch: Returnstrueif the value does not match the specifiedpattern, andfalseif it does match. If true, the element matches the:invalidCSS pseudo-class.tooLong: Returnstrueif the value is longer than the maximum length specified by themaxlengthattribute, orfalseif it is shorter than or equal to the maximum. If true, the element matches the:invalidCSS pseudo-class.tooShort: Returnstrueif the value is shorter than the minimum length specified by theminlengthattribute, orfalseif it is greater than or equal to the minimum. If true, the element matches the:invalidCSS pseudo-class.rangeOverflow: Returnstrueif the value is greater than the maximum specified by themaxattribute, orfalseif it is less than or equal to the maximum. If true, the element matches the:invalidand:out-of-rangeCSS pseudo-classes.rangeUnderflow: Returnstrueif the value is less than the minimum specified by theminattribute, orfalseif it is greater than or equal to the minimum. If true, the element matches the:invalidand:out-of-rangeCSS pseudo-classes.typeMismatch: Returnstrueif the value is not in the required syntax (whentypeisemailorurl), orfalseif the syntax is correct. Iftrue, the element matches the:invalidCSS pseudo-class.valid: Returnstrueif the element meets all its validation constraints, and is therefore considered to be valid, orfalseif it fails any constraint. If true, the element matches the:validCSS pseudo-class; the:invalidCSS pseudo-class otherwise.valueMissing: Returnstrueif the element has arequiredattribute, but no value, orfalseotherwise. If true, the element matches the:invalidCSS pseudo-class.
willValidate: Returnstrueif the element will be validated when the form is submitted;falseotherwise.
The Constraint Validation API also makes the following methods available on the above elements and the form element.
checkValidity(): Returnstrueif the element’s value has no validity problems;falseotherwise. If the element is invalid, this method also fires aninvalidevent on the element.reportValidity(): Reports invalid field(s) using events. This method is useful in combination withpreventDefault()in anonSubmitevent handler.setCustomValidity(message): Adds a custom error message to the element; if you set a custom error message, the element is considered to be invalid, and the specified error is displayed. This lets you use JavaScript code to establish a validation failure other than those offered by the standard HTML validation constraints. The message is shown to the user when reporting the problem.
Implementing a customized error message
As you saw in the HTML validation constraint examples earlier, each time a user tries to submit an invalid form, the browser displays an error message. The way this message is displayed depends on the browser.
These automated messages have two drawbacks:
- There is no standard way to change their look and feel with CSS.
- They depend on the browser locale, which means that you can have a page in one language but an error message displayed in another language, as seen in the following Firefox screenshot.
Customizing these error messages is one of the most common use cases of the Constraint Validation API.
Let’s work through a simple example of how to do this.
We’ll start with some simple HTML (feel free to put this in a blank HTML file; use a fresh copy of fruit-start.html as a basis, if you like):
<form>
  <label for="mail">
    I would like you to provide me with an email address:
  </label>
  <input type="email" id="mail" name="mail" />
  <button>Submit</button>
</form>
And add the following JavaScript to the page:
const email = document.getElementById("mail");

email.addEventListener("input", (event) => {
  if (email.validity.typeMismatch) {
    email.setCustomValidity("I am expecting an email address!");
  } else {
    email.setCustomValidity("");
  }
});
Here we store a reference to the email input, then add an event listener to it that runs the contained code each time the value inside the input is changed.
Inside the contained code, we check whether the email input’s validity.typeMismatch property returns true, meaning that the contained value doesn’t match the pattern for a well-formed email address. If so, we call the setCustomValidity() method with a custom message. This renders the input invalid, so that when you try to submit the form, submission fails and the custom error message is displayed.
If the validity.typeMismatch property returns false, we call the setCustomValidity() method with an empty string. This renders the input valid, so the form will submit.
You can try it out below:
A more detailed example
Now that we’ve seen a really simple example, let’s see how we can use this API to build some slightly more complex custom validation.
First, the HTML. Again, feel free to build this along with us:
<form novalidate>
  <p>
    <label for="mail">
      <span>Please enter an email address:</span>
      <input type="email" id="mail" name="mail" required minlength="8" />
      <span class="error" aria-live="polite"></span>
    </label>
  </p>
  <button>Submit</button>
</form>
This simple form uses the novalidate attribute to turn off the browser’s automatic validation; this lets our script take control over validation.
However, this doesn’t disable support for the constraint validation API nor the application of CSS pseudo-classes like :valid, etc.
That means that even though the browser doesn’t automatically check the validity of the form before sending its data, you can still do it yourself and style the form accordingly.
Our input to validate is an <input type="email">, which is required, and has a minlength of 8 characters. Let’s check these using our own code, and show a custom error message for each one.
We are aiming to show the error messages inside a <span> element.
The aria-live attribute is set on that <span> to make sure that our custom error message will be presented to everyone, including it being read out to screen reader users.
Note: A key point here is that setting the novalidate attribute on the form is what stops the form from showing its own error message bubbles, and allows us to instead display the custom error messages in the DOM in some manner of our own choosing.
Now onto some basic CSS to improve the look of the form slightly, and provide some visual feedback when the input data is invalid:
body {
  font: 1em sans-serif;
  width: 200px;
  padding: 0;
  margin: 0 auto;
}

p * {
  display: block;
}

input[type="email"] {
  appearance: none;

  width: 100%;
  border: 1px solid #333;
  margin: 0;

  font-family: inherit;
  font-size: 90%;

  box-sizing: border-box;
}

/* This is our style for the invalid fields */
input:invalid {
  border-color: #900;
  background-color: #fdd;
}

input:focus:invalid {
  outline: none;
}

/* This is the style of our error messages */
.error {
  width: 100%;
  padding: 0;

  font-size: 80%;
  color: white;
  background-color: #900;
  border-radius: 0 0 5px 5px;

  box-sizing: border-box;
}

.error.active {
  padding: 0.3em;
}
Now let’s look at the JavaScript that implements the custom error validation.
// There are many ways to pick a DOM node; here we get the form itself and the email
// input box, as well as the span element into which we will place the error message.
const form = document.querySelector("form");
const email = document.getElementById("mail");
const emailError = document.querySelector("#mail + span.error");

email.addEventListener("input", (event) => {
  // Each time the user types something, we check if the
  // form fields are valid.

  if (email.validity.valid) {
    // In case there is an error message visible, if the field
    // is valid, we remove the error message.
    emailError.textContent = ""; // Reset the content of the message
    emailError.className = "error"; // Reset the visual state of the message
  } else {
    // If there is still an error, show the correct error
    showError();
  }
});

form.addEventListener("submit", (event) => {
  // if the email field is valid, we let the form submit
  if (!email.validity.valid) {
    // If it isn't, we display an appropriate error message
    showError();
    // Then we prevent the form from being sent by canceling the event
    event.preventDefault();
  }
});

function showError() {
  if (email.validity.valueMissing) {
    // If the field is empty,
    // display the following error message.
    emailError.textContent = "You need to enter an email address.";
  } else if (email.validity.typeMismatch) {
    // If the field doesn't contain an email address,
    // display the following error message.
    emailError.textContent = "Entered value needs to be an email address.";
  } else if (email.validity.tooShort) {
    // If the data is too short,
    // display the following error message.
    emailError.textContent = `Email should be at least ${email.minLength} characters; you entered ${email.value.length}.`;
  }

  // Set the styling appropriately
  emailError.className = "error active";
}
The comments explain things pretty well, but briefly:
-
Every time we change the value of the input, we check to see if it contains valid data.
If it has then we remove any error message being shown.
If the data is not valid, we runshowError()to show the appropriate error. -
Every time we try to submit the form, we again check to see if the data is valid. If so, we let the form submit.
If not, we runshowError()to show the appropriate error, and stop the form submitting withpreventDefault(). - The
showError()function uses various properties of the input’svalidityobject to determine what the error is, and then displays an error message as appropriate.
Here is the live result:
The constraint validation API gives you a powerful tool to handle form validation, letting you have enormous control over the user interface above and beyond what you can do with HTML and CSS alone.
Validating forms without a built-in API
In some cases, such as custom controls, you won’t be able to or won’t want to use the Constraint Validation API. You’re still able to use JavaScript to validate your form, but you’ll just have to write your own.
To validate a form, ask yourself a few questions:
- What kind of validation should I perform?
-
You need to determine how to validate your data: string operations, type conversion, regular expressions, and so on. It’s up to you.
- What should I do if the form doesn’t validate?
-
This is clearly a UI matter. You have to decide how the form will behave. Does the form send the data anyway?
Should you highlight the fields that are in error?
Should you display error messages? - How can I help the user to correct invalid data?
-
In order to reduce the user’s frustration, it’s very important to provide as much helpful information as possible in order to guide them in correcting their inputs.
You should offer up-front suggestions so they know what’s expected, as well as clear error messages.
If you want to dig into form validation UI requirements, here are some useful articles you should read:- Help users enter the right data in forms
- Validating input
- How to Report Errors in Forms: 10 Design Guidelines
An example that doesn’t use the constraint validation API
In order to illustrate this, the following is a simplified version of the previous example without the Constraint Validation API.
The HTML is almost the same; we just removed the HTML validation features.
<form>
  <p>
    <label for="mail">
      <span>Please enter an email address:</span>
      <input type="text" id="mail" name="mail" />
      <span class="error" aria-live="polite"></span>
    </label>
  </p>
  <button>Submit</button>
</form>
Similarly, the CSS doesn’t need to change very much; we’ve just turned the :invalid CSS pseudo-class into a real class and avoided using the attribute selector that doesn’t work on Internet Explorer 6.
body {
  font: 1em sans-serif;
  width: 200px;
  padding: 0;
  margin: 0 auto;
}

form {
  max-width: 200px;
}

p * {
  display: block;
}

input.mail {
  appearance: none;
  width: 100%;
  border: 1px solid #333;
  margin: 0;

  font-family: inherit;
  font-size: 90%;

  box-sizing: border-box;
}

/* This is our style for the invalid fields */
input.invalid {
  border-color: #900;
  background-color: #fdd;
}

input:focus.invalid {
  outline: none;
}

/* This is the style of our error messages */
.error {
  width: 100%;
  padding: 0;

  font-size: 80%;
  color: white;
  background-color: #900;
  border-radius: 0 0 5px 5px;
  box-sizing: border-box;
}

.error.active {
  padding: 0.3em;
}
The big changes are in the JavaScript code, which needs to do much more heavy lifting.
const form = document.querySelector("form");
const email = document.getElementById("mail");
const error = email.nextElementSibling;

// As per the HTML Specification
const emailRegExp =
  /^[a-zA-Z0-9.!#$%&'*+/=?^_`{|}~-]+@[a-zA-Z0-9-]+(?:.[a-zA-Z0-9-]+)*$/;

// Now we can rebuild our validation constraint
// Because we do not rely on CSS pseudo-class, we have to
// explicitly set the valid/invalid class on our email field
window.addEventListener("load", () => {
  // Here, we test if the field is empty (remember, the field is not required)
  // If it is not, we check if its content is a well-formed email address.
  const isValid = email.value.length === 0 || emailRegExp.test(email.value);
  email.className = isValid ? "valid" : "invalid";
});

// This defines what happens when the user types in the field
email.addEventListener("input", () => {
  const isValid = email.value.length === 0 || emailRegExp.test(email.value);
  if (isValid) {
    email.className = "valid";
    error.textContent = "";
    error.className = "error";
  } else {
    email.className = "invalid";
  }
});

// This defines what happens when the user tries to submit the data
form.addEventListener("submit", (event) => {
  event.preventDefault();

  const isValid = email.value.length === 0 || emailRegExp.test(email.value);
  if (!isValid) {
    email.className = "invalid";
    error.textContent = "I expect an email, darling!";
    error.className = "error active";
  } else {
    email.className = "valid";
    error.textContent = "";
    error.className = "error";
  }
});
The result looks like this:
As you can see, it’s not that hard to build a validation system on your own. The difficult part is to make it generic enough to use both cross-platform and on any form you might create. There are many libraries available to perform form validation, such as Validate.js.
Test your skills!
You’ve reached the end of this article, but can you remember the most important information? You can find some further tests to verify that you’ve retained this information before you move on — see Test your skills: Form validation.
Summary
Client-side form validation sometimes requires JavaScript if you want to customize styling and error messages, but it always requires you to think carefully about the user.
Always remember to help your users correct the data they provide. To that end, be sure to:
- Display explicit error messages.
- Be permissive about the input format.
- Point out exactly where the error occurs, especially on large forms.
Once you have checked that the form is filled out correctly, the form can be submitted.
We’ll cover sending form data next.
- Previous
- Overview: Forms
- Next
In this module
Advanced Topics
Версия
![]()
![]()
Validation
- Introduction
-
Validation Quickstart
- Defining The Routes
- Creating The Controller
- Writing The Validation Logic
- Displaying The Validation Errors
- Repopulating Forms
- A Note On Optional Fields
-
Form Request Validation
- Creating Form Requests
- Authorizing Form Requests
- Customizing The Error Messages
- Preparing Input For Validation
-
Manually Creating Validators
- Automatic Redirection
- Named Error Bags
- Customizing The Error Messages
- After Validation Hook
- Working With Validated Input
-
Working With Error Messages
- Specifying Custom Messages In Language Files
- Specifying Attributes In Language Files
- Specifying Values In Language Files
- Available Validation Rules
- Conditionally Adding Rules
-
Validating Arrays
- Validating Nested Array Input
- Validating Passwords
-
Custom Validation Rules
- Using Rule Objects
- Using Closures
- Implicit Rules
Introduction
Laravel provides several different approaches to validate your application’s incoming data. It is most common to use the validate method available on all incoming HTTP requests. However, we will discuss other approaches to validation as well.
Laravel includes a wide variety of convenient validation rules that you may apply to data, even providing the ability to validate if values are unique in a given database table. We’ll cover each of these validation rules in detail so that you are familiar with all of Laravel’s validation features.
Validation Quickstart
To learn about Laravel’s powerful validation features, let’s look at a complete example of validating a form and displaying the error messages back to the user. By reading this high-level overview, you’ll be able to gain a good general understanding of how to validate incoming request data using Laravel:
Defining The Routes
First, let’s assume we have the following routes defined in our routes/web.php file:
use AppHttpControllersPostController;

Route::get('/post/create', [PostController::class, 'create']);
Route::post('/post', [PostController::class, 'store']);
The GET route will display a form for the user to create a new blog post, while the POST route will store the new blog post in the database.
Creating The Controller
Next, let’s take a look at a simple controller that handles incoming requests to these routes. We’ll leave the store method empty for now:
<?php

namespace AppHttpControllers;

use AppHttpControllersController;
use IlluminateHttpRequest;

class PostController extends Controller
{
    /**
     * Show the form to create a new blog post.
     *
     * @return IlluminateViewView
     */
    public function create()
    {
        return view('post.create');
    }

    /**
     * Store a new blog post.
     *
     * @param  IlluminateHttpRequest  $request
     * @return IlluminateHttpResponse
     */
    public function store(Request $request)
    {
        // Validate and store the blog post...
    }
}
Writing The Validation Logic
Now we are ready to fill in our store method with the logic to validate the new blog post. To do this, we will use the validate method provided by the IlluminateHttpRequest object. If the validation rules pass, your code will keep executing normally; however, if validation fails, an IlluminateValidationValidationException exception will be thrown and the proper error response will automatically be sent back to the user.
If validation fails during a traditional HTTP request, a redirect response to the previous URL will be generated. If the incoming request is an XHR request, a JSON response containing the validation error messages will be returned.
To get a better understanding of the validate method, let’s jump back into the store method:
/**
 * Store a new blog post.
 *
 * @param  IlluminateHttpRequest  $request
 * @return IlluminateHttpResponse
 */
public function store(Request $request)
{
    $validated = $request->validate([
        'title' => 'required|unique:posts|max:255',
        'body' => 'required',
    ]);

    // The blog post is valid...
}
As you can see, the validation rules are passed into the validate method. Don’t worry — all available validation rules are documented. Again, if the validation fails, the proper response will automatically be generated. If the validation passes, our controller will continue executing normally.
Alternatively, validation rules may be specified as arrays of rules instead of a single | delimited string:
$validatedData = $request->validate([
    'title' => ['required', 'unique:posts', 'max:255'],
    'body' => ['required'],
]);
In addition, you may use the validateWithBag method to validate a request and store any error messages within a named error bag:
$validatedData = $request->validateWithBag('post', [
    'title' => ['required', 'unique:posts', 'max:255'],
    'body' => ['required'],
]);
Stopping On First Validation Failure
Sometimes you may wish to stop running validation rules on an attribute after the first validation failure. To do so, assign the bail rule to the attribute:
$request->validate([
    'title' => 'bail|required|unique:posts|max:255',
    'body' => 'required',
]);
In this example, if the unique rule on the title attribute fails, the max rule will not be checked. Rules will be validated in the order they are assigned.
A Note On Nested Attributes
If the incoming HTTP request contains «nested» field data, you may specify these fields in your validation rules using «dot» syntax:
$request->validate([
    'title' => 'required|unique:posts|max:255',
    'author.name' => 'required',
    'author.description' => 'required',
]);
On the other hand, if your field name contains a literal period, you can explicitly prevent this from being interpreted as «dot» syntax by escaping the period with a backslash:
$request->validate([
    'title' => 'required|unique:posts|max:255',
    'v1.0' => 'required',
]);
Displaying The Validation Errors
So, what if the incoming request fields do not pass the given validation rules? As mentioned previously, Laravel will automatically redirect the user back to their previous location. In addition, all of the validation errors and request input will automatically be flashed to the session.
An $errors variable is shared with all of your application’s views by the IlluminateViewMiddlewareShareErrorsFromSession middleware, which is provided by the web middleware group. When this middleware is applied an $errors variable will always be available in your views, allowing you to conveniently assume the $errors variable is always defined and can be safely used. The $errors variable will be an instance of IlluminateSupportMessageBag. For more information on working with this object, check out its documentation.
So, in our example, the user will be redirected to our controller’s create method when validation fails, allowing us to display the error messages in the view:
<!-- /resources/views/post/create.blade.php -->

<h1>Create Post</h1>

@if ($errors->any())
    <div class="alert alert-danger">
        <ul>
            @foreach ($errors->all() as $error)
                <li>{{ $error }}</li>
            @endforeach
        </ul>
    </div>
@endif

<!-- Create Post Form -->
Customizing The Error Messages
Laravel’s built-in validation rules each has an error message that is located in your application’s lang/en/validation.php file. Within this file, you will find a translation entry for each validation rule. You are free to change or modify these messages based on the needs of your application.
In addition, you may copy this file to another translation language directory to translate the messages for your application’s language. To learn more about Laravel localization, check out the complete localization documentation.
XHR Requests & Validation
In this example, we used a traditional form to send data to the application. However, many applications receive XHR requests from a JavaScript powered frontend. When using the validate method during an XHR request, Laravel will not generate a redirect response. Instead, Laravel generates a JSON response containing all of the validation errors. This JSON response will be sent with a 422 HTTP status code.
The @error Directive
You may use the @error Blade directive to quickly determine if validation error messages exist for a given attribute. Within an @error directive, you may echo the $message variable to display the error message:
<!-- /resources/views/post/create.blade.php -->

<label for="title">Post Title</label>

<input id="title"
    type="text"
    name="title"
    class="@error('title') is-invalid @enderror">

@error('title')
    <div class="alert alert-danger">{{ $message }}</div>
@enderror
If you are using named error bags, you may pass the name of the error bag as the second argument to the @error directive:
<input ... class="@error('title', 'post') is-invalid @enderror">
Repopulating Forms
When Laravel generates a redirect response due to a validation error, the framework will automatically flash all of the request’s input to the session. This is done so that you may conveniently access the input during the next request and repopulate the form that the user attempted to submit.
To retrieve flashed input from the previous request, invoke the old method on an instance of IlluminateHttpRequest. The old method will pull the previously flashed input data from the session:
$title = $request->old('title');
Laravel also provides a global old helper. If you are displaying old input within a Blade template, it is more convenient to use the old helper to repopulate the form. If no old input exists for the given field, null will be returned:
<input type="text" name="title" value="{{ old('title') }}">
A Note On Optional Fields
By default, Laravel includes the TrimStrings and ConvertEmptyStringsToNull middleware in your application’s global middleware stack. These middleware are listed in the stack by the AppHttpKernel class. Because of this, you will often need to mark your «optional» request fields as nullable if you do not want the validator to consider null values as invalid. For example:
$request->validate([
    'title' => 'required|unique:posts|max:255',
    'body' => 'required',
    'publish_at' => 'nullable|date',
]);
In this example, we are specifying that the publish_at field may be either null or a valid date representation. If the nullable modifier is not added to the rule definition, the validator would consider null an invalid date.
Form Request Validation
Creating Form Requests
For more complex validation scenarios, you may wish to create a «form request». Form requests are custom request classes that encapsulate their own validation and authorization logic. To create a form request class, you may use the make:request Artisan CLI command:
php artisan make:request StorePostRequest
The generated form request class will be placed in the app/Http/Requests directory. If this directory does not exist, it will be created when you run the make:request command. Each form request generated by Laravel has two methods: authorize and rules.
As you might have guessed, the authorize method is responsible for determining if the currently authenticated user can perform the action represented by the request, while the rules method returns the validation rules that should apply to the request’s data:
/**
* Get the validation rules that apply to the request.
*
* @return array
*/
public function rules()
{
return [
'title' => 'required|unique:posts|max:255',
'body' => 'required',
];
}
{tip} You may type-hint any dependencies you require within the
rulesmethod’s signature. They will automatically be resolved via the Laravel service container.
So, how are the validation rules evaluated? All you need to do is type-hint the request on your controller method. The incoming form request is validated before the controller method is called, meaning you do not need to clutter your controller with any validation logic:
/**
* Store a new blog post.
*
* @param AppHttpRequestsStorePostRequest $request
* @return IlluminateHttpResponse
*/
public function store(StorePostRequest $request)
{
// The incoming request is valid...
// Retrieve the validated input data...
$validated = $request->validated();
// Retrieve a portion of the validated input data...
$validated = $request->safe()->only(['name', 'email']);
$validated = $request->safe()->except(['name', 'email']);
}
If validation fails, a redirect response will be generated to send the user back to their previous location. The errors will also be flashed to the session so they are available for display. If the request was an XHR request, an HTTP response with a 422 status code will be returned to the user including a JSON representation of the validation errors.
Adding After Hooks To Form Requests
If you would like to add an «after» validation hook to a form request, you may use the withValidator method. This method receives the fully constructed validator, allowing you to call any of its methods before the validation rules are actually evaluated:
/**
* Configure the validator instance.
*
* @param IlluminateValidationValidator $validator
* @return void
*/
public function withValidator($validator)
{
$validator->after(function ($validator) {
if ($this->somethingElseIsInvalid()) {
$validator->errors()->add('field', 'Something is wrong with this field!');
}
});
}
Stopping On First Validation Failure Attribute
By adding a stopOnFirstFailure property to your request class, you may inform the validator that it should stop validating all attributes once a single validation failure has occurred:
/**
* Indicates if the validator should stop on the first rule failure.
*
* @var bool
*/
protected $stopOnFirstFailure = true;
Customizing The Redirect Location
As previously discussed, a redirect response will be generated to send the user back to their previous location when form request validation fails. However, you are free to customize this behavior. To do so, define a $redirect property on your form request:
/**
* The URI that users should be redirected to if validation fails.
*
* @var string
*/
protected $redirect = '/dashboard';
Or, if you would like to redirect users to a named route, you may define a $redirectRoute property instead:
/**
* The route that users should be redirected to if validation fails.
*
* @var string
*/
protected $redirectRoute = 'dashboard';
Authorizing Form Requests
The form request class also contains an authorize method. Within this method, you may determine if the authenticated user actually has the authority to update a given resource. For example, you may determine if a user actually owns a blog comment they are attempting to update. Most likely, you will interact with your authorization gates and policies within this method:
use AppModelsComment;
/**
* Determine if the user is authorized to make this request.
*
* @return bool
*/
public function authorize()
{
$comment = Comment::find($this->route('comment'));
return $comment && $this->user()->can('update', $comment);
}
Since all form requests extend the base Laravel request class, we may use the user method to access the currently authenticated user. Also, note the call to the route method in the example above. This method grants you access to the URI parameters defined on the route being called, such as the {comment} parameter in the example below:
Route::post('/comment/{comment}');
Therefore, if your application is taking advantage of route model binding, your code may be made even more succinct by accessing the resolved model as a property of the request:
return $this->user()->can('update', $this->comment);
If the authorize method returns false, an HTTP response with a 403 status code will automatically be returned and your controller method will not execute.
If you plan to handle authorization logic for the request in another part of your application, you may simply return true from the authorize method:
/**
* Determine if the user is authorized to make this request.
*
* @return bool
*/
public function authorize()
{
return true;
}
{tip} You may type-hint any dependencies you need within the
authorizemethod’s signature. They will automatically be resolved via the Laravel service container.
Customizing The Error Messages
You may customize the error messages used by the form request by overriding the messages method. This method should return an array of attribute / rule pairs and their corresponding error messages:
/**
* Get the error messages for the defined validation rules.
*
* @return array
*/
public function messages()
{
return [
'title.required' => 'A title is required',
'body.required' => 'A message is required',
];
}
Customizing The Validation Attributes
Many of Laravel’s built-in validation rule error messages contain an :attribute placeholder. If you would like the :attribute placeholder of your validation message to be replaced with a custom attribute name, you may specify the custom names by overriding the attributes method. This method should return an array of attribute / name pairs:
/**
* Get custom attributes for validator errors.
*
* @return array
*/
public function attributes()
{
return [
'email' => 'email address',
];
}
Preparing Input For Validation
If you need to prepare or sanitize any data from the request before you apply your validation rules, you may use the prepareForValidation method:
use IlluminateSupportStr;
/**
* Prepare the data for validation.
*
* @return void
*/
protected function prepareForValidation()
{
$this->merge([
'slug' => Str::slug($this->slug),
]);
}
Manually Creating Validators
If you do not want to use the validate method on the request, you may create a validator instance manually using the Validator facade. The make method on the facade generates a new validator instance:
<?php
namespace AppHttpControllers;
use AppHttpControllersController;
use IlluminateHttpRequest;
use IlluminateSupportFacadesValidator;
class PostController extends Controller
{
/**
* Store a new blog post.
*
* @param Request $request
* @return Response
*/
public function store(Request $request)
{
$validator = Validator::make($request->all(), [
'title' => 'required|unique:posts|max:255',
'body' => 'required',
]);
if ($validator->fails()) {
return redirect('post/create')
->withErrors($validator)
->withInput();
}
// Retrieve the validated input...
$validated = $validator->validated();
// Retrieve a portion of the validated input...
$validated = $validator->safe()->only(['name', 'email']);
$validated = $validator->safe()->except(['name', 'email']);
// Store the blog post...
}
}
The first argument passed to the make method is the data under validation. The second argument is an array of the validation rules that should be applied to the data.
After determining whether the request validation failed, you may use the withErrors method to flash the error messages to the session. When using this method, the $errors variable will automatically be shared with your views after redirection, allowing you to easily display them back to the user. The withErrors method accepts a validator, a MessageBag, or a PHP array.
Stopping On First Validation Failure
The stopOnFirstFailure method will inform the validator that it should stop validating all attributes once a single validation failure has occurred:
if ($validator->stopOnFirstFailure()->fails()) {
// ...
}
Automatic Redirection
If you would like to create a validator instance manually but still take advantage of the automatic redirection offered by the HTTP request’s validate method, you may call the validate method on an existing validator instance. If validation fails, the user will automatically be redirected or, in the case of an XHR request, a JSON response will be returned:
Validator::make($request->all(), [
'title' => 'required|unique:posts|max:255',
'body' => 'required',
])->validate();
You may use the validateWithBag method to store the error messages in a named error bag if validation fails:
Validator::make($request->all(), [
'title' => 'required|unique:posts|max:255',
'body' => 'required',
])->validateWithBag('post');
Named Error Bags
If you have multiple forms on a single page, you may wish to name the MessageBag containing the validation errors, allowing you to retrieve the error messages for a specific form. To achieve this, pass a name as the second argument to withErrors:
return redirect('register')->withErrors($validator, 'login');
You may then access the named MessageBag instance from the $errors variable:
{{ $errors->login->first('email') }}
Customizing The Error Messages
If needed, you may provide custom error messages that a validator instance should use instead of the default error messages provided by Laravel. There are several ways to specify custom messages. First, you may pass the custom messages as the third argument to the Validator::make method:
$validator = Validator::make($input, $rules, $messages = [
'required' => 'The :attribute field is required.',
]);
In this example, the :attribute placeholder will be replaced by the actual name of the field under validation. You may also utilize other placeholders in validation messages. For example:
$messages = [
'same' => 'The :attribute and :other must match.',
'size' => 'The :attribute must be exactly :size.',
'between' => 'The :attribute value :input is not between :min - :max.',
'in' => 'The :attribute must be one of the following types: :values',
];
Specifying A Custom Message For A Given Attribute
Sometimes you may wish to specify a custom error message only for a specific attribute. You may do so using «dot» notation. Specify the attribute’s name first, followed by the rule:
$messages = [
'email.required' => 'We need to know your email address!',
];
Specifying Custom Attribute Values
Many of Laravel’s built-in error messages include an :attribute placeholder that is replaced with the name of the field or attribute under validation. To customize the values used to replace these placeholders for specific fields, you may pass an array of custom attributes as the fourth argument to the Validator::make method:
$validator = Validator::make($input, $rules, $messages, [
'email' => 'email address',
]);
After Validation Hook
You may also attach callbacks to be run after validation is completed. This allows you to easily perform further validation and even add more error messages to the message collection. To get started, call the after method on a validator instance:
$validator = Validator::make(...);
$validator->after(function ($validator) {
if ($this->somethingElseIsInvalid()) {
$validator->errors()->add(
'field', 'Something is wrong with this field!'
);
}
});
if ($validator->fails()) {
//
}
Working With Validated Input
After validating incoming request data using a form request or a manually created validator instance, you may wish to retrieve the incoming request data that actually underwent validation. This can be accomplished in several ways. First, you may call the validated method on a form request or validator instance. This method returns an array of the data that was validated:
$validated = $request->validated();
$validated = $validator->validated();
Alternatively, you may call the safe method on a form request or validator instance. This method returns an instance of IlluminateSupportValidatedInput. This object exposes only, except, and all methods to retrieve a subset of the validated data or the entire array of validated data:
$validated = $request->safe()->only(['name', 'email']);
$validated = $request->safe()->except(['name', 'email']);
$validated = $request->safe()->all();
In addition, the IlluminateSupportValidatedInput instance may be iterated over and accessed like an array:
// Validated data may be iterated...
foreach ($request->safe() as $key => $value) {
//
}
// Validated data may be accessed as an array...
$validated = $request->safe();
$email = $validated['email'];
If you would like to add additional fields to the validated data, you may call the merge method:
$validated = $request->safe()->merge(['name' => 'Taylor Otwell']);
If you would like to retrieve the validated data as a collection instance, you may call the collect method:
$collection = $request->safe()->collect();
Working With Error Messages
After calling the errors method on a Validator instance, you will receive an IlluminateSupportMessageBag instance, which has a variety of convenient methods for working with error messages. The $errors variable that is automatically made available to all views is also an instance of the MessageBag class.
Retrieving The First Error Message For A Field
To retrieve the first error message for a given field, use the first method:
$errors = $validator->errors();
echo $errors->first('email');
Retrieving All Error Messages For A Field
If you need to retrieve an array of all the messages for a given field, use the get method:
foreach ($errors->get('email') as $message) {
//
}
If you are validating an array form field, you may retrieve all of the messages for each of the array elements using the * character:
foreach ($errors->get('attachments.*') as $message) {
//
}
Retrieving All Error Messages For All Fields
To retrieve an array of all messages for all fields, use the all method:
foreach ($errors->all() as $message) {
//
}
Determining If Messages Exist For A Field
The has method may be used to determine if any error messages exist for a given field:
if ($errors->has('email')) {
//
}
Specifying Custom Messages In Language Files
Laravel’s built-in validation rules each has an error message that is located in your application’s lang/en/validation.php file. Within this file, you will find a translation entry for each validation rule. You are free to change or modify these messages based on the needs of your application.
In addition, you may copy this file to another translation language directory to translate the messages for your application’s language. To learn more about Laravel localization, check out the complete localization documentation.
Custom Messages For Specific Attributes
You may customize the error messages used for specified attribute and rule combinations within your application’s validation language files. To do so, add your message customizations to the custom array of your application’s lang/xx/validation.php language file:
'custom' => [
'email' => [
'required' => 'We need to know your email address!',
'max' => 'Your email address is too long!'
],
],
Specifying Attributes In Language Files
Many of Laravel’s built-in error messages include an :attribute placeholder that is replaced with the name of the field or attribute under validation. If you would like the :attribute portion of your validation message to be replaced with a custom value, you may specify the custom attribute name in the attributes array of your lang/xx/validation.php language file:
'attributes' => [
'email' => 'email address',
],
Specifying Values In Language Files
Some of Laravel’s built-in validation rule error messages contain a :value placeholder that is replaced with the current value of the request attribute. However, you may occasionally need the :value portion of your validation message to be replaced with a custom representation of the value. For example, consider the following rule that specifies that a credit card number is required if the payment_type has a value of cc:
Validator::make($request->all(), [
'credit_card_number' => 'required_if:payment_type,cc'
]);
If this validation rule fails, it will produce the following error message:
The credit card number field is required when payment type is cc.
Instead of displaying cc as the payment type value, you may specify a more user-friendly value representation in your lang/xx/validation.php language file by defining a values array:
'values' => [
'payment_type' => [
'cc' => 'credit card'
],
],
After defining this value, the validation rule will produce the following error message:
The credit card number field is required when payment type is credit card.
Available Validation Rules
Below is a list of all available validation rules and their function:
accepted
The field under validation must be "yes", "on", 1, or true. This is useful for validating «Terms of Service» acceptance or similar fields.
accepted_if:anotherfield,value,…
The field under validation must be "yes", "on", 1, or true if another field under validation is equal to a specified value. This is useful for validating «Terms of Service» acceptance or similar fields.
active_url
The field under validation must have a valid A or AAAA record according to the dns_get_record PHP function. The hostname of the provided URL is extracted using the parse_url PHP function before being passed to dns_get_record.
after:date
The field under validation must be a value after a given date. The dates will be passed into the strtotime PHP function in order to be converted to a valid DateTime instance:
'start_date' => 'required|date|after:tomorrow'
Instead of passing a date string to be evaluated by strtotime, you may specify another field to compare against the date:
'finish_date' => 'required|date|after:start_date'
after_or_equal:date
The field under validation must be a value after or equal to the given date. For more information, see the after rule.
alpha
The field under validation must be entirely alphabetic characters.
alpha_dash
The field under validation may have alpha-numeric characters, as well as dashes and underscores.
alpha_num
The field under validation must be entirely alpha-numeric characters.
array
The field under validation must be a PHP array.
When additional values are provided to the array rule, each key in the input array must be present within the list of values provided to the rule. In the following example, the admin key in the input array is invalid since it is not contained in the list of values provided to the array rule:
use IlluminateSupportFacadesValidator;
$input = [
'user' => [
'name' => 'Taylor Otwell',
'username' => 'taylorotwell',
'admin' => true,
],
];
Validator::make($input, [
'user' => 'array:username,locale',
]);
In general, you should always specify the array keys that are allowed to be present within your array.
bail
Stop running validation rules for the field after the first validation failure.
While the bail rule will only stop validating a specific field when it encounters a validation failure, the stopOnFirstFailure method will inform the validator that it should stop validating all attributes once a single validation failure has occurred:
if ($validator->stopOnFirstFailure()->fails()) {
// ...
}
before:date
The field under validation must be a value preceding the given date. The dates will be passed into the PHP strtotime function in order to be converted into a valid DateTime instance. In addition, like the after rule, the name of another field under validation may be supplied as the value of date.
before_or_equal:date
The field under validation must be a value preceding or equal to the given date. The dates will be passed into the PHP strtotime function in order to be converted into a valid DateTime instance. In addition, like the after rule, the name of another field under validation may be supplied as the value of date.
between:min,max
The field under validation must have a size between the given min and max. Strings, numerics, arrays, and files are evaluated in the same fashion as the size rule.
boolean
The field under validation must be able to be cast as a boolean. Accepted input are true, false, 1, 0, "1", and "0".
confirmed
The field under validation must have a matching field of {field}_confirmation. For example, if the field under validation is password, a matching password_confirmation field must be present in the input.
current_password
The field under validation must match the authenticated user’s password. You may specify an authentication guard using the rule’s first parameter:
'password' => 'current_password:api'
date
The field under validation must be a valid, non-relative date according to the strtotime PHP function.
date_equals:date
The field under validation must be equal to the given date. The dates will be passed into the PHP strtotime function in order to be converted into a valid DateTime instance.
date_format:format
The field under validation must match the given format. You should use either date or date_format when validating a field, not both. This validation rule supports all formats supported by PHP’s DateTime class.
declined
The field under validation must be "no", "off", 0, or false.
declined_if:anotherfield,value,…
The field under validation must be "no", "off", 0, or false if another field under validation is equal to a specified value.
different:field
The field under validation must have a different value than field.
digits:value
The field under validation must be numeric and must have an exact length of value.
digits_between:min,max
The field under validation must be numeric and must have a length between the given min and max.
dimensions
The file under validation must be an image meeting the dimension constraints as specified by the rule’s parameters:
'avatar' => 'dimensions:min_width=100,min_height=200'
Available constraints are: min_width, max_width, min_height, max_height, width, height, ratio.
A ratio constraint should be represented as width divided by height. This can be specified either by a fraction like 3/2 or a float like 1.5:
'avatar' => 'dimensions:ratio=3/2'
Since this rule requires several arguments, you may use the Rule::dimensions method to fluently construct the rule:
use IlluminateSupportFacadesValidator;
use IlluminateValidationRule;
Validator::make($data, [
'avatar' => [
'required',
Rule::dimensions()->maxWidth(1000)->maxHeight(500)->ratio(3 / 2),
],
]);
distinct
When validating arrays, the field under validation must not have any duplicate values:
'foo.*.id' => 'distinct'
Distinct uses loose variable comparisons by default. To use strict comparisons, you may add the strict parameter to your validation rule definition:
'foo.*.id' => 'distinct:strict'
You may add ignore_case to the validation rule’s arguments to make the rule ignore capitalization differences:
'foo.*.id' => 'distinct:ignore_case'
The field under validation must be formatted as an email address. This validation rule utilizes the egulias/email-validator package for validating the email address. By default, the RFCValidation validator is applied, but you can apply other validation styles as well:
'email' => 'email:rfc,dns'
The example above will apply the RFCValidation and DNSCheckValidation validations. Here’s a full list of validation styles you can apply:
-
rfc:RFCValidation -
strict:NoRFCWarningsValidation -
dns:DNSCheckValidation -
spoof:SpoofCheckValidation -
filter:FilterEmailValidation
The filter validator, which uses PHP’s filter_var function, ships with Laravel and was Laravel’s default email validation behavior prior to Laravel version 5.8.
{note} The
dnsandspoofvalidators require the PHPintlextension.
ends_with:foo,bar,…
The field under validation must end with one of the given values.
enum
The Enum rule is a class based rule that validates whether the field under validation contains a valid enum value. The Enum rule accepts the name of the enum as its only constructor argument:
use AppEnumsServerStatus;
use IlluminateValidationRulesEnum;
$request->validate([
'status' => [new Enum(ServerStatus::class)],
]);
{note} Enums are only available on PHP 8.1+.
exclude
The field under validation will be excluded from the request data returned by the validate and validated methods.
exclude_if:anotherfield,value
The field under validation will be excluded from the request data returned by the validate and validated methods if the anotherfield field is equal to value.
exclude_unless:anotherfield,value
The field under validation will be excluded from the request data returned by the validate and validated methods unless anotherfield‘s field is equal to value. If value is null (exclude_unless:name,null), the field under validation will be excluded unless the comparison field is null or the comparison field is missing from the request data.
exclude_without:anotherfield
The field under validation will be excluded from the request data returned by the validate and validated methods if the anotherfield field is not present.
exists:table,column
The field under validation must exist in a given database table.
Basic Usage Of Exists Rule
'state' => 'exists:states'
If the column option is not specified, the field name will be used. So, in this case, the rule will validate that the states database table contains a record with a state column value matching the request’s state attribute value.
Specifying A Custom Column Name
You may explicitly specify the database column name that should be used by the validation rule by placing it after the database table name:
'state' => 'exists:states,abbreviation'
Occasionally, you may need to specify a specific database connection to be used for the exists query. You can accomplish this by prepending the connection name to the table name:
'email' => 'exists:connection.staff,email'
Instead of specifying the table name directly, you may specify the Eloquent model which should be used to determine the table name:
'user_id' => 'exists:AppModelsUser,id'
If you would like to customize the query executed by the validation rule, you may use the Rule class to fluently define the rule. In this example, we’ll also specify the validation rules as an array instead of using the | character to delimit them:
use IlluminateSupportFacadesValidator;
use IlluminateValidationRule;
Validator::make($data, [
'email' => [
'required',
Rule::exists('staff')->where(function ($query) {
return $query->where('account_id', 1);
}),
],
]);
file
The field under validation must be a successfully uploaded file.
filled
The field under validation must not be empty when it is present.
gt:field
The field under validation must be greater than the given field. The two fields must be of the same type. Strings, numerics, arrays, and files are evaluated using the same conventions as the size rule.
gte:field
The field under validation must be greater than or equal to the given field. The two fields must be of the same type. Strings, numerics, arrays, and files are evaluated using the same conventions as the size rule.
image
The file under validation must be an image (jpg, jpeg, png, bmp, gif, svg, or webp).
in:foo,bar,…
The field under validation must be included in the given list of values. Since this rule often requires you to implode an array, the Rule::in method may be used to fluently construct the rule:
use IlluminateSupportFacadesValidator;
use IlluminateValidationRule;
Validator::make($data, [
'zones' => [
'required',
Rule::in(['first-zone', 'second-zone']),
],
]);
When the in rule is combined with the array rule, each value in the input array must be present within the list of values provided to the in rule. In the following example, the LAS airport code in the input array is invalid since it is not contained in the list of airports provided to the in rule:
use IlluminateSupportFacadesValidator;
use IlluminateValidationRule;
$input = [
'airports' => ['NYC', 'LAS'],
];
Validator::make($input, [
'airports' => [
'required',
'array',
Rule::in(['NYC', 'LIT']),
],
]);
in_array:anotherfield.*
The field under validation must exist in anotherfield‘s values.
integer
The field under validation must be an integer.
{note} This validation rule does not verify that the input is of the «integer» variable type, only that the input is of a type accepted by PHP’s
FILTER_VALIDATE_INTrule. If you need to validate the input as being a number please use this rule in combination with thenumericvalidation rule.
ip
The field under validation must be an IP address.
ipv4
The field under validation must be an IPv4 address.
ipv6
The field under validation must be an IPv6 address.
mac_address
The field under validation must be a MAC address.
json
The field under validation must be a valid JSON string.
lt:field
The field under validation must be less than the given field. The two fields must be of the same type. Strings, numerics, arrays, and files are evaluated using the same conventions as the size rule.
lte:field
The field under validation must be less than or equal to the given field. The two fields must be of the same type. Strings, numerics, arrays, and files are evaluated using the same conventions as the size rule.
max:value
The field under validation must be less than or equal to a maximum value. Strings, numerics, arrays, and files are evaluated in the same fashion as the size rule.
mimetypes:text/plain,…
The file under validation must match one of the given MIME types:
'video' => 'mimetypes:video/avi,video/mpeg,video/quicktime'
To determine the MIME type of the uploaded file, the file’s contents will be read and the framework will attempt to guess the MIME type, which may be different from the client’s provided MIME type.
mimes:foo,bar,…
The file under validation must have a MIME type corresponding to one of the listed extensions.
Basic Usage Of MIME Rule
'photo' => 'mimes:jpg,bmp,png'
Even though you only need to specify the extensions, this rule actually validates the MIME type of the file by reading the file’s contents and guessing its MIME type. A full listing of MIME types and their corresponding extensions may be found at the following location:
https://svn.apache.org/repos/asf/httpd/httpd/trunk/docs/conf/mime.types
min:value
The field under validation must have a minimum value. Strings, numerics, arrays, and files are evaluated in the same fashion as the size rule.
multiple_of:value
The field under validation must be a multiple of value.
{note} The
bcmathPHP extension is required in order to use themultiple_ofrule.
not_in:foo,bar,…
The field under validation must not be included in the given list of values. The Rule::notIn method may be used to fluently construct the rule:
use IlluminateValidationRule;
Validator::make($data, [
'toppings' => [
'required',
Rule::notIn(['sprinkles', 'cherries']),
],
]);
not_regex:pattern
The field under validation must not match the given regular expression.
Internally, this rule uses the PHP preg_match function. The pattern specified should obey the same formatting required by preg_match and thus also include valid delimiters. For example: 'email' => 'not_regex:/^.+$/i'.
{note} When using the
regex/not_regexpatterns, it may be necessary to specify your validation rules using an array instead of using|delimiters, especially if the regular expression contains a|character.
nullable
The field under validation may be null.
numeric
The field under validation must be numeric.
password
The field under validation must match the authenticated user’s password.
{note} This rule was renamed to
current_passwordwith the intention of removing it in Laravel 9. Please use the Current Password rule instead.
present
The field under validation must be present in the input data but can be empty.
prohibited
The field under validation must be empty or not present.
prohibited_if:anotherfield,value,…
The field under validation must be empty or not present if the anotherfield field is equal to any value.
prohibited_unless:anotherfield,value,…
The field under validation must be empty or not present unless the anotherfield field is equal to any value.
prohibits:anotherfield,…
If the field under validation is present, no fields in anotherfield can be present, even if empty.
regex:pattern
The field under validation must match the given regular expression.
Internally, this rule uses the PHP preg_match function. The pattern specified should obey the same formatting required by preg_match and thus also include valid delimiters. For example: 'email' => 'regex:/^.+@.+$/i'.
{note} When using the
regex/not_regexpatterns, it may be necessary to specify rules in an array instead of using|delimiters, especially if the regular expression contains a|character.
required
The field under validation must be present in the input data and not empty. A field is considered «empty» if one of the following conditions are true:
- The value is
null. - The value is an empty string.
- The value is an empty array or empty
Countableobject. - The value is an uploaded file with no path.
required_if:anotherfield,value,…
The field under validation must be present and not empty if the anotherfield field is equal to any value.
If you would like to construct a more complex condition for the required_if rule, you may use the Rule::requiredIf method. This method accepts a boolean or a closure. When passed a closure, the closure should return true or false to indicate if the field under validation is required:
use IlluminateSupportFacadesValidator;
use IlluminateValidationRule;
Validator::make($request->all(), [
'role_id' => Rule::requiredIf($request->user()->is_admin),
]);
Validator::make($request->all(), [
'role_id' => Rule::requiredIf(function () use ($request) {
return $request->user()->is_admin;
}),
]);
required_unless:anotherfield,value,…
The field under validation must be present and not empty unless the anotherfield field is equal to any value. This also means anotherfield must be present in the request data unless value is null. If value is null (required_unless:name,null), the field under validation will be required unless the comparison field is null or the comparison field is missing from the request data.
required_with:foo,bar,…
The field under validation must be present and not empty only if any of the other specified fields are present and not empty.
required_with_all:foo,bar,…
The field under validation must be present and not empty only if all of the other specified fields are present and not empty.
required_without:foo,bar,…
The field under validation must be present and not empty only when any of the other specified fields are empty or not present.
required_without_all:foo,bar,…
The field under validation must be present and not empty only when all of the other specified fields are empty or not present.
required_array_keys:foo,bar,…
The field under validation must be an array and must contain at least the specified keys.
same:field
The given field must match the field under validation.
size:value
The field under validation must have a size matching the given value. For string data, value corresponds to the number of characters. For numeric data, value corresponds to a given integer value (the attribute must also have the numeric or integer rule). For an array, size corresponds to the count of the array. For files, size corresponds to the file size in kilobytes. Let’s look at some examples:
// Validate that a string is exactly 12 characters long...
'title' => 'size:12';
// Validate that a provided integer equals 10...
'seats' => 'integer|size:10';
// Validate that an array has exactly 5 elements...
'tags' => 'array|size:5';
// Validate that an uploaded file is exactly 512 kilobytes...
'image' => 'file|size:512';
starts_with:foo,bar,…
The field under validation must start with one of the given values.
string
The field under validation must be a string. If you would like to allow the field to also be null, you should assign the nullable rule to the field.
timezone
The field under validation must be a valid timezone identifier according to the timezone_identifiers_list PHP function.
unique:table,column
The field under validation must not exist within the given database table.
Specifying A Custom Table / Column Name:
Instead of specifying the table name directly, you may specify the Eloquent model which should be used to determine the table name:
'email' => 'unique:AppModelsUser,email_address'
The column option may be used to specify the field’s corresponding database column. If the column option is not specified, the name of the field under validation will be used.
'email' => 'unique:users,email_address'
Specifying A Custom Database Connection
Occasionally, you may need to set a custom connection for database queries made by the Validator. To accomplish this, you may prepend the connection name to the table name:
'email' => 'unique:connection.users,email_address'
Forcing A Unique Rule To Ignore A Given ID:
Sometimes, you may wish to ignore a given ID during unique validation. For example, consider an «update profile» screen that includes the user’s name, email address, and location. You will probably want to verify that the email address is unique. However, if the user only changes the name field and not the email field, you do not want a validation error to be thrown because the user is already the owner of the email address in question.
To instruct the validator to ignore the user’s ID, we’ll use the Rule class to fluently define the rule. In this example, we’ll also specify the validation rules as an array instead of using the | character to delimit the rules:
use IlluminateSupportFacadesValidator;
use IlluminateValidationRule;
Validator::make($data, [
'email' => [
'required',
Rule::unique('users')->ignore($user->id),
],
]);
{note} You should never pass any user controlled request input into the
ignoremethod. Instead, you should only pass a system generated unique ID such as an auto-incrementing ID or UUID from an Eloquent model instance. Otherwise, your application will be vulnerable to an SQL injection attack.
Instead of passing the model key’s value to the ignore method, you may also pass the entire model instance. Laravel will automatically extract the key from the model:
Rule::unique('users')->ignore($user)
If your table uses a primary key column name other than id, you may specify the name of the column when calling the ignore method:
Rule::unique('users')->ignore($user->id, 'user_id')
By default, the unique rule will check the uniqueness of the column matching the name of the attribute being validated. However, you may pass a different column name as the second argument to the unique method:
Rule::unique('users', 'email_address')->ignore($user->id),
Adding Additional Where Clauses:
You may specify additional query conditions by customizing the query using the where method. For example, let’s add a query condition that scopes the query to only search records that have an account_id column value of 1:
'email' => Rule::unique('users')->where(function ($query) {
return $query->where('account_id', 1);
})
url
The field under validation must be a valid URL.
uuid
The field under validation must be a valid RFC 4122 (version 1, 3, 4, or 5) universally unique identifier (UUID).
Conditionally Adding Rules
Skipping Validation When Fields Have Certain Values
You may occasionally wish to not validate a given field if another field has a given value. You may accomplish this using the exclude_if validation rule. In this example, the appointment_date and doctor_name fields will not be validated if the has_appointment field has a value of false:
use IlluminateSupportFacadesValidator;
$validator = Validator::make($data, [
'has_appointment' => 'required|boolean',
'appointment_date' => 'exclude_if:has_appointment,false|required|date',
'doctor_name' => 'exclude_if:has_appointment,false|required|string',
]);
Alternatively, you may use the exclude_unless rule to not validate a given field unless another field has a given value:
$validator = Validator::make($data, [
'has_appointment' => 'required|boolean',
'appointment_date' => 'exclude_unless:has_appointment,true|required|date',
'doctor_name' => 'exclude_unless:has_appointment,true|required|string',
]);
Validating When Present
In some situations, you may wish to run validation checks against a field only if that field is present in the data being validated. To quickly accomplish this, add the sometimes rule to your rule list:
$v = Validator::make($data, [
'email' => 'sometimes|required|email',
]);
In the example above, the email field will only be validated if it is present in the $data array.
{tip} If you are attempting to validate a field that should always be present but may be empty, check out this note on optional fields.
Complex Conditional Validation
Sometimes you may wish to add validation rules based on more complex conditional logic. For example, you may wish to require a given field only if another field has a greater value than 100. Or, you may need two fields to have a given value only when another field is present. Adding these validation rules doesn’t have to be a pain. First, create a Validator instance with your static rules that never change:
use IlluminateSupportFacadesValidator;
$validator = Validator::make($request->all(), [
'email' => 'required|email',
'games' => 'required|numeric',
]);
Let’s assume our web application is for game collectors. If a game collector registers with our application and they own more than 100 games, we want them to explain why they own so many games. For example, perhaps they run a game resale shop, or maybe they just enjoy collecting games. To conditionally add this requirement, we can use the sometimes method on the Validator instance.
$validator->sometimes('reason', 'required|max:500', function ($input) {
return $input->games >= 100;
});
The first argument passed to the sometimes method is the name of the field we are conditionally validating. The second argument is a list of the rules we want to add. If the closure passed as the third argument returns true, the rules will be added. This method makes it a breeze to build complex conditional validations. You may even add conditional validations for several fields at once:
$validator->sometimes(['reason', 'cost'], 'required', function ($input) {
return $input->games >= 100;
});
{tip} The
$inputparameter passed to your closure will be an instance ofIlluminateSupportFluentand may be used to access your input and files under validation.
Complex Conditional Array Validation
Sometimes you may want to validate a field based on another field in the same nested array whose index you do not know. In these situations, you may allow your closure to receive a second argument which will be the current individual item in the array being validated:
$input = [
'channels' => [
[
'type' => 'email',
'address' => 'abigail@example.com',
],
[
'type' => 'url',
'address' => 'https://example.com',
],
],
];
$validator->sometimes('channels.*.address', 'email', function ($input, $item) {
return $item->type === 'email';
});
$validator->sometimes('channels.*.address', 'url', function ($input, $item) {
return $item->type !== 'email';
});
Like the $input parameter passed to the closure, the $item parameter is an instance of IlluminateSupportFluent when the attribute data is an array; otherwise, it is a string.
Validating Arrays
As discussed in the array validation rule documentation, the array rule accepts a list of allowed array keys. If any additional keys are present within the array, validation will fail:
use IlluminateSupportFacadesValidator;
$input = [
'user' => [
'name' => 'Taylor Otwell',
'username' => 'taylorotwell',
'admin' => true,
],
];
Validator::make($input, [
'user' => 'array:username,locale',
]);
In general, you should always specify the array keys that are allowed to be present within your array. Otherwise, the validator’s validate and validated methods will return all of the validated data, including the array and all of its keys, even if those keys were not validated by other nested array validation rules.
Validating Nested Array Input
Validating nested array based form input fields doesn’t have to be a pain. You may use «dot notation» to validate attributes within an array. For example, if the incoming HTTP request contains a photos[profile] field, you may validate it like so:
use IlluminateSupportFacadesValidator;
$validator = Validator::make($request->all(), [
'photos.profile' => 'required|image',
]);
You may also validate each element of an array. For example, to validate that each email in a given array input field is unique, you may do the following:
$validator = Validator::make($request->all(), [
'person.*.email' => 'email|unique:users',
'person.*.first_name' => 'required_with:person.*.last_name',
]);
Likewise, you may use the * character when specifying custom validation messages in your language files, making it a breeze to use a single validation message for array based fields:
'custom' => [
'person.*.email' => [
'unique' => 'Each person must have a unique email address',
]
],
Accessing Nested Array Data
Sometimes you may need to access the value for a given nested array element when assigning validation rules to the attribute. You may accomplish this using the Rule::foreEach method. The forEach method accepts a closure that will be invoked for each iteration of the array attribute under validation and will receive the attribute’s value and explicit, fully-expanded attribute name. The closure should return an array of rules to assign to the array element:
use AppRulesHasPermission;
use IlluminateSupportFacadesValidator;
use IlluminateValidationRule;
$validator = Validator::make($request->all(), [
'companies.*.id' => Rule::forEach(function ($value, $attribute) {
return [
Rule::exists(Company::class, 'id'),
new HasPermission('manage-company', $value),
];
}),
]);
Validating Passwords
To ensure that passwords have an adequate level of complexity, you may use Laravel’s Password rule object:
use IlluminateSupportFacadesValidator;
use IlluminateValidationRulesPassword;
$validator = Validator::make($request->all(), [
'password' => ['required', 'confirmed', Password::min(8)],
]);
The Password rule object allows you to easily customize the password complexity requirements for your application, such as specifying that passwords require at least one letter, number, symbol, or characters with mixed casing:
// Require at least 8 characters...
Password::min(8)
// Require at least one letter...
Password::min(8)->letters()
// Require at least one uppercase and one lowercase letter...
Password::min(8)->mixedCase()
// Require at least one number...
Password::min(8)->numbers()
// Require at least one symbol...
Password::min(8)->symbols()
In addition, you may ensure that a password has not been compromised in a public password data breach leak using the uncompromised method:
Password::min(8)->uncompromised()
Internally, the Password rule object uses the k-Anonymity model to determine if a password has been leaked via the haveibeenpwned.com service without sacrificing the user’s privacy or security.
By default, if a password appears at least once in a data leak, it will be considered compromised. You can customize this threshold using the first argument of the uncompromised method:
// Ensure the password appears less than 3 times in the same data leak...
Password::min(8)->uncompromised(3);
Of course, you may chain all the methods in the examples above:
Password::min(8)
->letters()
->mixedCase()
->numbers()
->symbols()
->uncompromised()
Defining Default Password Rules
You may find it convenient to specify the default validation rules for passwords in a single location of your application. You can easily accomplish this using the Password::defaults method, which accepts a closure. The closure given to the defaults method should return the default configuration of the Password rule. Typically, the defaults rule should be called within the boot method of one of your application’s service providers:
use IlluminateValidationRulesPassword;
/**
* Bootstrap any application services.
*
* @return void
*/
public function boot()
{
Password::defaults(function () {
$rule = Password::min(8);
return $this->app->isProduction()
? $rule->mixedCase()->uncompromised()
: $rule;
});
}
Then, when you would like to apply the default rules to a particular password undergoing validation, you may invoke the defaults method with no arguments:
'password' => ['required', Password::defaults()],
Occasionally, you may want to attach additional validation rules to your default password validation rules. You may use the rules method to accomplish this:
use AppRulesZxcvbnRule;
Password::defaults(function () {
$rule = Password::min(8)->rules([new ZxcvbnRule]);
// ...
});
Custom Validation Rules
Using Rule Objects
Laravel provides a variety of helpful validation rules; however, you may wish to specify some of your own. One method of registering custom validation rules is using rule objects. To generate a new rule object, you may use the make:rule Artisan command. Let’s use this command to generate a rule that verifies a string is uppercase. Laravel will place the new rule in the app/Rules directory. If this directory does not exist, Laravel will create it when you execute the Artisan command to create your rule:
php artisan make:rule Uppercase
Once the rule has been created, we are ready to define its behavior. A rule object contains two methods: passes and message. The passes method receives the attribute value and name, and should return true or false depending on whether the attribute value is valid or not. The message method should return the validation error message that should be used when validation fails:
<?php
namespace AppRules;
use IlluminateContractsValidationRule;
class Uppercase implements Rule
{
/**
* Determine if the validation rule passes.
*
* @param string $attribute
* @param mixed $value
* @return bool
*/
public function passes($attribute, $value)
{
return strtoupper($value) === $value;
}
/**
* Get the validation error message.
*
* @return string
*/
public function message()
{
return 'The :attribute must be uppercase.';
}
}
You may call the trans helper from your message method if you would like to return an error message from your translation files:
/**
* Get the validation error message.
*
* @return string
*/
public function message()
{
return trans('validation.uppercase');
}
Once the rule has been defined, you may attach it to a validator by passing an instance of the rule object with your other validation rules:
use AppRulesUppercase;
$request->validate([
'name' => ['required', 'string', new Uppercase],
]);
Accessing Additional Data
If your custom validation rule class needs to access all of the other data undergoing validation, your rule class may implement the IlluminateContractsValidationDataAwareRule interface. This interface requires your class to define a setData method. This method will automatically be invoked by Laravel (before validation proceeds) with all of the data under validation:
<?php
namespace AppRules;
use IlluminateContractsValidationRule;
use IlluminateContractsValidationDataAwareRule;
class Uppercase implements Rule, DataAwareRule
{
/**
* All of the data under validation.
*
* @var array
*/
protected $data = [];
// ...
/**
* Set the data under validation.
*
* @param array $data
* @return $this
*/
public function setData($data)
{
$this->data = $data;
return $this;
}
}
Or, if your validation rule requires access to the validator instance performing the validation, you may implement the ValidatorAwareRule interface:
<?php
namespace AppRules;
use IlluminateContractsValidationRule;
use IlluminateContractsValidationValidatorAwareRule;
class Uppercase implements Rule, ValidatorAwareRule
{
/**
* The validator instance.
*
* @var IlluminateValidationValidator
*/
protected $validator;
// ...
/**
* Set the current validator.
*
* @param IlluminateValidationValidator $validator
* @return $this
*/
public function setValidator($validator)
{
$this->validator = $validator;
return $this;
}
}
Using Closures
If you only need the functionality of a custom rule once throughout your application, you may use a closure instead of a rule object. The closure receives the attribute’s name, the attribute’s value, and a $fail callback that should be called if validation fails:
use IlluminateSupportFacadesValidator;
$validator = Validator::make($request->all(), [
'title' => [
'required',
'max:255',
function ($attribute, $value, $fail) {
if ($value === 'foo') {
$fail('The '.$attribute.' is invalid.');
}
},
],
]);
Implicit Rules
By default, when an attribute being validated is not present or contains an empty string, normal validation rules, including custom rules, are not run. For example, the unique rule will not be run against an empty string:
use IlluminateSupportFacadesValidator;
$rules = ['name' => 'unique:users,name'];
$input = ['name' => ''];
Validator::make($input, $rules)->passes(); // true
For a custom rule to run even when an attribute is empty, the rule must imply that the attribute is required. To create an «implicit» rule, implement the IlluminateContractsValidationImplicitRule interface. This interface serves as a «marker interface» for the validator; therefore, it does not contain any additional methods you need to implement beyond the methods required by the typical Rule interface.
To generate a new implicit rule object, you may use the make:rule Artisan command with the --implicit option :
php artisan make:rule Uppercase --implicit
{note} An «implicit» rule only implies that the attribute is required. Whether it actually invalidates a missing or empty attribute is up to you.
Validation
- Introduction
- Validation Quickstart
- Defining The Routes
- Creating The Controller
- Writing The Validation Logic
- Displaying The Validation Errors
- Repopulating Forms
- A Note On Optional Fields
- Validation Error Response Format
- Form Request Validation
- Creating Form Requests
- Authorizing Form Requests
- Customizing The Error Messages
- Preparing Input For Validation
- Manually Creating Validators
- Automatic Redirection
- Named Error Bags
- Customizing The Error Messages
- After Validation Hook
- Working With Validated Input
- Working With Error Messages
- Specifying Custom Messages In Language Files
- Specifying Attributes In Language Files
- Specifying Values In Language Files
- Available Validation Rules
- Conditionally Adding Rules
- Validating Arrays
- Validating Nested Array Input
- Error Message Indexes & Positions
- Validating Files
- Validating Passwords
- Custom Validation Rules
- Using Rule Objects
- Using Closures
- Implicit Rules
Introduction
Laravel provides several different approaches to validate your application’s incoming data. It is most common to use the validate method available on all incoming HTTP requests. However, we will discuss other approaches to validation as well.
Laravel includes a wide variety of convenient validation rules that you may apply to data, even providing the ability to validate if values are unique in a given database table. We’ll cover each of these validation rules in detail so that you are familiar with all of Laravel’s validation features.
Validation Quickstart
To learn about Laravel’s powerful validation features, let’s look at a complete example of validating a form and displaying the error messages back to the user. By reading this high-level overview, you’ll be able to gain a good general understanding of how to validate incoming request data using Laravel:
Defining The Routes
First, let’s assume we have the following routes defined in our routes/web.php file:
use AppHttpControllersPostController;
Route::get('/post/create', [PostController::class, 'create']);
Route::post('/post', [PostController::class, 'store']);
The GET route will display a form for the user to create a new blog post, while the POST route will store the new blog post in the database.
Creating The Controller
Next, let’s take a look at a simple controller that handles incoming requests to these routes. We’ll leave the store method empty for now:
<?php
namespace AppHttpControllers;
use AppHttpControllersController;
use IlluminateHttpRequest;
class PostController extends Controller
{
/**
* Show the form to create a new blog post.
*
* @return IlluminateViewView
*/
public function create()
{
return view('post.create');
}
/**
* Store a new blog post.
*
* @param IlluminateHttpRequest $request
* @return IlluminateHttpResponse
*/
public function store(Request $request)
{
// Validate and store the blog post...
}
}
Writing The Validation Logic
Now we are ready to fill in our store method with the logic to validate the new blog post. To do this, we will use the validate method provided by the IlluminateHttpRequest object. If the validation rules pass, your code will keep executing normally; however, if validation fails, an IlluminateValidationValidationException exception will be thrown and the proper error response will automatically be sent back to the user.
If validation fails during a traditional HTTP request, a redirect response to the previous URL will be generated. If the incoming request is an XHR request, a JSON response containing the validation error messages will be returned.
To get a better understanding of the validate method, let’s jump back into the store method:
/**
* Store a new blog post.
*
* @param IlluminateHttpRequest $request
* @return IlluminateHttpResponse
*/
public function store(Request $request)
{
$validated = $request->validate([
'title' => 'required|unique:posts|max:255',
'body' => 'required',
]);
// The blog post is valid...
}
As you can see, the validation rules are passed into the validate method. Don’t worry — all available validation rules are documented. Again, if the validation fails, the proper response will automatically be generated. If the validation passes, our controller will continue executing normally.
Alternatively, validation rules may be specified as arrays of rules instead of a single | delimited string:
$validatedData = $request->validate([
'title' => ['required', 'unique:posts', 'max:255'],
'body' => ['required'],
]);
In addition, you may use the validateWithBag method to validate a request and store any error messages within a named error bag:
$validatedData = $request->validateWithBag('post', [
'title' => ['required', 'unique:posts', 'max:255'],
'body' => ['required'],
]);
Stopping On First Validation Failure
Sometimes you may wish to stop running validation rules on an attribute after the first validation failure. To do so, assign the bail rule to the attribute:
$request->validate([
'title' => 'bail|required|unique:posts|max:255',
'body' => 'required',
]);
In this example, if the unique rule on the title attribute fails, the max rule will not be checked. Rules will be validated in the order they are assigned.
A Note On Nested Attributes
If the incoming HTTP request contains «nested» field data, you may specify these fields in your validation rules using «dot» syntax:
$request->validate([
'title' => 'required|unique:posts|max:255',
'author.name' => 'required',
'author.description' => 'required',
]);
On the other hand, if your field name contains a literal period, you can explicitly prevent this from being interpreted as «dot» syntax by escaping the period with a backslash:
$request->validate([
'title' => 'required|unique:posts|max:255',
'v1.0' => 'required',
]);
Displaying The Validation Errors
So, what if the incoming request fields do not pass the given validation rules? As mentioned previously, Laravel will automatically redirect the user back to their previous location. In addition, all of the validation errors and request input will automatically be flashed to the session.
An $errors variable is shared with all of your application’s views by the IlluminateViewMiddlewareShareErrorsFromSession middleware, which is provided by the web middleware group. When this middleware is applied an $errors variable will always be available in your views, allowing you to conveniently assume the $errors variable is always defined and can be safely used. The $errors variable will be an instance of IlluminateSupportMessageBag. For more information on working with this object, check out its documentation.
So, in our example, the user will be redirected to our controller’s create method when validation fails, allowing us to display the error messages in the view:
<!-- /resources/views/post/create.blade.php --> <h1>Create Post</h1> @if ($errors->any()) <div class="alert alert-danger"> <ul> @foreach ($errors->all() as $error) <li>{{ $error }}</li> @endforeach </ul> </div> @endif <!-- Create Post Form -->
Customizing The Error Messages
Laravel’s built-in validation rules each have an error message that is located in your application’s lang/en/validation.php file. Within this file, you will find a translation entry for each validation rule. You are free to change or modify these messages based on the needs of your application.
In addition, you may copy this file to another translation language directory to translate the messages for your application’s language. To learn more about Laravel localization, check out the complete localization documentation.
XHR Requests & Validation
In this example, we used a traditional form to send data to the application. However, many applications receive XHR requests from a JavaScript powered frontend. When using the validate method during an XHR request, Laravel will not generate a redirect response. Instead, Laravel generates a JSON response containing all of the validation errors. This JSON response will be sent with a 422 HTTP status code.
The @error Directive
You may use the @error Blade directive to quickly determine if validation error messages exist for a given attribute. Within an @error directive, you may echo the $message variable to display the error message:
<!-- /resources/views/post/create.blade.php --> <label for="title">Post Title</label> <input id="title" type="text" name="title" class="@error('title') is-invalid @enderror"> @error('title') <div class="alert alert-danger">{{ $message }}</div> @enderror
If you are using named error bags, you may pass the name of the error bag as the second argument to the @error directive:
<input ... class="@error('title', 'post') is-invalid @enderror">
Repopulating Forms
When Laravel generates a redirect response due to a validation error, the framework will automatically flash all of the request’s input to the session. This is done so that you may conveniently access the input during the next request and repopulate the form that the user attempted to submit.
To retrieve flashed input from the previous request, invoke the old method on an instance of IlluminateHttpRequest. The old method will pull the previously flashed input data from the session:
$title = $request->old('title');
Laravel also provides a global old helper. If you are displaying old input within a Blade template, it is more convenient to use the old helper to repopulate the form. If no old input exists for the given field, null will be returned:
<input type="text" name="title" value="{{ old('title') }}">
A Note On Optional Fields
By default, Laravel includes the TrimStrings and ConvertEmptyStringsToNull middleware in your application’s global middleware stack. These middleware are listed in the stack by the AppHttpKernel class. Because of this, you will often need to mark your «optional» request fields as nullable if you do not want the validator to consider null values as invalid. For example:
$request->validate([
'title' => 'required|unique:posts|max:255',
'body' => 'required',
'publish_at' => 'nullable|date',
]);
In this example, we are specifying that the publish_at field may be either null or a valid date representation. If the nullable modifier is not added to the rule definition, the validator would consider null an invalid date.
Validation Error Response Format
When your application throws a IlluminateValidationValidationException exception and the incoming HTTP request is expecting a JSON response, Laravel will automatically format the error messages for you and return a 422 Unprocessable Entity HTTP response.
Below, you can review an example of the JSON response format for validation errors. Note that nested error keys are flattened into «dot» notation format:
{
    "message": "The team name must be a string. (and 4 more errors)",
    "errors": {
        "team_name": [
            "The team name must be a string.",
            "The team name must be at least 1 characters."
        ],
        "authorization.role": [
            "The selected authorization.role is invalid."
        ],
        "users.0.email": [
            "The users.0.email field is required."
        ],
        "users.2.email": [
            "The users.2.email must be a valid email address."
        ]
    }
}
Form Request Validation
Creating Form Requests
For more complex validation scenarios, you may wish to create a «form request». Form requests are custom request classes that encapsulate their own validation and authorization logic. To create a form request class, you may use the make:request Artisan CLI command:
php artisan make:request StorePostRequest
The generated form request class will be placed in the app/Http/Requests directory. If this directory does not exist, it will be created when you run the make:request command. Each form request generated by Laravel has two methods: authorize and rules.
As you might have guessed, the authorize method is responsible for determining if the currently authenticated user can perform the action represented by the request, while the rules method returns the validation rules that should apply to the request’s data:
/**
 * Get the validation rules that apply to the request.
 *
 * @return array
 */
public function rules()
{
    return [
        'title' => 'required|unique:posts|max:255',
        'body' => 'required',
    ];
}
Note
You may type-hint any dependencies you require within therulesmethod’s signature. They will automatically be resolved via the Laravel service container.
So, how are the validation rules evaluated? All you need to do is type-hint the request on your controller method. The incoming form request is validated before the controller method is called, meaning you do not need to clutter your controller with any validation logic:
/**
 * Store a new blog post.
 *
 * @param  AppHttpRequestsStorePostRequest  $request
 * @return IlluminateHttpResponse
 */
public function store(StorePostRequest $request)
{
    // The incoming request is valid...

    // Retrieve the validated input data...
    $validated = $request->validated();

    // Retrieve a portion of the validated input data...
    $validated = $request->safe()->only(['name', 'email']);
    $validated = $request->safe()->except(['name', 'email']);
}
If validation fails, a redirect response will be generated to send the user back to their previous location. The errors will also be flashed to the session so they are available for display. If the request was an XHR request, an HTTP response with a 422 status code will be returned to the user including a JSON representation of the validation errors.
Adding After Hooks To Form Requests
If you would like to add an «after» validation hook to a form request, you may use the withValidator method. This method receives the fully constructed validator, allowing you to call any of its methods before the validation rules are actually evaluated:
/**
 * Configure the validator instance.
 *
 * @param  IlluminateValidationValidator  $validator
 * @return void
 */
public function withValidator($validator)
{
    $validator->after(function ($validator) {
        if ($this->somethingElseIsInvalid()) {
            $validator->errors()->add('field', 'Something is wrong with this field!');
        }
    });
}
Stopping On First Validation Failure Attribute
By adding a stopOnFirstFailure property to your request class, you may inform the validator that it should stop validating all attributes once a single validation failure has occurred:
/**
 * Indicates if the validator should stop on the first rule failure.
 *
 * @var bool
 */
protected $stopOnFirstFailure = true;
Customizing The Redirect Location
As previously discussed, a redirect response will be generated to send the user back to their previous location when form request validation fails. However, you are free to customize this behavior. To do so, define a $redirect property on your form request:
/**
 * The URI that users should be redirected to if validation fails.
 *
 * @var string
 */
protected $redirect = '/dashboard';
Or, if you would like to redirect users to a named route, you may define a $redirectRoute property instead:
/**
 * The route that users should be redirected to if validation fails.
 *
 * @var string
 */
protected $redirectRoute = 'dashboard';
Authorizing Form Requests
The form request class also contains an authorize method. Within this method, you may determine if the authenticated user actually has the authority to update a given resource. For example, you may determine if a user actually owns a blog comment they are attempting to update. Most likely, you will interact with your authorization gates and policies within this method:
use AppModelsComment;

/**
 * Determine if the user is authorized to make this request.
 *
 * @return bool
 */
public function authorize()
{
    $comment = Comment::find($this->route('comment'));

    return $comment && $this->user()->can('update', $comment);
}
Since all form requests extend the base Laravel request class, we may use the user method to access the currently authenticated user. Also, note the call to the route method in the example above. This method grants you access to the URI parameters defined on the route being called, such as the {comment} parameter in the example below:
Route::post('/comment/{comment}');
Therefore, if your application is taking advantage of route model binding, your code may be made even more succinct by accessing the resolved model as a property of the request:
return $this->user()->can('update', $this->comment);
If the authorize method returns false, an HTTP response with a 403 status code will automatically be returned and your controller method will not execute.
If you plan to handle authorization logic for the request in another part of your application, you may simply return true from the authorize method:
/**
 * Determine if the user is authorized to make this request.
 *
 * @return bool
 */
public function authorize()
{
    return true;
}
Note
You may type-hint any dependencies you need within theauthorizemethod’s signature. They will automatically be resolved via the Laravel service container.
Customizing The Error Messages
You may customize the error messages used by the form request by overriding the messages method. This method should return an array of attribute / rule pairs and their corresponding error messages:
/**
 * Get the error messages for the defined validation rules.
 *
 * @return array
 */
public function messages()
{
    return [
        'title.required' => 'A title is required',
        'body.required' => 'A message is required',
    ];
}
Customizing The Validation Attributes
Many of Laravel’s built-in validation rule error messages contain an :attribute placeholder. If you would like the :attribute placeholder of your validation message to be replaced with a custom attribute name, you may specify the custom names by overriding the attributes method. This method should return an array of attribute / name pairs:
/**
 * Get custom attributes for validator errors.
 *
 * @return array
 */
public function attributes()
{
    return [
        'email' => 'email address',
    ];
}
Preparing Input For Validation
If you need to prepare or sanitize any data from the request before you apply your validation rules, you may use the prepareForValidation method:
use IlluminateSupportStr;

/**
 * Prepare the data for validation.
 *
 * @return void
 */
protected function prepareForValidation()
{
    $this->merge([
        'slug' => Str::slug($this->slug),
    ]);
}
Likewise, if you need to normalize any request data after validation is complete, you may use the passedValidation method:
use IlluminateSupportStr;

/**
 * Handle a passed validation attempt.
 *
 * @return void
 */
protected function passedValidation()
{
    $this->replace(['name' => 'Taylor']);
}
Manually Creating Validators
If you do not want to use the validate method on the request, you may create a validator instance manually using the Validator facade. The make method on the facade generates a new validator instance:
<?php

namespace AppHttpControllers;

use AppHttpControllersController;
use IlluminateHttpRequest;
use IlluminateSupportFacadesValidator;

class PostController extends Controller
{
    /**
     * Store a new blog post.
     *
     * @param  Request  $request
     * @return Response
     */
    public function store(Request $request)
    {
        $validator = Validator::make($request->all(), [
            'title' => 'required|unique:posts|max:255',
            'body' => 'required',
        ]);

        if ($validator->fails()) {
            return redirect('post/create')
                        ->withErrors($validator)
                        ->withInput();
        }

        // Retrieve the validated input...
        $validated = $validator->validated();

        // Retrieve a portion of the validated input...
        $validated = $validator->safe()->only(['name', 'email']);
        $validated = $validator->safe()->except(['name', 'email']);

        // Store the blog post...
    }
}
The first argument passed to the make method is the data under validation. The second argument is an array of the validation rules that should be applied to the data.
After determining whether the request validation failed, you may use the withErrors method to flash the error messages to the session. When using this method, the $errors variable will automatically be shared with your views after redirection, allowing you to easily display them back to the user. The withErrors method accepts a validator, a MessageBag, or a PHP array.
Stopping On First Validation Failure
The stopOnFirstFailure method will inform the validator that it should stop validating all attributes once a single validation failure has occurred:
if ($validator->stopOnFirstFailure()->fails()) {
    // ...
}
Automatic Redirection
If you would like to create a validator instance manually but still take advantage of the automatic redirection offered by the HTTP request’s validate method, you may call the validate method on an existing validator instance. If validation fails, the user will automatically be redirected or, in the case of an XHR request, a JSON response will be returned:
Validator::make($request->all(), [
    'title' => 'required|unique:posts|max:255',
    'body' => 'required',
])->validate();
You may use the validateWithBag method to store the error messages in a named error bag if validation fails:
Validator::make($request->all(), [
    'title' => 'required|unique:posts|max:255',
    'body' => 'required',
])->validateWithBag('post');
Named Error Bags
If you have multiple forms on a single page, you may wish to name the MessageBag containing the validation errors, allowing you to retrieve the error messages for a specific form. To achieve this, pass a name as the second argument to withErrors:
return redirect('register')->withErrors($validator, 'login');
You may then access the named MessageBag instance from the $errors variable:
{{ $errors->login->first('email') }}
Customizing The Error Messages
If needed, you may provide custom error messages that a validator instance should use instead of the default error messages provided by Laravel. There are several ways to specify custom messages. First, you may pass the custom messages as the third argument to the Validator::make method:
$validator = Validator::make($input, $rules, $messages = [
    'required' => 'The :attribute field is required.',
]);
In this example, the :attribute placeholder will be replaced by the actual name of the field under validation. You may also utilize other placeholders in validation messages. For example:
$messages = [
    'same' => 'The :attribute and :other must match.',
    'size' => 'The :attribute must be exactly :size.',
    'between' => 'The :attribute value :input is not between :min - :max.',
    'in' => 'The :attribute must be one of the following types: :values',
];
Specifying A Custom Message For A Given Attribute
Sometimes you may wish to specify a custom error message only for a specific attribute. You may do so using «dot» notation. Specify the attribute’s name first, followed by the rule:
$messages = [
    'email.required' => 'We need to know your email address!',
];
Specifying Custom Attribute Values
Many of Laravel’s built-in error messages include an :attribute placeholder that is replaced with the name of the field or attribute under validation. To customize the values used to replace these placeholders for specific fields, you may pass an array of custom attributes as the fourth argument to the Validator::make method:
$validator = Validator::make($input, $rules, $messages, [
    'email' => 'email address',
]);
After Validation Hook
You may also attach callbacks to be run after validation is completed. This allows you to easily perform further validation and even add more error messages to the message collection. To get started, call the after method on a validator instance:
$validator = Validator::make(/* ... */);

$validator->after(function ($validator) {
    if ($this->somethingElseIsInvalid()) {
        $validator->errors()->add(
            'field', 'Something is wrong with this field!'
        );
    }
});

if ($validator->fails()) {
    //
}
Working With Validated Input
After validating incoming request data using a form request or a manually created validator instance, you may wish to retrieve the incoming request data that actually underwent validation. This can be accomplished in several ways. First, you may call the validated method on a form request or validator instance. This method returns an array of the data that was validated:
$validated = $request->validated();

$validated = $validator->validated();
Alternatively, you may call the safe method on a form request or validator instance. This method returns an instance of IlluminateSupportValidatedInput. This object exposes only, except, and all methods to retrieve a subset of the validated data or the entire array of validated data:
$validated = $request->safe()->only(['name', 'email']);

$validated = $request->safe()->except(['name', 'email']);

$validated = $request->safe()->all();
In addition, the IlluminateSupportValidatedInput instance may be iterated over and accessed like an array:
// Validated data may be iterated...
foreach ($request->safe() as $key => $value) {
    //
}

// Validated data may be accessed as an array...
$validated = $request->safe();

$email = $validated['email'];
If you would like to add additional fields to the validated data, you may call the merge method:
$validated = $request->safe()->merge(['name' => 'Taylor Otwell']);
If you would like to retrieve the validated data as a collection instance, you may call the collect method:
$collection = $request->safe()->collect();
Working With Error Messages
After calling the errors method on a Validator instance, you will receive an IlluminateSupportMessageBag instance, which has a variety of convenient methods for working with error messages. The $errors variable that is automatically made available to all views is also an instance of the MessageBag class.
Retrieving The First Error Message For A Field
To retrieve the first error message for a given field, use the first method:
$errors = $validator->errors();

echo $errors->first('email');
Retrieving All Error Messages For A Field
If you need to retrieve an array of all the messages for a given field, use the get method:
foreach ($errors->get('email') as $message) {
    //
}
If you are validating an array form field, you may retrieve all of the messages for each of the array elements using the * character:
foreach ($errors->get('attachments.*') as $message) {
    //
}
Retrieving All Error Messages For All Fields
To retrieve an array of all messages for all fields, use the all method:
foreach ($errors->all() as $message) {
    //
}
Determining If Messages Exist For A Field
The has method may be used to determine if any error messages exist for a given field:
if ($errors->has('email')) {
    //
}
Specifying Custom Messages In Language Files
Laravel’s built-in validation rules each have an error message that is located in your application’s lang/en/validation.php file. Within this file, you will find a translation entry for each validation rule. You are free to change or modify these messages based on the needs of your application.
In addition, you may copy this file to another translation language directory to translate the messages for your application’s language. To learn more about Laravel localization, check out the complete localization documentation.
Custom Messages For Specific Attributes
You may customize the error messages used for specified attribute and rule combinations within your application’s validation language files. To do so, add your message customizations to the custom array of your application’s lang/xx/validation.php language file:
'custom' => [
    'email' => [
        'required' => 'We need to know your email address!',
        'max' => 'Your email address is too long!'
    ],
],
Specifying Attributes In Language Files
Many of Laravel’s built-in error messages include an :attribute placeholder that is replaced with the name of the field or attribute under validation. If you would like the :attribute portion of your validation message to be replaced with a custom value, you may specify the custom attribute name in the attributes array of your lang/xx/validation.php language file:
'attributes' => [
    'email' => 'email address',
],
Specifying Values In Language Files
Some of Laravel’s built-in validation rule error messages contain a :value placeholder that is replaced with the current value of the request attribute. However, you may occasionally need the :value portion of your validation message to be replaced with a custom representation of the value. For example, consider the following rule that specifies that a credit card number is required if the payment_type has a value of cc:
Validator::make($request->all(), [
    'credit_card_number' => 'required_if:payment_type,cc'
]);
If this validation rule fails, it will produce the following error message:
The credit card number field is required when payment type is cc.
Instead of displaying cc as the payment type value, you may specify a more user-friendly value representation in your lang/xx/validation.php language file by defining a values array:
'values' => [
    'payment_type' => [
        'cc' => 'credit card'
    ],
],
After defining this value, the validation rule will produce the following error message:
The credit card number field is required when payment type is credit card.
Available Validation Rules
Below is a list of all available validation rules and their function:
<style>
.collection-method-list > p {
columns: 10.8em 3; -moz-columns: 10.8em 3; -webkit-columns: 10.8em 3;
}
.collection-method-list a {
display: block;
overflow: hidden;
text-overflow: ellipsis;
white-space: nowrap;
}
</style>
accepted
The field under validation must be "yes", "on", 1, or true. This is useful for validating «Terms of Service» acceptance or similar fields.
accepted_if:anotherfield,value,…
The field under validation must be "yes", "on", 1, or true if another field under validation is equal to a specified value. This is useful for validating «Terms of Service» acceptance or similar fields.
active_url
The field under validation must have a valid A or AAAA record according to the dns_get_record PHP function. The hostname of the provided URL is extracted using the parse_url PHP function before being passed to dns_get_record.
after:date
The field under validation must be a value after a given date. The dates will be passed into the strtotime PHP function in order to be converted to a valid DateTime instance:
'start_date' => 'required|date|after:tomorrow'
Instead of passing a date string to be evaluated by strtotime, you may specify another field to compare against the date:
'finish_date' => 'required|date|after:start_date'
after_or_equal:date
The field under validation must be a value after or equal to the given date. For more information, see the after rule.
alpha
The field under validation must be entirely Unicode alphabetic characters contained in p{L} and p{M}.
To restrict this validation rule to characters in the ASCII range (a-z and A-Z), you may provide the ascii option to the validation rule:
'username' => 'alpha:ascii',
alpha_dash
The field under validation must be entirely Unicode alpha-numeric characters contained in p{L}, p{M}, p{N}, as well as ASCII dashes (-) and ASCII underscores (_).
To restrict this validation rule to characters in the ASCII range (a-z and A-Z), you may provide the ascii option to the validation rule:
'username' => 'alpha_dash:ascii',
alpha_num
The field under validation must be entirely Unicode alpha-numeric characters contained in p{L}, p{M}, and p{N}.
To restrict this validation rule to characters in the ASCII range (a-z and A-Z), you may provide the ascii option to the validation rule:
'username' => 'alpha_num:ascii',
array
The field under validation must be a PHP array.
When additional values are provided to the array rule, each key in the input array must be present within the list of values provided to the rule. In the following example, the admin key in the input array is invalid since it is not contained in the list of values provided to the array rule:
use IlluminateSupportFacadesValidator;

$input = [
    'user' => [
        'name' => 'Taylor Otwell',
        'username' => 'taylorotwell',
        'admin' => true,
    ],
];

Validator::make($input, [
    'user' => 'array:name,username',
]);
In general, you should always specify the array keys that are allowed to be present within your array.
ascii
The field under validation must be entirely 7-bit ASCII characters.
bail
Stop running validation rules for the field after the first validation failure.
While the bail rule will only stop validating a specific field when it encounters a validation failure, the stopOnFirstFailure method will inform the validator that it should stop validating all attributes once a single validation failure has occurred:
if ($validator->stopOnFirstFailure()->fails()) {
    // ...
}
before:date
The field under validation must be a value preceding the given date. The dates will be passed into the PHP strtotime function in order to be converted into a valid DateTime instance. In addition, like the after rule, the name of another field under validation may be supplied as the value of date.
before_or_equal:date
The field under validation must be a value preceding or equal to the given date. The dates will be passed into the PHP strtotime function in order to be converted into a valid DateTime instance. In addition, like the after rule, the name of another field under validation may be supplied as the value of date.
between:min,max
The field under validation must have a size between the given min and max (inclusive). Strings, numerics, arrays, and files are evaluated in the same fashion as the size rule.
boolean
The field under validation must be able to be cast as a boolean. Accepted input are true, false, 1, 0, "1", and "0".
confirmed
The field under validation must have a matching field of {field}_confirmation. For example, if the field under validation is password, a matching password_confirmation field must be present in the input.
current_password
The field under validation must match the authenticated user’s password. You may specify an authentication guard using the rule’s first parameter:
'password' => 'current_password:api'
date
The field under validation must be a valid, non-relative date according to the strtotime PHP function.
date_equals:date
The field under validation must be equal to the given date. The dates will be passed into the PHP strtotime function in order to be converted into a valid DateTime instance.
date_format:format,…
The field under validation must match one of the given formats. You should use either date or date_format when validating a field, not both. This validation rule supports all formats supported by PHP’s DateTime class.
decimal:min,max
The field under validation must be numeric and must contain the specified number of decimal places:
// Must have exactly two decimal places (9.99)...
'price' => 'decimal:2'

// Must have between 2 and 4 decimal places...
'price' => 'decimal:2,4'
declined
The field under validation must be "no", "off", 0, or false.
declined_if:anotherfield,value,…
The field under validation must be "no", "off", 0, or false if another field under validation is equal to a specified value.
different:field
The field under validation must have a different value than field.
digits:value
The integer under validation must have an exact length of value.
digits_between:min,max
The integer validation must have a length between the given min and max.
dimensions
The file under validation must be an image meeting the dimension constraints as specified by the rule’s parameters:
'avatar' => 'dimensions:min_width=100,min_height=200'
Available constraints are: min_width, max_width, min_height, max_height, width, height, ratio.
A ratio constraint should be represented as width divided by height. This can be specified either by a fraction like 3/2 or a float like 1.5:
'avatar' => 'dimensions:ratio=3/2'
Since this rule requires several arguments, you may use the Rule::dimensions method to fluently construct the rule:
use IlluminateSupportFacadesValidator;
use IlluminateValidationRule;

Validator::make($data, [
    'avatar' => [
        'required',
        Rule::dimensions()->maxWidth(1000)->maxHeight(500)->ratio(3 / 2),
    ],
]);
distinct
When validating arrays, the field under validation must not have any duplicate values:
Distinct uses loose variable comparisons by default. To use strict comparisons, you may add the strict parameter to your validation rule definition:
'foo.*.id' => 'distinct:strict'
You may add ignore_case to the validation rule’s arguments to make the rule ignore capitalization differences:
'foo.*.id' => 'distinct:ignore_case'
doesnt_start_with:foo,bar,…
The field under validation must not start with one of the given values.
doesnt_end_with:foo,bar,…
The field under validation must not end with one of the given values.
The field under validation must be formatted as an email address. This validation rule utilizes the egulias/email-validator package for validating the email address. By default, the RFCValidation validator is applied, but you can apply other validation styles as well:
'email' => 'email:rfc,dns'
The example above will apply the RFCValidation and DNSCheckValidation validations. Here’s a full list of validation styles you can apply:
rfc:RFCValidationstrict:NoRFCWarningsValidationdns:DNSCheckValidationspoof:SpoofCheckValidationfilter:FilterEmailValidationfilter_unicode:FilterEmailValidation::unicode()
The filter validator, which uses PHP’s filter_var function, ships with Laravel and was Laravel’s default email validation behavior prior to Laravel version 5.8.
Warning
Thednsandspoofvalidators require the PHPintlextension.
ends_with:foo,bar,…
The field under validation must end with one of the given values.
enum
The Enum rule is a class based rule that validates whether the field under validation contains a valid enum value. The Enum rule accepts the name of the enum as its only constructor argument:
use AppEnumsServerStatus;
use IlluminateValidationRulesEnum;

$request->validate([
    'status' => [new Enum(ServerStatus::class)],
]);
Warning
Enums are only available on PHP 8.1+.
exclude
The field under validation will be excluded from the request data returned by the validate and validated methods.
exclude_if:anotherfield,value
The field under validation will be excluded from the request data returned by the validate and validated methods if the anotherfield field is equal to value.
If complex conditional exclusion logic is required, you may utilize the Rule::excludeIf method. This method accepts a boolean or a closure. When given a closure, the closure should return true or false to indicate if the field under validation should be excluded:
use IlluminateSupportFacadesValidator;
use IlluminateValidationRule;

Validator::make($request->all(), [
    'role_id' => Rule::excludeIf($request->user()->is_admin),
]);

Validator::make($request->all(), [
    'role_id' => Rule::excludeIf(fn () => $request->user()->is_admin),
]);
exclude_unless:anotherfield,value
The field under validation will be excluded from the request data returned by the validate and validated methods unless anotherfield‘s field is equal to value. If value is null (exclude_unless:name,null), the field under validation will be excluded unless the comparison field is null or the comparison field is missing from the request data.
exclude_with:anotherfield
The field under validation will be excluded from the request data returned by the validate and validated methods if the anotherfield field is present.
exclude_without:anotherfield
The field under validation will be excluded from the request data returned by the validate and validated methods if the anotherfield field is not present.
exists:table,column
The field under validation must exist in a given database table.
Basic Usage Of Exists Rule
'state' => 'exists:states'
If the column option is not specified, the field name will be used. So, in this case, the rule will validate that the states database table contains a record with a state column value matching the request’s state attribute value.
Specifying A Custom Column Name
You may explicitly specify the database column name that should be used by the validation rule by placing it after the database table name:
'state' => 'exists:states,abbreviation'
Occasionally, you may need to specify a specific database connection to be used for the exists query. You can accomplish this by prepending the connection name to the table name:
'email' => 'exists:connection.staff,email'
Instead of specifying the table name directly, you may specify the Eloquent model which should be used to determine the table name:
'user_id' => 'exists:AppModelsUser,id'
If you would like to customize the query executed by the validation rule, you may use the Rule class to fluently define the rule. In this example, we’ll also specify the validation rules as an array instead of using the | character to delimit them:
use IlluminateSupportFacadesValidator;
use IlluminateValidationRule;

Validator::make($data, [
    'email' => [
        'required',
        Rule::exists('staff')->where(function ($query) {
            return $query->where('account_id', 1);
        }),
    ],
]);
You may explicitly specify the database column name that should be used by the exists rule generated by the Rule::exists method by providing the column name as the second argument to the exists method:
'state' => Rule::exists('states', 'abbreviation'),
file
The field under validation must be a successfully uploaded file.
filled
The field under validation must not be empty when it is present.
gt:field
The field under validation must be greater than the given field. The two fields must be of the same type. Strings, numerics, arrays, and files are evaluated using the same conventions as the size rule.
gte:field
The field under validation must be greater than or equal to the given field. The two fields must be of the same type. Strings, numerics, arrays, and files are evaluated using the same conventions as the size rule.
image
The file under validation must be an image (jpg, jpeg, png, bmp, gif, svg, or webp).
in:foo,bar,…
The field under validation must be included in the given list of values. Since this rule often requires you to implode an array, the Rule::in method may be used to fluently construct the rule:
use IlluminateSupportFacadesValidator;
use IlluminateValidationRule;

Validator::make($data, [
    'zones' => [
        'required',
        Rule::in(['first-zone', 'second-zone']),
    ],
]);
When the in rule is combined with the array rule, each value in the input array must be present within the list of values provided to the in rule. In the following example, the LAS airport code in the input array is invalid since it is not contained in the list of airports provided to the in rule:
use IlluminateSupportFacadesValidator;
use IlluminateValidationRule;

$input = [
    'airports' => ['NYC', 'LAS'],
];

Validator::make($input, [
    'airports' => [
        'required',
        'array',
    ],
    'airports.*' => Rule::in(['NYC', 'LIT']),
]);
in_array:anotherfield.*
The field under validation must exist in anotherfield‘s values.
integer
The field under validation must be an integer.
Warning
This validation rule does not verify that the input is of the «integer» variable type, only that the input is of a type accepted by PHP’sFILTER_VALIDATE_INTrule. If you need to validate the input as being a number please use this rule in combination with thenumericvalidation rule.
ip
The field under validation must be an IP address.
ipv4
The field under validation must be an IPv4 address.
ipv6
The field under validation must be an IPv6 address.
json
The field under validation must be a valid JSON string.
lt:field
The field under validation must be less than the given field. The two fields must be of the same type. Strings, numerics, arrays, and files are evaluated using the same conventions as the size rule.
lte:field
The field under validation must be less than or equal to the given field. The two fields must be of the same type. Strings, numerics, arrays, and files are evaluated using the same conventions as the size rule.
lowercase
The field under validation must be lowercase.
mac_address
The field under validation must be a MAC address.
max:value
The field under validation must be less than or equal to a maximum value. Strings, numerics, arrays, and files are evaluated in the same fashion as the size rule.
max_digits:value
The integer under validation must have a maximum length of value.
mimetypes:text/plain,…
The file under validation must match one of the given MIME types:
'video' => 'mimetypes:video/avi,video/mpeg,video/quicktime'
To determine the MIME type of the uploaded file, the file’s contents will be read and the framework will attempt to guess the MIME type, which may be different from the client’s provided MIME type.
mimes:foo,bar,…
The file under validation must have a MIME type corresponding to one of the listed extensions.
Basic Usage Of MIME Rule
'photo' => 'mimes:jpg,bmp,png'
Even though you only need to specify the extensions, this rule actually validates the MIME type of the file by reading the file’s contents and guessing its MIME type. A full listing of MIME types and their corresponding extensions may be found at the following location:
https://svn.apache.org/repos/asf/httpd/httpd/trunk/docs/conf/mime.types
min:value
The field under validation must have a minimum value. Strings, numerics, arrays, and files are evaluated in the same fashion as the size rule.
min_digits:value
The integer under validation must have a minimum length of value.
multiple_of:value
The field under validation must be a multiple of value.
missing
The field under validation must not be present in the input data.
missing_if:anotherfield,value,…
The field under validation must not be present if the anotherfield field is equal to any value.
missing_unless:anotherfield,value
The field under validation must not be present unless the anotherfield field is equal to any value.
missing_with:foo,bar,…
The field under validation must not be present only if any of the other specified fields are present.
missing_with_all:foo,bar,…
The field under validation must not be present only if all of the other specified fields are present.
not_in:foo,bar,…
The field under validation must not be included in the given list of values. The Rule::notIn method may be used to fluently construct the rule:
use IlluminateValidationRule;

Validator::make($data, [
    'toppings' => [
        'required',
        Rule::notIn(['sprinkles', 'cherries']),
    ],
]);
not_regex:pattern
The field under validation must not match the given regular expression.
Internally, this rule uses the PHP preg_match function. The pattern specified should obey the same formatting required by preg_match and thus also include valid delimiters. For example: 'email' => 'not_regex:/^.+$/i'.
Warning
When using theregex/not_regexpatterns, it may be necessary to specify your validation rules using an array instead of using|delimiters, especially if the regular expression contains a|character.
nullable
The field under validation may be null.
numeric
The field under validation must be numeric.
password
The field under validation must match the authenticated user’s password.
Warning
This rule was renamed tocurrent_passwordwith the intention of removing it in Laravel 9. Please use the Current Password rule instead.
present
The field under validation must exist in the input data.
prohibited
The field under validation must be missing or empty. A field is «empty» if it meets one of the following criteria:
- The value is
null. - The value is an empty string.
- The value is an empty array or empty
Countableobject. - The value is an uploaded file with an empty path.
prohibited_if:anotherfield,value,…
The field under validation must be missing or empty if the anotherfield field is equal to any value. A field is «empty» if it meets one of the following criteria:
- The value is
null. - The value is an empty string.
- The value is an empty array or empty
Countableobject. - The value is an uploaded file with an empty path.
If complex conditional prohibition logic is required, you may utilize the Rule::prohibitedIf method. This method accepts a boolean or a closure. When given a closure, the closure should return true or false to indicate if the field under validation should be prohibited:
use IlluminateSupportFacadesValidator;
use IlluminateValidationRule;

Validator::make($request->all(), [
    'role_id' => Rule::prohibitedIf($request->user()->is_admin),
]);

Validator::make($request->all(), [
    'role_id' => Rule::prohibitedIf(fn () => $request->user()->is_admin),
]);
prohibited_unless:anotherfield,value,…
The field under validation must be missing or empty unless the anotherfield field is equal to any value. A field is «empty» if it meets one of the following criteria:
- The value is
null. - The value is an empty string.
- The value is an empty array or empty
Countableobject. - The value is an uploaded file with an empty path.
prohibits:anotherfield,…
If the field under validation is not missing or empty, all fields in anotherfield must be missing or empty. A field is «empty» if it meets one of the following criteria:
- The value is
null. - The value is an empty string.
- The value is an empty array or empty
Countableobject. - The value is an uploaded file with an empty path.
regex:pattern
The field under validation must match the given regular expression.
Internally, this rule uses the PHP preg_match function. The pattern specified should obey the same formatting required by preg_match and thus also include valid delimiters. For example: 'email' => 'regex:/^.+@.+$/i'.
Warning
When using theregex/not_regexpatterns, it may be necessary to specify rules in an array instead of using|delimiters, especially if the regular expression contains a|character.
required
The field under validation must be present in the input data and not empty. A field is «empty» if it meets one of the following criteria:
- The value is
null. - The value is an empty string.
- The value is an empty array or empty
Countableobject. - The value is an uploaded file with no path.
required_if:anotherfield,value,…
The field under validation must be present and not empty if the anotherfield field is equal to any value.
If you would like to construct a more complex condition for the required_if rule, you may use the Rule::requiredIf method. This method accepts a boolean or a closure. When passed a closure, the closure should return true or false to indicate if the field under validation is required:
use IlluminateSupportFacadesValidator;
use IlluminateValidationRule;

Validator::make($request->all(), [
    'role_id' => Rule::requiredIf($request->user()->is_admin),
]);

Validator::make($request->all(), [
    'role_id' => Rule::requiredIf(fn () => $request->user()->is_admin),
]);
required_unless:anotherfield,value,…
The field under validation must be present and not empty unless the anotherfield field is equal to any value. This also means anotherfield must be present in the request data unless value is null. If value is null (required_unless:name,null), the field under validation will be required unless the comparison field is null or the comparison field is missing from the request data.
required_with:foo,bar,…
The field under validation must be present and not empty only if any of the other specified fields are present and not empty.
required_with_all:foo,bar,…
The field under validation must be present and not empty only if all of the other specified fields are present and not empty.
required_without:foo,bar,…
The field under validation must be present and not empty only when any of the other specified fields are empty or not present.
required_without_all:foo,bar,…
The field under validation must be present and not empty only when all of the other specified fields are empty or not present.
required_array_keys:foo,bar,…
The field under validation must be an array and must contain at least the specified keys.
same:field
The given field must match the field under validation.
size:value
The field under validation must have a size matching the given value. For string data, value corresponds to the number of characters. For numeric data, value corresponds to a given integer value (the attribute must also have the numeric or integer rule). For an array, size corresponds to the count of the array. For files, size corresponds to the file size in kilobytes. Let’s look at some examples:
// Validate that a string is exactly 12 characters long...
'title' => 'size:12';

// Validate that a provided integer equals 10...
'seats' => 'integer|size:10';

// Validate that an array has exactly 5 elements...
'tags' => 'array|size:5';

// Validate that an uploaded file is exactly 512 kilobytes...
'image' => 'file|size:512';
starts_with:foo,bar,…
The field under validation must start with one of the given values.
string
The field under validation must be a string. If you would like to allow the field to also be null, you should assign the nullable rule to the field.
timezone
The field under validation must be a valid timezone identifier according to the timezone_identifiers_list PHP function.
unique:table,column
The field under validation must not exist within the given database table.
Specifying A Custom Table / Column Name:
Instead of specifying the table name directly, you may specify the Eloquent model which should be used to determine the table name:
'email' => 'unique:AppModelsUser,email_address'
The column option may be used to specify the field’s corresponding database column. If the column option is not specified, the name of the field under validation will be used.
'email' => 'unique:users,email_address'
Specifying A Custom Database Connection
Occasionally, you may need to set a custom connection for database queries made by the Validator. To accomplish this, you may prepend the connection name to the table name:
'email' => 'unique:connection.users,email_address'
Forcing A Unique Rule To Ignore A Given ID:
Sometimes, you may wish to ignore a given ID during unique validation. For example, consider an «update profile» screen that includes the user’s name, email address, and location. You will probably want to verify that the email address is unique. However, if the user only changes the name field and not the email field, you do not want a validation error to be thrown because the user is already the owner of the email address in question.
To instruct the validator to ignore the user’s ID, we’ll use the Rule class to fluently define the rule. In this example, we’ll also specify the validation rules as an array instead of using the | character to delimit the rules:
use IlluminateSupportFacadesValidator;
use IlluminateValidationRule;

Validator::make($data, [
    'email' => [
        'required',
        Rule::unique('users')->ignore($user->id),
    ],
]);
Warning
You should never pass any user controlled request input into theignoremethod. Instead, you should only pass a system generated unique ID such as an auto-incrementing ID or UUID from an Eloquent model instance. Otherwise, your application will be vulnerable to an SQL injection attack.
Instead of passing the model key’s value to the ignore method, you may also pass the entire model instance. Laravel will automatically extract the key from the model:
Rule::unique('users')->ignore($user)
If your table uses a primary key column name other than id, you may specify the name of the column when calling the ignore method:
Rule::unique('users')->ignore($user->id, 'user_id')
By default, the unique rule will check the uniqueness of the column matching the name of the attribute being validated. However, you may pass a different column name as the second argument to the unique method:
Rule::unique('users', 'email_address')->ignore($user->id),
Adding Additional Where Clauses:
You may specify additional query conditions by customizing the query using the where method. For example, let’s add a query condition that scopes the query to only search records that have an account_id column value of 1:
'email' => Rule::unique('users')->where(fn ($query) => $query->where('account_id', 1))
uppercase
The field under validation must be uppercase.
url
The field under validation must be a valid URL.
ulid
The field under validation must be a valid Universally Unique Lexicographically Sortable Identifier (ULID).
uuid
The field under validation must be a valid RFC 4122 (version 1, 3, 4, or 5) universally unique identifier (UUID).
Conditionally Adding Rules
Skipping Validation When Fields Have Certain Values
You may occasionally wish to not validate a given field if another field has a given value. You may accomplish this using the exclude_if validation rule. In this example, the appointment_date and doctor_name fields will not be validated if the has_appointment field has a value of false:
use IlluminateSupportFacadesValidator;

$validator = Validator::make($data, [
    'has_appointment' => 'required|boolean',
    'appointment_date' => 'exclude_if:has_appointment,false|required|date',
    'doctor_name' => 'exclude_if:has_appointment,false|required|string',
]);
Alternatively, you may use the exclude_unless rule to not validate a given field unless another field has a given value:
$validator = Validator::make($data, [
    'has_appointment' => 'required|boolean',
    'appointment_date' => 'exclude_unless:has_appointment,true|required|date',
    'doctor_name' => 'exclude_unless:has_appointment,true|required|string',
]);
Validating When Present
In some situations, you may wish to run validation checks against a field only if that field is present in the data being validated. To quickly accomplish this, add the sometimes rule to your rule list:
$v = Validator::make($data, [
    'email' => 'sometimes|required|email',
]);
In the example above, the email field will only be validated if it is present in the $data array.
Note
If you are attempting to validate a field that should always be present but may be empty, check out this note on optional fields.
Complex Conditional Validation
Sometimes you may wish to add validation rules based on more complex conditional logic. For example, you may wish to require a given field only if another field has a greater value than 100. Or, you may need two fields to have a given value only when another field is present. Adding these validation rules doesn’t have to be a pain. First, create a Validator instance with your static rules that never change:
use IlluminateSupportFacadesValidator;

$validator = Validator::make($request->all(), [
    'email' => 'required|email',
    'games' => 'required|numeric',
]);
Let’s assume our web application is for game collectors. If a game collector registers with our application and they own more than 100 games, we want them to explain why they own so many games. For example, perhaps they run a game resale shop, or maybe they just enjoy collecting games. To conditionally add this requirement, we can use the sometimes method on the Validator instance.
$validator->sometimes('reason', 'required|max:500', function ($input) {
    return $input->games >= 100;
});
The first argument passed to the sometimes method is the name of the field we are conditionally validating. The second argument is a list of the rules we want to add. If the closure passed as the third argument returns true, the rules will be added. This method makes it a breeze to build complex conditional validations. You may even add conditional validations for several fields at once:
$validator->sometimes(['reason', 'cost'], 'required', function ($input) {
    return $input->games >= 100;
});
Note
The$inputparameter passed to your closure will be an instance ofIlluminateSupportFluentand may be used to access your input and files under validation.
Complex Conditional Array Validation
Sometimes you may want to validate a field based on another field in the same nested array whose index you do not know. In these situations, you may allow your closure to receive a second argument which will be the current individual item in the array being validated:
$input = [
    'channels' => [
        [
            'type' => 'email',
            'address' => 'abigail@example.com',
        ],
        [
            'type' => 'url',
            'address' => 'https://example.com',
        ],
    ],
];

$validator->sometimes('channels.*.address', 'email', function ($input, $item) {
    return $item->type === 'email';
});

$validator->sometimes('channels.*.address', 'url', function ($input, $item) {
    return $item->type !== 'email';
});
Like the $input parameter passed to the closure, the $item parameter is an instance of IlluminateSupportFluent when the attribute data is an array; otherwise, it is a string.
Validating Arrays
As discussed in the array validation rule documentation, the array rule accepts a list of allowed array keys. If any additional keys are present within the array, validation will fail:
use IlluminateSupportFacadesValidator;

$input = [
    'user' => [
        'name' => 'Taylor Otwell',
        'username' => 'taylorotwell',
        'admin' => true,
    ],
];

Validator::make($input, [
    'user' => 'array:username,locale',
]);
In general, you should always specify the array keys that are allowed to be present within your array. Otherwise, the validator’s validate and validated methods will return all of the validated data, including the array and all of its keys, even if those keys were not validated by other nested array validation rules.
Validating Nested Array Input
Validating nested array based form input fields doesn’t have to be a pain. You may use «dot notation» to validate attributes within an array. For example, if the incoming HTTP request contains a photos[profile] field, you may validate it like so:
use IlluminateSupportFacadesValidator;

$validator = Validator::make($request->all(), [
    'photos.profile' => 'required|image',
]);
You may also validate each element of an array. For example, to validate that each email in a given array input field is unique, you may do the following:
$validator = Validator::make($request->all(), [
    'person.*.email' => 'email|unique:users',
    'person.*.first_name' => 'required_with:person.*.last_name',
]);
Likewise, you may use the * character when specifying custom validation messages in your language files, making it a breeze to use a single validation message for array based fields:
'custom' => [
    'person.*.email' => [
        'unique' => 'Each person must have a unique email address',
    ]
],
Accessing Nested Array Data
Sometimes you may need to access the value for a given nested array element when assigning validation rules to the attribute. You may accomplish this using the Rule::forEach method. The forEach method accepts a closure that will be invoked for each iteration of the array attribute under validation and will receive the attribute’s value and explicit, fully-expanded attribute name. The closure should return an array of rules to assign to the array element:
use AppRulesHasPermission;
use IlluminateSupportFacadesValidator;
use IlluminateValidationRule;

$validator = Validator::make($request->all(), [
    'companies.*.id' => Rule::forEach(function ($value, $attribute) {
        return [
            Rule::exists(Company::class, 'id'),
            new HasPermission('manage-company', $value),
        ];
    }),
]);
Error Message Indexes & Positions
When validating arrays, you may want to reference the index or position of a particular item that failed validation within the error message displayed by your application. To accomplish this, you may include the :index (starts from 0) and :position (starts from 1) placeholders within your custom validation message:
use IlluminateSupportFacadesValidator;

$input = [
    'photos' => [
        [
            'name' => 'BeachVacation.jpg',
            'description' => 'A photo of my beach vacation!',
        ],
        [
            'name' => 'GrandCanyon.jpg',
            'description' => '',
        ],
    ],
];

Validator::validate($input, [
    'photos.*.description' => 'required',
], [
    'photos.*.description.required' => 'Please describe photo #:position.',
]);
Given the example above, validation will fail and the user will be presented with the following error of «Please describe photo #2.»
Validating Files
Laravel provides a variety of validation rules that may be used to validate uploaded files, such as mimes, image, min, and max. While you are free to specify these rules individually when validating files, Laravel also offers a fluent file validation rule builder that you may find convenient:
use IlluminateSupportFacadesValidator;
use IlluminateValidationRulesFile;

Validator::validate($input, [
    'attachment' => [
        'required',
        File::types(['mp3', 'wav'])
            ->min(1024)
            ->max(12 * 1024),
    ],
]);
If your application accepts images uploaded by your users, you may use the File rule’s image constructor method to indicate that the uploaded file should be an image. In addition, the dimensions rule may be used to limit the dimensions of the image:
use IlluminateSupportFacadesValidator;
use IlluminateValidationRulesFile;

Validator::validate($input, [
    'photo' => [
        'required',
        File::image()
            ->min(1024)
            ->max(12 * 1024)
            ->dimensions(Rule::dimensions()->maxWidth(1000)->maxHeight(500)),
    ],
]);
Note
More information regarding validating image dimensions may be found in the dimension rule documentation.
File Types
Even though you only need to specify the extensions when invoking the types method, this method actually validates the MIME type of the file by reading the file’s contents and guessing its MIME type. A full listing of MIME types and their corresponding extensions may be found at the following location:
https://svn.apache.org/repos/asf/httpd/httpd/trunk/docs/conf/mime.types
Validating Passwords
To ensure that passwords have an adequate level of complexity, you may use Laravel’s Password rule object:
use IlluminateSupportFacadesValidator;
use IlluminateValidationRulesPassword;

$validator = Validator::make($request->all(), [
    'password' => ['required', 'confirmed', Password::min(8)],
]);
The Password rule object allows you to easily customize the password complexity requirements for your application, such as specifying that passwords require at least one letter, number, symbol, or characters with mixed casing:
// Require at least 8 characters...
Password::min(8)

// Require at least one letter...
Password::min(8)->letters()

// Require at least one uppercase and one lowercase letter...
Password::min(8)->mixedCase()

// Require at least one number...
Password::min(8)->numbers()

// Require at least one symbol...
Password::min(8)->symbols()
In addition, you may ensure that a password has not been compromised in a public password data breach leak using the uncompromised method:
Password::min(8)->uncompromised()
Internally, the Password rule object uses the k-Anonymity model to determine if a password has been leaked via the haveibeenpwned.com service without sacrificing the user’s privacy or security.
By default, if a password appears at least once in a data leak, it will be considered compromised. You can customize this threshold using the first argument of the uncompromised method:
// Ensure the password appears less than 3 times in the same data leak...
Password::min(8)->uncompromised(3);
Of course, you may chain all the methods in the examples above:
Password::min(8)
    ->letters()
    ->mixedCase()
    ->numbers()
    ->symbols()
    ->uncompromised()
Defining Default Password Rules
You may find it convenient to specify the default validation rules for passwords in a single location of your application. You can easily accomplish this using the Password::defaults method, which accepts a closure. The closure given to the defaults method should return the default configuration of the Password rule. Typically, the defaults rule should be called within the boot method of one of your application’s service providers:
use IlluminateValidationRulesPassword;

/**
 * Bootstrap any application services.
 *
 * @return void
 */
public function boot()
{
    Password::defaults(function () {
        $rule = Password::min(8);

        return $this->app->isProduction()
                    ? $rule->mixedCase()->uncompromised()
                    : $rule;
    });
}
Then, when you would like to apply the default rules to a particular password undergoing validation, you may invoke the defaults method with no arguments:
'password' => ['required', Password::defaults()],
Occasionally, you may want to attach additional validation rules to your default password validation rules. You may use the rules method to accomplish this:
use AppRulesZxcvbnRule;

Password::defaults(function () {
    $rule = Password::min(8)->rules([new ZxcvbnRule]);

    // ...
});
Custom Validation Rules
Using Rule Objects
Laravel provides a variety of helpful validation rules; however, you may wish to specify some of your own. One method of registering custom validation rules is using rule objects. To generate a new rule object, you may use the make:rule Artisan command. Let’s use this command to generate a rule that verifies a string is uppercase. Laravel will place the new rule in the app/Rules directory. If this directory does not exist, Laravel will create it when you execute the Artisan command to create your rule:
php artisan make:rule Uppercase --invokable
Once the rule has been created, we are ready to define its behavior. A rule object contains a single method: __invoke. This method receives the attribute name, its value, and a callback that should be invoked on failure with the validation error message:
<?php

namespace AppRules;

use IlluminateContractsValidationInvokableRule;

class Uppercase implements InvokableRule
{
    /**
     * Run the validation rule.
     *
     * @param  string  $attribute
     * @param  mixed  $value
     * @param  Closure  $fail
     * @return void
     */
    public function __invoke($attribute, $value, $fail)
    {
        if (strtoupper($value) !== $value) {
            $fail('The :attribute must be uppercase.');
        }
    }
}
Once the rule has been defined, you may attach it to a validator by passing an instance of the rule object with your other validation rules:
use AppRulesUppercase;

$request->validate([
    'name' => ['required', 'string', new Uppercase],
]);
Translating Validation Messages
Instead of providing a literal error message to the $fail closure, you may also provide a translation string key and instruct Laravel to translate the error message:
if (strtoupper($value) !== $value) {
    $fail('validation.uppercase')->translate();
}
If necessary, you may provide placeholder replacements and the preferred language as the first and second arguments to the translate method:
$fail('validation.location')->translate([
    'value' => $this->value,
], 'fr')
Accessing Additional Data
If your custom validation rule class needs to access all of the other data undergoing validation, your rule class may implement the IlluminateContractsValidationDataAwareRule interface. This interface requires your class to define a setData method. This method will automatically be invoked by Laravel (before validation proceeds) with all of the data under validation:
<?php

namespace AppRules;

use IlluminateContractsValidationDataAwareRule;
use IlluminateContractsValidationInvokableRule;

class Uppercase implements DataAwareRule, InvokableRule
{
    /**
     * All of the data under validation.
     *
     * @var array
     */
    protected $data = [];

    // ...

    /**
     * Set the data under validation.
     *
     * @param  array  $data
     * @return $this
     */
    public function setData($data)
    {
        $this->data = $data;

        return $this;
    }
}
Or, if your validation rule requires access to the validator instance performing the validation, you may implement the ValidatorAwareRule interface:
<?php

namespace AppRules;

use IlluminateContractsValidationInvokableRule;
use IlluminateContractsValidationValidatorAwareRule;

class Uppercase implements InvokableRule, ValidatorAwareRule
{
    /**
     * The validator instance.
     *
     * @var IlluminateValidationValidator
     */
    protected $validator;

    // ...

    /**
     * Set the current validator.
     *
     * @param  IlluminateValidationValidator  $validator
     * @return $this
     */
    public function setValidator($validator)
    {
        $this->validator = $validator;

        return $this;
    }
}
Using Closures
If you only need the functionality of a custom rule once throughout your application, you may use a closure instead of a rule object. The closure receives the attribute’s name, the attribute’s value, and a $fail callback that should be called if validation fails:
use IlluminateSupportFacadesValidator;

$validator = Validator::make($request->all(), [
    'title' => [
        'required',
        'max:255',
        function ($attribute, $value, $fail) {
            if ($value === 'foo') {
                $fail('The '.$attribute.' is invalid.');
            }
        },
    ],
]);
Implicit Rules
By default, when an attribute being validated is not present or contains an empty string, normal validation rules, including custom rules, are not run. For example, the unique rule will not be run against an empty string:
use IlluminateSupportFacadesValidator;

$rules = ['name' => 'unique:users,name'];

$input = ['name' => ''];

Validator::make($input, $rules)->passes(); // true
For a custom rule to run even when an attribute is empty, the rule must imply that the attribute is required. To quickly generate a new implicit rule object, you may use the make:rule Artisan command with the --implicit option:
php artisan make:rule Uppercase --invokable --implicit
Warning
An «implicit» rule only implies that the attribute is required. Whether it actually invalidates a missing or empty attribute is up to you.
This is usually a cascading error caused by a an undefined entity
reference or use of an unencoded ampersand (&) in an URL or body
text. See the previous message for further details.
✉
Check that you are using a proper syntax for your comments, e.g: <!— comment here —>.
This error may appear if you forget the last «—» to close one comment, therefore including the rest
of the content in your comment.
✉
Did you forget to close a (double) quote mark?
✉
This error may appear if you are using a bad syntax for your comments, such as «<!invalid comment>»
The proper syntax for comments is <!— your comment here —>.
✉
This error may appear when the validator receives an empty document. Please make sure that the document you are uploading is not empty, and report any discrepancy.
✉
You have used character data somewhere it is not permitted to appear.
Mistakes that can cause this error include:
- putting text directly in the body of the document without wrapping
it in a container element (such as a <p>aragraph</p>), or - forgetting to quote an attribute value
(where characters such as «%» and «/» are common, but cannot appear
without surrounding quotes), or - using XHTML-style self-closing tags (such as <meta … />)
in HTML 4.01 or earlier. To fix, remove the extra slash (‘/’)
character. For more information about the reasons for this, see
Empty
elements in SGML, HTML, XML, and XHTML.
✉
The element named above was found in a context where it is not allowed.
This could mean that you have incorrectly nested elements — such as a
«style» element in the «body» section instead of inside «head» — or
two elements that overlap (which is not allowed).
One common cause for this error is the use of XHTML syntax in HTML
documents. Due to HTML’s rules of implicitly closed elements, this error
can create cascading effects. For instance, using XHTML’s «self-closing»
tags for «meta» and «link» in the «head» section of a HTML document may
cause the parser to infer the end of the «head» section and the
beginning of the «body» section (where «link» and «meta» are not
allowed; hence the reported error).
✉
The mentioned element is not allowed to appear in the context in which
you’ve placed it; the other mentioned elements are the only ones that
are both allowed there and can contain the element mentioned.
This might mean that you need a containing element, or possibly that
you’ve forgotten to close a previous element.
One possible cause for this message is that you have attempted to put a
block-level element (such as «<p>» or «<table>») inside an
inline element (such as «<a>», «<span>», or «<font>»).
✉
- You forgot to close a tag, or
- you used something inside this tag that was not allowed, and the validator
is complaining that the tag should be closed before such content can be allowed.
The next message, «start tag was here»
points to the particular instance of the tag in question); the
positional indicator points to where the validator expected you to close the
tag.
✉
This is not an error, but rather a pointer to the start tag of the element
the previous error referred to.
✉
You may have neglected to close an element, or perhaps you meant to
«self-close» an element, that is, ending it with «/>» instead of «>».
✉
This is not an error, but rather a pointer to the start tag of the element
the previous error referred to.
✉
Most likely, you nested tags and closed them in the wrong order. For
example <p><em>…</p> is not acceptable, as <em>
must be closed before <p>. Acceptable nesting is:
<p><em>…</em></p>
Another possibility is that you used an element which requires
a child element that you did not include. Hence the parent element
is «not finished», not complete. For instance, in HTML the <head>
element must contain a <title> child element, lists require
appropriate list items (<ul> and <ol> require <li>;
<dl> requires <dt> and <dd>), and so on.
✉
You have used the element named above in your document, but the
document type you are using does not define an element of that name.
This error is often caused by:
- incorrect use of the «Strict» document type with a document that
uses frames (e.g. you must use the «Frameset» document type to get
the «<frameset>» element), - by using vendor proprietary extensions such as «<spacer>»
or «<marquee>» (this is usually fixed by using CSS to achieve
the desired effect instead). - by using upper-case tags in XHTML (in XHTML attributes and elements
must be all lower-case).
✉
The Validator found an end tag for the above element, but that element is
not currently open. This is often caused by a leftover end tag from an
element that was removed during editing, or by an implicitly closed
element (if you have an error related to an element being used where it
is not allowed, this is almost certainly the case). In the latter case
this error will disappear as soon as you fix the original problem.
If this error occurred in a script section of your document, you should probably
read this FAQ entry.
✉
You have used a character that is not considered a «name character» in an
attribute value. Which characters are considered «name characters» varies
between the different document types, but a good rule of thumb is that
unless the value contains only lower or upper case letters in the
range a-z you must put quotation marks around the value. In fact, unless
you have extreme file size requirements it is a very very good
idea to always put quote marks around your attribute values. It
is never wrong to do so, and very often it is absolutely necessary.
✉
An attribute name (and some attribute values) must start with one of
a restricted set of characters. This error usually indicates that
you have failed to add a closing quotation mark on a previous
attribute value (so the attribute value looks like the start of a
new attribute) or have used an attribute that is not defined
(usually a typo in a common attribute name).
✉
«VI delimiter» is a technical term for the equal sign. This error message
means that the name of an attribute and the equal sign cannot be omitted
when specifying an attribute. A common cause for this error message is
the use of «Attribute Minimization» in document types where it is not allowed,
in XHTML for instance.
How to fix: For attributes such as compact, checked or selected, do not write
e.g <option selected … but rather <option selected=»selected» …
✉
You have used the attribute named above in your document, but the
document type you are using does not support that attribute for this
element. This error is often caused by incorrect use of the «Strict»
document type with a document that uses frames (e.g. you must use
the «Transitional» document type to get the «target» attribute), or
by using vendor proprietary extensions such as «marginheight» (this
is usually fixed by using CSS to achieve the desired effect instead).
This error may also result if the element itself is not supported in
the document type you are using, as an undefined element will have no
supported attributes; in this case, see the element-undefined error
message for further information.
How to fix: check the spelling and case of the element and attribute,
(Remember XHTML is all lower-case) and/or
check that they are both allowed in the chosen document type, and/or
use CSS instead of this attribute. If you received this error when using the
<embed> element to incorporate flash media in a Web page, see the
FAQ item on valid flash.
✉
Have you forgotten the «equal» sign marking the separation
between the attribute and its declared value?
Typical syntax is attribute="value".
✉
You have specified an attribute more than once. Example: Using
the «height» attribute twice on the same
«img» tag.
✉
This error almost always means that you’ve forgotten a closing quote on an attribute value. For instance,
in:
            <img src="fred.gif>

            <!-- 50 lines of stuff -->

            <img src="joe.gif">
The «src» value for the first
<img> is the entire
fifty lines of stuff up to the next double quote, which probably
exceeds the SGML-defined
length limit for HTML
string literals. Note that the position indicator in the error
message points to where the attribute value ended — in
this case, the "joe.gif" line.
✉
The value of an attribute contained something that is not allowed by
the specified syntax for that type of attribute. For instance, the
“selected” attribute must be
either minimized as “selected”
or spelled out in full as “selected="selected"”; the variant
“selected=""” is not allowed.
✉
It is possible that you violated the naming convention for this attribute.
For example, id and name attributes must begin with
a letter, not a digit.
✉
This attribute cannot take a space-separated list of words as a value, but only one word («token»).
This may also be caused by the use of a space for the value of an attribute which does not permit it.
✉
The value of this attribute should be a number, and you probably used a wrong syntax.
✉
It is possible that you violated the naming convention for this attribute.
For example, id and name attributes must begin with
a letter, not a digit.
✉
The attribute given above is required for an element that you’ve used,
but you have omitted it. For instance, in most HTML and XHTML document
types the «type» attribute is required on the «script» element and the
«alt» attribute is required for the «img» element.
Typical values for type are
type="text/css" for <style>
and type="text/javascript" for <script>.
✉
The value of the attribute is defined to be one of a list of possible
values but in the document it contained something that is not allowed
for that type of attribute. For instance, the “selected” attribute must be either
minimized as “selected”
or spelled out in full as “selected="selected"”; a value like
“selected="true"” is not
allowed.
✉
Check that you are using a proper syntax for your comments, e.g: <!— comment here —>.
This error may appear if you forget the last «—» to close one comment, and later open another.
✉
You have used an illegal character in your text.
HTML uses the standard
UNICODE Consortium character repertoire,
and it leaves undefined (among others) 65 character codes (0 to 31 inclusive and 127 to 159
inclusive) that are sometimes used for typographical quote marks and similar in
proprietary character sets. The validator has found one of these undefined
characters in your document. The character may appear on your browser as a
curly quote, or a trademark symbol, or some other fancy glyph; on a different
computer, however, it will likely appear as a completely different
character, or nothing at all.
Your best bet is to replace the character with the nearest equivalent
ASCII character, or to use an appropriate character
entity.
For more information on Character Encoding on the web, see Alan
Flavell’s excellent HTML Character
Set Issues reference.
This error can also be triggered by formatting characters embedded in
documents by some word processors. If you use a word processor to edit
your HTML documents, be sure to use the «Save as ASCII» or similar
command to save the document without formatting information.
✉
An «id» is a unique identifier. Each time this attribute is used in a document
it must have a different value. If you are using this attribute as a hook for
style sheets it may be more appropriate to use classes (which group elements)
than id (which are used to identify exactly one element).
✉
This error can be triggered by:
- A non-existent input, select or textarea element
- A missing id attribute
- A typographical error in the id attribute
Try to check the spelling and case of the id you are referring to.
✉
The document type could not be determined, because the document had no correct DOCTYPE declaration. The document does not look like HTML, therefore automatic fallback could not be performed, and the document was only checked against basic markup syntax.
Learn how to add a doctype to your document
from our FAQ, or use the validator’s
Document Type option to validate your document against a specific Document Type.
✉
The construct <foo<bar> is valid in HTML (it is an example of the rather obscure “Shorttags” feature)
but its use is not recommended.
In most cases, this is a typo that you will want to fix. If you really want to use shorttags,
be aware that they are not well implemented by browsers.
✉
For the current document, the validator interprets strings like
<FOO /> according to legacy rules that
break the expectations of most authors and thus cause confusing warnings
and error messages from the validator. This interpretation is triggered
by HTML 4 documents or other SGML-based HTML documents. To avoid the
messages, simply remove the «/» character in such contexts. NB: If you
expect <FOO /> to be interpreted as an
XML-compatible «self-closing» tag, then you need to use XHTML or HTML5.
This warning and related errors may also be caused by an unquoted
attribute value containing one or more «/». Example:
<a href=http://w3c.org>W3C</a>.
In such cases, the solution is to put quotation marks around the value.
✉
The construct </foo<bar> is valid in HTML (it is an example of the rather obscure “Shorttags” feature)
but its use is not recommended.
In most cases, this is a typo that you will want to fix. If you really want to use shorttags,
be aware that they are not well implemented by browsers.
✉
A DOCTYPE declares the version of the language used, as well as what the root
(top) element of your document will be. For example, if the top element
of your document is <html>, the DOCTYPE declaration
will look like: «<!DOCTYPE html».
In most cases, it is safer not to type or edit the DOCTYPE declaration at all,
and preferable to let a tool include it, or copy and paste it from a
trusted list of DTDs.
✉
This is usually a cascading error caused by a an undefined entity
reference or use of an unencoded ampersand (&) in an URL or body
text. See the previous message for further details.
✉
The construct <> is sometimes valid in HTML (it is an example of the rather obscure “Shorttags” feature)
but its use is not recommended.
In most cases, this is a typo that you will want to fix. If you really want to use shorttags,
be aware that they are not well implemented by browsers.
✉
The construct </> is valid in HTML (it is an example of the rather obscure “Shorttags” feature)
but its use is not recommended.
In most cases, this is a typo that you will want to fix. If you really want to use shorttags,
be aware that they are not well implemented by browsers.
✉
An entity reference was found in the document, but there is no reference
by that name defined. Often this is caused by misspelling the reference
name, unencoded ampersands, or by leaving off the trailing semicolon (;).
The most common cause of this error is unencoded ampersands in
URLs as described by the WDG in «Ampersands
in URLs».
Entity references start with an ampersand (&) and end with a
semicolon (;). If you want to use a literal ampersand in your document
you must encode it as «&» (even inside URLs!). Be
careful to end entity references with a semicolon or your entity
reference may get interpreted in connection with the following text.
Also keep in mind that named entity references are case-sensitive;
&Aelig; and æ are different characters.
If this error appears in some markup generated by PHP’s session handling
code, this article has
explanations and solutions to your problem.
Note that in most documents, errors related to entity references will
trigger up to 5 separate messages from the Validator. Usually these
will all disappear when the original problem is fixed.
✉
The checked page did not contain a document type («DOCTYPE») declaration.
The Validator has tried to validate with a fallback DTD,
but this is quite likely to be incorrect and will generate a large number
of incorrect error messages. It is highly recommended that you insert the
proper DOCTYPE declaration in your document — instructions for doing this
are given above — and it is necessary to have this declaration before the
page can be declared to be valid.
✉
Your document includes a DOCTYPE declaration with a public identifier
(e.g. «-//W3C//DTD XHTML 1.0 Strict//EN») but no system identifier
(e.g. «http://www.w3.org/TR/xhtml1/DTD/xhtml1-strict.dtd»). This is
authorized in HTML (based on SGML), but not in XML-based languages.
If you are using a standard XHTML document type, it is recommended to use exactly
one of the DOCTYPE declarations from the
recommended list on the W3C QA Website.
✉
This may happen if you have consecutive comments but did not close one of them properly.
The proper syntax for comments is <!— my comment —>.
✉
If you meant to include an entity that starts with «&», then you should
terminate it with «;». Another reason for this error message is that
you inadvertently created an entity by failing to escape an «&»
character just before this text.
✉
This is generally the sign of an ampersand that was not properly escaped for inclusion
in an attribute, in a href for example. You will need to escape all instances of ‘&’
into ‘&’.
✉
This message may appear in several cases:
- You tried to include the «<» character in your page: you should escape it as «<»
- You used an unescaped ampersand «&»: this may be valid in some contexts,
but it is recommended to use «&», which is always safe. - Another possibility is that you forgot to close quotes in a previous tag.
✉
This error may occur when there is a mistake in how a self-closing tag is closed, e.g ‘…/ >’.
The proper syntax is ‘… />’ (note the position of the space).
✉
You’ve included a character reference to a character that is not defined
in the document type you’ve chosen. This is most commonly caused by
numerical references to characters from vendor proprietary
character repertoires. Often the culprit will be fancy or typographical
quote marks from either the Windows or Macintosh character repertoires.
The solution is to reference UNICODE characters instead. A list of
common characters from the Windows character repertoire and their
UNICODE equivalents can be found in the document «On the use of some MS Windows characters in HTML» maintained by
Jukka Korpela
<jkorpela@cs.tut.fi>.
✉
The following validation errors do not have an explanation yet. We invite you to use the
feedback channels to send your suggestions.
0: length of name must not exceed NAMELEN (X)
✉
1: length of parameter entity name must not exceed NAMELEN less the length of the PERO delimiter (X)
✉
2: length of number must not exceed NAMELEN (X)
✉
3: length of attribute value must not exceed LITLEN less NORMSEP (X)
✉
4: a name group is not allowed in a parameter entity reference in the prolog
✉
5: an entity end in a token separator must terminate an entity referenced in the same group
✉
6: character X invalid: only Y and token separators allowed
✉
7: a parameter separator is required after a number that is followed by a name start character
✉
8: character X invalid: only Y and parameter separators allowed
✉
9: an entity end in a parameter separator must terminate an entity referenced in the same declaration
✉
10: an entity end is not allowed in a token separator that does not follow a token
✉
11: X is not a valid token here
✉
12: a parameter entity reference can only occur in a group where a token could occur
✉
13: token X has already occurred in this group
✉
14: the number of tokens in a group must not exceed GRPCNT (X)
✉
15: an entity end in a literal must terminate an entity referenced in the same literal
✉
16: character X invalid: only minimum data characters allowed
✉
18: a parameter literal in a data tag pattern must not contain a numeric character reference to a non-SGML character
✉
19: a parameter literal in a data tag pattern must not contain a numeric character reference to a function character
✉
20: a name group is not allowed in a general entity reference in a start tag
✉
21: a name group is not allowed in a general entity reference in the prolog
✉
22: X is not a function name
✉
23: X is not a character number in the document character set
✉
24: parameter entity X not defined
✉
26: RNI delimiter must be followed by name start character
✉
29: comment started here
✉
30: only one type of connector should be used in a single group
✉
31: X is not a reserved name
✉
32: X is not allowed as a reserved name here
✉
33: length of interpreted minimum literal must not exceed reference LITLEN (X)
✉
34: length of tokenized attribute value must not exceed LITLEN less NORMSEP (X)
✉
35: length of system identifier must not exceed LITLEN (X)
✉
36: length of interpreted parameter literal must not exceed LITLEN (X)
✉
37: length of interpreted parameter literal in data tag pattern must not exceed DTEMPLEN (X)
✉
39: X invalid: only Y and parameter separators are allowed
✉
40: X invalid: only Y and token separators are allowed
✉
41: X invalid: only Y and token separators are allowed
✉
43: X declaration not allowed in DTD subset
✉
44: character X not allowed in declaration subset
✉
45: end of document in DTD subset
✉
46: character X not allowed in prolog
✉
48: X declaration not allowed in prolog
✉
49: X used both a rank stem and generic identifier
✉
50: omitted tag minimization parameter can be omitted only if OMITTAG NO is specified
✉
51: element type X already defined
✉
52: entity reference with no applicable DTD
✉
53: invalid comment declaration: found X outside comment but inside comment declaration
✉
54: comment declaration started here
✉
55: X declaration not allowed in instance
✉
56: non-SGML character not allowed in content
✉
57: no current rank for rank stem X
✉
58: duplicate attribute definition list for notation X
✉
59: duplicate attribute definition list for element X
✉
60: entity end not allowed in end tag
✉
61: character X not allowed in end tag
✉
62: X invalid: only S separators and TAGC allowed here
✉
66: document type does not allow element X here; assuming missing Y start-tag
✉
67: no start tag specified for implied empty element X
✉
72: start tag omitted for element X with declared content
✉
74: start tag for X omitted, but its declaration does not permit this
✉
75: number of open elements exceeds TAGLVL (X)
✉
77: empty end tag but no open elements
✉
78: X not finished but containing element ended
✉
80: internal parameter entity X cannot be CDATA or SDATA
✉
81: character X not allowed in attribute specification list
✉
83: entity end not allowed in attribute specification list except in attribute value literal
✉
84: external parameter entity X cannot be CDATA, SDATA, NDATA or SUBDOC
✉
85: duplicate declaration of entity X
✉
86: duplicate declaration of parameter entity X
✉
87: a reference to a PI entity is allowed only in a context where a processing instruction could occur
✉
88: a reference to a CDATA or SDATA entity is allowed only in a context where a data character could occur
✉
89: a reference to a subdocument entity or external data entity is allowed only in a context where a data character could occur
✉
90: a reference to a subdocument entity or external data entity is not allowed in replaceable character data
✉
91: the number of open entities cannot exceed ENTLVL (X)
✉
92: a reference to a PI entity is not allowed in replaceable character data
✉
93: entity X is already open
✉
94: short reference map X not defined
✉
95: short reference map in DTD must specify associated element type
✉
96: short reference map in document instance cannot specify associated element type
✉
97: short reference map X for element Y not defined in DTD
✉
98: X is not a short reference delimiter
✉
99: short reference delimiter X already mapped in this declaration
✉
100: no document element
✉
102: entity end not allowed in processing instruction
✉
103: length of processing instruction must not exceed PILEN (X)
✉
104: missing PIC delimiter
✉
106: X is not a member of a group specified for any attribute
✉
109: an attribute value specification must start with a literal or a name character
✉
110: length of name token must not exceed NAMELEN (X)
✉
113: duplicate definition of attribute X
✉
114: data attribute specification must be omitted if attribute specification list is empty
✉
115: marked section end not in marked section declaration
✉
116: number of open marked sections must not exceed TAGLVL (X)
✉
117: missing marked section end
✉
118: marked section started here
✉
119: entity end in character data, replaceable character data or ignored marked section
✉
126: non-impliable attribute X not specified but OMITTAG NO and SHORTTAG NO
✉
128: first occurrence of CURRENT attribute X not specified
✉
129: X is not a notation name
✉
130: X is not a general entity name
✉
132: X is not a data or subdocument entity
✉
133: content model is ambiguous: when no tokens have been matched, both the Y and Z occurrences of X are possible
✉
134: content model is ambiguous: when the current token is the Y occurrence of X, both the a and b occurrences of Z are possible
✉
135: content model is ambiguous: when the current token is the Y occurrence of X and the innermost containing AND group has been matched, both the a and b occurrences of Z are possible
✉
136: content model is ambiguous: when the current token is the Y occurrence of X and the innermost Z containing AND groups have been matched, both the b and c occurrences of a are possible
✉
138: comment declaration started here
✉
140: data or replaceable character data in declaration subset
✉
142: ID X first defined here
✉
143: value of fixed attribute X not equal to default
✉
144: character X is not significant in the reference concrete syntax and so cannot occur in a comment in the SGML declaration
✉
145: minimum data of first minimum literal in SGML declaration must be «»ISO 8879:1986″» or «»ISO 8879:1986 (ENR)»» or «»ISO 8879:1986 (WWW)»» not X
✉
146: parameter before LCNMSTRT must be NAMING not X
✉
147: unexpected entity end in SGML declaration: only X, S separators and comments allowed
✉
148: X invalid: only Y and parameter separators allowed
✉
149: magnitude of X too big
✉
150: character X is not significant in the reference concrete syntax and so cannot occur in a literal in the SGML declaration except as the replacement of a character reference
✉
151: X is not a valid syntax reference character number
✉
152: a parameter entity reference cannot occur in an SGML declaration
✉
153: X invalid: only Y and parameter separators are allowed
✉
154: cannot continue because of previous errors
✉
155: SGML declaration cannot be parsed because the character set does not contain characters having the following numbers in ISO 646: X
✉
156: the specified character set is invalid because it does not contain the minimum data characters having the following numbers in ISO 646: X
✉
157: character numbers declared more than once: X
✉
158: character numbers should have been declared UNUSED: X
✉
159: character numbers missing in base set: X
✉
160: characters in the document character set with numbers exceeding X not supported
✉
161: invalid formal public identifier X: missing //
✉
162: invalid formal public identifier X: no SPACE after public text class
✉
163: invalid formal public identifier X: invalid public text class
✉
164: invalid formal public identifier X: public text language must be a name containing only upper case letters
✉
165: invalid formal public identifer X: public text display version not permitted with this text class
✉
166: invalid formal public identifier X: extra field
✉
167: public text class of public identifier in notation identifier must be NOTATION
✉
168: base character set X is unknown
✉
169: delimiter set is ambiguous: X and Y can be recognized in the same mode
✉
170: characters with the following numbers in the syntax reference character set are significant in the concrete syntax but are not in the document character set: X
✉
171: there is no unique character in the document character set corresponding to character number X in the syntax reference character set
✉
172: there is no unique character in the internal character set corresponding to character number X in the syntax reference character set
✉
173: the character with number X in ISO 646 is significant but has no representation in the syntax reference character set
✉
174: capacity set X is unknown
✉
175: capacity X already specified
✉
176: value of capacity X exceeds value of TOTALCAP
✉
177: syntax X is unknown
✉
178: UCNMSTRT must have the same number of characters as LCNMSTRT
✉
179: UCNMCHAR must have the same number of characters as LCNMCHAR
✉
180: number of open subdocuments exceeds quantity specified for SUBDOC parameter in SGML declaration (X)
✉
181: entity X declared SUBDOC, but SUBDOC NO specified in SGML declaration
✉
182: a parameter entity referenced in a parameter separator must end in the same declaration
✉
184: generic identifier X used in DTD but not defined
✉
185: X not finished but document ended
✉
186: cannot continue with subdocument because of previous errors
✉
188: no internal or external document type declaration subset; will parse without validation
✉
189: this is not an SGML document
✉
190: length of start-tag before interpretation of literals must not exceed TAGLEN (X)
✉
191: a parameter entity referenced in a token separator must end in the same group
✉
192: the following character numbers are shunned characters that are not significant and so should have been declared UNUSED: X
✉
193: there is no unique character in the specified document character set corresponding to character number X in ISO 646
✉
194: length of attribute value must not exceed LITLEN less NORMSEP (-X)
✉
195: length of tokenized attribute value must not exceed LITLEN less NORMSEP (-X)
✉
196: concrete syntax scope is INSTANCE but value of X quantity is less than value in reference quantity set
✉
197: public text class of formal public identifier of base character set must be CHARSET
✉
198: public text class of formal public identifier of capacity set must be CAPACITY
✉
199: public text class of formal public identifier of concrete syntax must be SYNTAX
✉
200: when there is an MSOCHAR there must also be an MSICHAR
✉
201: character number X in the syntax reference character set was specified as a character to be switched but is not a markup character
✉
202: character number X was specified as a character to be switched but is not in the syntax reference character set
✉
203: character numbers X in the document character set have been assigned the same meaning, but this is the meaning of a significant character
✉
204: character number X assigned to more than one function
✉
205: X is already a function name
✉
206: characters with the following numbers in ISO 646 are significant in the concrete syntax but are not in the document character set: X
✉
207: general delimiter X consists solely of function characters
✉
208: letters assigned to LCNMCHAR, UCNMCHAR, LCNMSTRT or UCNMSTRT: X
✉
209: digits assigned to LCNMCHAR, UCNMCHAR, LCNMSTRT or UCNMSTRT: X
✉
210: character number X cannot be assigned to LCNMCHAR, UCNMCHAR, LCNMSTRT or UCNMSTRT because it is RE
✉
211: character number X cannot be assigned to LCNMCHAR, UCNMCHAR, LCNMSTRT or UCNMSTRT because it is RS
✉
212: character number X cannot be assigned to LCNMCHAR, UCNMCHAR, LCNMSTRT or UCNMSTRT because it is SPACE
✉
213: separator characters assigned to LCNMCHAR, UCNMCHAR, LCNMSTRT or UCNMSTRT: X
✉
214: character number X cannot be switched because it is a Digit, LC Letter or UC Letter
✉
215: pointless for number of characters to be 0
✉
216: X cannot be the replacement for a reference reserved name because it is another reference reserved name
✉
217: X cannot be the replacement for a reference reserved name because it is the replacement of another reference reserved name
✉
218: replacement for reserved name X already specified
✉
219: X is not a valid name in the declared concrete syntax
✉
220: X is not a valid short reference delimiter because it has more than one B sequence
✉
221: X is not a valid short reference delimiter because it is adjacent to a character that can occur in a blank sequence
✉
222: length of delimiter X exceeds NAMELEN (Y)
✉
223: length of reserved name X exceeds NAMELEN (Y)
✉
224: character numbers assigned to both LCNMCHAR or UCNMCHAR and LCNMSTRT or UCNMSTRT: X
✉
225: when the concrete syntax scope is INSTANCE the syntax reference character set of the declared syntax must be the same as that of the reference concrete syntax
✉
226: end-tag minimization should be O for element with declared content of EMPTY
✉
227: end-tag minimization should be O for element X because it has CONREF attribute
✉
228: element X has a declared content of EMPTY and a CONREF attribute
✉
229: element X has a declared content of EMPTY and a NOTATION attribute
✉
230: declared value of data attribute cannot be ENTITY, ENTITIES, ID, IDREF, IDREFS or NOTATION
✉
231: default value of data attribute cannot be CONREF or CURRENT
✉
232: number of attribute names and name tokens (X) exceeds ATTCNT (Y)
✉
233: if the declared value is ID the default value must be IMPLIED or REQUIRED
✉
234: the attribute definition list already declared attribute X as the ID attribute
✉
235: the attribute definition list already declared attribute X as the NOTATION attribute
✉
236: token X occurs more than once in attribute definition list
✉
237: no attributes defined for notation X
✉
238: notation X for entity Y undefined
✉
239: entity X undefined in short reference map Y
✉
240: notation X is undefined but had attribute definition
✉
241: length of interpreted parameter literal in bracketed text plus the length of the bracketing delimiters must not exceed LITLEN (X)
✉
242: length of rank stem plus length of rank suffix must not exceed NAMELEN (X)
✉
243: document instance must start with document element
✉
244: content model nesting level exceeds GRPLVL (X)
✉
245: grand total of content tokens exceeds GRPGTCNT (X)
✉
249: DTDs other than base allowed only if CONCUR YES or EXPLICIT YES
✉
250: end of entity other than document entity after document element
✉
251: X declaration illegal after document element
✉
252: character reference illegal after document element
✉
253: entity reference illegal after document element
✉
254: marked section illegal after document element
✉
255: the X occurrence of Y in the content model for Z cannot be excluded at this point because it is contextually required
✉
256: the X occurrence of Y in the content model for Z cannot be excluded because it is neither inherently optional nor a member of an OR group
✉
257: an attribute value specification must be an attribute value literal unless SHORTTAG YES is specified
✉
258: value cannot be specified both for notation attribute and content reference attribute
✉
259: notation X already defined
✉
260: short reference map X already defined
✉
261: first defined here
✉
262: general delimiter role X already defined
✉
263: number of ID references in start-tag must not exceed GRPCNT (X)
✉
264: number of entity names in attribute specification list must not exceed GRPCNT (X)
✉
265: normalized length of attribute specification list must not exceed ATTSPLEN (X); length was Y
✉
266: short reference delimiter X already specified
✉
267: single character short references were already specified for character numbers: X
✉
268: default entity used in entity attribute X
✉
269: reference to entity X uses default entity
✉
270: entity X in short reference map Y uses default entity
✉
271: no DTD X declared
✉
272: LPD X has neither internal nor external subset
✉
273: element types have different link attribute definitions
✉
274: link set X already defined
✉
275: empty result attribute specification
✉
276: no source element type X
✉
277: no result element type X
✉
278: end of document in LPD subset
✉
279: X declaration not allowed in LPD subset
✉
280: ID link set declaration not allowed in simple link declaration subset
✉
281: link set declaration not allowed in simple link declaration subset
✉
282: attributes can only be defined for base document element (not X) in simple link declaration subset
✉
283: a short reference mapping declaration is allowed only in the base DTD
✉
284: a short reference use declaration is allowed only in the base DTD
✉
285: default value of link attribute cannot be CURRENT or CONREF
✉
286: declared value of link attribute cannot be ID, IDREF, IDREFS or NOTATION
✉
287: only fixed attributes can be defined in simple LPD
✉
288: only one ID link set declaration allowed in an LPD subset
✉
289: no initial link set defined for LPD X
✉
290: notation X not defined in source DTD
✉
291: result document type in simple link specification must be implied
✉
292: simple link requires SIMPLE YES
✉
293: implicit link requires IMPLICIT YES
✉
294: explicit link requires EXPLICIT YES
✉
295: LPD not allowed before first DTD
✉
296: DTD not allowed after an LPD
✉
297: definition of general entity X is unstable
✉
298: definition of parameter entity X is unstable
✉
299: multiple link rules for ID X but not all have link attribute specifications
✉
300: multiple link rules for element type X but not all have link attribute specifications
✉
301: link type X does not have a link set Y
✉
302: link set use declaration for simple link process
✉
303: no link type X
✉
304: both document type and link type X
✉
305: link type X already defined
✉
306: document type X already defined
✉
307: link set X used in LPD but not defined
✉
308: #IMPLIED already linked to result element type X
✉
309: number of active simple link processes exceeds quantity specified for SIMPLE parameter in SGML declaration (X)
✉
310: only one chain of explicit link processes can be active
✉
311: source document type name for link type X must be base document type since EXPLICIT YES 1
✉
312: only one implicit link process can be active
✉
313: sorry, link type X not activated: only one implicit or explicit link process can be active (with base document type as source document type)
✉
314: name missing after name group in entity reference
✉
315: source document type name for link type X must be base document type since EXPLICIT NO
✉
316: link process must be activated before base DTD
✉
317: unexpected entity end while starting second pass
✉
318: type X of element with ID Y not associated element type for applicable link rule in ID link set
✉
319: DATATAG feature not implemented
✉
320: generic identifier specification missing after document type specification in start-tag
✉
321: generic identifier specification missing after document type specification in end-tag
✉
322: a NET-enabling start-tag cannot include a document type specification
✉
324: invalid default SGML declaration
✉
326: entity was defined here
✉
327: content model is mixed but does not allow #PCDATA everywhere
✉
328: start or end of range must specify a single character
✉
329: number of first character in range must not exceed number of second character in range
✉
330: delimiter cannot be an empty string
✉
331: too many characters assigned same meaning with minimum literal
✉
332: earlier reference to entity X used default entity
✉
335: unused short reference map X
✉
336: unused parameter entity X
✉
337: cannot generate system identifier for public text X
✉
339: cannot generate system identifier for parameter entity X
✉
340: cannot generate system identifier for document type X
✉
341: cannot generate system identifier for link type X
✉
342: cannot generate system identifier for notation X
✉
343: element type X both included and excluded
✉
345: minimum data of AFDR declaration must be «»ISO/IEC 10744:1997″» not X
✉
346: AFDR declaration required before use of AFDR extensions
✉
347: ENR extensions were used but minimum literal was not «»ISO 8879:1986 (ENR)»» or «»ISO 8879:1986 (WWW)»»
✉
348: illegal numeric character reference to non-SGML character X in literal
✉
349: cannot convert character reference to number X because description Y unrecognized
✉
350: cannot convert character reference to number X because character Y from baseset Z unknown
✉
351: character reference to number X cannot be converted because of problem with internal character set
✉
352: cannot convert character reference to number X because character not in internal character set
✉
353: Web SGML adaptations were used but minimum literal was not «»ISO 8879:1986 (WWW)»»
✉
354: token X can be value for multiple attributes so attribute name required
✉
355: length of hex number must not exceed NAMELEN (X)
✉
356: X is not a valid name in the declared concrete syntax
✉
357: CDATA declared content
✉
358: RCDATA declared content
✉
359: inclusion
✉
360: exclusion
✉
361: NUMBER or NUMBERS declared value
✉
362: NAME or NAMES declared value
✉
363: NUTOKEN or NUTOKENS declared value
✉
364: CONREF attribute
✉
365: CURRENT attribute
✉
366: TEMP marked section
✉
367: included marked section in the instance
✉
368: ignored marked section in the instance
✉
369: RCDATA marked section
✉
370: processing instruction entity
✉
371: bracketed text entity
✉
372: internal CDATA entity
✉
373: internal SDATA entity
✉
374: external CDATA entity
✉
375: external SDATA entity
✉
376: attribute definition list declaration for notation
✉
377: rank stem
✉
379: comment in parameter separator
✉
380: named character reference
✉
381: AND group
✉
382: attribute value not a literal
✉
383: attribute name missing
✉
384: element declaration for group of element types
✉
385: attribute definition list declaration for group of element types
✉
386: empty comment declaration
✉
388: multiple comments in comment declaration
✉
389: no status keyword
✉
390: multiple status keywords
✉
391: parameter entity reference in document instance
✉
392: CURRENT attribute
✉
393: element type minimization parameter
✉
395: #PCDATA not first in model group
✉
396: #PCDATA in SEQ group
✉
397: #PCDATA in nested model group
✉
398: #PCDATA in model group that does not have REP occurrence indicator
✉
399: name group or name token group used connector other than OR
✉
400: processing instruction does not start with name
✉
401: S separator in status keyword specification in document instance
✉
402: reference to external data entity
✉
405: SGML declaration was not implied
✉
406: marked section in internal DTD subset
✉
408: entity end in different element from entity reference
✉
409: NETENABL IMMEDNET requires EMPTYNRM YES
✉
411: declaration of default entity
✉
412: reference to parameter entity in parameter separator in internal subset
✉
413: reference to parameter entity in token separator in internal subset
✉
414: reference to parameter entity in parameter literal in internal subset
✉
415: cannot generate system identifier for SGML declaration reference
✉
416: public text class of formal public identifier of SGML declaration must be SD
✉
417: SGML declaration reference was used but minimum literal was not «»ISO 8879:1986 (WWW)»»
✉
418: member of model group containing #PCDATA has occurrence indicator
✉
419: member of model group containing #PCDATA is a model group
✉
420: reference to non-predefined entity
✉
421: reference to external entity
✉
422: declaration of default entity conflicts with IMPLYDEF ENTITY YES
✉
423: parsing with respect to more than one active doctype not supported
✉
424: cannot have active doctypes and link types at the same time
✉
425: number of concurrent document instances exceeds quantity specified for CONCUR parameter in SGML declaration (X)
✉
426: datatag group can only be specified in base document type
✉
427: element not in the base document type can’t have an empty start-tag
✉
428: element not in base document type can’t have an empty end-tag
✉
429: immediately recursive element
✉
430: invalid URN X: missing «»:»»
✉
431: invalid URN X: missing «»urn:»» prefix
✉
432: invalid URN X: invalid namespace identifier
✉
433: invalid URN X: invalid namespace specific string
✉
434: invalid URN X: extra field
✉
435: prolog can’t be omitted unless CONCUR NO and LINK EXPLICIT NO and either IMPLYDEF ELEMENT YES or IMPLYDEF DOCTYPE YES
✉
436: can’t determine name of #IMPLIED document element
✉
437: can’t use #IMPLICIT doctype unless CONCUR NO and LINK EXPLICIT NO
✉
438: Sorry, #IMPLIED doctypes not implemented
✉
439: reference to DTD data entity ignored
✉
440: notation X for parameter entity Y undefined
✉
441: notation X for external subset undefined
✉
442: attribute X can’t be redeclared
✉
443: #IMPLICIT attributes have already been specified for notation X
✉
444: a name group is not allowed in a parameter entity reference in a start tag
✉
445: name group in a parameter entity reference in an end tag (SGML forbids them in start tags)
✉
446: if the declared value is NOTATION a default value of CONREF is useless
✉
447: Sorry, #ALL and #IMPLICIT content tokens not implemented
✉
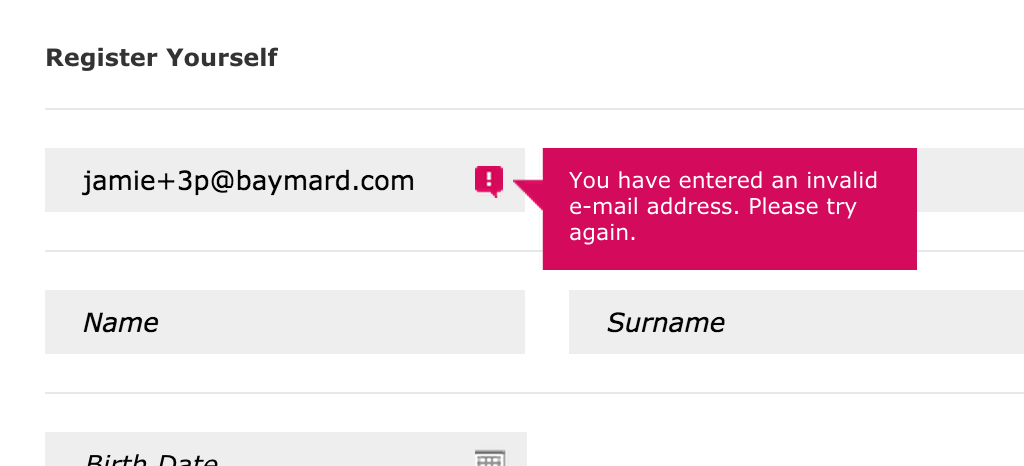
This is pretty much as bad as it gets. The user is just told their input is invalid with no hints as to why that is or how they can fix it.
Form validation errors are inevitable. Yes, they can (and should) be minimized, but validation errors won’t ever be eliminated – they are a natural part of complex forms and user’s data input. The key question then is how to make it easy for the user to recover from form errors.
In this article we’ll go over findings from our usability studies on how the wording of validation error messages largely determines the user’s error recovery experience, and how “Adaptive Error Messages” have shown to significantly reduce the user’s error recovery time.
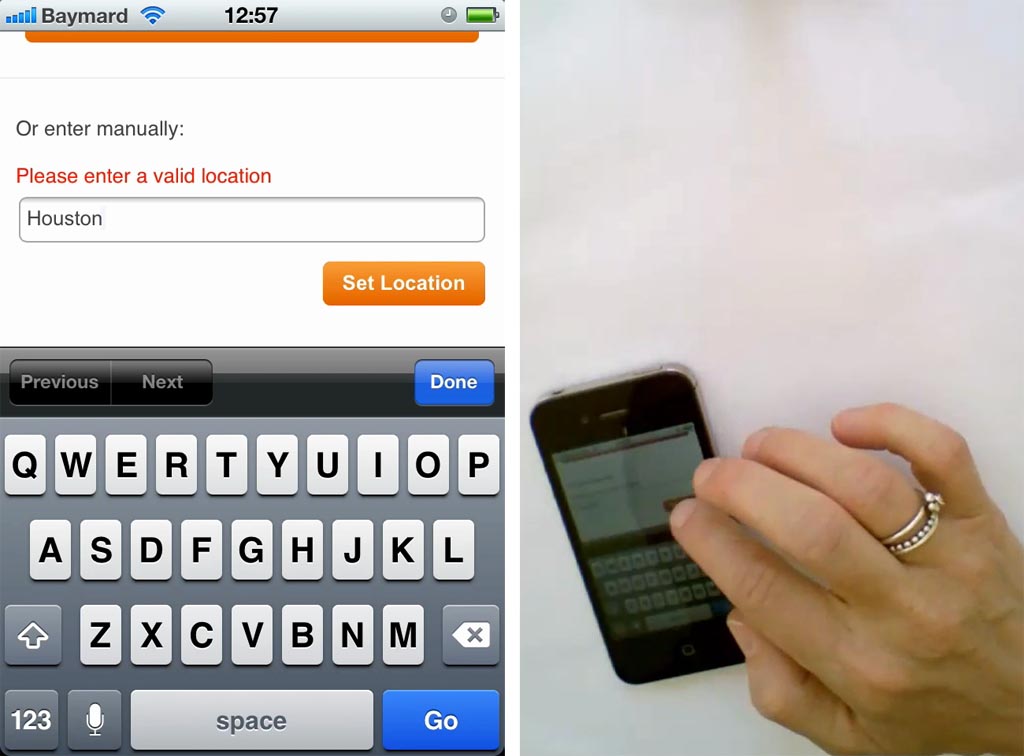
Common fields that we frequently observe to cause cause validation issues during testing include: phone number (formatting), state text field (‘TX’ vs. ‘Texas’), dates (month names or digits), monetary amounts (decimal separator, thousand separators, currency, etc) credit card number (are spaces allowed?), and address (street number in address line 1 or 2?).
Generic Error Messages
When benchmarking the checkout process of 100 major e-commerce sites, we found that most form validation error messages are woefully generic. This is problematic because it doesn’t do much in way of helping the user understand what the error is and how to fix it. Generic error messages tend to run the spectrum from unhelpful to completely useless. For instance, during benchmarking we saw the ‘Phone’ field yield error messages such as:
- “Invalid”
- “Not a valid US phone number”
- “Not a valid 10-digit US phone number (must not include spaces or special characters)”
The first error message is obviously the worst as it offers zero help as to why the input isn’t accepted – it just states that the site doesn’t consider it “valid”. The second error message is still pretty bad, in that it just says the input isn’t a “valid US phone number” but it doesn’t hint at why that might be. The third error message is better than the others because it not only states that it must be a US phone number but also indicates that a country code, spaces, or other formatting, will cause the validation to fail even if it actually is a legit US phone number.
However, even though the third error message is the best of the generic error messages, our usability tests showed that it is still far from ideal because it doesn’t show the user what the actual problem is. Without any indication of what the actual error is, the user will basically have to do all the work figuring this out themselves.
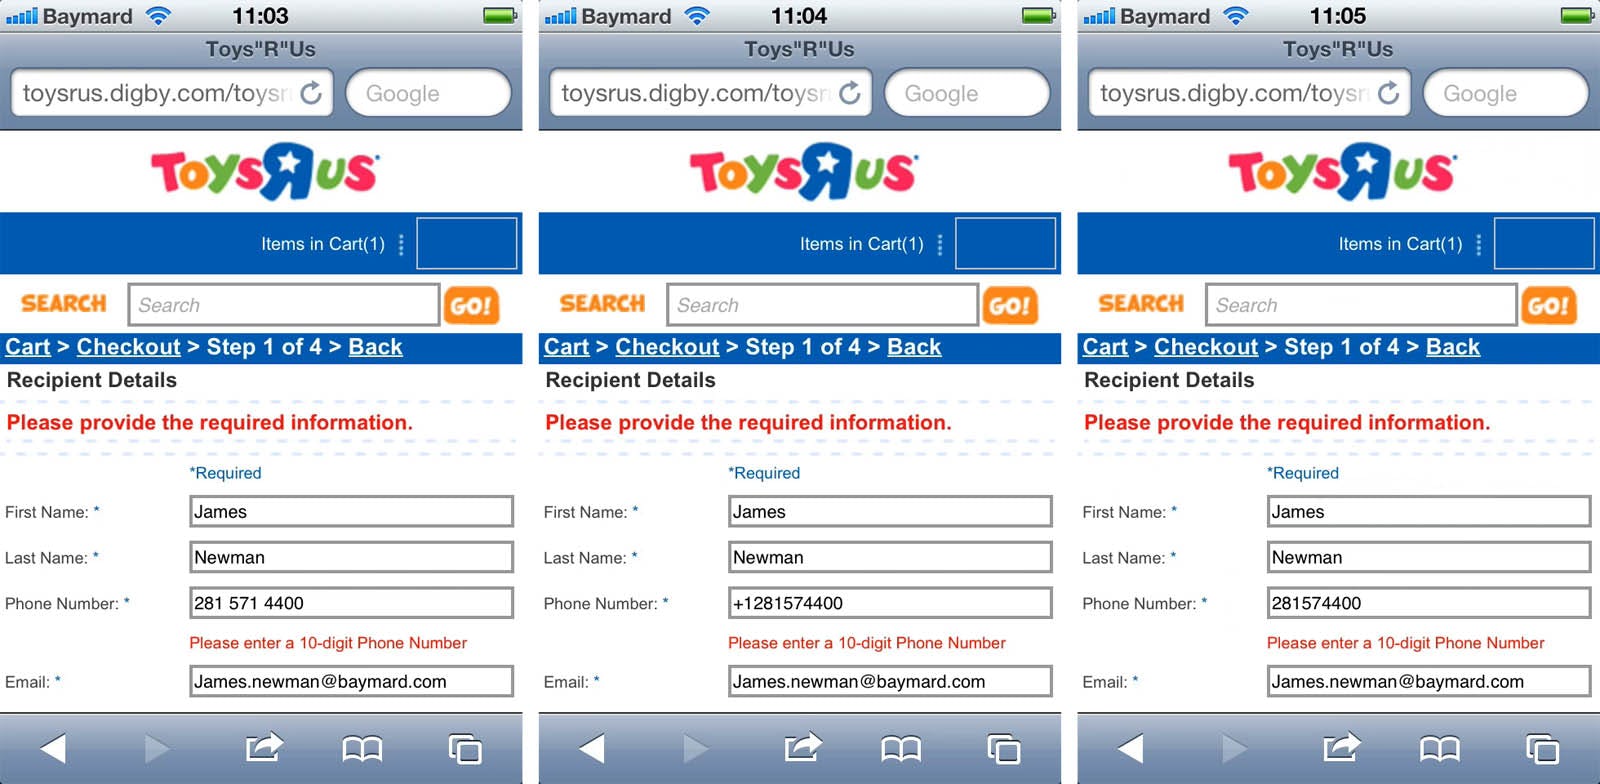
During our mobile commerce study this subject first entered her phone number but included spaces which provoked a validation error. While this should not cause a validation error at all, the error message itself should at the very least tell the user what the problem is. In this case, the subject thought she might need to add a country code, but that also did not work (middle image). She then removed the country code but during editing, accidentally removed another digit too. So while the phone number was now formatted correctly, it only had nine digits. Alas, at this point the test subject no longer trusted the error message as she it had told her the exact same thing for all three input variations, and instead concluded the site was “broken” and abandoned the purchase.
Most of the time having to figure out what caused an error is just tedious for the user. During our usability studies the test subjects were often observed spending an inordinate amount of time trying to fix errors with generic error messages – especially of the first two types, although plenty struggled with the third type as well, leading to repeat validation errors. Obviously this results in a poor user experience although the subjects were able to work it out most of the time.
However, where things get really thorny is when it isn’t immediately obvious to the user why their input is deemed invalid. This can be downright harmful because it effectively forces the user to guess how to fix the input through trial and error – or give up and abandon their purchase, a route we’ve seen many subjects begrudgingly trudge down.
Adaptive Error Messages
Luckily, testing also revealed a solution to this problem: adaptive error messages. These are error messages that adapt based on what invoked the validation error and use this to provide the user with helpful instructions on how they can correct their input.
In other words, adaptive error messages dynamically change to best match the user’s situation. For example, if a user tried to provide “john.newman@gmail” in an e-mail field, an adaptive validation error message would read “This email address is missing a top-level domain (such as ‘.com’).”
While the copywriting of this validation error message could be optimized, it is still light years ahead of a generic error message as it alerts the user to the specific problem identified in their input. This makes it instantly clear to the user what the issue is and how they can fix it.
This is vastly superior to generic error messages because it alerts the user to the actual validation failure and provides them with an easy way to fix it. If we go back to the earlier phone error example, an adaptive error message could tell a user who had submitted their phone number with a country code that: “It seems the provided phone number includes a country code (‘+1’) which isn’t accepted by the site – please provide a 10-digit US phone number without country code, spaces, or special characters.”
Letting the user know why the validation failed, it makes it much easier for them to fix it. During testing we observed it to drastically improve error recovery time, and perhaps even more critically helped reassure the user that their input in itself wasn’t wrong but that they had just provided it in a format the site was incapable of processing.

Instead of simply reading “Invalid password”, or “Password should contain 6 digits, ..” Symantec provides the user with an error message specific to the validation rule triggered. Here a user has entered their email as password and is told that this is not allowed – an error message that’s much clear and easy to recover from.

When a user leaves a required field blank but fills out all other entries in the form it is most likely because they are uneasy about providing that information. Here an adaptive error message “identifies” this user concern for privacy and returns an explanation as to why the phone number is required and and reassures the user of how and what it will be used for.
Now, ostensibly the reason most sites don’t do this is because it is difficult. However, if our validation rules are smart enough to identify these types of errors, we should be able to inform the user about the exact problem identified rather than handing them a generic error message. It is precisely because validation errors can be caused by such a wide range of reasons (i.e. the input’s content, length, formatting, etc) that it is so important to let the user know exactly why their input failed because they’ll otherwise have to try and work it out themselves.
So there we have it. Adaptive validation errors – the smarter, situation-aware error message that let’s the user know exactly what the problem is and how to fix it. A much improved validation error experience that the user can easily recover from.
Of course avoiding validation errors in the first place is ideal. The perhaps easiest way to lower validation errors is by accepting all common inputs and formats (and then perform any necessary data and formatting harmonization in the back-end). Other useful strategies include providing proper inline help and formatting examples, indicating both required and optional fields, having helpful field descriptions, and auto-detecting content where possible. Also, consider whether a validation warning might be more meaningful than a validation error.
This article presents the research findings from just 1 of the 650+ UX guidelines in Baymard Premium – get full access to learn how to create a “State of the Art” e-commerce user experience.