I’ve been running WindowsXP on VirtualBox 2.1.4 and Ubuntu 8.04, unfortunately there was a power loss and since then I can’t load the WindowsXP virtual machine due to the message below.
Could not load the settings file ‘/home/beto/.VirtualBox/Machines/WinXP/WinXP.xml’.
Premature end of data in tag VirtualBox line 3.
Location: ‘/home/beto/.VirtualBox/Machines/WinXP/WinXP.xml’, line 88 (3), column 1.
VBOX_E_XML_ERROR (0x80BB000A)
Componente:
VirtualBox
Interface:
IVirtualBox {339abca2-f47a-4302-87f5-7bc324e6bbde}
Result Code:
- Code: Select all Expand viewCollapse view
<?xml version="1.0" encoding="UTF-8"?>
<!-- Sun xVM VirtualBox Machine Configuration -->
<VirtualBox xmlns="http://www.innotek.de/VirtualBox-settings" version="1.6-linux">
  <Machine uuid="{38bcecaf-826a-4cfe-93f6-655f91f72677}" name="WinXP" OSType="WindowsXP" lastStateChange="2009-03-03T21:17:42Z">
    <ExtraData>
      <ExtraDataItem name="GUI/SaveMountedAtRuntime" value="yes"/>
      <ExtraDataItem name="GUI/LastWindowPostion" value="51,49,968,689"/>
      <ExtraDataItem name="GUI/Fullscreen" value="off"/>
      <ExtraDataItem name="GUI/Seamless" value="off"/>
      <ExtraDataItem name="GUI/AutoresizeGuest" value="on"/>
    </ExtraData>
    <Hardware>
      <CPU count="1">
        <HardwareVirtEx enabled="false"/>
      </CPU>
      <Memory RAMSize="196"/>
      <Boot>
        <Order position="1" device="Floppy"/>
        <Order position="2" device="DVD"/>
        <Order position="3" device="HardDisk"/>
      </Boot>
      <Display VRAMSize="12" monitorCount="1" accelerate3D="false"/>
      <RemoteDisplay enabled="false" port="3389" authType="Null" authTimeout="5000"/>
      <BIOS>
        <ACPI enabled="true"/>
        <IOAPIC enabled="false"/>
        <Logo fadeIn="true" fadeOut="true" displayTime="0"/>
        <BootMenu mode="MessageAndMenu"/>
        <TimeOffset value="0"/>
        <PXEDebug enabled="false"/>
        <IDEController type="PIIX4"/>
      </BIOS>
      <DVDDrive passthrough="true">
        <Image uuid="{5f1c27d6-e32b-486a-b1f1-47d674f28949}"/>
      </DVDDrive>
      <FloppyDrive enabled="true"/>
      <USBController enabled="true" enabledEhci="true"/>
      <SATAController enabled="false" PortCount="1" IDE0MasterEmulationPort="0" IDE0SlaveEmulationPort="1" IDE1MasterEmulationPort="2" IDE1SlaveEmulationPort="3"/>
      <Network>
        <Adapter slot="0" enabled="true" MACAddress="08002791F577" cable="true" speed="0" type="Am79C973">
          <NAT/>
        </Adapter>
        <Adapter slot="1" enabled="false" MACAddress="0800273C7BA7" cable="true" speed="0" type="Am79C973"/>
        <Adapter slot="2" enabled="false" MACAddress="080027CC8C0C" cable="true" speed="0" type="Am79C973"/>
        <Adapter slot="3" enabled="false" MACAddress="080027906B72" cable="true" speed="0" type="Am79C973"/>
        <Adapter slot="4" enabled="false" MACAddress="080027106B3F" cable="true" speed="0" type="Am79C973"/>
        <Adapter slot="5" enabled="false" MACAddress="0800278F400C" cable="true" speed="0" type="Am79C973"/>
        <Adapter slot="6" enabled="false" MACAddress="080027EA2E77" cable="true" speed="0" type="Am79C973"/>
        <Adapter slot="7" enabled="false" MACAddress="080027CC9462" cable="true" speed="0" type="Am79C973"/>
      </Network>
      <UART>
        <Port slot="0" enabled="false" IOBase="0x3f8" IRQ="4" hostMode="Disconnected"/>
        <Port slot="1" enabled="false" IOBase="0x3f8" IRQ="4" hostMode="Disconnected"/>
      </UART>
      <LPT>
        <Port slot="0" enabled="false" IOBase="0x378" IRQ="4"/>
        <Port slot="1" enabled="false" IOBase="0x378" IRQ="4"/>
      </LPT>
      <AudioAdapter controller="AC97" driver="Null" enabled="true"/>
      <SharedFolders>
        <SharedFolder name="Público" hostPath="/home/beto/Público" writable="true"/>
      </SharedFolders>
      <Clipboard mode="Bidirectional"/>
      <Guest memoryBalloonSize="0" statisticsUpdateInterval="0"/>
      <GuestProperties>
        <GuestProperty name="/VirtualBox/GuestInfo/OS/Product" value="Windows XP Home" timestamp="1236113639385643000" flags=""/>
        <GuestProperty name="/VirtualBox/GuestInfo/OS/Release" value="5.1.2600" timestamp="1236113639535614000" flags=""/>
        <GuestProperty name="/VirtualBox/GuestInfo/OS/ServicePack" value="3" timestamp="1236113639536032000" flags=""/>
        <GuestProperty name="/VirtualBox/GuestAdd/InstallDir" value="C:/Arquivos de programas/Sun/xVM VirtualBox Guest Additions" timestamp="1236113639536409000" flags=""/>
        <GuestProperty name="/VirtualBox/GuestAdd/Revision" value="41885" timestamp="1236113639536571000" flags=""/>
        <GuestProperty name="/VirtualBox/GuestAdd/Version" value="2.1.2" timestamp="1236113639536710000" flags=""/>
        <GuestProperty name="/VirtualBox/GuestAdd/Components/VBoxControl.exe" value="2.1.2r41885" timestamp="1236113639668657000" flags=""/>
        <GuestProperty name="/VirtualBox/GuestAdd/Components/VBoxHook.dll" value="2.1.2r41885" timestamp="1236113639671134000" flags=""/>
        <GuestProperty name="/VirtualBox/GuestAdd/Components/VBoxDisp.dll" value="2.1.2r41885" timestamp="1236113639707731000" flags=""/>
        <GuestProperty name="/VirtualBox/GuestAdd/Components/VBoxMRXNP.dll" value="2.1.2r41885" timestamp="1236113639712450000" flags=""/>
        <GuestProperty name="/VirtualBox/GuestAdd/Components/VBoxService.exe" value="2.1.2r41885" timestamp="1236113639743856000" flags=""/>
        <GuestProperty name="/VirtualBox/GuestAdd/Components/VBoxTray.exe" value="2.1.2r41885" timestamp="1236113639748544000" flags=""/>
        <GuestProperty name="/VirtualBox/GuestAdd/Components/VBoxGuest.sys" value="2.1.2r41885" timestamp="1236113639752830000" flags=""/>
        <GuestProperty name="/VirtualBox/GuestAdd/Components/VBoxMouse.sys" value="2.1.2r41885" timestamp="1236113639769612000" flags=""/>
        <GuestProperty name="/VirtualBox/GuestAdd/Components/VBoxSF.sys" value="2.1.2r41885" timestamp="1236113639773651000" flags=""/>
        <GuestProperty name="/VirtualBox/GuestAdd/Components/VBoxVideo.sys" value="2.1.2r41885" timestamp="1236113639798095000" flags=""/>
        <GuestProperty name="/VirtualBox/GuestInfo/OS/LoggedInUsers" value="1" timestamp="1236115060636543000" flags=""/>
        <GuestProperty name="/VirtualBox/GuestInfo/OS/NoLoggedInUsers" value="false" timestamp="1236113640400570000" flags=""/>
        <GuestProperty name="/VirtualBox/GuestInfo/Net/Count" value="1" timestamp="1236115060597623000" flags=""/>
        <GuestProperty name="/VirtualBox/HostInfo/GUI/LanguageID" value="pt_BR" timestamp="1236113498195784000" flags=""/>
        <GuestProperty name="/VirtualBox/GuestInfo/Net/0/V4/IP" value="10.0.2.15" timestamp="1236115060599662000" flags=""/>
        <GuestProperty name="/VirtualBox/GuestInfo/Net/0/V4/Broadcast" value="255.255.255.255" timestamp="
Modedit: It would help if you used code blocks yourself
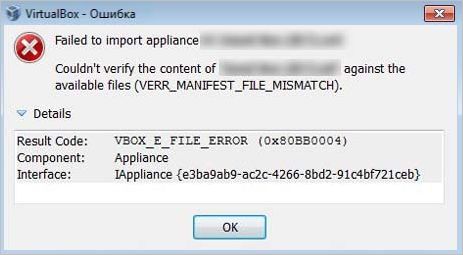
A lot of users receive the “VBOX_E_FILE_ERROR (0x80BB0004)” error message when trying to attach a virtual disk or export a created appliance into VM. Don’t worry. This post of MiniTool summarizes 8 effective ways to fix it.
Possible Reasons for the VBOX_E_FILE_ERROR (0x80bb0004)
After investigating extensive user reports on forums, we found the VBOX_E_FILE_ERROR (0x80BB0004) error code usually appears in two situations. The first situation is when they were trying to attach a virtual disk to the virtual machine using VirtualBox. The other is when they failed to export a previously created appliance into VM.
According to user reports, the several common scenarios below will trigger the result code: VBOX_E_FILE_ERROR (0x80BB0004).
- The .vdi or .vmdk file gets corrupted or missing. A lot of users encounter the error when they failed to import a virtual appliance that was torrent files downloaded via a brave browser. This error could occur due to an incomplete download or a network issue.
- The path of the created appliance doesn’t exist in the current laptop. It often occurs when importing a virtual machine that contains multiple appliances into a new laptop. For instance, some users find that the original VM path was “drive I:” which doesn’t exist on the new laptop. In this case, you can fix it by changing its path to a C drive.
- The vbomxmanage.exe lacks administrator privileges. This situation is mostly reported to happen when trying to attach a virtual disk hosted on a USB flash drive.
- The .vdi or .vmdk file is saved on a drive that has bad sectors. If the vdi file contains bad sectors, the error can occur due to file corruption.
- The VM disk image format is incorrect. Some users find the “failed to import appliance VirtualBox” error can occur when the image became other formats like “.qcow” or “.vhd”. The error can disappear after converting it to VDI.
- The saved state file inside .vbox is invalid. Some users get the error 0x80BB0004 in the log file after VM refused to start. This can occur due to an invalid saved state file.
- The virtual machine configuration gets outdated or corrupted. It is also responsible for the VirtualBox failed to import appliance error. For that, you can create a new virtual machine.
- The VM VirtualBox installation is corrupted. Some users have managed to fix the error by uninstalling the whole VirtualBox client.
How to Fix the VBOX_E_FILE_ERROR (0x80bb0004)
Based on the above analysis, we summarize several effective ways to fix the VBOX_E_FILE_ERROR. Let’s try them one by one.
Solution 1. Re-download the .vmdk or .vdi File
If download the .vmdk or vdi file via a brave browser instead of a torrent client, then the file may get corrupted or incomplete. That’s why you receive the “result code: VBOX_E_FILE_ERROR (0x80BB0004)” error when importing a virtual appliance into VM. In this case, you need to re-download the file using a torrent client like QBitTorrent or download via HTTPS directly.
Solution 2. Change the Path of the Created Appliance to C Drive
A lot of users get the error 0x80BB0004 after exporting a virtual machine into a new laptop. This is because the drive path of the VM doesn’t exist in the laptop. In this case, you need to change the path of the VM to C drive. Also, you can create a new partition and assign a correct drive letter to it, and transfer the VM into the new partition. Once done, you can reboot the virtual machine from the drive and check if the error code disappears.
Solution 3. Run Vboxmanage.exe File as Administrator
If the VirtualBox failed to import appliance error stuck on an Access Denied error, it is possible that you are not running the vboxmanage.exe file with administrator privileges. This is because accessing a virtual disk hosted on a USB drive requires Admin rights. To avoid the error code, we recommend you run both VirtualBox and vboxmanage.exe as administrators.
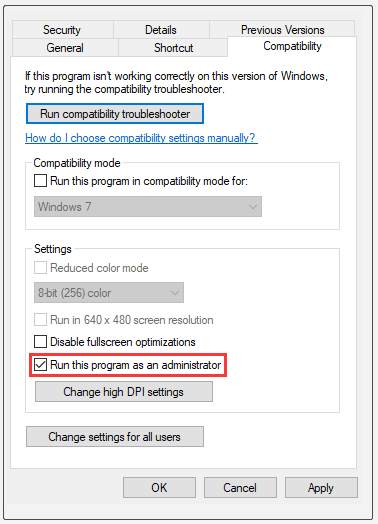
Step 1. Right-click the VirtualBox shortcut on your desktop and select Properties.
Step 2. In the Properties window, navigate to the Compatibility tab and tick the checkbox next to Run this program as an administrator. Then click on OK to save the change.
Tip: Also, you can right-click the VirtualBox shortcut and select Run as administrator directly each time you launch the program.
Step 3. Press Win + E keys to open the File Explorer, and then find the vboxmanage.exe file and run it as administrator by following the above 2 steps.
Solution 4. Check Bad Sectors on the Hard Drive
Another common reason for the “failed to import appliance VirtualBox” error is that the .vdi or .vmdk contains bad sectors. To fully check hard drive errors, we highly recommend you use the professional utility – MiniTool Partition Wizard. It is a reliable multifunctional partition manager that can help you convert MBR to GPT, recover lost data, migrate OS, etc.
Free Download
Step 1. In the main interface of this program, select the hard disk that contains the vdi/vmdk file and click on the Surface Test from the left pane.
Step 2. Click on the Start now button in the pop-up window. After that, this program will scan the whole disk immediately and show you the test result.

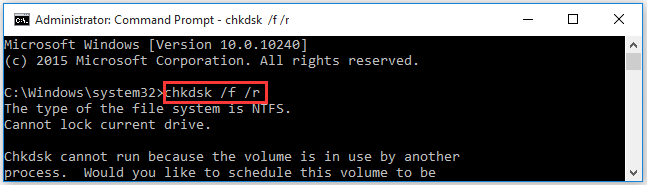
Step 3. Once any bad sectors are tested, you will the red blocks in the disk map. To mark the bad sectors as unusable, you can utilize the CHKDSK utility. Specifically, you can run Command Prompt as administrator, and then type chkdsk /f /r command and hit Enter in the elevated command prompt.
Once done, you can reboot your computer. Then re-download the .vdi file and use it to create a VM, and check if the error is fixed.
Solution 5. Convert the Virtual Disk Image into VDI
In some cases, users get the “result code: VBOX_E_FILE_ERROR (0x80BB0004)” accompanied with the “file not accessible or erroneous file contents” message. If you find the virtual disk image inside the VM is .vhd or .qcom instead of the .vdi format, then you may encounter the issue. To fix it, you need to convert the disk image into .vdi. For that:
Step 1. Navigate to the VirtualBox installation that is mostly located at C:Program FilesOracleVirtualBox, and then find the .vhd file inside the VirtualBox folder and write down its path.
Step 2. Type cmd in the search box, and then right-click the Command Prompt app and select Run as administrator.
Step 3. In the elevated command prompt, type the following command and hit Enter. Here make sure you change the correct path of the .vhd file. For example, the file path is C:Program FilesOracleVirtualBoxWindows 8.vhd.
VBoxManage.exe clonemedium disk «C:Program FilesOracleVirtualBoxWindows 8.vhd» —format vdi
Solution 6. Delete the Saved State Value in the .vbox File
Some users get the VBOX_E_FILE_ERROR (0x80BB0004) error after VM refused to start. In the log file, they find the “VM cannot start because the saved state file is invalid, VERR_FILE_NOT_FOUND” error message. If you are in this situation, you can try deleting the saved state file and restart VM. This method has been proven by some affected users to be helpful.
Step 1. Open the File Explorer and navigate to the C:UsersmeVirtualBox VMs Snapshots path.
Step 2. Open the Snapshots folder and find the .vbox file (its XML) inside it. Then right-click it and select Open with Notepad.
Step 3. Find the Variable LastStateChange and delete it. And also delete the stateFile= Snapshots value.
Tip: To find the Variable LastStateChange quickly, you can press Ctrl + F keys to open the Find box and copy LastStateChange in it.
Step 4. Press Ctrl + S keys to save changes and restart the VM.
Solution 7. Create a New Virtual Machine
Some users managed to resolve the VirtualBox failed to import appliance error by creating a new virtual machine. Here is a full guide on how to do that:
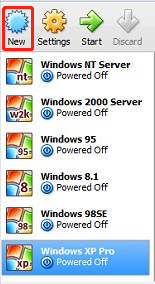
Step 1. Launch your Oracle VM VirtualBox as administrator, and then select the New button from the top toolbar and select an OS that you want to create.
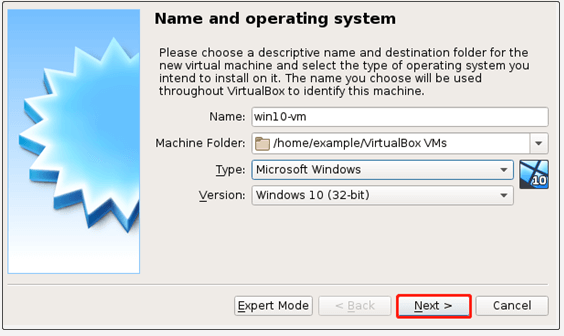
Step 2. In the pop-up window, name your virtual machine, and select the Machine Folder from File Explorer, and then select the Type and Version of the operating system. After that, click on Next to go on.
Step 3. Select the allocated memory size for the VM by using the blue toggle and click on Next to continue. Here the recommended memory size is 1024MB.

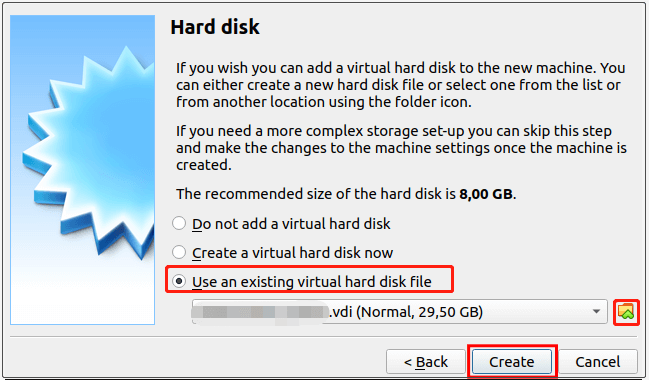
Step 4. Now, you need to select a virtual disk for the VM. Here we take the Use an existing virtual hard disk file option for example, and then click on the Folder icon and browse to the location of the .vdi file. Then click on Create to confirm it.
Step 5. Wait for the process to complete. Once done, you can repeat the steps that you provoke the error 0x80BB0004 and see if it has been solved.
Solution 8. Reinstall Oracle VirtualBox
If all the above methods can’t help you fix the error, then you may have to consider reinstalling Oracle VirtualBox Manager. To do so, follow the steps below:
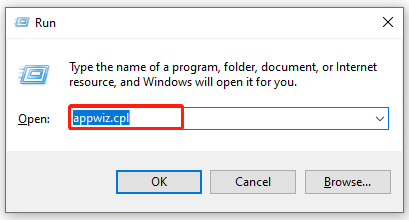
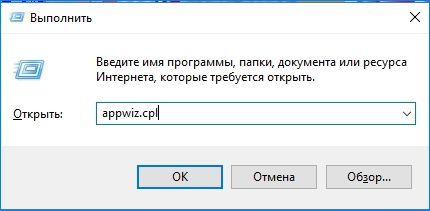
Step 1. Press Win + R keys to open the Run dialog box, and then type appwiz.cpl in the box and hit Enter to open Programs and Features.
Step 2. Scroll down the list of installed programs to find Oracle VM VirtualBox, and then right-click it and select Uninstall. Click on Yes/Uninstall in the confirmation prompt and follow the on-screen to complete the uninstallation.
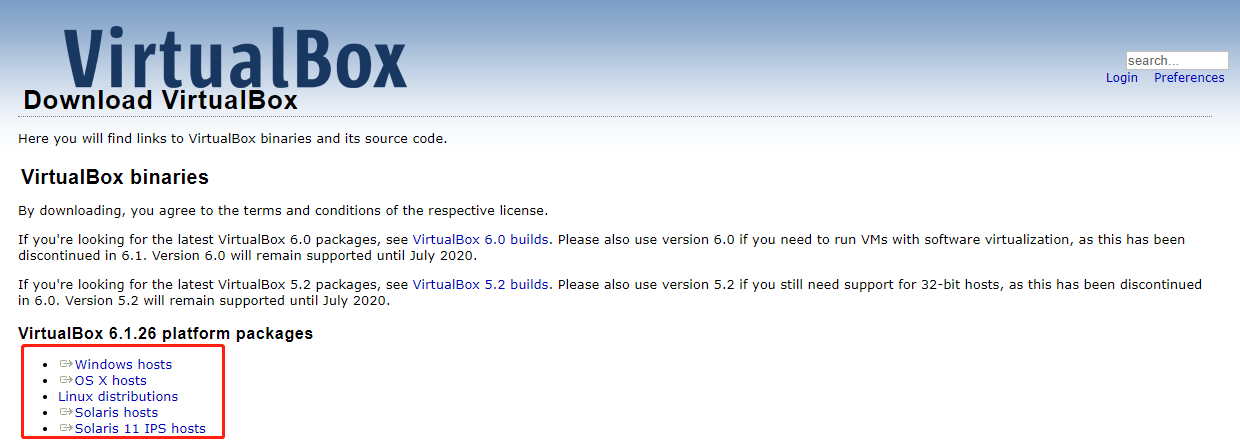
Step 3. Once installed, restart your computer and click here to re-download the VirtualBox manager.
Step 4. The VirtualBox packages vary from different operating systems. Make sure you select the correct one.
Step 5. Open the executable file in the installation folder and follow the on-screen instructions to reinstall the program on your computer.
Now, you can try attaching the virtual disk to the VM and check if the error code disappears.
Are you still troubled by the VBOX_E_FILE_ERROR (0x80BB0004)? You can get 8 applicable methods from this post now! Click to Tweet
Have a Try Now
How to fix VBOX_E_FILE_ERROR (0x80BB0004)? The top 8 solutions have been told to you. Now, it’s your turn to have a try. If you have any other ideas on this topic, you can leave them in the comment area below. For any difficulties in using MiniTool Partition Wizard, you can send us an email at [email protected].
При попытке подключения виртуального диска в VirtualBox система может выбросить ошибку vbox_e_file_error (0x80bb0004). Узнаем подробнее, как ее исправить.
Содержание
- 1 Чем вызвана ошибка?
- 2 Повторная загрузка файлов vmdk или vdi
- 3 Открытие vboxmanage.exe с правами администратора
- 4 Создание новой виртуальной машины
- 5 Проверка CHKDSK
- 6 Переустановка Oracle VM VirtualBox
Чем вызвана ошибка?
В большинстве случаев проблема с подключением виртуального диска может возникнуть по следующим причинам:
- Файлы «.vmdk» или «.vdi» повреждены или содержать сбойные сектора. Сбой часто возникает при попытке импортировать виртуальное устройство, загруженное через интернет. Это может произойти из-за неполной загрузки или нестабильного подключения к сети.
- Не предоставлены права администратора файлу vbomxmanage.exe, который участвует при импорте или экспорте. Это происходит в случае, когда пользователь пытается подключить виртуальный диск, размещенный на накопителе USB.
- Повреждена текущая конфигурация виртуальной машины. В этом случае требуется заново ее пересоздать в VirtualBox.
- Повреждена установка VirtualBox.
Повторная загрузка файлов vmdk или vdi
Если не удается импортировать устройство в менеджере Oracle VM VirtualBox из-за ошибки vbox_e_file_error (0x80bb0004), скорее всего, имеете дело с каким-то повреждением. Попробуйте загрузить повторно (если получили его через интернет) или проверить утилитой CHKDSK.
Возможно, файл загружен частично из-за проблем с сетью. После повторной загрузки снова импортируйте виртуальный диск в VirtualBox. Если продолжаете сталкиваться с vbox_e_file_error (0x80bb0004), то таким образом подтвердили, что она не возникает из-за поврежденной загрузки.
Открытие vboxmanage.exe с правами администратора
Если в коде ошибки видите «Отказано в доступе», то, скорее всего, у исполняемого файла vboxmanage.exe отсутствуют доступ администратора. Это довольно распространенное явление при попытке подключить виртуальный диск, размещенный на USB-накопителе.
Как оказалось, доступ к USB-накопителя требует прав администратора, в противном случае это приведет к коду ошибки vbox_e_file_error (0x80bb0004). Для этого щелкните правой кнопкой мыши на vboxmanage.exe и выберите пункт «Запуск от имени администратора».
Создание новой виртуальной машины
Если проблема остается, попробуйте создать новую виртуальную машину заново.
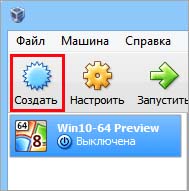
Откройте Oracle VM VirtualBox и кликните на кнопку Создать.
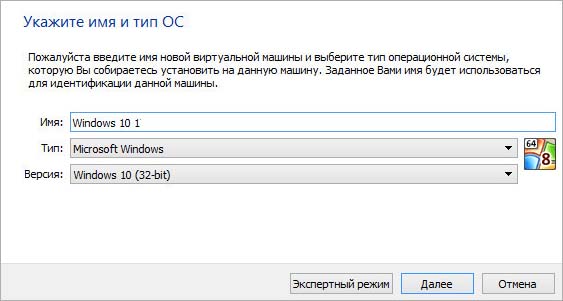
Присвойте имя новой машине, затем выберите тип и версию эмулируемой операционной системы.
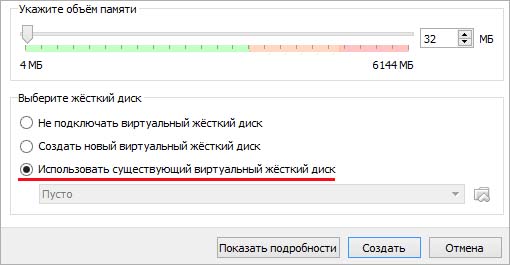
Выберите выделенный объем памяти с помощью переключателя. Затем отметьте опцию «Использовать существующий виртуальный жесткий диск, щелкните на значок папки и перейдите к месту расположения VDI.
Когда будет создана новая ВМ, повторите шаги, которые ранее вызывали ошибку vbox_e_file_error (0x80bb0004).
Проверка CHKDSK
Иногда удается исправить ошибку путем сканирования диска утилитой CHKDSK. Если проблема возникает из-за сбойных секторов в месте записи VDI, выполните следующие шаги.
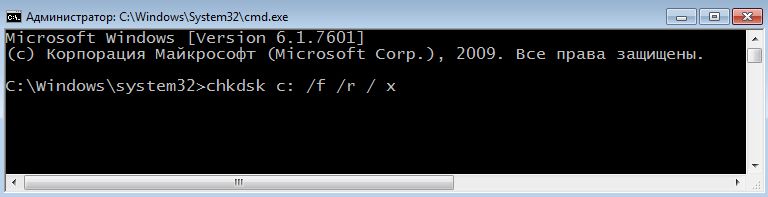
Откройте командную строку с правами администратора из панели поиска Windows. Если файл «.vmdk» или «.vmi» находится на диске «С», выполните в консоли следующую команду:
chkdsk c: /f /r / x
В ходе сканирования она проверит том и попытается исправить все найденный ошибки, а также восстановит информацию из сбойных секторов.
После завершения сканирования закройте консоль, и перезагрузите компьютер. Проверьте, была ли решена проблема путем выполнения процедуры, которая вызывала сбой vbox_e_file_error (0x80bb0004).
Переустановка Oracle VM VirtualBox
Если предыдущие способы не сработали, попробуйте переустановить Oracle VirtualBox.
Перейдите в раздел «Программы и компоненты» командой appwiz.cpl из окна Win + R.
В списке программ найдите Oracle VM VirtualBox, щелкните по нему правой кнопкой мыши и удалите.
После завершения удаления перезагрузите компьютер. Загрузите последнюю версию для Windows из официального сайта. Запустите установку и следуйте инструкциям на экране, чтобы заново установить программное обеспечение. После попробуйте снова подключить виртуальный диск.
-
Partition Wizard
-
Partition Manager
- 3 Simple Ways to Fix VirtualBox E_FAIL (0x80004005) Error
By Linda | Follow |
Last Updated January 03, 2023
Have you received the Result Code: E_FAIL (0x80004005) when starting a VirtualBox VM? This post from MiniTool Partition Wizard offers you 3 simple ways to solve this problem. Keep reading to get them!
VirtualBox E_FAIL (0x80004005) Error
VirtualBox is an open-source type-2 hypervisor for x86 virtualization. It can be installed on Microsoft Windows, macOS, Linux, Solaris, and OpenSolaris. It supports the creation and management of guest virtual machines running Windows, Linux, BSD, OS/2, Solaris, Haiku, and OSx86, as well as limited virtualization of macOS guests on Apple hardware.
Many people use VirtualBox to run VMs. However, some people report that they have encountered the VirtualBox E_FAIL (0x80004005) error when starting a VM.
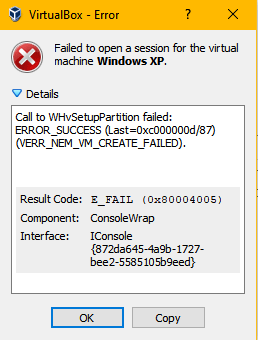
The error details, the component, and the interface may be various, but the “Failed to open a session for the virtual machine xx.” message and “Result Code: E_FAIL (0x80004005)” will not change.
How to Fix VirtualBox E_FAIL (0x80004005) Error
To solve the Result Code: E_FAIL (0x80004005), you can try the following methods.
Fix 1. Use CMD to Disable Hyper-V
Since version 6.0, VirtualBox is able to use the Hyper-V API to coexist next to Hyper-V. If you use an old version of VirtualBox, it may be incompatible with Windows Hyper-V. When the Hyper-V is enabled, VirtualBox VM won’t start.
Many people have confirmed that the Result Code: E_FAIL (0x80004005) may be caused by Hyper-V and disabling it will solve the problem. However, disabling Hyper-V in Windows Features may don’t work. You should disable Hyper-V using CMD. Here is the guide:
- Type “cmd” in the Windows search bar, right-click the best-matched result, and then click Run as administrator.
- Execute this command: bcdedit /set hypervisorlaunchtype off.
- Restart your PC and start the VirtualBox VM again to see whether the problem is solved.
Tip: To enable the Hyper-V later, you can use this command: bcdedit /set hypervisorlaunchtype auto.
Fix 2. Check the VM XML File
When the E_FAIL (0x80004005) error occurs, please navigate to the folder «C:UsersCOMPUTER_NAME.VirtualBoxMachinesVM_NAME» and check whether there are the following two files:
- VM_NAME.xml-prev
- VM_NAME.xml-tmp
When VirtualBox starts a VM, it needs to find an XML file. However, when the E_FAIL (0x80004005) error occurs, it seems that VirtualBox simply just couldn’t find «VM_NAME.xml» because this file technically doesn’t exist.
To solve this problem, you just need to make a copy of the «VM_NAME.xml-prev» file and rename the copy to «VM_NAME.xml». Then, restart VirtualBox and it will work just fine.
Fix 3. Install VBoxDrv.inf Manually
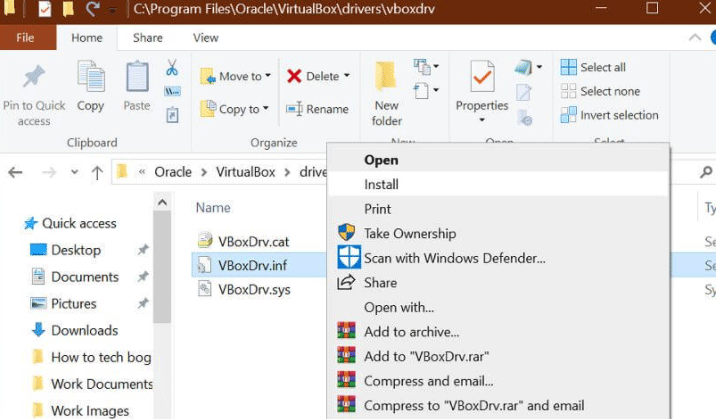
VBoxDrv.inf is a driver used for VirtualBox. However, it’s possible that due to some permission issues, the installation of this crucial driver isn’t completed during the initial installation. Then, the VM won’t start and the error E_FAIL (0x80004005) occurs. In this case, you can solve the problem by installing the VBoxDrv.inf manually. Here is the guide:
Navigate to the VirtualBox installation folder and find the VBoxDrv.inf. If you didn’t customize the installation location, the VBoxDrv.inf file path should be C:Program FilesOracleVirtualBoxdriversvboxdrv. Right-click this file and choose Install.
If all the above three methods fail to solve the problem, you can try reinstalling VirtualBox.
Bottom Line
Are the above methods useful to you? Do you have other solutions to the Result Code: E_FAIL (0x80004005) issue? Please share them with us in the following comment zone. I will appreciate that very much.
About The Author

Position: Columnist
Author Linda has been working as an editor at MiniTool for 1 year. As a fresh man in IT field, she is curious about computer knowledge and learns it crazily. Maybe due to this point, her articles are simple and easy to understand. Even people who do not understand computer can gain something.
By the way, her special focuses are data recovery, partition management, disk clone, and OS migration.
Issue
$ vagrant up
Bringing machine 'default' up with 'virtualbox' provider...
==> default: Checking if box 'ubuntu/trusty64' is up to date...
==> default: Clearing any previously set forwarded ports...
There was an error while executing `VBoxManage`, a CLI used by Vagrant
for controlling VirtualBox. The command and stderr is shown below.

Command: ["modifyvm", "c8f076e7-b65f-4a48-9632-b65af0e27ba7", "--natpf1", "delet
e", "ssh"]

Stderr: VBoxManage.exe: error: The machine 'default' is
already locked for a session (or being unlocked)
VBoxManage.exe: error: Details: code VBOX_E_INVALID_OBJECT_STATE (0x80bb0007), c
omponent Machine, interface IMachine, callee IUnknown
VBoxManage.exe: error: Context: "LockMachine(a->session, LockType_Write)" at lin
e 471 of file VBoxManageModifyVM.cpp
How to fix?
1st try and force power off of VM
Microsoft Windows [Version 6.1.7601]
Copyright (c) 2009 Microsoft Corporation.  All rights reserved.

C:Windowssystem32>VBoxManage.exe controlvm default poweroff
'VBoxManage.exe' is not recognized as an internal or external command,
operable program or batch file.

C:Windowssystem32>C:Progra~1OracleVirtualBoxVBoxManage.exe controlvm default
poweroff
VBoxManage.exe: error: The virtual machine is being powered down
<b>VBoxManage.exe: error: Details: code VBOX_E_INVALID_VM_STATE (0x80bb0002)</b>, compo
nent Console, interface IConsole, callee IUnknown
VBoxManage.exe: error: Context: "PowerDown(progress.asOutParam())" at line 222 o
f file VBoxManageControlVM.cpp
ok, still have problem, lets try something else…
C:Windowssystem32>C:Progra~1OracleVirtualBoxVBoxManage.exe startvm default
--type emergencystop
Fixed!
Bringing machine 'default' up with 'virtualbox' provider...
==> default: Checking if box 'ubuntu/trusty64' is up to date...
==> default: Clearing any previously set forwarded ports...
==> default: Clearing any previously set network interfaces...
==> default: Preparing network interfaces based on configuration...
    default: Adapter 1: nat
    default: Adapter 2: hostonly
==> default: Forwarding ports...
    default: 22 => 2222 (adapter 1)
==> default: Running 'pre-boot' VM customizations...
==> default: Booting VM...
==> default: Waiting for machine to boot. This may take a few minutes...
Other issues:
VBOX_E_INVALID_OBJECT_STATE (0x80BB0007)
Solution: After the vm exports the .ovf, use the vbox to open the .vmdk. You don’t have to import .ovf.
In windows you can kill the VboxHeadless.exe process in task manager. CMD prompt was opened in Administrative mode.
 Многие пользователи при запуске, а в некоторых случаях и до запуска виртуальной машины в VirtualBox, независимо от установленной в ней операционной системы (Windows 10 и более ранние, Linux и другие) сталкиваются с ошибкой E_FAIL 0x80004005 от компонентов MachineWrap, MediumWrap и других.
В этой инструкции подробно о наиболее частых причинах, вызывающих ошибку 0x80004005 в виртуальных машинах VirtualBox и способах исправить проблему. Возможно, для кого-то из читателей окажется полезной статья Виртуальные машины VirtualBox для начинающих.
- Исправление код ошибки E_FAIL 0x80004005 в VirtualBox
- Дополнительные возможные причины ошибки
Исправление код ошибки E_FAIL 0x80004005 в VirtualBox
Существуют различные причины появления ошибки E_FAIL 0x80004005 в VirtualBox, начнем с нескольких самых простых, которые очень легко исправить:
- Изменение пути к расположению с файлами виртуальной машины вследствие изменения буквы диска, переименования папки, содержащей файлы виртуальной машины, изменении имени папки пользователя (если папки виртуальной машины находились в ней внутри, как это обычно и есть по умолчанию). В этом случае, при запуске VirtualBox (при условии, что менеджер VB не был запущен до переименования) вы увидите отметку «Inaccessible» (Недоступно) у имени виртуальной машины и, при её выделении — информацию о рассматриваемой ошибке, как на изображении ниже. Возможные решения: вернуть изначальное расположение виртуальной машины (путь будет указан вверху вместе с сообщением File Not Found), либо удалить эту виртуальную машину в менеджере и импортировать её из нового расположения (через меню Машина — Добавить).

- Удаление файлов виртуальных дисков, ранее использовавшихся в виртуальной машине. Решение — зайти в настройки виртуальной машины и убрать удаленный виртуальный диск из раздела «Носители».
- Если вы пробрасывали физический диск, флешку или другой накопитель в виртуальную машину VirtualBox (например, вот так: Как подключить физическую USB флешку к виртуальной машине VirtualBox), то при отсутствии этого физического диска, а также если запустить менеджер VirtualBox не от имени администратора вы можете получить тот же код ошибки 0x Решения: подключить диск на место; удалить диск в настройках виртуальной машины в разделе «Носители»; запустить VirtualBox от имени администратора.


Выше были приведены простые для диагностики случаи возникновения рассматриваемой ошибки, но возможен и иной вариант: вы как обычно запускаете виртуальную машину, при этом в последнее время никаких изменений не выполнялось и, тем не менее, ошибка E_FAIL 0x80004005 появляется. Как правило, причиной тому являются проблемы с файлами конфигурации .vbox, .vbox-tmp и .vbox-prev, находящимися в папке с каждой виртуальной машиной VirtualBox.
Допустим, наша виртуальная машина называется Win10. Тогда суть будет состоять в следующем: при запуске сессии виртуальной машины, VirtualBox переименовывает файл Win10.vbox в Win10.vbox-prev и, одновременно, создает файл Win10.vbox-tmp в той же папке. Последний файл будет использоваться в качестве текущего файла конфигурации для этой сессии, а .vbox-prev сохраняется в качестве резервной копии. После завершения сессии Win10.vbox-tmp переименовывается в Win10.vbox. При следующем старте всё повторяется.

Однако, если по какой-то причине на одном из этапов процесс будет прерван, необходимый файл .vbox может не быть создан, что приведет к появлению ошибки при следующем запуске виртуальной машины.
Чтобы исправить ошибку E_FAIL 0x80004005 в таком случае выполните следующие действия:
- Полностью закройте менеджер VirtualBox, на всякий случай проверьте наличие процессов VirtualBox.exe и VBoxSVC.exe в диспетчере задач (закройте их, если запущены).
- Зайдите в папку с вашей виртуальной машиной. Стандартный путь: C:ПользователиИмя_пользователяVirtualbox VMsИмя_виртуальной_машины.
- В случае если в указанной папке нет файла имя_виртуальной_машины.vbox, но есть файлы .vbox-tmp или .vbox-prev, на всякий случай сохраните эти файлы в какой-то расположение на компьютере.
- Измените расширение файла .vbox-prev на .vbox
- Запустите менеджер VirtualBox и проверьте, запускается ли виртуальная машина теперь.
- Если это не помогло, также можете попробовать вместо .vbox-prev аналогичным образом переименовать файл .vbox-tmp.
- Если файл .vbox уже присутствовал в папке, можно попробовать перенести его в какой-то другое расположение, а потом попробовать выполнить шаги 4-6.
- В старых версиях VirtualBox использовались файлы .xml вместо .vbox, но суть решения остается той же самой и для них.
В крайнем случае, если в расположении нет ни одного из указанных файлов, вы можете настроить новую виртуальную машину VirtualBox и подключить к ней имеющийся виртуальный диск.
Дополнительные возможные причины ошибки
В случае, если предыдущие варианты не помогли, ниже — еще несколько возможных причин, способных вызвать ту же проблему при запуске виртуальной машины:
- Отключенный файл подкачки Windows или недостаток памяти для работы виртуальной машины.
- Отсутствие поддержки виртуализации или отключенная виртуализация, здесь может помочь: Как включить аппаратную виртуализацию в БИОС/UEFI.
- Включенные компоненты Hyper-V в Windows 10, подробнее: Как запускать виртуальные машины Hyper-V и VirtualBox на одном компьютере.
Также иногда срабатывает метод исправления ошибки 0x80004005 путем запуска виртуальной машины не из менеджера VirtualBox, а, после его закрытия, простым запуском файла .vbox из папки с виртуальной машиной.