by Milan Stanojevic
Milan has been enthusiastic about technology ever since his childhood days, and this led him to take interest in all PC-related technologies. He’s a PC enthusiast and he… read more
Updated on January 17, 2022
- The PHASE1 INITIALIZATION FAILED error is a BSoD error usually caused by out-of-date drivers or faulty hardware.
- You can update your Windows 10 with a professional tool that downloads missing patches with just a few clicks.
- Fixing the stop code PHASE1 INITIALIZATION FAILED may also require running the BSoD troubleshooter option.
- We also advise you to try to remove your third-party antivirus tool or any other problematic software from your PC.
XINSTALL BY CLICKING THE DOWNLOAD FILE
This software will keep your drivers up and running, thus keeping you safe from common computer errors and hardware failure. Check all your drivers now in 3 easy steps:
- Download DriverFix (verified download file).
- Click Start Scan to find all problematic drivers.
- Click Update Drivers to get new versions and avoid system malfunctionings.
- DriverFix has been downloaded by 0 readers this month.
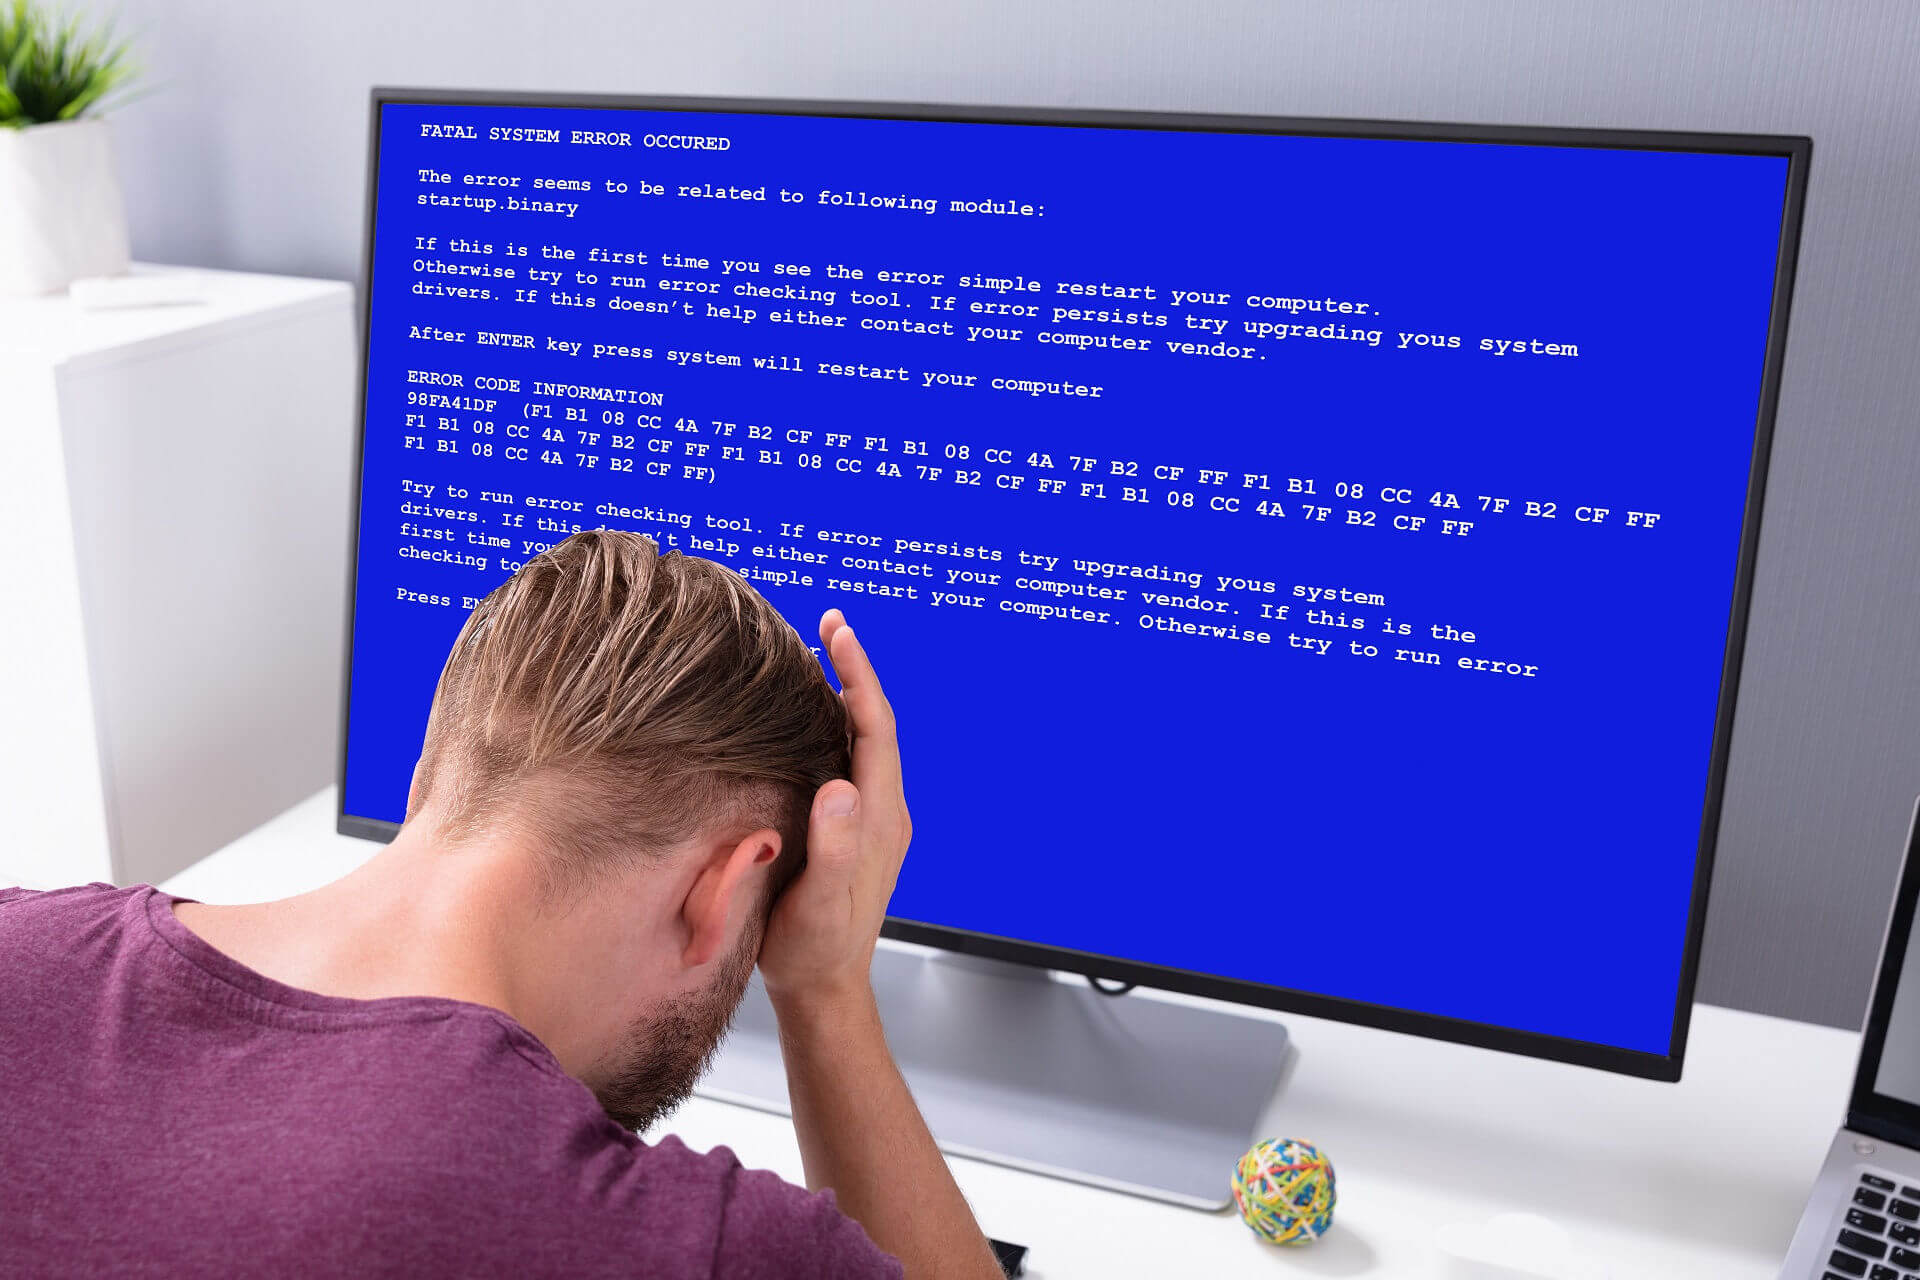
Computer errors are a common occurrence, but without a doubt, Blue Screen of Death errors are one of the most serious errors on Windows 10.
These errors are usually caused by certain software or faulty hardware. However, as you will see in this article there are many other causes that we will explore.
And since they are such a major problem, today we’re going to show you how to fix PHASE 1 INITIALIZATION FAILED errors.
How can I fix PHASE1 INITIALIZATION FAILED BSoD?
1. Make sure your Windows is up to date
Microsoft is constantly working on Windows 10, and if you wish to get the latest Windows 10 features, you’re advised to perform Windows updates regularly.
In addition to the latest features, these updates offer security and bug fixes, and often they fix many hardware and software issues.
So if you’re having problems with the PHASE INITIALIZATION FAILED BSoD error, we advise you to update Windows 10 as soon as you can.
2. Update your drivers
2.1. Perform a manual update
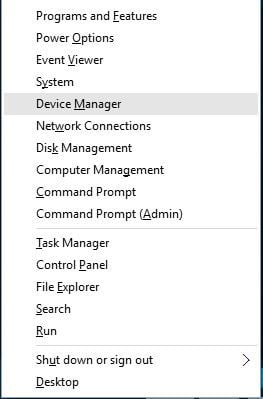
- Press Windows Key + X to open Power User Menu and select Device Manager from the list.

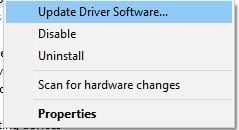
- When the Device Manager opens, locate the driver you want to update, right-click it, and choose Update Driver Software.

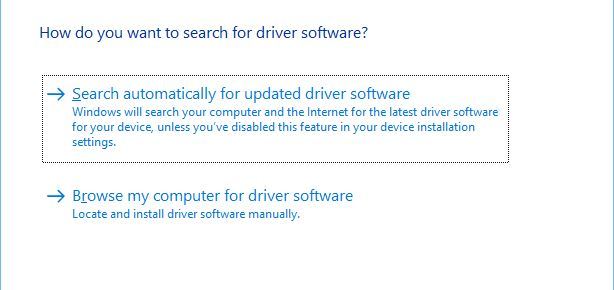
- Choose Search automatically for updated driver software and wait for the process to finish.

Drivers are a key component of Windows 10, and if a certain driver isn’t working properly, that can cause the session 1 initialization failed BSoD error to appear.
In order to update a certain driver, you need to visit your hardware manufacturer’s website, find the model of the device you wish to update, and download the latest drivers for it.
Alternatively, you can download all the necessary files by using Device Manager and then follow the steps we mentioned above.
2.2. Update drivers automatically
Searching for drivers on your own can be time-consuming. So, we advise you to use a tool that will do this for you automatically.
Using an automatic driver updater will certainly save you from the hassle of searching for drivers manually, and it will always keep your system up to date with the latest drivers.
This high-quality software will help you update drivers automatically in just a few seconds and prevent PC damage caused by installing the wrong driver versions.
⇒ Get DriverFix
3. Run the BSOD Troubleshooter
- Go to the Settings app.
- Navigate to the Update & Security section.
- Select Troubleshoot from the menu on the left.
- Select BSOD from the right pane and click Run the troubleshooter.

- Follow the instructions on the screen to complete the troubleshooter.
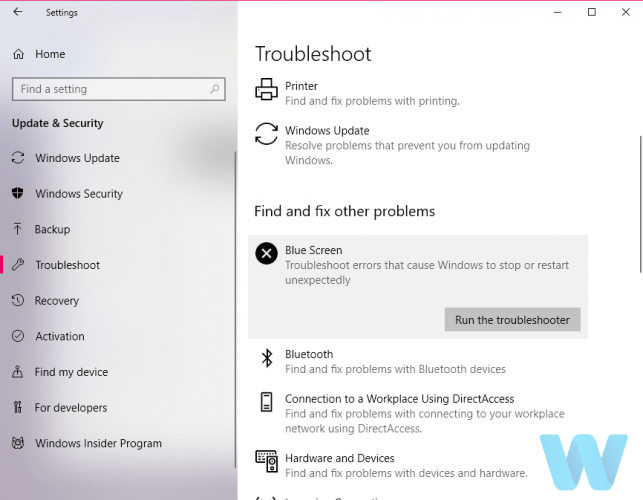
Now, we’re going to try Windows 10’s built-in troubleshooting tool. This tool can resolve basically any system-related problem you can think of, including the Windows 10 error, PHASE1 INITIALIZATION FAILED.
4. Run the SFC scan
- Go to Search, type cmd, and open Command Prompt as Administrator.
- Enter the following line and press Enter:
sfc/scannow
- Wait until the process is done (it may take a while).
- Now, close the Command Prompt and restart your computer.
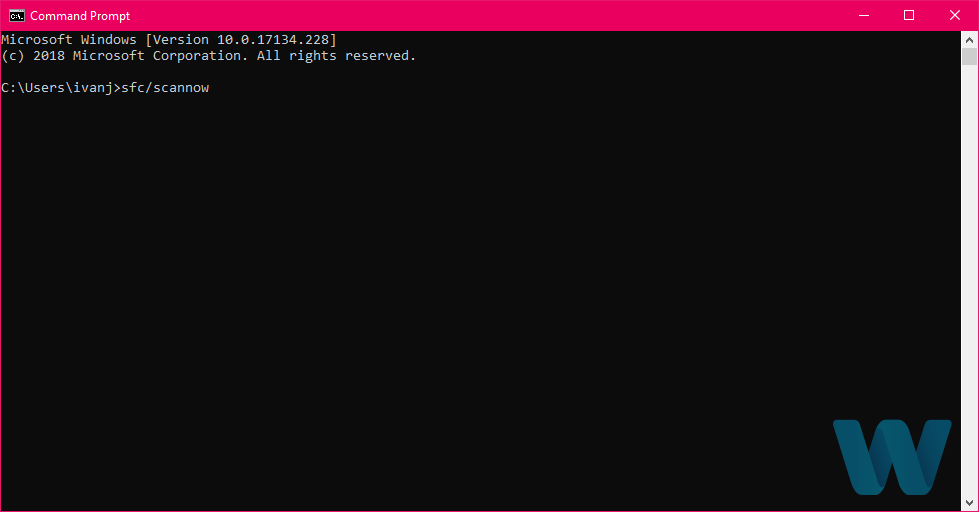
The SFC scan is another troubleshooting tool we’re going to try here. You can run the SFC scan from the command line, and it also scans your computer for potential flaws and resolves them (if possible).
5. Run DISM
5.1. Standard way
- Right-click Start and open Command Prompt (Admin).
- Paste the following command and press Enter:
DISM /Online /Cleanup-Image /RestoreHealth
- Wait until the scan is finished.
- Restart your computer and try updating again.
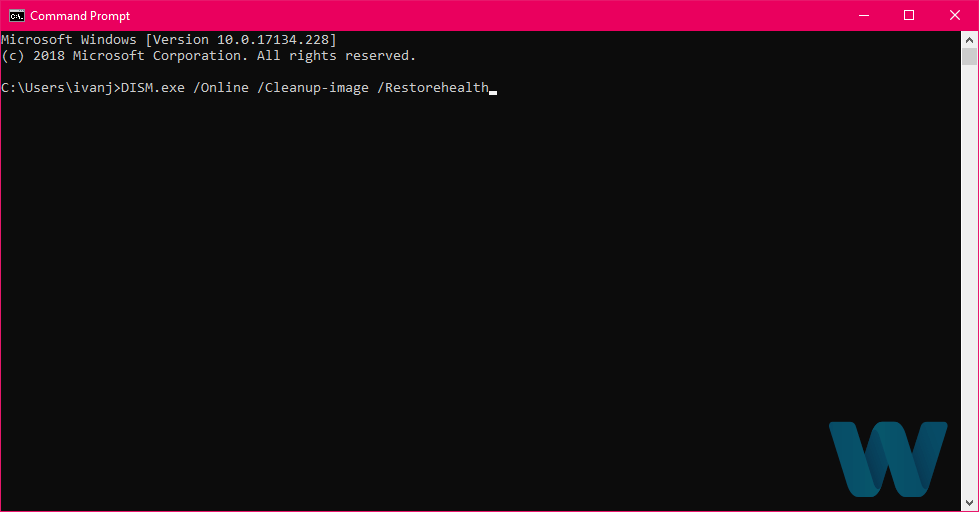
And the third tool we’re going to run is DISM. Deployment Image Servicing and Management is a tool that reloads the system image, which tends to resolve potential issues.
So, it might be helpful when resolving the PHASE1 INITIALIZATION FAILED error, as well.
5.2. With the Windows installation media
- Insert your Windows installation media.
- Right-click the Start menu and, from the menu, choose the Command Prompt (Admin).
- In the command line, type the following commands and press Enter after each:
dism /online /cleanup-image /scanhealthdism /online /cleanup-image /restorehealth
- Now, type the following command and press Enter:
DISM /Online /Cleanup-Image /RestoreHealth /source:WIM:X:SourcesInstall.wim:1 /LimitAccess
- Make sure to change an X value with the letter of the mounted drive with Windows 10 installation.
- After the procedure is finished, restart your computer.
6. Check the hard drive
- Enter the Advanced Startup (Restart your computer while holding the Shift key).
- Choose Troubleshoot, select Advanced Options.
- Select Command Prompt from the list of options.
- When Command Prompt appears, enter the following lines and press Enter after each line in order to run it:
bootrec.exe /rebuildbcd
bootrec.exe /fixmbrbootrec.exe /fixboot
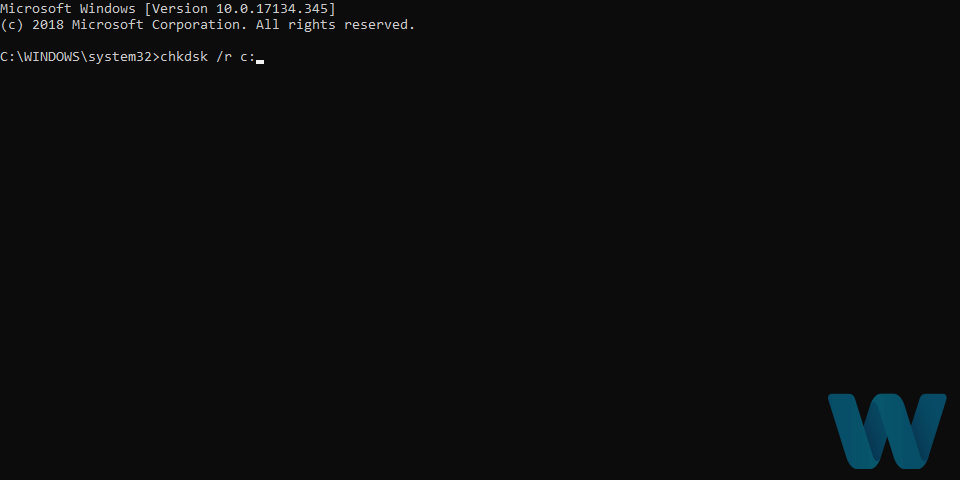
- Some users are also suggesting that you need to run additional chkdsk commands as well. To perform these commands, you need to know drive letters for all your hard drive partitions. In Command Prompt you should enter the following (but remember to use the letters that match your hard drive partitions on your PC):
chkdsk /r c:chkdsk /r d:This is just our example, so keep in mind that you have to perform chkdsk command for every hard drive partition that you have.
- Restart your computer and check if the issue is resolved.
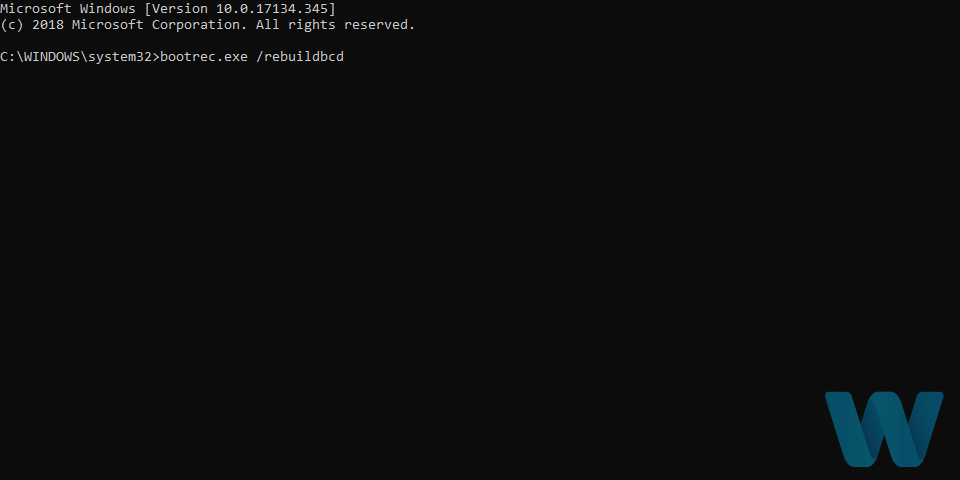
If there’s a problem with your hard drive or partitions, BSOD errors are quite possible. So, we’re going to run a test to see if everything is in its place.
7. Copy Catroot, Catroot2 and CodeIntegrity folders from a working PC
According to the users, PHASE1 INITIALIZATION FAILED BSoD error sometimes appears due to corrupted Catroot, Catroot2, and CodeIntegrity folders.
In order to fix this issue, users are suggesting copying these folders from a working computer and replace them. Before copying these files, make sure that both versions of Windows 10 are identical.
Some PC issues are hard to tackle, especially when it comes to corrupted repositories or missing Windows files. If you are having troubles fixing an error, your system may be partially broken.
We recommend installing Restoro, a tool that will scan your machine and identify what the fault is.
Click here to download and start repairing.
For example, if you’re using a 32-bit version of Windows 10, make sure to copy these folders from another computer that runs a 32-bit version of Windows 10.
8. Temporarily uninstall your antivirus software
In many cases your antivirus can be responsible for the stop code PHASE1 INITIALIZATION FAILED error and in order to fix it, it’s advised that you remove your antivirus software completely.
Removing your antivirus software is relatively simple, but to remove antivirus software completely including all the remaining files and registry keys it’s advised to use dedicated uninstaller tools.
Many antivirus companies offer these tools, and you can download them for free. If uninstalling your antivirus fixes this problem, you can install the latest version of your current antivirus software.
9. Check for problematic software
In some cases, your software can cause this error to appear, especially if you use VPN tools or any similar programs.
If you recently installed or updated certain software, uninstall that software in order to fix this Blue Screen of Death problem.
One of the most efficient methods that allow you to find out exactly what program is causing the Blue Screen of Death error is to access the BSoD file log location.
10. Perform System Restore or reset your PC
- Start the Automatic Repair process by restarting your computer while it boots. (You might have to repeat this step a few times before you access Automatic Repair options.)
- Choose Troubleshoot, select Advanced Options, click System Restore.
- Choose the restore point and follow the instructions.
If the problem is caused by problematic software or a driver, you can fix the PHASE1 INITIALIZATION FAILED BSoD error by performing a System Restore.
- Start Automatic Repair.
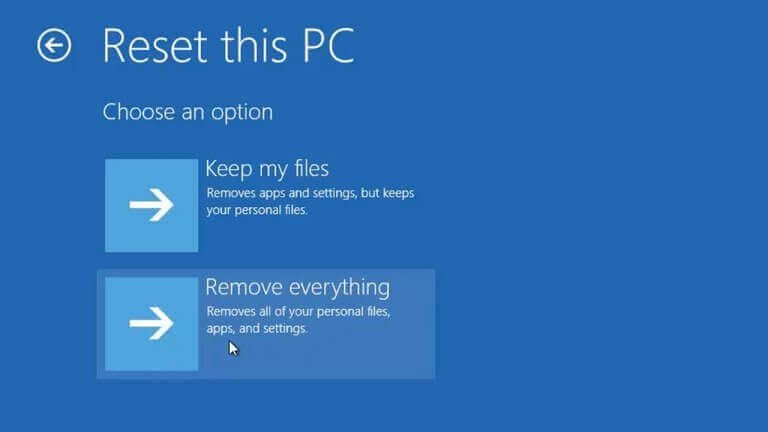
- Choose Troubleshoot then Reset your PC.
- Select Remove everything, choose Only the drive where Windows 10 is installed.
- Follow the process and wait for Windows 10 to install again.
If the System Restore didn’t fix the problem, you need to reset your PC. Before we start, we urge you to back up all your important files since this process will remove all files and folders from your C drive.
By performing this process you successfully deleted all files and folders from drive C thus removing any potential software problems.
If the error PHASE1 INITIALIZATION FAILED still appears, it’s most likely that it’s being caused by a hardware problem.
11. Check your hardware
If you recently installed any new hardware, make sure to replace it or remove it since it might not be fully compatible with your PC.
If no new hardware is installed, make sure to check your hard drive and RAM since they are the most likely causes of PHASE1 INITIALIZATION FAILED errors.
To check your RAM you can use tools such as MemTest86+, just make sure to keep the tool running for a couple of hours in order to perform a thorough scan.
If your RAM is working properly, the error is probably caused by another component. Users reported that your hard drive can also cause this error, so make sure to replace it.
You can also check out other solutions that can help you when it comes to the BSoD error, so take a look at these quick fixes for Black Screen of Death on Windows 10.
PHASE1 INITIALIZATION FAILED error can be problematic, especially if it’s caused by faulty hardware. We hope that some of our solutions were helpful to you and that you managed to fix this error.
We also strongly advise you to try a high-quality dedicated tool for fixing this type of error. See what apps we’re recommending, in this article on the best software for fixing BSOD errors.
See what are the most common factors that generate the Blue Screen of Death errors in this excellent article that explores all the causes for the BSoD on your Windows 10.
We’d like to hear more on this subject from you so please drop us a comment in the dedicated section below.
![]()
Newsletter
by Milan Stanojevic
Milan has been enthusiastic about technology ever since his childhood days, and this led him to take interest in all PC-related technologies. He’s a PC enthusiast and he… read more
Updated on January 17, 2022
- The PHASE1 INITIALIZATION FAILED error is a BSoD error usually caused by out-of-date drivers or faulty hardware.
- You can update your Windows 10 with a professional tool that downloads missing patches with just a few clicks.
- Fixing the stop code PHASE1 INITIALIZATION FAILED may also require running the BSoD troubleshooter option.
- We also advise you to try to remove your third-party antivirus tool or any other problematic software from your PC.
XINSTALL BY CLICKING THE DOWNLOAD FILE
This software will keep your drivers up and running, thus keeping you safe from common computer errors and hardware failure. Check all your drivers now in 3 easy steps:
- Download DriverFix (verified download file).
- Click Start Scan to find all problematic drivers.
- Click Update Drivers to get new versions and avoid system malfunctionings.
- DriverFix has been downloaded by 0 readers this month.
Computer errors are a common occurrence, but without a doubt, Blue Screen of Death errors are one of the most serious errors on Windows 10.
These errors are usually caused by certain software or faulty hardware. However, as you will see in this article there are many other causes that we will explore.
And since they are such a major problem, today we’re going to show you how to fix PHASE 1 INITIALIZATION FAILED errors.
How can I fix PHASE1 INITIALIZATION FAILED BSoD?
1. Make sure your Windows is up to date
Microsoft is constantly working on Windows 10, and if you wish to get the latest Windows 10 features, you’re advised to perform Windows updates regularly.
In addition to the latest features, these updates offer security and bug fixes, and often they fix many hardware and software issues.
So if you’re having problems with the PHASE INITIALIZATION FAILED BSoD error, we advise you to update Windows 10 as soon as you can.
2. Update your drivers
2.1. Perform a manual update
- Press Windows Key + X to open Power User Menu and select Device Manager from the list.
- When the Device Manager opens, locate the driver you want to update, right-click it, and choose Update Driver Software.
- Choose Search automatically for updated driver software and wait for the process to finish.
Drivers are a key component of Windows 10, and if a certain driver isn’t working properly, that can cause the session 1 initialization failed BSoD error to appear.
In order to update a certain driver, you need to visit your hardware manufacturer’s website, find the model of the device you wish to update, and download the latest drivers for it.
Alternatively, you can download all the necessary files by using Device Manager and then follow the steps we mentioned above.
2.2. Update drivers automatically
Searching for drivers on your own can be time-consuming. So, we advise you to use a tool that will do this for you automatically.
Using an automatic driver updater will certainly save you from the hassle of searching for drivers manually, and it will always keep your system up to date with the latest drivers.
This high-quality software will help you update drivers automatically in just a few seconds and prevent PC damage caused by installing the wrong driver versions.
⇒ Get DriverFix
3. Run the BSOD Troubleshooter
- Go to the Settings app.
- Navigate to the Update & Security section.
- Select Troubleshoot from the menu on the left.
- Select BSOD from the right pane and click Run the troubleshooter.
- Follow the instructions on the screen to complete the troubleshooter.
Now, we’re going to try Windows 10’s built-in troubleshooting tool. This tool can resolve basically any system-related problem you can think of, including the Windows 10 error, PHASE1 INITIALIZATION FAILED.
4. Run the SFC scan
- Go to Search, type cmd, and open Command Prompt as Administrator.
- Enter the following line and press Enter:
sfc/scannow - Wait until the process is done (it may take a while).
- Now, close the Command Prompt and restart your computer.
The SFC scan is another troubleshooting tool we’re going to try here. You can run the SFC scan from the command line, and it also scans your computer for potential flaws and resolves them (if possible).
5. Run DISM
5.1. Standard way
- Right-click Start and open Command Prompt (Admin).
- Paste the following command and press Enter:
DISM /Online /Cleanup-Image /RestoreHealth
- Wait until the scan is finished.
- Restart your computer and try updating again.
And the third tool we’re going to run is DISM. Deployment Image Servicing and Management is a tool that reloads the system image, which tends to resolve potential issues.
So, it might be helpful when resolving the PHASE1 INITIALIZATION FAILED error, as well.
5.2. With the Windows installation media
- Insert your Windows installation media.
- Right-click the Start menu and, from the menu, choose the Command Prompt (Admin).
- In the command line, type the following commands and press Enter after each:
dism /online /cleanup-image /scanhealthdism /online /cleanup-image /restorehealth
- Now, type the following command and press Enter:
DISM /Online /Cleanup-Image /RestoreHealth /source:WIM:X:SourcesInstall.wim:1 /LimitAccess
- Make sure to change an X value with the letter of the mounted drive with Windows 10 installation.
- After the procedure is finished, restart your computer.
6. Check the hard drive
- Enter the Advanced Startup (Restart your computer while holding the Shift key).
- Choose Troubleshoot, select Advanced Options.
- Select Command Prompt from the list of options.
- When Command Prompt appears, enter the following lines and press Enter after each line in order to run it:
bootrec.exe /rebuildbcdbootrec.exe /fixmbrbootrec.exe /fixboot
- Some users are also suggesting that you need to run additional chkdsk commands as well. To perform these commands, you need to know drive letters for all your hard drive partitions. In Command Prompt you should enter the following (but remember to use the letters that match your hard drive partitions on your PC):
chkdsk /r c:chkdsk /r d:This is just our example, so keep in mind that you have to perform chkdsk command for every hard drive partition that you have.
- Restart your computer and check if the issue is resolved.
If there’s a problem with your hard drive or partitions, BSOD errors are quite possible. So, we’re going to run a test to see if everything is in its place.
7. Copy Catroot, Catroot2 and CodeIntegrity folders from a working PC
According to the users, PHASE1 INITIALIZATION FAILED BSoD error sometimes appears due to corrupted Catroot, Catroot2, and CodeIntegrity folders.
In order to fix this issue, users are suggesting copying these folders from a working computer and replace them. Before copying these files, make sure that both versions of Windows 10 are identical.
Some PC issues are hard to tackle, especially when it comes to corrupted repositories or missing Windows files. If you are having troubles fixing an error, your system may be partially broken.
We recommend installing Restoro, a tool that will scan your machine and identify what the fault is.
Click here to download and start repairing.
For example, if you’re using a 32-bit version of Windows 10, make sure to copy these folders from another computer that runs a 32-bit version of Windows 10.
8. Temporarily uninstall your antivirus software
In many cases your antivirus can be responsible for the stop code PHASE1 INITIALIZATION FAILED error and in order to fix it, it’s advised that you remove your antivirus software completely.
Removing your antivirus software is relatively simple, but to remove antivirus software completely including all the remaining files and registry keys it’s advised to use dedicated uninstaller tools.
Many antivirus companies offer these tools, and you can download them for free. If uninstalling your antivirus fixes this problem, you can install the latest version of your current antivirus software.
9. Check for problematic software
In some cases, your software can cause this error to appear, especially if you use VPN tools or any similar programs.
If you recently installed or updated certain software, uninstall that software in order to fix this Blue Screen of Death problem.
One of the most efficient methods that allow you to find out exactly what program is causing the Blue Screen of Death error is to access the BSoD file log location.
10. Perform System Restore or reset your PC
- Start the Automatic Repair process by restarting your computer while it boots. (You might have to repeat this step a few times before you access Automatic Repair options.)
- Choose Troubleshoot, select Advanced Options, click System Restore.
- Choose the restore point and follow the instructions.
If the problem is caused by problematic software or a driver, you can fix the PHASE1 INITIALIZATION FAILED BSoD error by performing a System Restore.
- Start Automatic Repair.
- Choose Troubleshoot then Reset your PC.
- Select Remove everything, choose Only the drive where Windows 10 is installed.
- Follow the process and wait for Windows 10 to install again.
If the System Restore didn’t fix the problem, you need to reset your PC. Before we start, we urge you to back up all your important files since this process will remove all files and folders from your C drive.
By performing this process you successfully deleted all files and folders from drive C thus removing any potential software problems.
If the error PHASE1 INITIALIZATION FAILED still appears, it’s most likely that it’s being caused by a hardware problem.
11. Check your hardware
If you recently installed any new hardware, make sure to replace it or remove it since it might not be fully compatible with your PC.
If no new hardware is installed, make sure to check your hard drive and RAM since they are the most likely causes of PHASE1 INITIALIZATION FAILED errors.
To check your RAM you can use tools such as MemTest86+, just make sure to keep the tool running for a couple of hours in order to perform a thorough scan.
If your RAM is working properly, the error is probably caused by another component. Users reported that your hard drive can also cause this error, so make sure to replace it.
You can also check out other solutions that can help you when it comes to the BSoD error, so take a look at these quick fixes for Black Screen of Death on Windows 10.
PHASE1 INITIALIZATION FAILED error can be problematic, especially if it’s caused by faulty hardware. We hope that some of our solutions were helpful to you and that you managed to fix this error.
We also strongly advise you to try a high-quality dedicated tool for fixing this type of error. See what apps we’re recommending, in this article on the best software for fixing BSOD errors.
See what are the most common factors that generate the Blue Screen of Death errors in this excellent article that explores all the causes for the BSoD on your Windows 10.
We’d like to hear more on this subject from you so please drop us a comment in the dedicated section below.
![]()
Newsletter
We have an RD farm with two session hosts and a gateway that has been working. It has been in use for several months and I don’t think anything was changed. I was informed that it stopped working and I do see evidence of this. I’ve been troubleshooting and
see that the hosts both left the farm last week with this error message:
Log Name: Microsoft-Windows-TerminalServices-SessionBroker-Client/Operational
Source: Microsoft-Windows-TerminalServices-SessionBroker-Client
Date: 7/19/2013 3:06:42 PM
Event ID: 1283
Task Category: Connection Broker Client terminate
Level: Information
Keywords:
User: NETWORK SERVICE
Computer: server08.domain.com
Description:
Remote Desktop Services successfully left a farm on the Connection Broker server gate.domain.com.
Since then whenever someone connects we get three events in a row in the same log:
Event ID: 1301
Task Category: RD Connection Broker Client processes request from a user
User: NETWORK SERVICE
Computer: server08.domain.com
Description:
Remote Desktop Connection Broker Client received request for redirection.
User : DOMAINddawson
RDP Client Version : 5
Event ID: 1296
Task Category: RD Connection Broker Client processes request from a user
Computer: server08.domain.com
Description:
Remote Desktop Connection Broker Client failed while getting redirection packet from Connection Broker.
User : DOMAINddawson
HRESULT = 0x88150002
Event ID: 1306
Task Category: RD Connection Broker Client processes request from a user
Computer: server08.domain.com
Description:
Remote Desktop Connection Broker Client failed to redirect the user DOMAINddawson.
HRESULT = 0x88150002
I’m not sure which direction to go. I’ve confirmed that the session hosts are both in local group «Session Broker Computers» on our Session Broker. On each host I’ve removed them from the farm and put them back in. When I do that I get the error:
Event ID: 1284
Task Category: Connection Broker Client start up
Computer: server08.domain.com
Description:
Remote Desktop Connection Broker Client failed to initialize while joining the Connection Broker on server gate.domain.com.
HRESULT = 0x80070534
I’ve read the articles telling me to test connectivity. These computers are all on the same physical network and I can RDP and PING back and forth between them all. What can I try next?
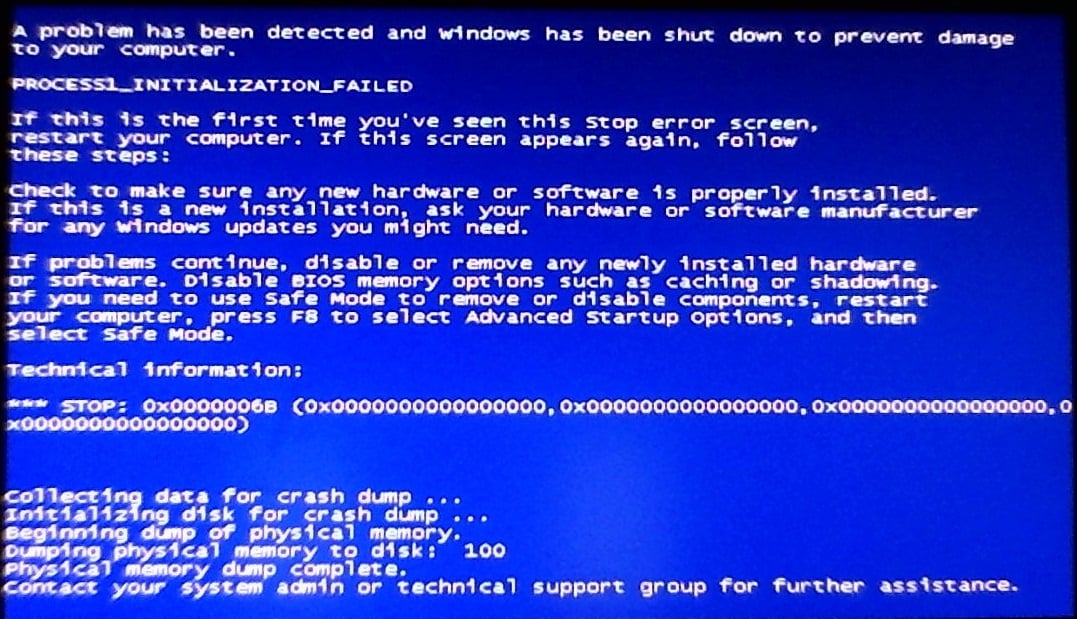
В данной статье мы с вами будем рассматривать синий экран смерти, который именуется PROCESS1_INITIALIZATION_FAILED и имеет номер 0x0000006B. Что сами Майкрософт говорят по поводу этой проблемы? Они говорят вот что: «Данная проблема появляется вследствие повреждения файла Bootcat.cache или же из-за изменения размера этого файла». Из этого мы точно можем утверждать, что проблема заключается в файле Bootcat.cache. Также нельзя исключать таких вещей, как повреждения системных файлов, аппаратных компонентов, кабелей или прочее. Синий экран смерти PROCESS1_INITIALIZATION_FAILED может проявлять себя на большинстве версий операционной системы Windows.
В сообщении этого критического сбоя присутствует следующая информация:
STOP: 0x0000006B (Параметр1, Параметр2, Параметр3, Параметр4)
PROCESS1_INITIALIZATION_FAILED
Заметка: эти четыре параметра могут меняться в зависимости от конфигурации компьютера пользователя.
Помимо прочего, этот синий экран смерти можно увидеть даже на клиентах, серверных машинах и смартфонах. В данной статье мы опишем целых 8 методов, которые помогут разрешить вам эту непростую ситуацию.
Содержание
- Решаем сбой PROCESS1_INITIALIZATION_FAILED
- Метод №1 Удаление файла Bootcat.cache
- Метод №2 Копирование Bootcat.cache с другого компьютера
- Метод №3 Удаление файла COMPONENTS
- Метод No4 Установка Windows 7 SP1
- Метод No5 Удаление Roxio GoBack
- Метод №6 Восстановление Windows с помощью утилиты DISM
- Метод №7 Исключить папку от сканирований
- Метод №8 Использование утилиты CHKDSK
Решаем сбой PROCESS1_INITIALIZATION_FAILED
Метод №1 Удаление файла Bootcat.cache
Следуя из сообщения Майкрософт, первым вашим шагом станет удаление файла Bootcat.cache из папки CodeIntegrity. Данный файл располагается в директории C:WindowsSystem32Codeintegrity. Вам понадобится загрузить компьютер через диск восстановления системы Windows. Если вы не знаете, как создать этот диск, то пройдите по этой ссылке на сайт Майкрософт, где написаны точные инструкции по его созданию. Создав этот диск, сделайте следующее:
- Вставьте диск или же флеш-носитель в свой компьютер.
- Перезапустите компьютер.
- Загрузите систему через диск восстановления Windows.
- Выберите предпочитаемый язык и другие параметры, а затем нажмите «Далее» для продолжения.
- Кликните на кнопку «Восстановление системы».
- Далее пройдите путем «Диагностика→Дополнительные параметры→Командная строка»
- Выберите пункт «Командная строка».
- Впишите в нее команду diskpart.
- Впишите list volume и нажмите Enter.
- Запомните в каком разделе находится ваша ОС, затем впишите Exit и нажмите Enter.
- Впишите C:(укажите тот раздел, в котором находится ваша ОС) и нажмите Enter.
- Впишите cd windowssystem32codeintegrity и нажмите Enter.
- Впишите del bootcat.cache и нажмите Enter.
- Закройте Командную строку.
- Перезагрузите свой компьютер, а затем попытайтесь зайти в систему обычным путем.
Метод №2 Копирование Bootcat.cache с другого компьютера
Если первый метод вам не помог в решении проблемы с синим экраном смерти PROCESS1_INITIALIZATION_FAILED, то вы должны попробовать этот метод, который включает в себя копирование файла Bootcat.cache с другого компьютера, подразумевая, что тот работает там корректно. Также как и в предыдущем методе, вам снова придется загрузить свою систему через диск восстановления.
- Найдите другой компьютер и зайдите в его операционную систему.
- Вставьте в флеш-устройство в компьютер.
- Нажмите Windows+E чтобы открыть Проводник Windows.
- Пройдите в директорию C:WindowsSystem32Codeintegrity.
- Копируйте файл Bootcat.cache к себе на флеш-устройство.
- Вставьте флеш-хранилище в компьютер, у которого проблемы с синим экраном смерти PROCESS1_INITIALIZATION_FAILED.
- Запустите проблемный компьютер через диск восстановления Windows и доберитесь до Командной строки, как это было показано в предыдущем методе.
- Открыв Командную строку, впишите в нее команду diskpart.
- Впишите list volume и нажмите Enter.
- Запомните в каком разделе находится ваша ОС, затем впишите Exit и нажмите Enter.
- Впишите C:(укажите тот раздел, в котором находится ваша ОС) и нажмите Enter.
- Впишите cd windowssystem32codeintegrity и нажмите Enter.
- Впишите copy E:bootcat.cache(впишите ту букву, под которой выступает ваше флеш-хранилище) и нажмите Enter.
- Закройте Командную строку.
- Перезагрузите свой компьютер.
Метод №3 Удаление файла COMPONENTS
Итак, если ничего из вышеперечисленного не помогло, а такое вполне возможно, то давайте двигаться дальше. На этот раз мы с вами попробуем сделать кое-что другое – удаление файла COMPONENTS из директории windowssystem32config. Данное действие также зарекомендовало себя отличным способом по борьбе с синим экраном смерти PROCESS1_INITIALIZATION_FAILED.
- Снова запустите свою ОС через диск восстановления.
- Пройдите весь путь до Командной строки, как это было уже показано в предыдущих методах.
- Впишите команду diskpart и нажмите Enter.
- Впишите list volume и нажмите Enter.
- Впишите Exit и нажмите Enter.
- Впишите cd windowssystem32config и нажмите Enter.
- Впишите del components и нажмите Enter.
- Закройте Командную строку.
- Перезагрузите свой компьютер.
Ну что, ваша система все еще загружается с синим экраном смерти PROCESS1_INITIALIZATION_FAILED? Ок, тогда давайте двигаться далее.
Метод No4 Установка Windows 7 SP1
Если вы используете Windows 7 без SP1, то вам нужно попробовать установить этот сервисный пакет для вашей операционной системы. Все что вам нужно сделать, так это пройти в Центр загрузок Майкрософт и скачать от туда необходимый сервисный пакет. Однако, будьте внимательно, что именно вы скачивайте. Обязательно отталкивайтесь от того, какой разрядностью обладает ваша система, т.е. 32-битная или 64-битная. Загрузите Windows 7 SP1, установите его и перезагрузите систему. Затем проверьте, появляется ли синий экран смерти PROCESS1_INITIALIZATION_FAILED.
Метод No5 Удаление Roxio GoBack
Если вы используете программное обеспечение Roxio GoBack, то вам нужно попробовать удалить его, чтобы проверить, не вызывает ли ли оно уже оговоренный синий экран смерти. Удаляется Roxio GoBack довольно просто через Программы и компоненты.
- Нажмите на клавиатуре Windows+R.
- Впишите appwiz.cpl и нажмите Enter.
- Выберите Roxio GoBack и удалите ее.
- Перезагрузите компьютер.
- Протестируйте систему на стабильность.
Возможно, что именно эта утилита и стояла за таким серьезным сбоем в системе, как PROCESS1_INITIALIZATION_FAILED. Однако, если ничего не изменилось, то давайте двигаться дальше по нашему списку методов.
Метод №6 Восстановление Windows с помощью утилиты DISM
Для выполнения этого метода, нам потребуется использовать утилиту под названием DISM. DISM – это команда, которая позволяет вам монтировать образ Windows(install.wim) и выполнять такие действия, как установку, удаление, настройку и обновление операционной системы. DISM является компонентом комплекта средств для развертывания и оценки Windows(Windows ADK), который можно загрузить по этой ссылке. Итак, чтобы восстановить Windows с помощью утилиты DISM, вам потребуется сделать следующее:
- Для начала загрузите Windows ADK, а затем установите DISM.
- Нажмите на Пуск и впишите в поисковик запрос «Система обслуживания образов развертывания и управления ими».
- Нажмите на найденный результат ПКМ и выберите Запустить от Администратора.
- Впишите в нее DISM /image:D: /cleanup-image /revertpendingactions и нажмите Enter.
- После выполнения команды, перезагрузите свой компьютер, а затем протестируйте систему на наличие синего экрана смерти PROCESS1_INITIALIZATION_FAILED.
Метод №7 Исключить папку от сканирований
Антивирусное программное обеспечение также может стоять у истоков проблемы с появлением оговоренного синего экрана смерти. Чтобы исправить это, вам нужно исключить папки CodeIntegrity и catroot от сканирования антивирусом. Сейчас мы покажем вам как это делать на примере Защитника Windows. Если вы используете иной антивирус, то это не беда, так как там, скорее всего, будут применимы эти шаги.
- Кликните на Пуск и впишите в поисковик запрос «Защитник Windows».
- Нажмите на найденный результат ПКМ и выберите «Запустить от имени Администратора».
- Перейдите во вкладку «Параметры».
- Кликните на «Добавить исключение».
- Кликните на «Исключить папку».
- Пройдите в директорию C:WindowsSystem32CodeIntegrity.
- Кликните «Исключить эту папку».
- Кликните на «Исключить папку» еще один раз.
- Пройдите в директорию C:WindowsSystem32catroot.
- Кликните «Исключить эту папку».
- Еще раз хорошенько проверьте, исключили ли вы нужные вам папки.
Возможно, синий экран смерти PROCESS1_INITIALIZATION_FAILED появлялся в случае сканирования этих папок. По крайней мере, так утверждают некоторые пользователи в Интернете. Ну что, проблема все еще преследует вас?
Метод №8 Использование утилиты CHKDSK
Когда ваш жесткий диск не работает как надо, то на нем могут появиться поврежденные данные или же плохие сектора. В этом случае вам поможет довольно неплохая системная утилита CHKDSK, которая поможет найти вам бэдблоки и исправить их, но только если это будет возможно.
- Нажмите ПКМ на Пуск и выберите «Командная строка(администратор)».
- Впишите chkdsk /r и нажмите Enter.
- Далее напишите Y и нажмите Enter, чтобы принять перезагрузку компьютера.
- Подождите, пока утилита завершит починку файловой системы на компьютере. Должны завершиться все пять стадий операции.
Мы надеемся, что данная статья помогла вам преодолеть проблему в виде синего экрана смерти PROCESS1_INITIALIZATION_FAILED. Если же он так и продолжает постоянно проявляться, то вы также можете еще попробовать выполнить восстановление системы с помощью ранее созданной точки или через бэкап. Если и это не помогло, то это может означать, что у вас присутствуют проблемы аппаратного характера, например, виновниками могли стать ваш HDD/SSD или же оперативная память.
Hi i am a proxmox nub and i definitely messed something up. I cannot access my Vms or do any backups. When i try i get a permission denied and the «Start all VMs and Containers» is just stuck in a loop show below.
May 09 18:09:00 Vera systemd[1]: Starting Proxmox VE replication runner...
May 09 18:09:00 Vera pvesr[9012]: trying to acquire cfs lock 'file-replication_cfg' ...
May 09 18:09:01 Vera pvesr[9012]: trying to acquire cfs lock 'file-replication_cfg' ...
May 09 18:09:02 Vera pvesr[9012]: trying to acquire cfs lock 'file-replication_cfg' ...
May 09 18:09:02 Vera pmxcfs[1304]: [quorum] crit: quorum_initialize failed: 2
May 09 18:09:02 Vera pmxcfs[1304]: [confdb] crit: cmap_initialize failed: 2
May 09 18:09:02 Vera pmxcfs[1304]: [dcdb] crit: cpg_initialize failed: 2
May 09 18:09:02 Vera pmxcfs[1304]: [status] crit: cpg_initialize failed: 2
May 09 18:09:03 Vera pvesr[9012]: trying to acquire cfs lock 'file-replication_cfg' ...
May 09 18:09:04 Vera pvesr[9012]: trying to acquire cfs lock 'file-replication_cfg' ...
May 09 18:09:05 Vera pvesr[9012]: trying to acquire cfs lock 'file-replication_cfg' ...
May 09 18:09:06 Vera pvesr[9012]: trying to acquire cfs lock 'file-replication_cfg' ...
May 09 18:09:07 Vera pvesr[9012]: trying to acquire cfs lock 'file-replication_cfg' ...
May 09 18:09:08 Vera pvesr[9012]: trying to acquire cfs lock 'file-replication_cfg' ...
May 09 18:09:08 Vera pmxcfs[1304]: [quorum] crit: quorum_initialize failed: 2
May 09 18:09:08 Vera pmxcfs[1304]: [confdb] crit: cmap_initialize failed: 2
May 09 18:09:08 Vera pmxcfs[1304]: [dcdb] crit: cpg_initialize failed: 2
May 09 18:09:08 Vera pmxcfs[1304]: [status] crit: cpg_initialize failed: 2
May 09 18:09:09 Vera pvesr[9012]: error with cfs lock 'file-replication_cfg': no quorum!
May 09 18:09:09 Vera systemd[1]: pvesr.service: Main process exited, code=exited, status=13/n/a
May 09 18:09:09 Vera systemd[1]: Failed to start Proxmox VE replication runner.
May 09 18:09:09 Vera systemd[1]: pvesr.service: Unit entered failed state.
May 09 18:09:09 Vera systemd[1]: pvesr.service: Failed with result 'exit-code'.
May 09 18:09:14 Vera pmxcfs[1304]: [quorum] crit: quorum_initialize failed: 2
May 09 18:09:14 Vera pmxcfs[1304]: [confdb] crit: cmap_initialize failed: 2
May 09 18:09:14 Vera pmxcfs[1304]: [dcdb] crit: cpg_initialize failed: 2
May 09 18:09:14 Vera pmxcfs[1304]: [status] crit: cpg_initialize failed: 2
May 09 18:09:20 Vera pmxcfs[1304]: [quorum] crit: quorum_initialize failed: 2
May 09 18:09:20 Vera pmxcfs[1304]: [confdb] crit: cmap_initialize failed: 2
May 09 18:09:20 Vera pmxcfs[1304]: [dcdb] crit: cpg_initialize failed: 2
May 09 18:09:20 Vera pmxcfs[1304]: [status] crit: cpg_initialize failed: 2
May 09 18:09:26 Vera pmxcfs[1304]: [quorum] crit: quorum_initialize failed: 2
May 09 18:09:26 Vera pmxcfs[1304]: [confdb] crit: cmap_initialize failed: 2
May 09 18:09:26 Vera pmxcfs[1304]: [dcdb] crit: cpg_initialize failed: 2
May 09 18:09:26 Vera pmxcfs[1304]: [status] crit: cpg_initialize failed: 2
May 09 18:09:32 Vera pmxcfs[1304]: [quorum] crit: quorum_initialize failed: 2
May 09 18:09:32 Vera pmxcfs[1304]: [confdb] crit: cmap_initialize failed: 2
May 09 18:09:32 Vera pmxcfs[1304]: [dcdb] crit: cpg_initialize failed: 2
May 09 18:09:32 Vera pmxcfs[1304]: [status] crit: cpg_initialize failed: 2
May 09 18:09:38 Vera pmxcfs[1304]: [quorum] crit: quorum_initialize failed: 2
May 09 18:09:38 Vera pmxcfs[1304]: [confdb] crit: cmap_initialize failed: 2
May 09 18:09:38 Vera pmxcfs[1304]: [dcdb] crit: cpg_initialize failed: 2
May 09 18:09:38 Vera pmxcfs[1304]: [status] crit: cpg_initialize failed: 2
May 09 18:09:44 Vera pmxcfs[1304]: [quorum] crit: quorum_initialize failed: 2
May 09 18:09:44 Vera pmxcfs[1304]: [confdb] crit: cmap_initialize failed: 2
May 09 18:09:44 Vera pmxcfs[1304]: [dcdb] crit: cpg_initialize failed: 2
May 09 18:09:44 Vera pmxcfs[1304]: [status] crit: cpg_initialize failed: 2
May 09 18:09:50 Vera pmxcfs[1304]: [quorum] crit: quorum_initialize failed: 2
May 09 18:09:50 Vera pmxcfs[1304]: [confdb] crit: cmap_initialize failed: 2
May 09 18:09:50 Vera pmxcfs[1304]: [dcdb] crit: cpg_initialize failed: 2
May 09 18:09:50 Vera pmxcfs[1304]: [status] crit: cpg_initialize failed: 2
May 09 18:09:56 Vera pmxcfs[1304]: [quorum] crit: quorum_initialize failed: 2
May 09 18:09:56 Vera pmxcfs[1304]: [confdb] crit: cmap_initialize failed: 2
May 09 18:09:56 Vera pmxcfs[1304]: [dcdb] crit: cpg_initialize failed: 2
May 09 18:09:56 Vera pmxcfs[1304]: [status] crit: cpg_initialize failed: 2
I have tried reseting permissions but it just says access denied. Im pretty sure the problem came up when i created a cluster to add antoher node to my setup. I a novice so i dont really know how to interpret this
Содержание
- Как исправить ошибки SESSION1_INITIALIZATION_FAILED типа «синий экран» (0x0000006D)
- Ошибки SESSION1_INITIALIZATION_FAILED
- Истоки проблем SESSION1_INITIALIZATION_FAILED
- Как исправить ошибки SESSION3_INITIALIZATION_FAILED типа «синий экран» (0x0000006F)
- Типичные ошибки SESSION3_INITIALIZATION_FAILED
- Источники проблем SESSION3_INITIALIZATION_FAILED
- Ошибка полной инициализации SESSION3 в Windows 10
- Исправить ошибку SESSION3 INITIALIZATION FAILED BSoD
- Исправлено – СБОЙ ИНИЦИАЛИЗАЦИИ SESSION3 Ошибка Windows 10
- Как убрать SESSION1_INITIALIZATION_FAILED (0x0000006D)?
- Как убрать « SESSION1_INITIALIZATION_FAILED» ( 0x0000006D)?
- Как просмотреть информацию об ошибках, исправить ошибки в Windows 10, 8 или 7
- Причины появления ошибки
- Восстановите удаленные файлы
- Запустите компьютер в «безопасном режиме»
- Как загрузить Windows в безопасном режиме
- Обновите драйвер через Диспетчер устройств
- Используйте sfc /scannow для проверки всех файлов системы
- Как восстановить системные файлы Windows 10
- Проверьте диск с Windows на наличие ошибок командой chkdsk c: /f
- Используйте режим совместимости со старой версией Windows
- Запуск программы в режиме совместимости Windows 10, 8, 7
- Отключите лишние программы из автозагрузки Windows
- Обратитесь в поддержку Microsoft
- Установите последние обновления системы
- Запустите проверку системы на вирусы
- Выполните проверку оперативной памяти
- Выполните «чистую» установку Windows
- Как исправить PROCESS1_INITIALIZATION_FAILED в Windows 7/8/10?
- Решаем сбой PROCESS1_INITIALIZATION_FAILED
- Метод №1 Удаление файла Bootcat.cache
- Метод №2 Копирование Bootcat.cache с другого компьютера
- Метод №3 Удаление файла COMPONENTS
- Метод No4 Установка Windows 7 SP1
- Метод No5 Удаление Roxio GoBack
- Метод №6 Восстановление Windows с помощью утилиты DISM
- Метод №7 Исключить папку от сканирований
- Метод №8 Использование утилиты CHKDSK
Как исправить ошибки SESSION1_INITIALIZATION_FAILED типа «синий экран» (0x0000006D)
| Номер ошибки: | Ошибка 0x6D | |
| Название ошибки: | SESSION1_INITIALIZATION_FAILED | |
| Описание ошибки: | The SESSION1_INITIALIZATION_FAILED bug check has a value of 0x0000006D. This bug check indicates that the initialization of the Microsoft Windows operating system failed. | |
| Шестнадцатеричный код: | 0x0000006D | |
| Разработчик: | Microsoft Corporation | |
| Программное обеспечение: | Windows Operating System | |
| Относится к: | Windows XP, Vista, 7, 8, 10, 11 |
Ошибки SESSION1_INITIALIZATION_FAILED
Ошибки BSOD, сокращенно от «Blue Screen of Death», обычно вызванные SESSION1_INITIALIZATION_FAILED, включают:
Во многих случаях ошибки SESSION1_INITIALIZATION_FAILED, вызывающие синий экран смерти, возникают после установки аппаратного или программного обеспечения, связанной с Windows s. Обычно ошибки синего экрана, связанные с SESSION1_INITIALIZATION_FAILED, возникают при загрузке драйвера устройства, связанного с Microsoft Corporation, во время установки Windows или связанной программы или во время запуска или завершения работы Windows. Отслеживание того, когда и где возникает ошибка STOP, является важной информацией при устранении проблемы. Notating при возникновении ошибок SESSION1_INITIALIZATION_FAILED STOP имеет первостепенное значение для поиска причины проблем, связанных с Windows s, и сообщая о них за помощью.
Истоки проблем SESSION1_INITIALIZATION_FAILED
Ошибки синего экрана SESSION1_INITIALIZATION_FAILED могут быть вызваны различными проблемами с оборудованием, прошивкой, драйвером или программным обеспечением. Они могут быть связаны с оборудованием Windows или Microsoft Corporation, но не всегда.
Более конкретно, данные ошибки SESSION1_INITIALIZATION_FAILED могут быть вызваны следующими причинами:
Совместима с Windows 2000, XP, Vista, 7, 8, 10 и 11
Источник
Как исправить ошибки SESSION3_INITIALIZATION_FAILED типа «синий экран» (0x0000006F)
| Номер ошибки: | Ошибка 0x6F | |
| Название ошибки: | SESSION3_INITIALIZATION_FAILED | |
| Описание ошибки: | The SESSION3_INITIALIZATION_FAILED bug check has a value of 0x0000006F. This bug check indicates that the initialization of the Microsoft Windows operating system failed. | |
| Шестнадцатеричный код: | 0x0000006F | |
| Разработчик: | Microsoft Corporation | |
| Программное обеспечение: | Windows Operating System | |
| Относится к: | Windows XP, Vista, 7, 8, 10, 11 |
В большинстве случаев проблемы с файлами 0x0000006F приводят к ошибкам типа «синий экран» и связаны с отсутствием или повреждением драйверов устройства для Windows 10 (из-за заражения вирусами / наличия вредоносных программ) или неисправным оборудованием. Основной способ решить эти проблемы вручную — заменить файл 0x6F новой копией.
Типичные ошибки SESSION3_INITIALIZATION_FAILED
Проблемы SESSION3_INITIALIZATION_FAILED обычно связаны с ошибкой синего экрана смерти, также известной как ошибка «BSOD» или «Stop»:
Установка аппаратного или программного обеспечения, связанная с турбоналогом, может вызвать ошибки BSOD SESSION3_INITIALIZATION_FAILED. Эти синие экраны SESSION3_INITIALIZATION_FAILED могут появляться во время установки программы, в то время как программа, связанная с SESSION3_INITIALIZATION_FAILED (например, Windows ), во время загрузки драйвера Microsoft Corporation или во время запуска или завершения работы Windows. Отслеживание того, когда и где возникает ошибка STOP, является важной информацией при устранении проблемы. Notating при возникновении ошибок SESSION3_INITIALIZATION_FAILED STOP имеет первостепенное значение для поиска причины проблем, связанных с Windows s, и сообщая о них за помощью.
Источники проблем SESSION3_INITIALIZATION_FAILED
Проблемы BSOD, связанные с SESSION3_INITIALIZATION_FAILED, обычно создаются соответствующим оборудованием, программным обеспечением, драйверами устройств или микропрограммным обеспечением. Эти BSOD могут быть вызваны проблемами Windows или проблемами с оборудованием, связанным с Microsoft Corporation.
В основном, осложнения SESSION3_INITIALIZATION_FAILED связаны с:
Совместима с Windows 2000, XP, Vista, 7, 8, 10 и 11
Источник
Ошибка полной инициализации SESSION3 в Windows 10
Ошибки Blue Screen of Death приводят к сбою Windows 10 и выводят сообщение об ошибке, например SESSION3_INITIALIZATION_FAILED, до перезагрузки компьютера. Эти типы ошибок могут быть вызваны неисправным оборудованием, и поскольку эти ошибки могут быть довольно проблематичными, сегодня мы собираемся показать вам, как исправить ошибку SESSION3_INITIALIZATION_FAILED.
Исправить ошибку SESSION3 INITIALIZATION FAILED BSoD
Исправлено – СБОЙ ИНИЦИАЛИЗАЦИИ SESSION3 Ошибка Windows 10
Обновление Windows 10 имеет решающее значение, если вы хотите, чтобы ваша система была безошибочной и стабильной. Определенное аппаратное или программное обеспечение может иметь проблемы с Windows 10, и это может привести к появлению ошибок BSoD, таких как SESSION3_INITIALIZATION_FAILED. Используя Центр обновления Windows, вы загрузите последние улучшения безопасности, а также множество исправлений ошибок. Эти исправления ошибок предназначены для устранения проблем несовместимости с определенным аппаратным или программным обеспечением, поэтому крайне важно загружать обновления Windows, чтобы предотвратить появление ошибок BSoD.
Иногда ошибки BSoD, такие как SESSION3_INITIALIZATION_FAILED, могут появляться из-за поврежденных файлов на вашем жестком диске, и для решения этой проблемы вам потребуется проверить жесткий диск с помощью команды chkdsk. Для этого выполните следующие действия:
Стоит отметить, что вы не сможете сканировать диск C прямо из Windows 10, поэтому обязательно перезагрузите компьютер, когда командная строка предложит вам это сделать. Когда ваш компьютер снова запустится, chkdsk автоматически просканирует ваш диск C на наличие ошибок.
Если вы не можете получить доступ к Windows 10 из-за ошибки SESSION3_INITIALIZATION_FAILED, вы можете выполнить сканирование chkdsk, выполнив следующие действия:
Решение 3. Обновите драйверы
Драйверы являются важной частью любой операционной системы, поскольку они позволяют Windows распознавать и использовать ваше оборудование. Если определенный драйвер поврежден или несовместим с Windows 10, это может вызвать ошибку BSoD, такую как SESSION3_INITIALIZATION_FAILED. Чтобы исправить эти ошибки, рекомендуется обновить драйверы, и вы можете сделать это прямо из диспетчера устройств, выполнив следующие действия:
Некоторые пользователи говорят, что лучше загружать драйверы вручную, поскольку диспетчер устройств не всегда находит последние версии драйверов для вашего оборудования. Чтобы загрузить драйверы вручную, вам просто нужно посетить веб-сайт производителя оборудования, найти свое устройство и загрузить для него последние версии драйверов. Обязательно загрузите и обновите драйверы для всех основных компонентов оборудования.
Источник
Как убрать SESSION1_INITIALIZATION_FAILED (0x0000006D)?

Как убрать « SESSION1_INITIALIZATION_FAILED» ( 0x0000006D)?
На компьютере или ноутбуке под управлением Windows появился «синий экран смерти»? После появления сообщения « SESSION1_INITIALIZATION_FAILED» ( 0x0000006D) система перезагружается? Ищите как исправить 0x0000006D: « SESSION1_INITIALIZATION_FAILED»?
Как просмотреть информацию об ошибках, исправить ошибки в Windows 10, 8 или 7

Причины появления ошибки
Актуально для ОС: Windows 10, Windows 8.1, Windows Server 2012, Windows 8, Windows Home Server 2011, Windows 7 (Seven), Windows Small Business Server, Windows Server 2008, Windows Home Server, Windows Vista, Windows XP, Windows 2000, Windows NT.
Вот несколько способов исправления ошибки « SESSION1_INITIALIZATION_FAILED»:
Восстановите удаленные файлы
Часто появление BSoD ошибок приводит к утери важных файлов. Блокировка файлов компьютерными вирусами, ошибки в работе программ для резервного копирования, повреждение или перезапись системных файлов, ошибки файловой системы или наличие битых секторов диска – это не далеко полный список причин удаления данных.
Исправление соответствующих ошибок восстановит работоспособность устройства, но не всегда восстановит повреждённые или утерянные файлы. Не всегда имеется возможность устранить ту или иную ошибку без форматирования диска или чистой установки операционной системы, что также может повлечь за собой утерю файлов.
Загрузите бесплатно и просканируйте ваше устройство с помощью Hetman Partition Recovery. Ознакомьтесь с возможностями программы и пошаговой инструкцией.

Запустите компьютер в «безопасном режиме»
Если ошибка «SESSION1_INITIALIZATION_FAILED» (0x0000006D) возникает в момент загрузки Windows и блокирует любую возможность работы с системой, попробуйте включить компьютер в «безопасном режиме». Этот режим предназначен для диагностики операционной системы (далее ОС), но функционал Windows при этом сильно ограничен. «Безопасный режим» следует использовать только если работа с системой заблокирована.

Чтобы запустить безопасный режим сделайте следующее:
Как загрузить Windows в безопасном режиме

Обновите драйвер через Диспетчер устройств
Вы установили новое аппаратное обеспечение на компьютере? Возможно вы начали использовать новое USB-устройство с вашим компьютером. Это могло привести к ошибке «SESSION1_INITIALIZATION_FAILED». Если вы установили драйвер устройства используя диск, который поставляется вместе с ним, или использовали драйвер не c официального сайта Microsoft, то причина в нем. Вам придется обновить драйвер устройства, чтобы устранить эту проблему.

Вы можете сделать это вручную в диспетчере устройств Windows, для того выполните следующие инструкции:
Перезагрузите компьютер после установки драйвера.
Используйте sfc /scannow для проверки всех файлов системы
Повреждение или перезапись системных файлов может привести к ошибке «SESSION1_INITIALIZATION_FAILED». Команда sfc находит поврежденные системные файлы Windows и заменяет их.

Этот процесс может занять несколько минут.
Как восстановить системные файлы Windows 10

Проверьте диск с Windows на наличие ошибок командой chkdsk c: /f
Возможно к синему экрану с «SESSION1_INITIALIZATION_FAILED» привела ошибка файловой системы или наличие битых секторов диска. Команда CHKDSK проверяет диск на наличие ошибок файловой системы и битых секторов. Использование параметра /f заставит программу автоматически исправлять найденные на диске ошибки, а параметр /r позволяет найти и «исправить» проблемные сектора диска. Для запуска следуйте инструкциям:

Дождитесь окончания процесса и перезагрузите компьютер.
Используйте режим совместимости со старой версией Windows
BSOD с кодом SESSION1_INITIALIZATION_FAILED» может вызывать «устаревшее» программное обеспечение. Если ошибка появляется после запуска программы, то использование режима совместимости Windows избавит от появления ошибки. Для устранения проблемы следуйте следующим инструкциям:


Запуск программы в режиме совместимости Windows 10, 8, 7

Отключите лишние программы из автозагрузки Windows
Программное обеспечение, вызывающее «SESSION1_INITIALIZATION_FAILED» (0x0000006D), может быть прописано в автозагрузку Windows и ошибка будет появляться сразу после запуска системы без вашего участия. Удалить программы из автозагрузки можно с помощью Диспетчера задач.

Обратитесь в поддержку Microsoft
Microsoft предлагает несколько решений удаления ошибки «голубого экрана». «SESSION1_INITIALIZATION_FAILED» (0x0000006D) можно убрать с помощью Центра обновления или обратившись в поддержку Windows.

Установите последние обновления системы
С обновлениями Windows дополняет базу драйверов, исправляет ошибки и уязвимости в системе безопасности. Загрузите последние обновления, что бы избавиться от ошибки «SESSION1_INITIALIZATION_FAILED» (0x0000006D).

Запустить Центр обновления Windows можно следующим образом:

Рекомендуется настроить автоматическую загрузку и установку обновлений операционной системы с помощью меню Дополнительные параметры.
Чтобы включить автоматическое обновление системы необходимо запустить Центр обновления Windows:
Запустите проверку системы на вирусы
«Синий экран смерти» с ошибкой «SESSION1_INITIALIZATION_FAILED» 0x0000006D может вызывать компьютерный вирус, заразивший систему Windows.
Для проверки системы на наличие вирусов запустите установленную на компьютере антивирусную программу.

Современные антивирусы позволяют проверить как жесткие диски, так и оперативную память. Выполните полную проверку системы.
Выполните проверку оперативной памяти
Неполадки с памятью могут привести к ошибкам, потере информации или прекращению работы компьютера.
Прежде чем проверять оперативную память, отключите её из разъёма на материнской плате компьютера и повторно вставьте в него. Иногда ошибка SESSION1_INITIALIZATION_FAILED» вызвана неправильно или не плотно вставленной в разъём планкой оперативной памяти, или засорением контактов разъёма.
Если предложенные действия не привели к положительному результату, исправность оперативной памяти можно проверить средствами операционной системы, с помощью средства проверки памяти Windows.
Запустить средство проверки памяти Windows можно двумя способами:


Запустите средство Выполнить с помощью комбинации клавиш Windows + R. Наберите mdsched и нажмите Enter. После чего откроется средство проверки Windows.
Для начала проверки выберите один из предлагаемых вариантов, проверка оперативной памяти в соответствии с которым будет запущена после перезагрузки компьютера.
Если в результате проверки будут определены ошибки, исправить которые не представляется возможным, то такую память необходимо заменить (замене подлежит модуль памяти с неполадками).
Выполните «чистую» установку Windows
Если не один из перечисленных методов не помог избавиться от SESSION1_INITIALIZATION_FAILED», попробуйте переустановить Windows. Для того чтобы выполнить чистую установку Windows необходимо создать установочный диск или другой носитель с которого планируется осуществление установки операционной системы.
Загрузите компьютер из установочного диска. Для этого может понадобиться изменить устройство загрузки в BIOS или UEFI для более современных компьютеров.
Следуя пунктам меню установщика укажите диск, на который вы хотите установить Windows. Для этого понадобится отформатировать его. Если вас не устраивает количество или размер локальных дисков, их можно полностью удалить и заново перераспределить.
Помните, что форматирование, удаление или перераспределения дисков удалит все файлы с жесткого диска.
После указания диска для установки Windows запуститься процесс копирования системных файлов и установки операционной системы. Во время установки от вас не потребуется дополнительных действий. В течении установки экран компьютера будет несколько раз гаснуть на непродолжительное время, и для завершения некоторых этапов установки компьютер будет самостоятельно перезагружаться.
В зависимости от версии Windows на одном из этапов от вас может понадобиться выбрать или внести базовые параметры персонализации, режим работы компьютера в сети, а также параметры учётной записи или создать новую.
После загрузки рабочего стола чистую установку Windows можно считать законченной.
Примечание. Прежде чем приступить к выполнению чистой установки Windows заранее побеспокойтесь о наличии драйверов ко всем установленным устройствам и сохранности ваших файлов. Загрузите и сохраните драйвера на отдельный носитель информации, а для важных данных создайте резервную копию.
Источник
Как исправить PROCESS1_INITIALIZATION_FAILED в Windows 7/8/10?
В данной статье мы с вами будем рассматривать синий экран смерти, который именуется PROCESS1_INITIALIZATION_FAILED и имеет номер 0x0000006B. Что сами Майкрософт говорят по поводу этой проблемы? Они говорят вот что: «Данная проблема появляется вследствие повреждения файла Bootcat.cache или же из-за изменения размера этого файла». Из этого мы точно можем утверждать, что проблема заключается в файле Bootcat.cache. Также нельзя исключать таких вещей, как повреждения системных файлов, аппаратных компонентов, кабелей или прочее. Синий экран смерти PROCESS1_INITIALIZATION_FAILED может проявлять себя на большинстве версий операционной системы Windows.
В сообщении этого критического сбоя присутствует следующая информация:
STOP: 0x0000006B (Параметр1, Параметр2, Параметр3, Параметр4)
Заметка: эти четыре параметра могут меняться в зависимости от конфигурации компьютера пользователя.
Помимо прочего, этот синий экран смерти можно увидеть даже на клиентах, серверных машинах и смартфонах. В данной статье мы опишем целых 8 методов, которые помогут разрешить вам эту непростую ситуацию.
Решаем сбой PROCESS1_INITIALIZATION_FAILED

Метод №1 Удаление файла Bootcat.cache
Метод №2 Копирование Bootcat.cache с другого компьютера
Если первый метод вам не помог в решении проблемы с синим экраном смерти PROCESS1_INITIALIZATION_FAILED, то вы должны попробовать этот метод, который включает в себя копирование файла Bootcat.cache с другого компьютера, подразумевая, что тот работает там корректно. Также как и в предыдущем методе, вам снова придется загрузить свою систему через диск восстановления.
Метод №3 Удаление файла COMPONENTS
Итак, если ничего из вышеперечисленного не помогло, а такое вполне возможно, то давайте двигаться дальше. На этот раз мы с вами попробуем сделать кое-что другое – удаление файла COMPONENTS из директории windowssystem32config. Данное действие также зарекомендовало себя отличным способом по борьбе с синим экраном смерти PROCESS1_INITIALIZATION_FAILED.
Ну что, ваша система все еще загружается с синим экраном смерти PROCESS1_INITIALIZATION_FAILED? Ок, тогда давайте двигаться далее.
Метод No4 Установка Windows 7 SP1
Если вы используете Windows 7 без SP1, то вам нужно попробовать установить этот сервисный пакет для вашей операционной системы. Все что вам нужно сделать, так это пройти в Центр загрузок Майкрософт и скачать от туда необходимый сервисный пакет. Однако, будьте внимательно, что именно вы скачивайте. Обязательно отталкивайтесь от того, какой разрядностью обладает ваша система, т.е. 32-битная или 64-битная. Загрузите Windows 7 SP1, установите его и перезагрузите систему. Затем проверьте, появляется ли синий экран смерти PROCESS1_INITIALIZATION_FAILED.
Метод No5 Удаление Roxio GoBack
Если вы используете программное обеспечение Roxio GoBack, то вам нужно попробовать удалить его, чтобы проверить, не вызывает ли ли оно уже оговоренный синий экран смерти. Удаляется Roxio GoBack довольно просто через Программы и компоненты.
Возможно, что именно эта утилита и стояла за таким серьезным сбоем в системе, как PROCESS1_INITIALIZATION_FAILED. Однако, если ничего не изменилось, то давайте двигаться дальше по нашему списку методов.
Метод №6 Восстановление Windows с помощью утилиты DISM
Метод №7 Исключить папку от сканирований
Антивирусное программное обеспечение также может стоять у истоков проблемы с появлением оговоренного синего экрана смерти. Чтобы исправить это, вам нужно исключить папки CodeIntegrity и catroot от сканирования антивирусом. Сейчас мы покажем вам как это делать на примере Защитника Windows. Если вы используете иной антивирус, то это не беда, так как там, скорее всего, будут применимы эти шаги.
Возможно, синий экран смерти PROCESS1_INITIALIZATION_FAILED появлялся в случае сканирования этих папок. По крайней мере, так утверждают некоторые пользователи в Интернете. Ну что, проблема все еще преследует вас?
Метод №8 Использование утилиты CHKDSK
Когда ваш жесткий диск не работает как надо, то на нем могут появиться поврежденные данные или же плохие сектора. В этом случае вам поможет довольно неплохая системная утилита CHKDSK, которая поможет найти вам бэдблоки и исправить их, но только если это будет возможно.
Мы надеемся, что данная статья помогла вам преодолеть проблему в виде синего экрана смерти PROCESS1_INITIALIZATION_FAILED. Если же он так и продолжает постоянно проявляться, то вы также можете еще попробовать выполнить восстановление системы с помощью ранее созданной точки или через бэкап. Если и это не помогло, то это может означать, что у вас присутствуют проблемы аппаратного характера, например, виновниками могли стать ваш HDD/SSD или же оперативная память.
Источник