While creating a partition on a hard disk by using the Diskpart utility, some users encountered the error “There is not enough usable space for this operation.” According to the error message, you are unable to create a new partition because of the lack of usable space on your hard disk. In this article, we will see how to deal with this error to get the issue fixed.

The complete error message displayed by the Diskpart utility could be either of the two:
There is not enough usable space on specified disks to extend the volume
There is not enough usable space for this operation
If Diskpart is showing the “Virtual Disk Service error: There is not enough usable space for this operation” while creating a new partition, the following solutions may help you fix the problem:
- Check the partition style of your Disk
- Rescan your disk
- Shrink the partition on your hard drive
- Use a third-party tool
1] Check the partition style of your disk
One possible cause of this error is the limitation of an MBR disk. If the disk installed on your system uses the Master Boot Record, you will not create more than 4 partitions on your disk. Whereas, in the GPT partition, there is no such limit. You can create unlimited partitions on a GPT disk, but Windows allows only up to 128 partitions on a GPT disk.

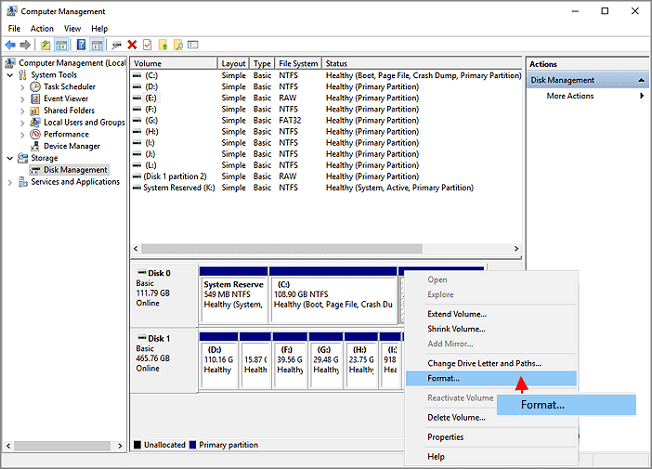
Check the partition style of your hard disk. To do so, follow the steps below:
- Launch the Run command box.
- Type diskmgmt.msc and click OK.
- The above command will open the Disk Management tool.
- Right-click on your hard disk and select Properties.
- Select the Volumes tab. You will see the partition style of your hard disk.
If the partition style of your hard disk is MBR and you already have 4 partitions on it, you have to convert it into GPT to create more partitions. Do note that the conversion is possible only if the hard disk contains no partitions or volumes. If your hard disk contains any partitions, you have to delete them before converting MBR into GPT. This action will also erase all the data on your hard disk. That’s why we suggest you backup all your data on an external hard disk.

The GPT disks use Unified Extensible Firmware Interface (UEFI) BIOS mode. You can check your BIOS mode in the System Information. If your BIOS supports both legacy and UEFI modes but it is set to the legacy mode, you can convert it to UEFI.
After converting your hard disk from MBR to GPT, check if the Diskpart is showing the same error while creating partitions.
2] Rescan your disk
The Rescan command helps you detect new disks added to your computer. When you run this command, it detects the configuration changes on your hard disk and updates the information. You can try running this command in Diskpart and see if it helps. Follow the steps below:
- Open Command Prompt as an administrator.
- Type Diskpart and press Enter.
- Type Rescan and press Enter.
After rescanning your disks, check if the issue persists.
3] Shrink the partition on your hard drive
According to the error, your disk does not have enough usable space. To fix this problem, you can shrink a partition to leave unallocated space. After shrinking the partition, you should be able to create a new partition. The steps to do this are written below:
- Open Command Prompt as an administrator.
- Type Diskpart.
- Type select disk #. Replace # with the disk number. For example, if you want to create a partition on disk 0, you have to type select disk 0 and press Enter.
- Now, you have to select the partition on your hard disk which you want to shrink. For this, type list par and press Enter. This command will list all the partitions on your hard disk.
- Now, type sel par #. Replace # with the partition number on your hard disk. After selecting a particular partition, say, partition 3, you will see a message “Partition 3 is now the selected partition.”
- Type shrink desired=size minimum=size. After that hit Enter. Replace the string size in the command with the actual size on the disk that you want to shrink. The size that you enter to shrink the volume should be less than the total size of the selected partition. For example, if the total size of the selected partition is 16 GB, the size to shrink the partition should be less than 16 GB.
- After the above command is executed successfully, a partition with unallocated space will be created. You can view this unallocated space in Disk Management.
- To make the unallocated space usable, you have to format it. Type fs=ntfs quick and press Enter.
- Wait till the formatting process gets completed.
After the formatting gets completed, a partition of the desired size is created. In step 6 above, we have used the command shrink desired=size minimum=size. This command consists of two values, namely, desired and minimum. Let’s see the meaning and purpose of each of these values.
- Desired: This represents the actual amount of space that you want on your partition.
- Minimum: It represents the minimum space on the selected partition.
If the size entered in the desired value is not possible to create, Windows will create the partition of the size that you enter in the minimum value. You can also enter the same size in both of these values.
Read: Diskpart error, The device does not recognize the command.
4] Use a third-party tool
You can also use a third-party tool to create partitions on your hard drive. If you search online, you will find many disk and partition manager tools that come with both free and paid plans.
Related:
- Diskpart Virtual Disk Service error. The operation timed out
- Diskpart Virtual Disk Service Error, The volume size is too big
- Diskpart Virtual Disk Service error, The file system is incompatible
- Diskpart Virtual Disk Service error. Delete is not allowed on the current boot, system, pagefile, crashdump or hibernation volume
- Diskpart Virtual Disk Service error, The operation is not supported by the object
- Diskpart Virtual Disk Service error, The specified disk is not convertible
How do you fix the virtual disk service error the specified disk is not convertible?
You may see an error message “The specified disk is not convertible” while converting an MBR disk into GPT by using the Diskpart utility. The complete error message is:
Virtual Disk Service error:
The specified disk is not convertible.
According to the error message, the disk you want to convert from MBR into GPT is not convertible. To fix this error, you should know what an MBR partition style is and what a GPT partition style is. If you want to convert an MBR disc into a GPT, your BIOS should support the UEFI mode. This is because the GPT disks use Unified Extensible Firmware Interface (UEFI) BIOS mode.
If you are getting this error message, first check your system’s BIOS mode. If it shows legacy mode, convert it into the UEFI mode. To know the BIOS mode, click on Windows Search and type System Information, then select the System Information app from the search results. In the System Information app, you will see your BIOS made on the right pane.
If your BIOS supports both legacy and UEFI modes, you will be able to convert legacy to UEFI. If your BIOS mode is already set to UEFI, but you are still getting this error message, you can use a third-party tool or software, like Minitool partition wizard to convert MBR to GPT.
Read: DiskPart error, Data error Cyclic redundancy check.
How do I fix the virtual disk service error volume size is too big?
The virtual disk service error volume size is too big usually occurs when you format a particular disk drive by using a FAT32 file system. In such a case, you can try another file system to format the disk drive, like NTFS. There are several limitations of the FAT32 file system. The maximum file size limit for the FAT32 file system is 4 GB. This is the reason why Diskpart displays this error while formatting a disk drive of large size by using the FAT32 file system.
Read next: Diskpart has encountered an error, The media is write-protected.
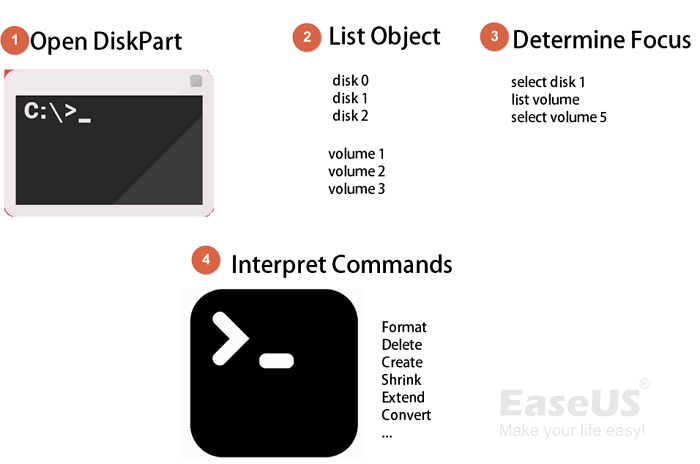
What Is DiskPart Virtual Disk Service Error
According to Microsoft, Virtual Disk Service is a Microsoft Windows service that performs query and configuration operations at the request of end users, scripts, and applications. It enables users to manage disk hard drives, volumes, etc., by running the DiskPart command prompt.
Sometimes, you will receive a DiskPart virtual disk service error while running DiskPart command to manage your disk partition, including format disk to FAT32, clean a disk, delete partitions, convert MBR disk to GPT disk or vice versa, etc.
Accordingly, the fixes toward different errors on DiskPart may differ. On this page, we list the typical Virtual Disk Service errors along with the solutions.
Common DiskPart Virtual Disk Service Errors and Solutions
Check the exact error that you are having and refer to the right solution to get rid of it from your computer immediately.
8 Common DiskPart Virtual Disk Service Errors and Fixes:
You Must-Have Tool
The best way to deal with Diskpart Virtual Disk Service errors is to try a powerful third-party disk management tool. EaseUS partition tool, which wins the praise of numerous users, is a wonderful choice. It perfectly resolves each error on your computer within a few simple clicks.
Download it, and let’s see how it works to help.
Error 1: Clean is not allowed on the disk containing the current boot, system, pagefile, crashdump or hibernation volume
Applies to:
Virtual Disk Service error:
Clean is not allowed on the disk containing the current boot, system, pagefile, crashdump or hibernation volume.
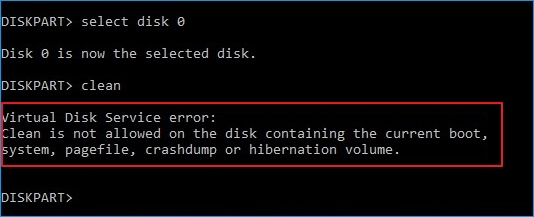
This error usually comes when you run DiskPart clean command on a system disk. If you tend to clean up the old system disk or a running system disk to reinstall the Windows OS, you’ll need to create a bootable disk using EaseUS Partition Master.
The Delete All feature in EaseUS Partition Master works the same as the clean command, which deletes all partitions that you may apply for help.
Tutorial: Two Options to Fix Virtual Disk Error — Clean is not allowed
- #1. Clean Up OS Disk — Delete All Partitions with OS
- #2. Clean Up Data Disk — Delete All Partitions
#1. Clean Up OS Disk — Delete all partitions with OS:
Step 1. Correctly connect a USB drive, flash drive, or a CD/DVD disc to your computer. Then, launch EaseUS Partition Master, go to the «Bootable Media» and click «Create bootable media», click «Next».

Step 2. You can choose the USB or CD/DVD when the drive is available. Once made the option, click «Proceed».
If you do not have a storage device at hand, you can also save the ISO file to a local drive, and later burn it to a storage media.

Step 3. Connect the WinPE bootable disk to the computer. Restart your computer and press F2/Del at the same time to enter BIOS. Set to boot the PC from «Removable Devices» (bootable USB disk) or «CD-ROM Drive» (bootable CD/DVD) beyond Hard Drive. Press «F10» to save and exit.
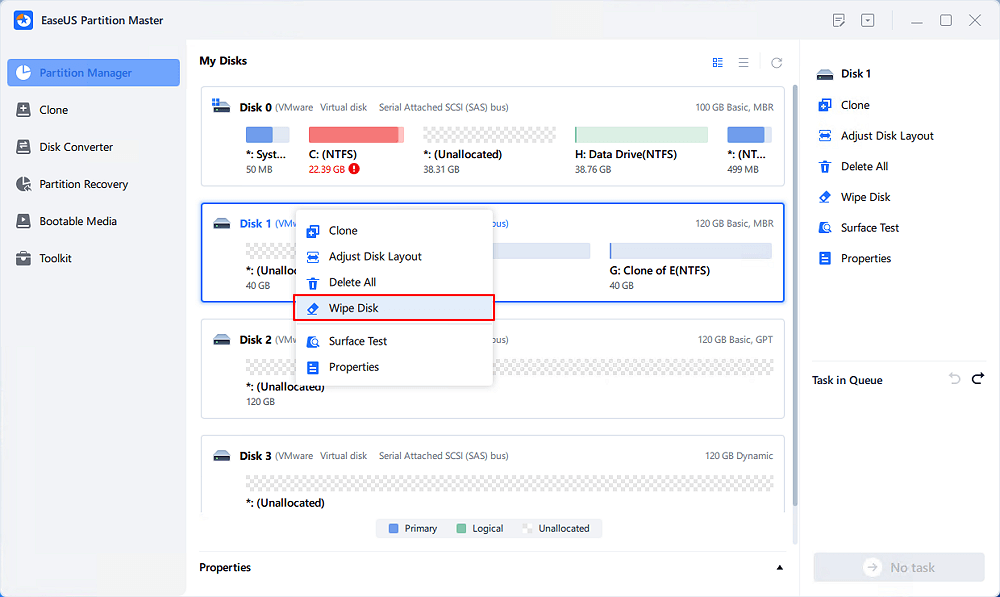
Step 4. Install and launch EaseUS Partition Master. Select the HDD or SSD which you want to wipe. And right-click to choose «Wipe Disk».
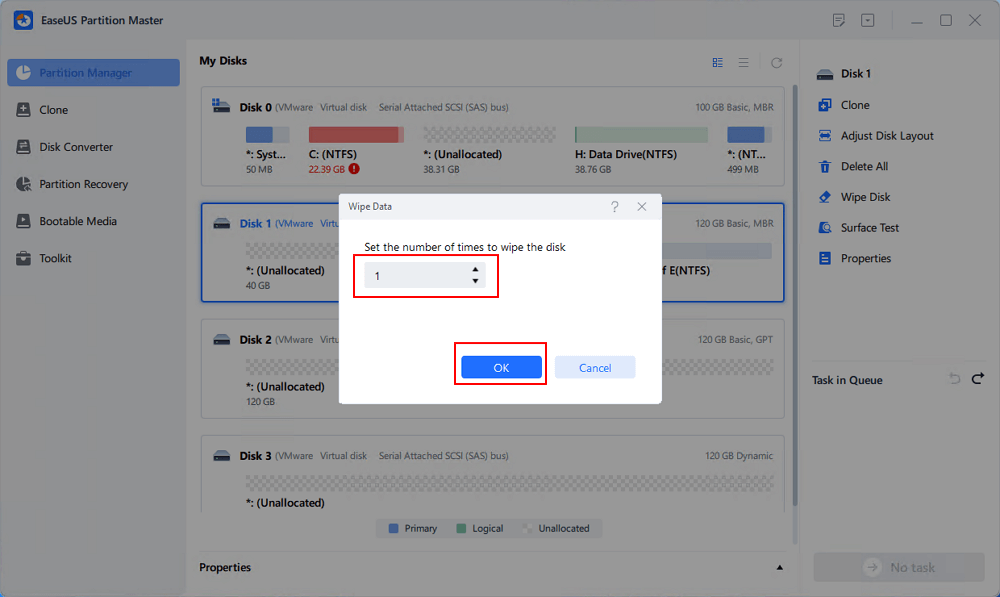
Step 5. Set the number of times to wipe data. You can set to 10 at most. Then, click «OK».
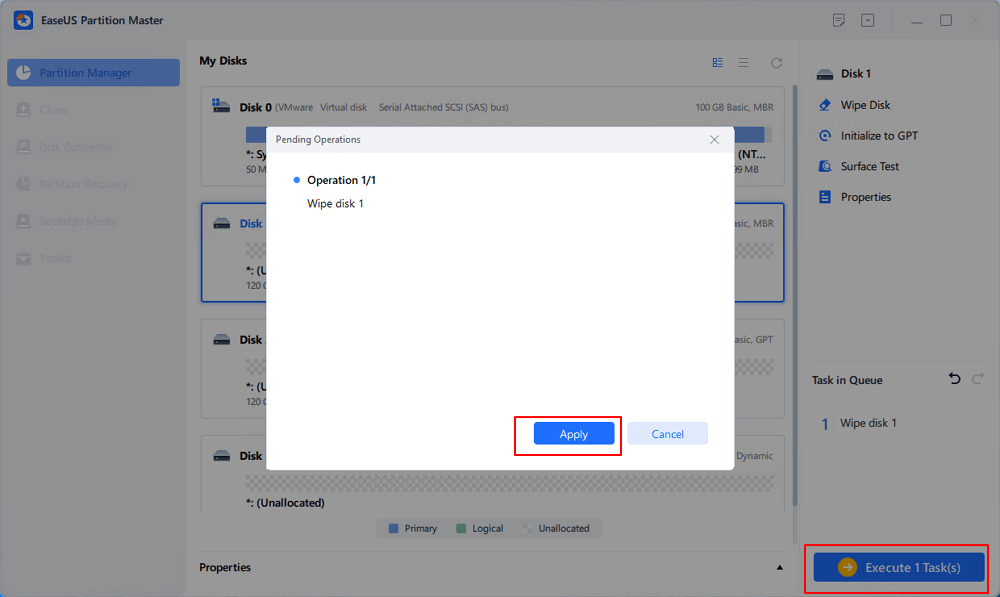
Step 6. Click «Execute 1 Task(s)» and then click «Apply» to start wiping data.
#2. Clean up and delete all existing partitions on the data disk:
Launch EaseUS Partition Master > Right-click on the target disk and select «Delete All» > Click «OK» and «Execute Operation».
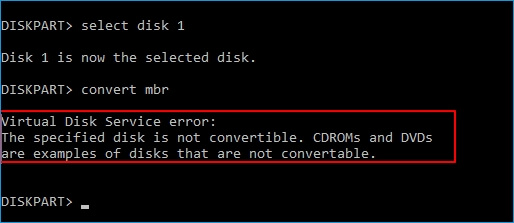
Error 2: The specified disk is not convertible. CDROMs and DVDs are examples of disks that are not convertible
Applies to:
Virtual Disk Service error:
The specified disk is not convertible. CDROMs and DVDs are examples of disks that are not convertible.
When you type list disk > select disk * > convert GPT or convert MBR but received an error message, telling that you are having a virtual disk service error on the current disk, the reason is that you have partitions existing on the drive.
So how to fix this error? You have two ways out:
Two Fixes for Virtual Disk Service Error — Specified Disk Is Not Convertible
- #1. Convert Disk to MBR/GPT without Losing Data
- #2. Clean Disk and Convert Disk to MBR/GPT
#1. Directly Convert Disk to MBR or GPT using EaseUS Partition Master
EaseUS Partition Master is an excellent DiskPart alternative tool that enables you to convert a disk to MBR or GPT without deleting partitions. No data loss issue will occur.
Follow the steps below to fix the virtual disk service error — the specified disk is not a convertible error on your own:
— Convert MBR to GPT:
Step 1. Download and launch EaseUS Partition Master on your computer.
Step 2. Go to Disk Converter, select «Convert MBR to GPT» and click «Next» to continue.

Step 3. Select the target MBR disk that you tend to convert to GPT, and click «Convert» to start the conversion.

— Convert GPT to MBR:
Right-click target GPT disk on EaseUS Partition Master > Select «Convert to MBR» > Click «OK» > «Execute Operation».
#2. Clean and Convert Disk to MBR/GPT using DiskPart Command
It requires deleting partitions before converting drive to GPT or MBR using the DiskPart conversion command. Therefore, if you have important data saved on the target disk, back up data to an external hard drive first.
Here are the steps:
Step 1. Open DiskPart by typing cmd in the Search bar, right-click Command Prompt and select «Run as Administrator».
Then type diskpart and hit Enter.
Step 2. Type the following commands and hit Enter each time:
- list disk
- select disk * (replace * with the target disk number)
- clean
- convert gpt or convert mbr
- exit
Error 3: Delete is not allowed on the current boot, system, pagefile, crashdump or hibernation volume
Applies to:
Virtual Disk Service error:
Delete is not allowed on the current boot, system, pagefile, crashdump, or hibernation volume.
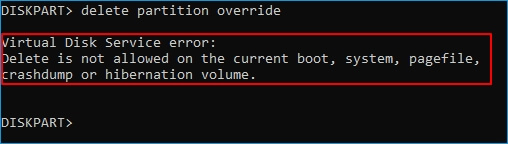
Note that this error often occurs when you set command in DiskPart to order Windows to delete the boot partition or system partition on its own. If you input the wrong volume number, retry to delete partitions again with the right volume number.
If your goal is to delete the OS partition or boot partition, try the below tutorial.
Fix: Delete Boot/System Volume via EaseUS Partition Master Bootable Disk
EaseUS Partition Master offers a safe way to help you delete the OS partition or the boot drive from its bootable disk.
- 1) You need first create an EaseUS Partition Master WinPE bootable disk.
- 2) Next, boot PC from EaseUS Partition software from the bootable disk.
- 3) Enter EaseUS Partition Master main window, right-click on the system or boot partition and choose «Delete» and click «OK».
- 4). Last, click «Execute Operation» to start deleting the boot, system, pagefile, crashdump, or hibernation volume.
Error 4: There is no media in the device
Applies to:
Virtual Disk Service error:
There is no media in the device.

When you run DiskPart to perform some operations on your target disk but receive virtual disk service error: there is no media in the device, it means that DiskPart could not find specified media. In other words, it could not load nor access the device.
2 Fixes for Virtual Disk Service Error — There Is No Media in The Device
#1. Change USB port to reconnect an external storage device or reinstall an HDD/SSD disk
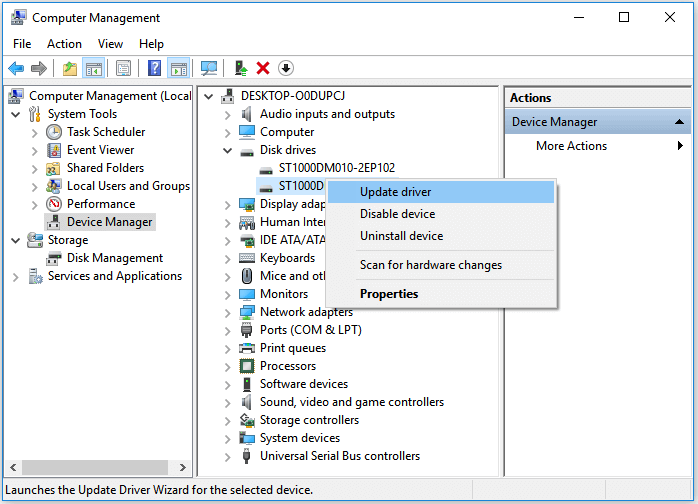
#2. Update No Media Device Drive Driver:
Step 1. Right-click «This PC» and choose «Manage» > «Device Manager».
Step 2. Expand «Disk Drives», then right-click your problematic device that shows no media and select «Update Driver».
Step 3. In the new window, choose «Search automatically for updated driver software».
You may also refer to: There Is No Media in The (Specified) Device for further fixes.
Error 5: The volume size is too big
Applies to:
Virtual Disk Service error:
The volume size is too big.
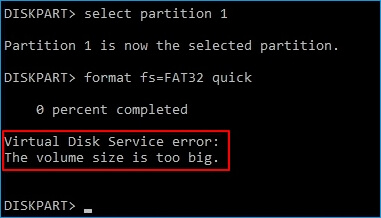
This error often occurs when you tend to format a large partition or a USB/external hard drive to the FAT32 file system using DiskPart utility. Due to the limit of the FAT32 file system, Windows doesn’t allow you to format a device larger than 32GB into FAT32. To fix this error, you have two options, as listed below.
2 Methods to Fix Virtual Disk Service Error — The Volume Size Is Too Big
- #1. Format Large Device to FAT32
- #2. Format Large Device to Other File System
#1. Using Third-Party Formatting Tool to Format Large Device to FAT32
If you tend to use a large device as a FAT32 removable drive, professional formatting tool — EaseUS Partition Master is your best shot. It breaks the limit of FAT32, enabling users to set large storage devices (more than 32GB) to FAT32 via its Format feature:
- Right-click the external drive or USB you intend to format and choose «Format».
- Set the Partition label, File system (NTFS/FAT32/EXT2/EXT3/EXT4/exFAT), and Cluster size, then click «OK».
- Click «Yes» to continue.
- Click the «Execute 1 Task(s)» button and click «Apply» to format the hard drive partition.
#2. Format Device to Other File Systems
The other fix that you can try is to change the file system, formatting your hard drive or external USB to other Windows supported format — NTFS (for internal HDD/SSD partition) or exFAT (for external hard drive):
Step 1. Right-click «This PC» and choose «Manage». Then go to «Disk Management».
Step 2. Right-click the target hard drive partition and choose «Format».
Step 3. Set the volume label, file system, and click «OK» to start formatting the drive.
Error 6: There is not enough usable space for this operation
Applies to:
Virtual Disk Service error:
There is not enough usable space for this operation.
This error often occurs when there is no unused free space or not enough unallocated space available on a hard disk for some specific operations, such as to extend a partition or to create a primary partition using DiskPart utility.
Two Fixes:
- 1]. Shrink Partition to leave unallocated space
- 2]. Extend Partition with or without unallocated space
Error 7: The service failed to initialize
Applies to:
Virtual Disk Service error:
The service failed to initialize.
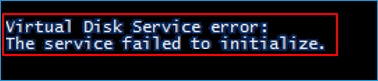
Normally, the Virtual Disk Service starts automatically on Windows PC. However, it may not start sometimes or failed to initialize.
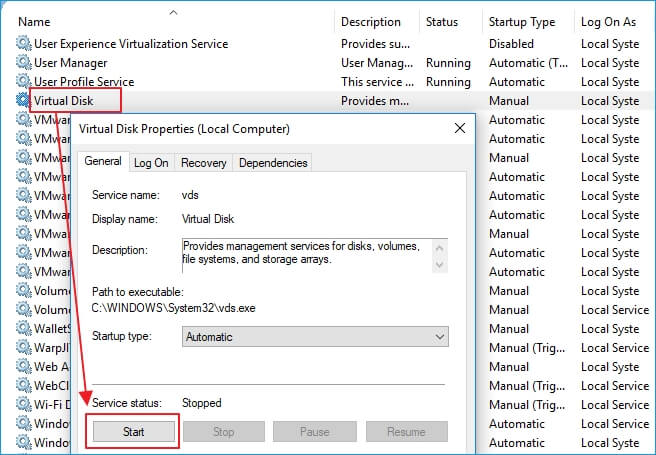
Two Fixes:
1]. Open DiskPart utility > Type net start vds and hit Enter.
2]. Manually restart Virtual Disk Service: Type services in the Search box and hit Enter > Right-click or double-click «Virtual Disk» service > Select «Start».
This will change the Virtual Disk service startup type from Manual to Automatic, then restart Windows.
Error 8: The media is write protected.
Applies to:
Virtual Disk Service error:
The media is write protected.
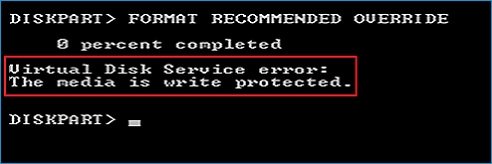
This error often occurs when a storage device is encrypted or locked due to some manual operation or device error. And the fixes toward this issue are multiple.
Full Fixes:
5 Ways to Remove Write Protection from USB, SD, internal/external hard drive in Windows 10/8/7.
Bonus Tip:
After fixing the diskpart error, you can now use this disk utility tool to manage your disks for free. And here is a guide to show you how to do so.
![]()
What Is Diskpart and How to Use Diskpart on Windows
After fixing the Diskpart Virtual Disk Service error, you may now apply the Diskpart to manage your disk partitions with relative command lines. This page offers you the complete guide to master and use Diskpart to partitioning hard drives on your own.
Conclusion
These are multiple solutions that can fix the typical Virtual Disk Service errors that you might encounter while manage disk partitions using Diskpart.
As we addressed, the methods to fix each error are different. You need to confirm the exact problem you are having in DiskPart to decide which method to apply. We collected the most possible ways to help you out and hope they are helpful!
If the problem that you are having is not included on this page, use the Search option at the top right corner on our homepage: https://www.easeus.com for help.
I can´t extend a partition. Why?
DISKPART> extend
Virtual Disk Service error:
There is not enough usable space for this operation.
 DISKPART> convert dynamic
Virtual Disk Service error:
Only the first 2TB are usable on large MBR disks.
Cannot create partitions beyond the 2TB mark, nor convert the disk to dynamic.
I´m trying to convert my disk to DYnamic to try to extend, but i can´t too (dimmed option) and i can´t use the convert to GPT option beucase there is a pagefile.
I have a Dell R710 with PERC 6/i Integrated
| Firmware Version | 6.2.0-0013 |
| Driver Version | 4.05.01.64 |
It´s a Array/VirtualDisk extened, added one more disk recently
| Virtual Disk 0 |
Ready | RAID-5 | 2,791.88GB | Windows Disk 0 |
Disks:
DISKPART> list disk
Disk ### Status Size Free Dyn Gpt
——— ————- ——- ——- — —
Disk 0 Online 2791 GB 263 GB
DISKPART> detai disk
DELL PERC 6/i SCSI Disk Device
Disk ID: 7B172D1E
Type : RAID
Status : Online
Path : 1
Target : 0
LUN ID : 0
Location Path : PCIROOT(0)#PCI(0400)#PCI(0000)#RAID(P01T00L00)
Current Read-only State : No
Read-only : No
Boot Disk : Yes
Pagefile Disk : Yes
Hibernation File Disk : No
Crashdump Disk : Yes
Clustered Disk : No
Volume ### Ltr Label Fs Type Size Status Info
———- — ———— —— ———- ——- ——— ———
Volume 1 System Rese NTFS Partition 100 MB Healthy System
Volume 2 C DISCO NTFS Partition 59 GB Healthy Boot
Volume 3 C:DATA NTFS Partition 992 GB Healthy
Volume 4 F VMs_MAXIMO NTFS Partition 732 GB Healthy
DISKPART> sele volume 3
Volume 3 is the selected volume.
DISKPART> detail volume
Disk ### Status Size Free Dyn Gpt
——— ————- ——- ——- — —
* Disk 0 Online 2791 GB 263 GB
Read-only : No
Hidden : No
No Default Drive Letter: No
Shadow Copy : No
Offline : No
BitLocker Encrypted : No
Installable : Yes
Volume Capacity : 992 GB
Volume Free Space : 833 GB
-
Edited by
Friday, November 4, 2011 12:19 PM
На чтение 13 мин Просмотров 2.9к. Опубликовано 01.12.2020
Содержание
- Назначение буквы скрытому системному разделу
- Подготовка загрузочной флэшки.
- Изменение разделов диска.
- Движение наружу.
- Ehwaz
- Как инициализировать новый диск
Для работы с DISKPART требуются права администратора системы. Утилита является мощным, но небезопасными инструментом для работы с дисковыми данными, что требует определенных знаний, навыков, понимания того, что вы делаете, и каковы будут результаты ваших действий.
Формат командной строки:
/s — использовать сценарий DiskPart. Сценарий представляет собой текстовый файл с набором внутренних команд утилиты DISKPART.EXE
/? — отобразить подсказку по параметрам командной строки DISKPART.
При запуске без параметров, утилита переходит в интерактивный режим с ожиданием ввода команд пользователя. Для получения списка допустимых команд используется ввод знака вопроса или директивы help . В ответ на это действие отображается версия утилиты diskpart.exe и перечень допустимых команд DISKPART:
По каждой из команд, также можно получить краткую справку по использованию, например по команде FORMAT:
В справке приводится краткое описание команды, синтаксис и примеры использования:
Утилита diskpart.exe является мощным средством, предоставляющим администратору практически весь спектр возможностей, необходимых для работы с дисками и разделами, однако, при ошибках или необдуманных действиях, ее использование может привести к краху системы и потере пользовательских данных. Поэтому, для безопасного применения DISKPART, нужно в первую очередь освоить работу с ее внутренними командами, обеспечивающими получение сведений об объектах, над которыми планируется выполнять какие-либо действия и способы выбора этих объектов.
Для получения списка дисков используется команда:
В результате получаем список дисков, присутствующих в системе:
В данном случае имеется 4 физических диска, нумерация которых начинается с нуля — Диск 0 – Диск 3 . Для выбора какого-либо из них для дальнейших операций, используется команда SELECT:
select disk 0 — выбрать первый диск.
В списке объектов (в данном случае – дисков), получаемом по команде LIST, выбранный объект отмечается звездочкой.
Для получения подробной информации о выбранном диске используется команда DETAIL:
В результате отображается подробная информация о диске, выбранном командой SELECT:
Список разделов, имеющихся на выбранном диске можно посмотреть с помощью команды:
list partition Разделы, в отличии от дисков нумеруются начиная с единицы, а не с нуля:
Для выполнения каких-либо действий по отношению к разделу, его нужно также выбрать командой SELECT:
select partition 2 — выбрать второй раздел.
Для получения детальной информации о выбранном разделе используется команда:
Пример результат выполнения команды:
Для получения списка логических томов используется команда:
Подобная информация полезна при работе с флэшками и съемными дисками. В колонке Имя отображаются привычные буквы логических дисков, в колонке Метка — метка тома. Нумерация томов, как и дисков начинается с нуля. В данном примере Том 2 — это логический диск C: .
select volume 2 — выбрать том 2
detail volume — отобразить детальную информацию о томе, которому соответствует логический диск C: . Пример информации:
Для отображения сведений о текущей файловой системе выбранного тома и о поддерживаемых файловых системах для форматирования используется команда FILESYSTEMS. Пример отображаемых сведений:
Для завершения работы с DISKPART используется команда EXIT.
Практические примеры применения утилиты diskpart.exe для решения типовых задач при работе с дисками и разделами рассматривается ниже.
Назначение буквы скрытому системному разделу
Речь идет о доступе стандартными средствами к системным разделам или разделам восстановления производителей оборудования. Такие разделы обычно скрыты от пользователя для защиты от неосторожных действий, которые могут привести к повреждению системы или средств ее восстановления. Необходимость же доступа может быть вызвана, например, при создании внешнего носителя среды восстановления или переделки существующей среды под личные предпочтения. В тех случаях, когда производители оборудования принимают дополнительные меры по защите своих данных, описанные ниже приемы могут не сработать.
list volume — определяем список томов.
Как видим, Том 1 — это скрытый системный раздел (c меткой ”Зарезервировано системой”), не имеющий назначенной буквы.
select volume 1 — выбираем Том 1
assign letter=R — назначаем тому букву R:
Если назначение буквы пошло успешно, то отобразится соответствующее сообщение:
Подготовка загрузочной флэшки.
Нужно выполнить форматирование флэшки и создать на ней активный раздел.
в строке приглашения ввести команду для отображения списка дисков:
выбрать для последующих операций нужную флэшку:
select disk 3 — если флэшка отображалась в списке дисков как «Диск 3». При наличии в системе нескольких дисков, обычно достаточно знать объем используемой флэшки. Однако, ошибка в выборе диска может привести к потере хранящихся на нем данных и в качестве дополнительной информации можно использовать данные полученные по подкоманде detail (после выбора командой select disk ):
detail disk . Пример отображаемой информации:
очистить содержимое флэшки:
Команду clean желательно применять для удаления любого форматирования, ранее примененного к данному диску. После выполнения команды диск переходит в неинициализированное состояние. На MBR-дисках перезаписываются только сведения о структуре разделов MBR и данные скрытых секторов. На GPT-дисках перезаписываются сведения о структуре GPT-разделов, в том числе защитный MBR. Дополнительно обнуляется первый и последний мегабайт дискового пространства.
создать первичный раздел на выбранном диске:
create partition primary
выполнить форматирование созданного раздела:
format fs=ntfs Label=»FlashDisk» quick
Параметр quick задает режим быстрого форматирования, при котором не выполняется сканирование всей поверхности раздела, а сразу выполняется запись пустого оглавления.
сделать текущий раздел флэшки активным (установить флажок активности раздела):
Нужно отметить, что команда active не пишет на диск какие-либо загрузочные секторы или программы загрузки операционной системы, а только устанавливает флажок активности раздела в главном загрузочном секторе диска. Все прочие операции, обеспечивающие загрузку, выполняются другим программным обеспечением (bootsect.exe, grub4dos и т.п.)
Изменение разделов диска.
Допустим, возникла необходимость разбить существующий на данный момент диск C: на два диска C: и D: без потери данных. Фактически, необходимо освободить часть дискового пространства раздела, которому соответствует диск C: и создать новый раздел в освободившейся области. Порядок действий:
list disk — при необходимости, просмотреть список дисков и выбрать тот, с которым будем работать. Выбранный диск отмечается звездочкой:
list partition — просмотреть список разделов для выбора того, от которого нужно «отнять» дискового пространства. Например:
В данном случае, на диске имеется 3 раздела, два служебных и один, соответствующий диску C: размером 59Gb. При необходимости, уточнить сведения о разделах можно с помощью команды DETAIL PARTITION (после SELECT)
select partition 2 — выбираем раздел, от которого будем отрезать свободное дисковое пространство.
Для сокращения раздела (тома) используется команда SHRINK, подсказку по которой можно получить выполнив:
Для того, чтобы освободить 10000Mb ( приблизительно 10Гб, правильнее в расчетах вместо числа 1000 использовать 1024) из выбранного раздела, выполняем команду:
shrink desired=10000 — освободить 10000Мб.
При выполнении команды отображается объем освободившегося дискового пространства (естественно, не совсем 10Гб):
Теперь можно создать новый раздел, смежный с тем, у которого было отнято дисковое пространство, которое будет занято новым разделом:
create partition primary
Можно посмотреть, как теперь представлен список разделов диска:
Вновь созданный раздел не имеет файловой системы, которую предстоит создать, выполнив команду форматирования. Выбираем раздел :
select partition 4 Выбранный раздел (фокус) отмечается звездочкой в списке. При выполнении команды CREATE фокус автоматически перемещается на созданный раздел. Однако, во избежание неприятностей, стоит взять за правило, выбирать и проверять выбор перед выполнением опасных операций, как например форматирование. Подсказку по использованию команды FORMAT можно получить стандартным HELP FORMAT:
Для быстрого форматирования раздела с использованием метки тома Disk_D и файловой системы NTFS:
format fs=ntfs label=»Disk_D» quick
Ждем завершения операции:
Раздел готов к использованию, и ему можно присвоить букву командой ASSIGN:
assign letter=d — присвоить букву D:
В случае, если указанная буква уже назначена другому разделу, утилита выдаст сообщение об ошибке:
Нужно либо переназначить буквы с учетом нового раздела, либо использовать первую свободную, что делается при помощи команды ASSIGN без параметров:
При успешном присвоении буквы, отображается соответствующее сообщение:
Аналогичным образом решается задача объединения двух смежных разделов в один. Например, созданный в рассмотренном выше случае, диск D: нужно удалить и занимаемое им место присоединить к диску C: . Естественно, команда DISKPART не занимается сохранением пользовательских данных и этим вопросом должен озаботиться сам пользователь, и до того, как будет удален раздел. Для решения задачи нужно удалить раздел 4 (Disk_D в примере выше) и на освободившееся место расширить раздел 2 (Disk_C). Для удаления раздела используется команда DELETE, а для расширения команда EXTEND. Подсказка по использованию может быть получена стандартным образом:
Таким образом, для решения задачи, нужно выполнить последовательность команд:
select partition 4 — выбрать раздел для удаления.
delete partition — удалить выбранный раздел.
Как правило, раздел используется системой и команда удаления может завершиться ошибкой:
delete partition override — удалить выбранный раздел независимо от его использования системой.
После удаления, необходимо переместить фокус на тот раздел, который нужно расширить:
select partition 2 — выбрать раздел 2.
extend — расширить раздел на весь объем смежного свободного пространства.
Движение наружу.
Ehwaz
Как инициализировать новый диск
Как инициализировать новый диск.
Оставлю здесь, может пригодится кому ещё.
открываем консоль, набираем «Diskpart»
C:> Diskpart
Далее делаем так:
Выводим список дисков:
DISKPART> list disk
Выбираем нужный диск:
DISKPART> select disk (id)
Монтируем:
DISKPART> online disk
Снимаем защиту от записи:
DISKPART> attributes disk clear readonly
Удаляем все данные:
DISKPART> clean
Конвертируем в MBR или GPT (последнее для дисков больше 2Тб):
DISKPART> convert mbr
DISKPART> convert gpt
Создаем основной раздел:
DISKPART> create partition primary
Выбираем его:
DISKPART> select part 1
Делаем активным, если это загрузочный диск. Если нет, то не делаем:
DISKPART> active
Форматируем в NTFS:
DISKPART> format fs=ntfs label=(name) quick
Назначаем букву:
DISKPART> assign letter (letter)
DISKPART> list volume
Если вы что-то пропустите, то могут быть ошибки::
DISKPART> clean
DiskPart has encountered an error: The media is write protected.
See the System Event Log for more information.
Решение: выполнить команду «attributes disk clear readonly»
DISKPART> convert mbr
Virtual Disk Service error:
The specified disk is not convertible. CDROMs and DVDs
are examples of disks that are not convertable.
Решение: выполнить команду clean для удаления всех данных и разделов.
DISKPART> create partition primary
Virtual Disk Service error:
There is not enough usable space for this operation.
Решение: выполнить команду clean для удаления всех данных и разделов.
DISKPART> format fs=ntfs quick
Virtual Disk Service error:
The volume is not online.
Решение: выполнить команду «online disk», конвертнуть в MBR/GPT и создать раздел до форматирования.
Проблема возникла с флешками после какого-то из обновлений Windows 10. Некоторые USB флешки (не все) при втыкании в компьютер не появлялись в проводнике. При просмотре же дисков через консоль управления дисками, эти флешки имели статус «Вне сети».
Эти же флешки на других компьютерах под управлением Windows 7 или Windows 10 открывались нормально
 USB флешка находится в состоянии «Вне сети»
Можно увидеть, что системой флешка распозналась, но она недоступна — «Вне сети» ( функция «в сети» для usb-флэшек недоступна ). При попытке включить диск из консоли управления компьютером получаем сообщение:
«Диск отключен в соответствии с установленной администратором политикой».
Политик никаких не применяется, система свежая, обновленная, лицензионная.
Погуглив немного, нашел несколько инструкций, как перевести диск в онлайн. Практически все они рекомендуют использовать запуск diskpart от лица администратора.
Однако, при попытке перевести диск в онлайн статус выдает ошибку:
DISKPART> online disk
Ошибка службы виртуальных дисков:
Объект не найден.
 Как перевести диск в онлайн, используя DISKPART.
Путем проб и ошибок, достаточно долго разбирая различные решения на англоязычных сайтах (где было предложено и обновить драйвера, и поменять настройки электропитания для USB устройств, и чего-то еще), наконец нашел рабочий вариант решения проблемы, как заставить Windows 10 увидеть флешку.
Решение оказалось достаточно близким к использованию DISKPART, но немного другим. А именно, вместо запуска DISKPART от админской учетки, надо запустить Windows PowerShell (Пуск — Меню — W — Windows PowerShell) все так же от учетной записи администратора системы.
Далее набираем следующие команды :
PS C:WINDOWSsystem32> get-disk
Получаем список дисков с номером в первой колонке
Number Friendly Name Serial Number HealthStatus OperationalStatus
—— ————- ————- ———— ——————
0 INTEL SSDSC2KW120H6 BTLT705503ZC120GGN Healthy Online
1 WDC WD5000AAKX-00… WD-WMAYUN942037 Healthy Online
2 WDC WD5000AAKX-00… WD-WCAYUK805107 Healthy Online
3 Flash USB Disk 37270818F853706118283 Healthy Offline
Нам нужен диск номер 3. Переводим его в в online режим
PS C:WINDOWSsystem32> set-disk 3 -isoffline $false
И проверяем результат:
PS C:WINDOWSsystem32> get-disk
Number Friendly Name Serial Number HealthStatus OperationalStatus
—— ————- ————- ———— ——————
0 INTEL SSDSC2KW120H6 BTLT705503ZC120GGN Healthy Online
1 WDC WD5000AAKX-00… WD-WMAYUN942037 Healthy Online
2 WDC WD5000AAKX-00… WD-WCAYUK805107 Healthy Online
3 Flash USB Disk 37270818F853706118283 Healthy Online

Задача решена. Эти же действия можно проделать для каждого диска, который Windows 10 не видит.
 Теперь флешка нормально определяется системой Windows 10
Ну и напоследок. Частенько бывает, что после таких манипуляций флешка появляется в системе с атрибутом только для чтения. Снять защиту от записи на флешке быстрее всего оказалось с использованием командной строки. Запускам командную строку от лица администратора.
Стандартно выполняем «Пуск» — «Служебные Windows» — «Командная строка» (запустить с правами администратора). Далее вызываем утилиту управления дисками DISKPART. Ниже у меня две флешки с атрибутами «только для чтения», чтобы убрать этот атрибут я вводил соответственно команды выбора нужного диска (select disk 3) и затем очистки соответствующего атрибута:
attributes disk clear readonly
C:WINDOWSsystem32>diskpart
Microsoft DiskPart, версия 10.0.17763.1
(C) Корпорация Майкрософт (Microsoft Corporation).
На компьютере: MYCOMP
DISKPART> list disk
Диск ### Состояние Размер Свободно Дин GPT
——— ————- ——- ——- — —
Диск 0 В сети 111 Gбайт 0 байт
Диск 1 В сети 465 Gбайт 0 байт
Диск 2 В сети 465 Gбайт 1024 Kбайт
Диск 3 В сети 14 Gбайт 2048 Kбайт
Диск 4 В сети 250 Gбайт 0 байт
DISKPART> select disk 3
Выбран диск 3.
DISKPART> attributes disk clear readonly
Атрибуты диска успешно очищены.
DISKPART> select disk 4
Выбран диск 4.
DISKPART> attributes disk clear readonly
Атрибуты диска успешно очищены.
DISKPART> exit
Завершение работы DiskPart…
C:WINDOWSsystem32>