VirtualBox запускает как обычные файлы виртуальный компьютер, на котором установлена необходимая пользователю ОС. Чаще всего утилиту используют, чтобы запустить серверы или протестировать функционирование программы в разных операционных системах. Начинающим пользователям виртуальная машина помогает разобраться в работе незнакомых систем или запустить сомнительный файл, обезопасив свой компьютер от вирусов.
Установка VirtualBox
Не устанавливайте программу, загруженную с трекера или софт портала, так как она может содержать вирусы или быть устаревшей.
Процесс установки виртуальной машины:
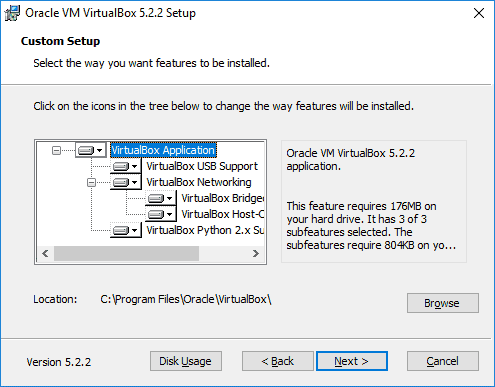
1. Запустите программу, затем нажмите на «Next». Вы увидите окно, предлагающее выбрать компоненты. Ничего менять не надо. Снова нажмите «Next».
2. В появившемся окне также ничего не стоит менять. Нажмите «Next». Увидите окно, сообщающее, что пока программа будет устанавливаться, система на время отключит интернет.
Согласитесь с условием, кликнув на «Yes».
Снова нажмите на «Next» и в последнем окне установки подтвердите действие, кликнув на надпись «Finish».
Процесс настройки языка
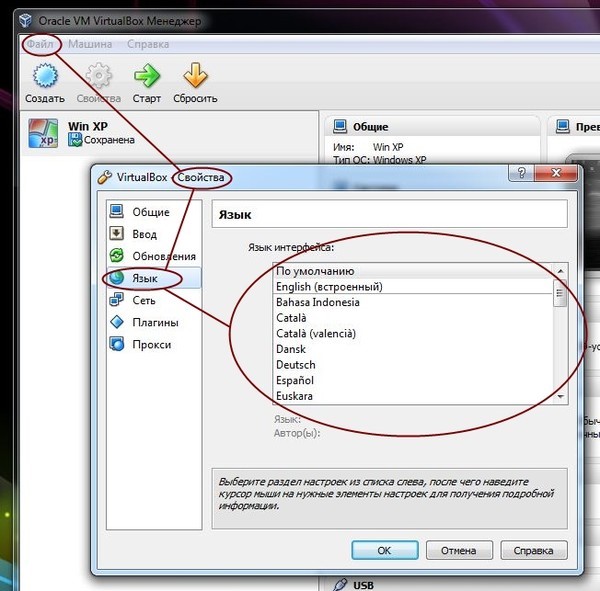
После установки, требуется настроить Виртуал Бокс. Если в вашей ОС стоит русский язык, то в автоматическом режиме программа запустится на русском. Если по какой-либо причине утилита открылась на английском языке, то откройте меню «Файл». Выберите «Свойства». В открывшейся вкладке выберите язык, который предпочитаете.
Больше в настройках менять ничего не стоит.
Создание VirtualBox
После установки необходимо создать сам VirtualBox. Для этого:
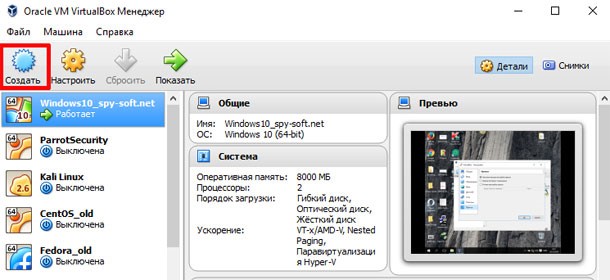
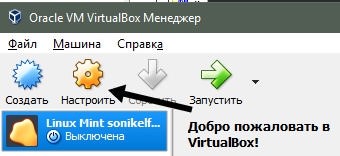
1. Кликните на надпись «Создать».
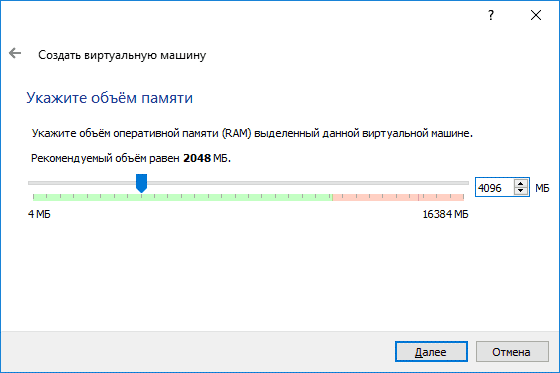
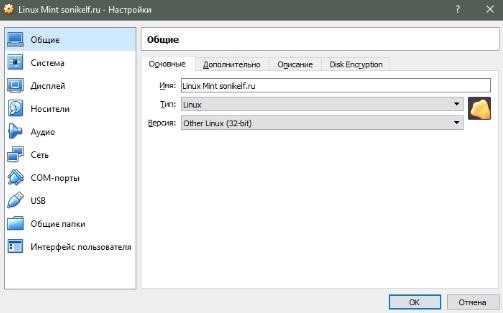
2. Появится окно настроек, в котором требуется указать имя. В последующем вы его легко сможете изменить. Выберите тип, а также версию ОС. Если решили использовать Windows 10, то выставляйте объем виртуальной памяти 8 Гб. Меньше не стоит, так как не сможете тестировать нормально программы. В некоторых случаях можете выбирать и больший объем, все зависит от поставленных целей.
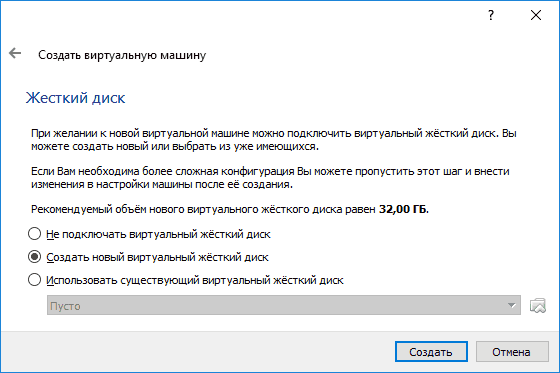
3. Нажмите на надпись «Создать», что даст возможность перейти к непосредственному созданию виртуального жесткого диска. Выбирайте размер не менее 80 Гб. Затем отметьте галочкой надпись «Динамический размер». При желании на этом этапе можете поменять место расположения виртуальной машины. Чтобы она быстрее действовала, рекомендуем производить установку на SSD-диск. Чаще всего в компьютере он называется «С».
Проверьте, все ли правильно отметили, и подтвердите действия, кликнув на «Создать».
Настройка VirtualBox
Правой кнопкой мыши кликните на созданную виртуальную машину, затем:
1. Откройте настройки.
2. Увидите различные вкладки, которые следует настроить перед началом работы.
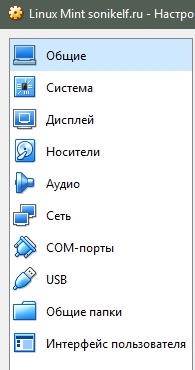
3. Нажмите на «Общие». Можете изменить название, добавить описание или поставить пароль на диск.
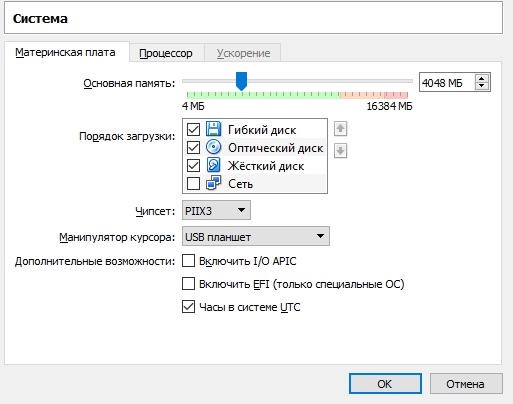
4. Зайдите во вкладку «Система» и поставьте галочку рядом с надписью «Сеть».
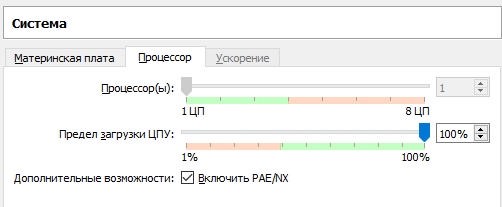
5. В под вкладке под названием «Процессор» поставьте галочку возле «Включить PAE». Выберите необходимое количество ядер и определитесь с предельной загрузкой. Рекомендуем использовать не более четверти от общего ресурса.
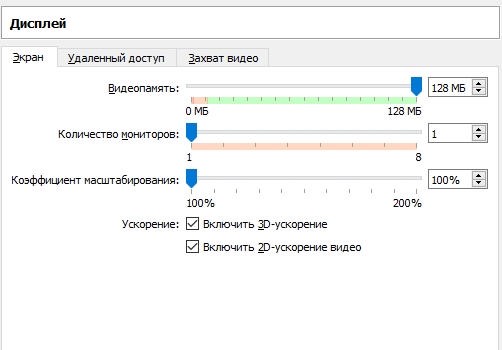
6. Увеличьте до максимальных показателей объем видеопамяти, 3Д и 2Д-ускорения.
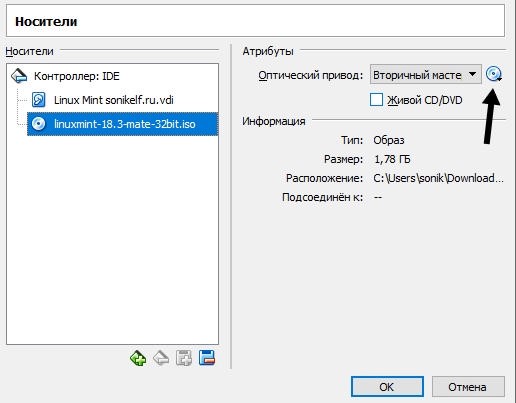
7. В разделе «Носители» перейдите на вторую строку. Выберите знак диска и укажите на Виндовс или Линукс.
8. Во вкладке «Аудио» поставьте галочки рядом с «Включить аудио» и «Включить аудио выход».

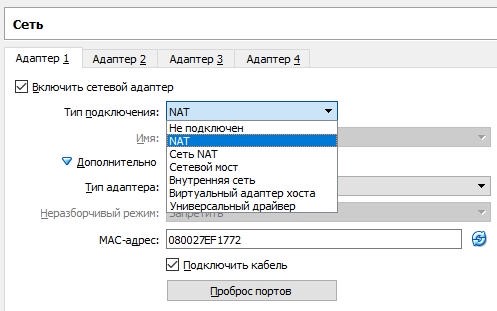
9. Во вкладке «Сеть» ничего не изменяйте. Если раньше не включали ее, то поставьте галочку возле надписи «Включить сетевой адаптер».
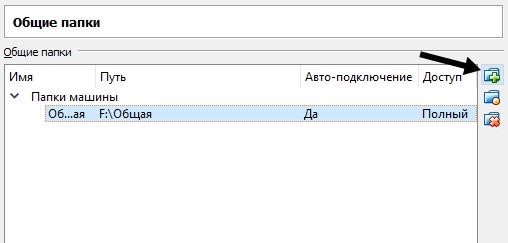
10. В разделе «Общие вкладки» можете использовать «+» для создания общих папок, которые нужны для обмена файлами между двумя ОС.
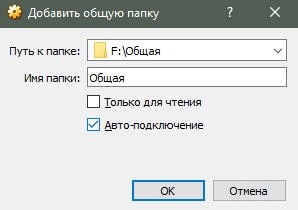
11. Создайте в любом месте пустую папку. Укажите путь, затем выберите «Авто-подключение».
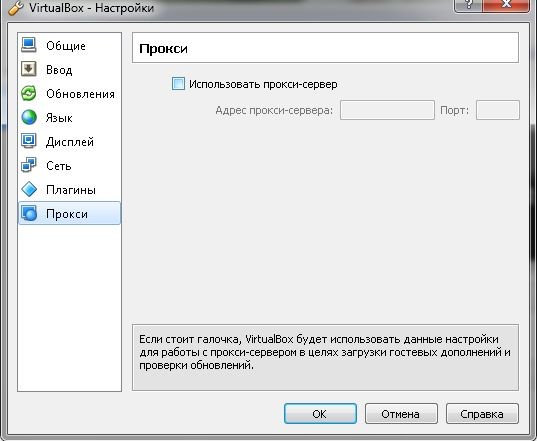
12. Во вкладке «Прокси» можете поменять IP-адрес для доступа в интернет. Если изменять ничего не надо, то открывать это окно не надо.
Первичная настройка на этом завершена. Можете запустить виртуальную машину.
Настройка скриншота
VirtualBox предоставляет возможность создавать снимки системы и просматривать их в любой момент. Причем в системе сохраняется несколько скриншотов.
Сделать снимок можете, когда VirtualBox запущен:
1. Зайдите в раздел «Машина». Выберите «Снимок состояния».
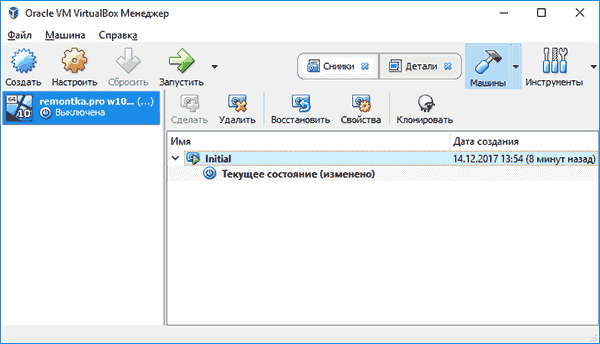
2. Чтобы восстановить снимок зайдите в «Машины». Кликните надпись «Снимки».
|
0 / 0 / 1 Регистрация: 04.09.2015 Сообщений: 123 |
|
|
1 |
|
|
15.03.2022, 00:03. Показов 2367. Ответов 8
Поставил linux mint 20,2 на виртуальную машину. Столкнулся с рядом проблем. Не смог справиться с проблемой переключения языка. Памагите! Не хочет переключаться совсем. Добавлено через 19 минут
__________________
0 |

|
2658 / 777 / 173 Регистрация: 14.01.2013 Сообщений: 3,594 |
|
|
15.03.2022, 06:58 |
2 |
|
А Вы его, переключение, настраивали как-то? Раскладки добавляли?
0 |
|
0 / 0 / 1 Регистрация: 04.09.2015 Сообщений: 123 |
|
|
15.03.2022, 12:21 [ТС] |
3 |
|
Добавил русскую устаревшую, как в одном гайде. Не помогло. Настройки во вложении Миниатюры
0 |

|
2658 / 777 / 173 Регистрация: 14.01.2013 Сообщений: 3,594 |
|
|
15.03.2022, 14:10 |
4 |
|
Там во вкладке «Комбинации клавиш» надо посмотреть.
0 |
|
0 / 0 / 1 Регистрация: 04.09.2015 Сообщений: 123 |
|
|
15.03.2022, 16:04 [ТС] |
5 |
|
добавил, но всё равно не работает Миниатюры
0 |
|
2658 / 777 / 173 Регистрация: 14.01.2013 Сообщений: 3,594 |
|
|
15.03.2022, 20:02 |
6 |
|
А если в терминале эту команду дать, что происходит?
0 |
|
0 / 0 / 1 Регистрация: 04.09.2015 Сообщений: 123 |
|
|
15.03.2022, 20:30 [ТС] |
7 |
|
Ничего) команда неправильная? какая команда для смены языка?
0 |
|
2658 / 777 / 173 Регистрация: 14.01.2013 Сообщений: 3,594 |
|
|
16.03.2022, 05:56 |
8 |
|
Ничего) Вот именно это же и происходит при нажатии комбинации клавиш
какая команда для смены языка? Надо узнавать у xfce-водов. В этих ваших интернетах пишуть, как-то так.
0 |

")
|
0 / 0 / 1 Регистрация: 04.09.2015 Сообщений: 123 |
|
|
16.03.2022, 11:28 [ТС] |
9 |
|
помогла команда sudo setxkbmap -layout «us,ru(winkeys)» -model pc105 -option grp:ctrl_shift_toggle
0 |
Виртуальная машина используется для имитации работы операционной системы (Windows, Linux или Mac) на одной физической машины. Иными словами вы на своем компьютере можете развернуть несколько виртуальных машин, которые будут работать как полноценные операционные системы, при этом находиться на вашем компьютереноутбуке и использовать ресурсы (процессор, оперативную память, жесткий диск) вашего компьютера ноутбука. В домашних, условиях виртуальные машины очень удобны для различных тестирований и построения небольшой сети. В организациях виртуальные машины используются для разделения ресурсов сервера и установки нескольких операционных систем (зависит от конфигурации сервера и требований к виртуальным машинам). В этой статье я опишу работу с наиболее популярной программой для развертывания виртуальных машин для домашнего использования.
VirtualBox является весьма хорошим продукт виртуализации для предприятий и домашнего использования. Мало того, что VirtualBox чрезвычайно много функций, он также является единственным профессиональным решением, которое находится в свободном доступе с открытым исходным кодом на условиях GNU General Public License (GPL) версии 2 и плюс ко всему полностью на русском языке.
Первым делом необходимо скачать последнюю версию дистрибутива VirtualBox .
После этого запускаем файл установщика. В окне приветствия нажимаем “Next”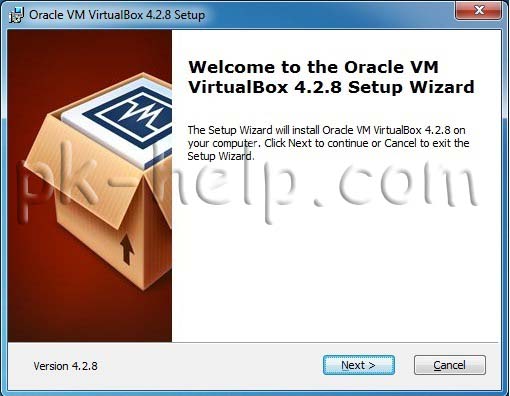
После этого будет предложен выбор компонентов установки и путь, рекомендую оставить все как есть и нажать “Next”.
В следующем окне будет предложено установить ярлыки VirualBox, можно оставить все как есть и нажать “Next”.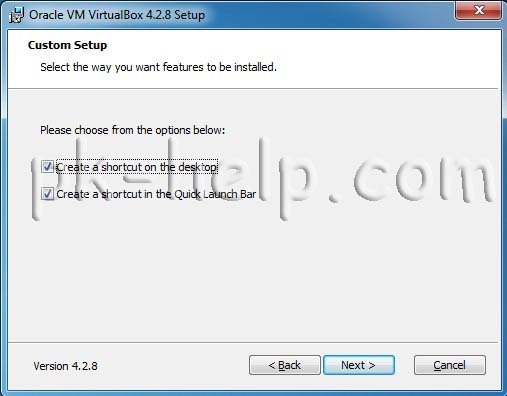
Следующее окно предупреждает о том, что во время установки может выключаться сеть, если во время установки вы ничего не скачиваете, можно нажать “Next”, иначе закончите закачку, а после этого продолжайте установку VirualBox.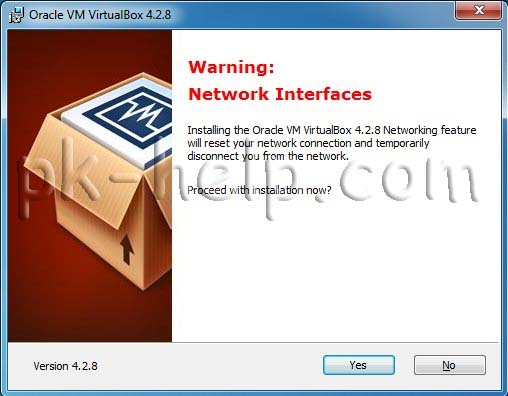
В следующем окне нажимаем “Install”
Во время установки будут появляться окна о установке- контроллера USB, сетевых служб и сетевых адаптеров, нажимаем «Установить».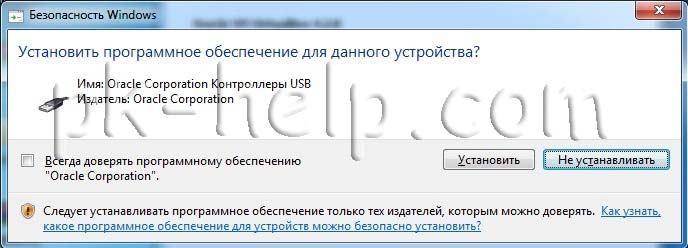
По окончании установки нажимаем «Finish»
После установки VirtualBox приступим к созданию виртуальной машины, но для начала изменим язык интерфейса, если конечно он вас не устраивает. Для этого в панели VirtualBox нажимаем “File- Preferences…”
В окне Settings выбираем “Language” и в правой колонке выбираем необходимые настройки языка панели, в данном случае Русский, нажимаем «ОК».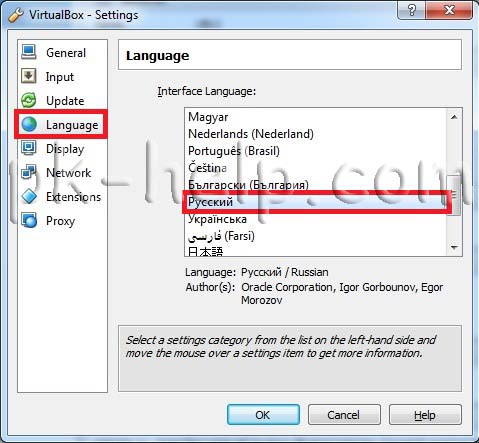
Теперь приступим к установки виртуальной машины. Сверху на панели нажимаем “Создать”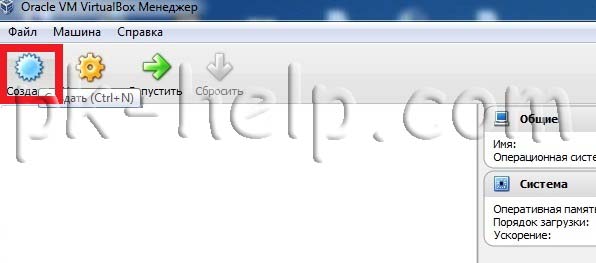
В окне Создать виртуальную машину вписываем имя, которое будет отображаться в VirtualBox, выбираем тип и версию устанавливаемой операционной системы.
Затем указываем количество выделяемой оперативной памяти для данной виртуальной машины, в дальнейшем это значение можно без труда изменить.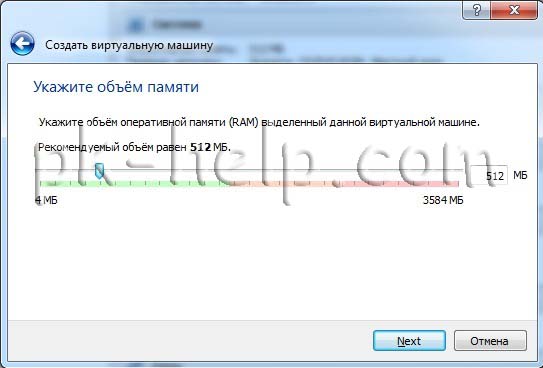
Поскольку мы создаем новую виртуальную машину в следующем окне выбираем “Создать новый виртуальный жесткий диск”.
Затем указываем тип файла, который будет служить жестким диском для новой виртуальной машины, рекомендую оставить VDI.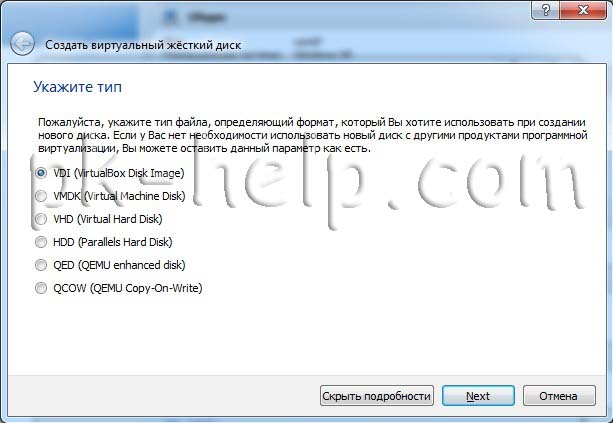
После этого выбираете формат хранения, рекомендую оставить Динамический виртуальный жёсткий диск.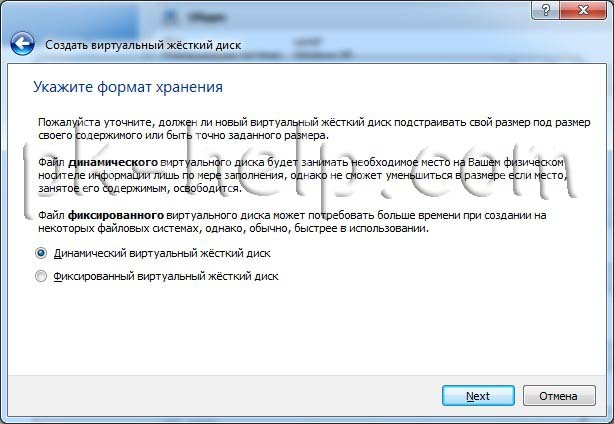
Указываете размер жесткого диска, по умолчанию указан наименьший размер, если вам этого мало, ползунком определите сколько необходимо места.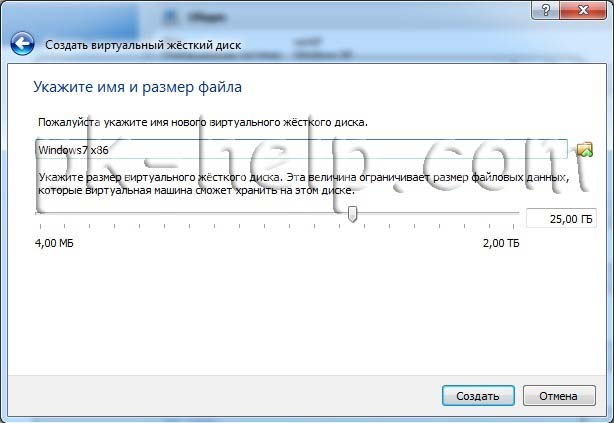
Запускаем созданную машину, для этого выбираем ее и сверху на панели VirtualBox нажимаем “Запустить”. 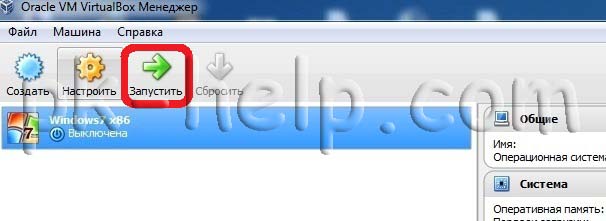
При запуске появится окно в котором необходимо выбрать привод вашего дисковода в котором установлен установочный диск, либо указать ISO образ операционной системы и нажать “Продолжить” после чего начнется знакомая всем установка операционной системы на виртуальную машину.
Если после установки операционной системы вам необходимо поменять параметры виртуальной машины, необходимо выбрать ее и в консоли VirtualBox и нажать “Настройки”.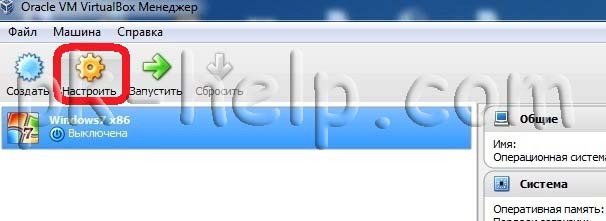
В меню Система вы можете изменить количество выделяемой для виртуальной машины оперативной памяти, определить порядок загрузки при включении. 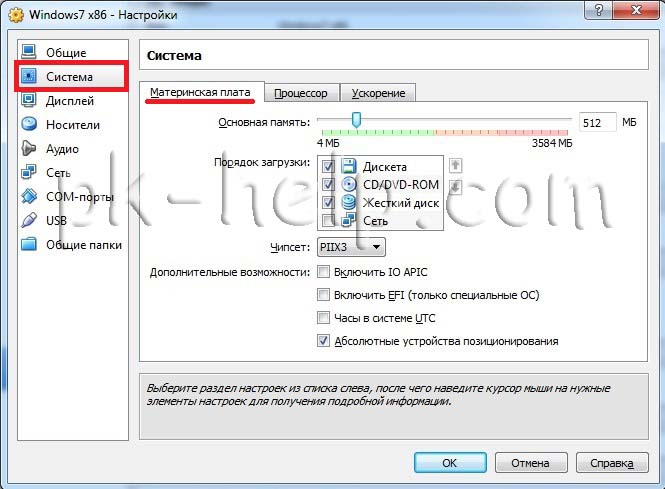
Во кладке Процессор указать количество процессоров выделяемых для виртуальной машины, а так же предел загрузки процессора.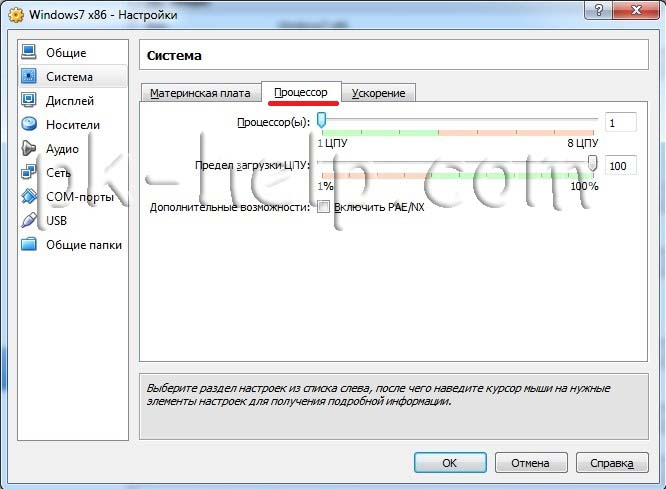
В меню сеть вы можете определить количество сетевых адаптеров и тип подключения.
В режиме «NAT», гостевому сетевому интерфейсу присваивается по умолчанию IPv4 адрес из диапазона 10.0.х.0/24, где х обозначает конкретный адрес NAT-интерфейса, определяемый по формуле +2. Таким образом, х будет равен 2, если имеется только один активный NAT-интерфейс. В этом случае, гостевая операционная система получает IP-адрес 10.0.2.15, сетевому шлюзу назначается адрес 10.0.2.2, серверу имен (DNS) назначается адрес 10.0.2.3.
В соединении типа «Сетевой мост» виртуальная машина работает также, как и все остальные компьютеры в сети. В этом случае адаптер выступает в роли моста между виртуальной и физической сетями. Со стороны внешней сети имеется возможность напрямую соединяться с гостевой операционной системой.
При подключении типа «Виртуальный адаптер хоста» гостевые ОС могут взаимодействовать между собой, а также с компьютером на котором установлена виртуальная машина. В этом режиме адаптер хоста использует свое собственное, специально для этого предназначенное устройство, которое называется vboxnet0. Также им создается подсеть и назначаются IP-адреса сетевым картам гостевых операционных систем. Гостевые ОС не могут взаимодействовать с устройствами, находящимися во внешней сети, так как они не подключены к ней через физический интерфейс. Режим «Виртуальный адаптер хоста» предоставляет ограниченный набор служб, полезных для создания частных сетей под VirtualBox для ее гостевых ОС.
В меню Общие папки вы можете подключить папку для более легкого обмена файлами с виртуальными машинами. Для этого нажимаете на кнопку Добавить общую папку (справа папка с плюсом) и указываете путь и имя общей папки.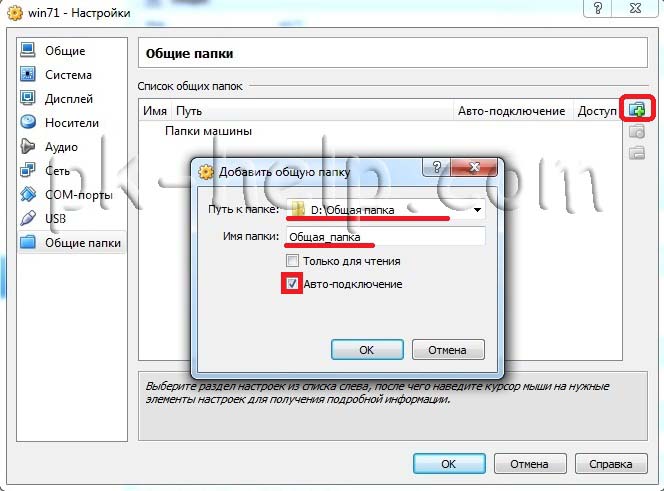
Надеюсь данная статья помогла вам в установке и настройки VirtualBox.
Я очень надеюсь, моя статья помогла Вам! Просьба поделиться ссылкой с друзьями:
This document describes how users without a strong technical background in software engineering can contribute translations to other languages. The process is very straightforward and based on the easy to use Qt Linguist tool which is a part of the Qt toolkit for C++ version 5.
If you are just wanting to point out a mistake or any other issue with one of the existing translations, you should add a comment onto the end of ticket:4503. Translators are encouraged to subscribe to that ticket by adding a short comment onto it themselves so that they will be notified about updates to the ticket.
Translation is possible for all languages, including languages with non-latin alphabets. The process requires you to perform an initial translation which you then have to keep up to date as VirtualBox evolves. The original language is English which — together with German and Russian — is handled by the VirtualBox team. The Qt Linguist tool will also assist you in finding where your translation has to be updated for a new release of VirtualBox.
We have tried to keep the information about how to do translation as understandable as possible, but if something is still not quite clear to you feel free to ask on the developers’ mailing list.
Language file naming and location
All language files in VirtualBox are named according to the following rule:
<component>_<lang>
where <component> is the name of the component and <lang> is the language identifier. Possible values for the <component> part are:
| VirtualBox | VirtualBox GUI front-end |
| qt | Qt library itself (built-in dialogs and other resources like key names) |
The language identifier has the form of <language>[_<TERRITORY>], where <language> is a two-letter language code as defined by ISO 639, and optional <TERRITORY> is a two-letter territory (country) code as defined by ISO 3166. See the examples of language file names at the end of this section.
Binary language files used at runtime are located in the nls subdirectory of the directory that contains the component’s executable, and have the .qm extension. Source translation files are located in the nls subdirectory of the component’s source tree and have the .ts extension.
At runtime, VirtualBox selects a binary language file for the given language identifier xx_YY in the following order (the first match wins):
- <component>_xx_YY.qm
- <component>_xx.qm
- [built-in English translation]
The language identifier is initially chosen according to the current user’s locale setting.
Here are some examples of language file names:
- qt_de.qm (Qt translation, Deutsch language, all territories)
- VirtualBox_ru.qm (VirtualBox GUI translation, Russian language, all territories)
- VirtualBox_zh_TW.qm (VirtualBox GUI translation, Chinese language, Taiwan)
Prerequisites
To create a new or update an existing translation, you will need the Qt Linguist tool, to edit .ts files. In order to get Qt Linguist, download the latest 5.x.x version of the Open Source Edition of the Qt toolkit for C++ for your platform from the Qt web site. Alternatively, you can try to download the toolkit sources and compile them yourself to get a Qt Linguist application. Please note that we will not accept translation files processed by Qt Linguist version 3 (part of Qt Toolkit 3.x.x) because the format of language files is incompatible with the newer versions of Qt.
Note that the full VirtualBox source code is not necessary to perform a translation or to test it. See below for detailed instructions.
Preparing a translation to a new language
This section describes how to start a translation of VirtualBox to a new language.
- Define a language identifier for your language according to the rule described above. If translations to your language vary depending on the country, use the _<TERRITORY> suffix, otherwise omit it (i.e. no need to apply the suffix if it represents the only possible country). Let’s say that your language code is my_MY for the purpose of this description.
- Check that your language is not yet in the list on ticket:17708 (the translation ticket).
- Add a comment to ticket:17708 that you are going to maintain the translation to your language to inform other people that may also want to participate. Before adding such a comment, check that nobody else has already started the translation to the same language.
- Download the files VirtualBox_xx_YY.ts and qt_xx_YY.ts from the web page https://www.virtualbox.org/download/testcase/nls/ to your computer (please be aware that the address of that page may change occasionally and check back to this instruction page if you are in doubt) and rename the files for your language using the language identifiers described above. For example, the name VirtualBox_yi.ts would be correct for Yiddish, and qt_sw_TZ.ts for Tanzanian Swahili.
- Start Qt Linguist, open and translate new files you got in step 5.
- Make sure all the fields in a special context named @@@ in the file VirtualBox_my_MY.ts are properly translated (see below).
- Make sure you followed the Translation hints while translating.
- Check your translation at runtime by referring to the Testing the translation section below.
- Submit your translation as described in the Submitting the translation section.
Special context @@@
A special context named @@@ contains translatable items necessary to identify the given translation file, so you must ensure they are properly translated. This context is currently present only in the VirtualBox_my_MY.ts file. There are five items in this context:
- Native language name (the original value is English). Translate it to a common, human-readable name of the language of your translation, as written in the language itself. For example, for Russian, it will be Русский. Please note that the <language> part in the name of the .ts file must match the language specified here.
- Native language country name (the original value is —). If the language of your translation is the same regardless of the territory (country) of speaking, then translate it to an empty string. If you are translating to a particular variant of your language, translate this item to a common, human-readable name of the territory (country) where this variant is used, as written in the language itself. Please note that the <TERRITORY> part in the name of the .ts file must match the language specified here.
- Language name, in English (the original value is English). The same as 1, but a common English spelling of the language name.
- Language country name, in English (the original value is —). The same as 2, but a common English spelling of the territory (country).
- Comma-separated list of translators (the original value is Oracle Corporation). This item used is to specify a list of authors who worked on this translation. Please use the Latin alphabet here, to make it readable by everyone.
Every item in this special context has a self-descriptive comment field, so it will not be difficult to locate them in your translation file even if the order there differs from the order they are listed here.
Picking up recent changes to the translation files
Existing .ts files are periodically synchronized with the source code by the GUI maintainer at Oracle, either a few weeks before a new product release, or after a big number of language-related changes in the user interface (UI). This synchronization is performed to add new (untranslated) strings used in the UI to .ts files which then need to be translated by contributors. Updates will be announced on ticket:17708. To translate the newly added text, you should replace the copies of the translation files on your computer with the new ones on the web page, which will contain any work which you have submitted previously.
Updating a translation done by someone else
If you want to continue a translation done by someone else, please perform the following steps:
- Determine the language identifier for your language as described above. If translations to your language vary depending on the country or region, use the _<TERRITORY> suffix, otherwise omit it (i.e. no need to apply the suffix if it represents the only possible country). Let’s say that your language code is my_MY for the purpose of this description.
- Look through comments to ticket:17708 to find out who is currently maintaining the translation to your language. Contact these people in order to coordinate your work and avoid conflicts by adding a comment to ticket:17708 (this is less important if you will be working on a new regional variant of the language, but consider that you may still gain a lot from working together).
- Copy the existing translation files from the web page mentioned in the Preparing a translation to a new language section. If you are working on a new regional variant of the language rename the files appropriately.
- Follow other steps starting from step 6 in the Preparing a translation to a new language section.
Translation hints
This section contains important notes about translating the VirtualBox product.
- Read the Qt Linguist manual to get general information about translating Qt applications. Pay special attention to understanding the status of translatable items (unfinished, obsolete).
- Properly translate Plural Forms. VirtualBox may contain sentences which include %n markers. This marker is used when numbers could be included either in a singular or plural variant. The Qt translation mechanism allows you to translate this one sentence to different variants to let the result look more natural. For more information on this topic see Plural Form(s) in Translation(s).
- Preserve spaces around (and between) words if they are used for justification purposes. Examples of such items are category names in the global and VM settings dialogs where leading and trailing space characters serve as horizontal item margins. Also, a leading space in the translatable item is often used as a separator from the preceding word that will appear after string concatenation, and therefore needs to be preserved.
- Translate only human-readable words and sentences. Leave HTML markup and other sorts of special characters untouched — otherwise you may completely break the text appearance in the UI.
- Don’t translate items starting with the # (hash) sign in contexts VBoxGlobalSettingsDlg and VBoxVMSettingsDlg, such as #general, #input and so on. They are responsible for the settings category hyper-link feature on the VM Details page and translating them will break this feature.
- When Qt Linguist shows the source text of the translatable item, it uses special text fragments inside it to mark unprintable characters, for example: (new-line) for new-line marks or (sp) for ambiguous space characters. However, if you copy the source text to the translation field (to use it as a template for translation), Qt Linguist will not replace these special fragments back with real control/formatting characters — they will remain (new line} and (sp) in the translation and will appear like that in the GUI as well. Therefore, you should be careful and always replace them with the corresponding formatting characters (new-line or space) manually.
- In general, it’s not recommended to translate Ctrl+<latin_letter> shortcuts (for example, Ctrl+S used to open the VM Settings Dialog) because they are intended to be language neutral and should have the same action regardless of the selected UI language. Translate them only if there is a very special reason to do so in your language; otherwise simply leave the original. Note that the action name starting with a different letter or having a different underscored (Alt+<any_letter>) accelerator in your language is not a valid reason to translate the corresponding Ctrl+<latin_letter> shortcut.
Testing the translation
Use these steps to test your translation:
- Select File -> Release As… from the main menu of Qt Linguist.
- Specify <path_to_VirtualBox_exe>/nls4/VirtualBox_my_MY.qm as the target path and file name and press Ok. This will generate a binary language file and save it to the proper directory.
- Repeat the previous step for all other components (qt_my_MY.qm).
- Setup the locale corresponding to the my_MY language identifier and start VirtualBox.exe. The language files should be loaded automatically if you did everything right.
- Navigate through all parts of the user interface and check the quality and meaningfulness of the translation.
Submitting the translation
When you think your translation looks good and ready to be shared with others, you may submit the translation source files you created (VirtualBox_my_MY.ts and qt_my_MY.ts, according to the examples above) by packing it to a .zip archive named VirtualBox_my_MY.zip and attaching to ticket:17708.
The same thing should be done after you have updated an existing translation, but please be careful with the name of the file you are attaching and make sure you will not replace somebody’s else attachment with the same name. Note though that you may and normally should replace a previous attachment of the same name if it was also attached by you and if it contains an outdated version of the same translation file you are attaching now.
PLEASE REMEMBER that before your translation can be included into the VirtualBox code base and distribution archives, you must allow Oracle Corporation to make use of your contributions. The Contributor_information section describes how to do it. Basically, you have two options: either to fill out the Oracle Contributor’s Agreement (ICA) and send it to Oracle Corporation or to make the following statement directly in the ticket:17708 comment where you attach your translation source file:
  The <MyLanguage> (<my_MY>) translation attached here by <my_full_name>
  is published under the terms of the [wiki:"MIT license"].
assuming that <MyLanguage> is the language name, <my_MY> is the language identifier and <my_full_name> is your full name that has exactly the same spelling you used in the .ts file itself (in the list of translators in the special context @@@). It’s enough to do it only once for a given language. If you translate VirtualBox to more than one language than a separate statement for every language is necessary.
Установил Android 4.4 на Virtual Box (на базе Windows 7). Все приложения и службы успешно работают. Как я могу настроить горячие клавиши для быстрой смены раскладки клавиатуры с ENG на RUS и обратно.
Например, при общении вебсерфинге приходится вручную менять раскладку через настройки Android => Язык и ввод => Физическая клавиатура => AT Translated Set 2 keyboard => смена языка. Как сами видите постоянно так менять неудобно и занимает немало времени и терпения. У кого есть опыт в работе с Virtual Box, подскажите пожалуйста как можно оптимизировать этот процесс?
-
Вопрос заданболее трёх лет назад
-
2988 просмотров
Пригласить эксперта
i.imgur.com/GGSghFc.png
Нужно в настройках просто настроить «физическую клавиатуру», в моём случае, я добавил русский язык и английский язык, и после, появилось окошко с подсказкой сочетания клавиш.
Столкнулся с такой же проблемой на android 7.1, решил при помощи Russian Keyboard из маркета, после установки нужно включить эту клавиатуру для использования по умолчанию и в настройках самого приложения выбрать необходимую комбинацию клавиш для смены языка.
-
Показать ещё
Загружается…
10 февр. 2023, в 04:49
50000 руб./за проект
10 февр. 2023, в 02:20
3000 руб./за проект
10 февр. 2023, в 01:33
1500 руб./за проект