Error Description:
Adding VirtualHost fails: Access Forbidden Error 403 (XAMPP) (Windows 7)
Solution 1:
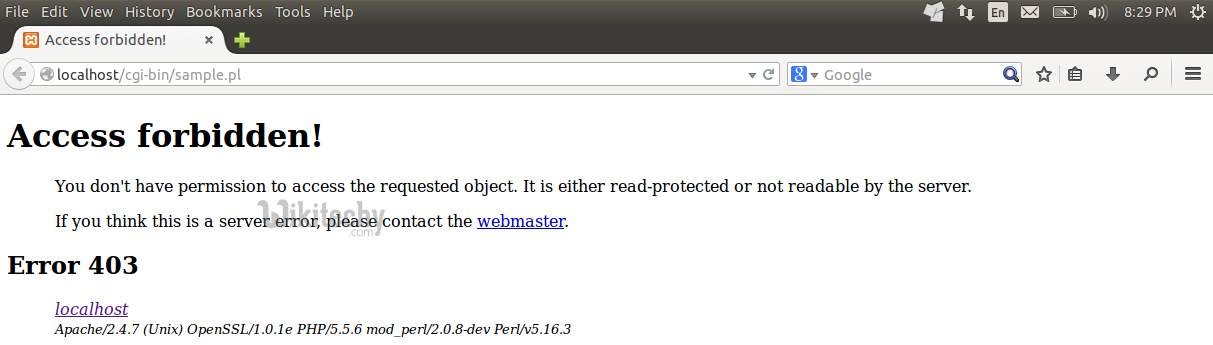
- Access forbidden! New XAMPP security concept. Error 403
Access Forbidden 403 ( New XAMPP security concept )
click below button to copy the code. By — apache tutorial — team
- During development and seeing unforced/unwanted errors… after all a few mins R&D and research , we got a solution at two different websites … but individually they were bit incomplete and on combining both solutions , we got the issue resolved
- Open httpd-vhosts.conf file and in the bottom of the file change it
<VirtualHost *:80>
DocumentRoot “E:/xampp/htdocs/”
ServerName localhost
<Directory E:/xampp/htdocs/>.
Require all granted
</Directory>
</VirtualHost>
click below button to copy the code. By — apache tutorial — team
- Here E:/xampp is project workspace, we can change it as per our settings and Second Change is
- Now Open httpd-xampp.conf file and in the bottom of the file change it
- # New XAMPP security concept
<LocationMatch “^/(?i:(?:xampp|security|licenses|phpmyadmin|webalizer|server-status|server-info))”>
Order deny,allow
click below button to copy the code. By — apache tutorial — team
- Allow from all
Allow from ::1 127.0.0.0/8
ErrorDocument 403 /error/XAMPP_FORBIDDEN.html.var
</LocationMatch>
click below button to copy the code. By — apache tutorial — team
NOTE : Make sure we backup files ( httpd-xampp.conf ) and ( httpd-vhosts.conf ) , Both Files are located in Drive:xamppapacheconfextra
Solution 2:
- We have to allow Apache to access the root folder of your LAMP files:
- Edit the conf file in /etc/apache2/sites-available/yourconffile.conf
- Enter following:
<VirtualHost localhost:80>
 DocumentRoot "/path/to/your/rootfolder"
        <Directory "/path/to/your/rootfolder">
            # AllowOverride All      # Deprecated
        # Order Allow,Deny       # Deprecated
        # Allow from all         # Deprecated
        # --New way of doing it
        Require all granted
    </Directory>
</VirtualHost>
click below button to copy the code. By — apache tutorial — team
Solution 3:
- This worked for us with Ubuntu 11.10 and version 1.7.7 in httpd.conf we’ve added the # in the directory to have it work with vhosts. vhosts were located outside of the root folder…
- And change user and group from nobody to our username:
User nobody
Group nobody
</IfModule>
</IfModule>

#
# Each directory to which Apache has access can be configured with respect
# to which services and features are allowed and/or disabled in that
# directory (and its subdirectories).
#
# First, we configure the "default" to be a very restrictive set of
# features.
#
<Directory />
# Options FollowSymLinks
# AllowOverride None
# Order deny,allow
# Deny from all
</Directory>
click below button to copy the code. By — apache tutorial — team
Solution 4:
- We are using XAMPP 1.6.7 on Windows 7.
- We added the following lines in the file
httpd-vhosts.confatC:/xampp/apache/conf/extra.
- we had also uncommented the line
# NameVirtualHost *:80
<VirtualHost mysite.dev:80>
    DocumentRoot "C:/xampp/htdocs/mysite"
    ServerName mysite.dev
    ServerAlias mysite.dev
    <Directory "C:/xampp/htdocs/mysite">
        Order allow,deny
        Allow from all
    </Directory>
</VirtualHost>
click below button to copy the code. By — apache tutorial — team
- After restarting the apache, it were still not working. Then we had to follow by editing the file
C:/Windows/System32/drivers/etc/hosts.
# localhost name resolution is handled within DNS itself.
     127.0.0.1       localhost
     ::1             localhost
     127.0.0.1       mysite.dev
click below button to copy the code. By — apache tutorial — team
Solution 5:
- For Http inside httpd-vhosts.conf
<Directory "D:/Projects">
AllowOverride All
Require all granted
</Directory>

##Letzgrow
<VirtualHost *:80>
DocumentRoot "D:/Projects/letzgrow"
ServerName letz.dev
ServerAlias letz.dev
</VirtualHost>
click below button to copy the code. By — apache tutorial — team
- For using Https (Open SSL) inside httpd-ssl.conf
<Directory "D:/Projects">
AllowOverride All
Require all granted
</Directory>

##Letzgrow
<VirtualHost *:443>
DocumentRoot "D:/Projects/letzgrow"
ServerName letz.dev
ServerAlias letz.dev
</VirtualHost>
click below button to copy the code. By — apache tutorial — team
Learn apache — apache tutorial — apache adding virtual host — apache examples — apache programs
1. You should configure your /etc/hosts file like that:
127.0.0.1   localhost
127.0.0.1   test-site
127.0.1.1   my-hostname
# The following lines are desirable for IPv6 capable hosts. etc...
Where test-site is the second «localhost». And my-hostname is the «System hostname» defined in /etc/hostname.
2. You should define and enable a Virtual Host (VH):
There is a default HTTP VH. It’s placed in /etc/apache2/sites-available/. The filename is 000-default.conf. You have to edit it (you can rename it, if you want, or make some other .conf files, based on it) and after that you have to enable it.
You can enable it manually through creation of «soft, symbolic link»:
sudo ln -s /etc/apache2/sites-available/000-default.conf /etc/apache2/sites-enabled/
Or you can use Apache2 tool called a2ensite, which make the same:
sudo a2ensite 000-default.conf
Let’s assume there has 3 Virtual Hosts, enabled SSL, and registered private domain (SOS.info for an example):
/etc/apache2/sites-available/http.SOS.info.conf
/etc/apache2/sites-available/https.SOS.info.conf
And one which is created for the purposes of this topic:
/etc/apache2/sites-available/http.test-site.conf
The content of First 2 VHs is:
$ cat /etc/apache2/sites-available/http.SOS.info.conf
<VirtualHost *:80>
    ServerName SOS.info
    ServerAlias www.SOS.info
    ServerAdmin admin@SOS.info

    # Redirect Requests to SSL
    Redirect permanent "/" "https://SOS.info/"

    ErrorLog ${APACHE_LOG_DIR}/http.SOS.info.error.log
    CustomLog ${APACHE_LOG_DIR}/http.SOS.info.access.log combined
</VirtualHost>
This one redirects all HTTP requests to HTTPS.
$ cat /etc/apache2/sites-available/https.SOS.info.conf
<IfModule mod_ssl.c>
    <VirtualHost _default_:443>
        ServerName SOS.info
        ServerAlias www.SOS.info
        ServerAdmin admin@SOS.info

        DocumentRoot /var/www/html

        SSLEngine on
        SSLCertificateFile /etc/ssl/certs/SOS.info.crt
        SSLCertificateKeyFile /etc/ssl/private/SOS.info.key
        SSLCertificateChainFile /etc/ssl/certs/SOS.info.root-bundle.crt
        #etc..
    </VirtualHost>
</IfModule>
This is the HTTPS VH.
The content of these two files can be posted in one file, but in this case their management (a2ensite/a2dissite)will be more difficult.
The third Virtual Host is that, which is created for our purposes:
$ cat /etc/apache2/sites-available/http.test-site.conf
<VirtualHost *:80>
    ServerName test-site
    ServerAlias test-site.SOS.info

    DocumentRoot /var/www/test-site
    DirectoryIndex index.html

    ErrorLog ${APACHE_LOG_DIR}/test-site.error.log
    CustomLog ${APACHE_LOG_DIR}/test-site.access.log combined

    <Directory /var/www/test-site>
        # Allow .htaccess
        AllowOverride All
        Allow from All
    </Directory>
</VirtualHost>
3. With this configuration you should access:
http://localhost     # pointed to the directory of the mine Domain
https://localhost    # iin our case: /var/www/html (SOS.info), but you should get an error, because the SSL certificate

http://SOS.info      # which redirects to https://SOS.info
https://SOS.info     # you should have valid SSL certificate

http://www.SOS.info  # which is allied to http://SOS.info and redirects to https://SOS.info
https://www.SOS.info # which is allied to https://SOS.info
On the main example you should access and:
http://test-site           # pointed to the directory /var/www/test-site
http://test-site.SOS.info  # which is allied to http://test-site
Try to open the site in the web browser or just try (in the terminal) with next commands:
$ curl -L http://test-site/index.html
$ curl -L http://test-site.SOS.info/index.html
Of course, you need to have some index.html pages in their DocumentRoot 
I will leave next notes by reason of pedantry

4. You need properly configured `/etc/apache2/apache2.conf`.
Ii is good idea to spend some time to improve your server’s security. These manuals are about the security configuration: 1st and 2nd. Here you can get free SSL certificate. These sites will help you to check your progress: 1st and 2nd.
According to above security manuals /etc/apache2/apache2.conf file must looks like:
Mutex file:${APACHE_LOCK_DIR} default

PidFile ${APACHE_PID_FILE}

Timeout 60

#KeepAlive Off
KeepAlive On
MaxKeepAliveRequests 100
KeepAliveTimeout 5

HostnameLookups Off

ErrorLog ${APACHE_LOG_DIR}/error.log
LogLevel warn

IncludeOptional mods-enabled/*.load
IncludeOptional mods-enabled/*.conf

Include ports.conf

<Directory />
    Options None FollowSymLinks
    AllowOverride None
    Require all denied
</Directory>

<Directory /var/www/>
    Options None FollowSymLinks
    AllowOverride None
    Require all granted
</Directory>

AccessFileName .htaccess
<FilesMatch "^.ht">
    Require all denied
</FilesMatch>

LogFormat "%v:%p %h %l %u %t "%r" %>s %O "%{Referer}i" "%{User-Agent}i"" vhost_combined
LogFormat "%h %l %u %t "%r" %>s %O "%{Referer}i" "%{User-Agent}i"" combined
LogFormat "%h %l %u %t "%r" %>s %O" common
LogFormat "%{Referer}i -> %U" referer
LogFormat "%{User-agent}i" agent

IncludeOptional conf-enabled/*.conf
IncludeOptional sites-enabled/*.conf

# Hide Server type in the http error-pages
ServerSignature Off
ServerTokens Prod

# Etag allows remote attackers to obtain sensitive information
FileETag None

# Disable Trace HTTP Request
TraceEnable off

# Set cookie with HttpOnly and Secure flag.
# a2enmod headers
Header edit Set-Cookie ^(.*)$ $1;HttpOnly;Secure

# Clickjacking Attack
Header always append X-Frame-Options SAMEORIGIN

# CX-XSS Protection
Header set X-XSS-Protection "1; mode=block"

# Disable HTTP 1.0 Protocol
RewriteEngine On
RewriteCond %{THE_REQUEST} !HTTP/1.1$
RewriteRule .* - [F]

# Change the server banner @ ModSecurity
# Send full server signature so ModSecurity can alter it
ServerTokens Full
# Alter the web server signature sent by Apache
<IfModule security2_module>
    SecServerSignature "Apache 1.3.26"
</IfModule>
Header set Server "Apache 1.3.26"
Header unset X-Powered-By

# Hde TCP Timestamp
#   gksu gedit /etc/sysctl.conf
#   >> net.ipv4.tcp_timestamps = 0
# Test: sudo hping3 SOS.info -p 443 -S --tcp-timestamp -c 1

# Disable -SSLv2 -SSLv3 and weak Ciphers
SSLProtocol all -SSLv2 -SSLv3
SSLHonorCipherOrder on
SSLCipherSuite "EECDH+ECDSA+AESGCM EECDH+aRSA+AESGCM EECDH+ECDSA+SHA384 EECDH+ECDSA+SHA256 EECDH+aRSA+SHA384 EECDH+aRSA+SHA256 EECDH+aRSA EECDH EDH+aRSA !aNULL !eNULL !LOW !3DES !MD5 !EXP !PSK !SRP !DSS !RC4"
5. Set up the Firewall.
To allow/deny external access to your web server you can use UFW (Uncomplicated Firewall):
sudo ufw allow http
sudo ufw allow https
To allow only tcp protocol use:
sudo ufw allow http/tcp
sudo ufw allow https/tcp
You can use and the port number directly:
sudo ufw allow 80/tcp
sudo ufw allow 443/tcp
Just in case you can reload the «rules table»:
sudo ufw reload
You can use and UFW’s GUI interface, called gufw.
sudo apt update
sudo apt install gufw
gufw &
Choice the Office profile. It will set: Status:ON, Incoming:Deny and Outgoing:Allow and add your rules.
6. If you have a router don’t forget to forward some ports:
If you have a router and you want your web server to be accessible from Internet, don’t forget to add some port forwarding. Something like this.
На самом деле работать с виртуальными хостами (virtual hosts) на веб-сервере Apache2 несложно, но всё усложняет тот факт, что в интернете очень трудно найти внятную документацию или хорошие примеры настройки.
Наиболее вероятной проблемой, с которой Вы можете столкнулся при настройке виртуальных хостов, будет: ошибка Вашего браузера
«HTTP 403 / client denied by server configuration error»
Ошибка 403 при настройке virtual hosts может возникнуть по двум причинам.
Первая маловероятна в ОС Microsoft Windows (зато вероятна во всех *nix-оподобных осях) и заключается в том, что главный (корневой) путь, по которому расположен каждый документ виртуального хоста, должен быть Readable, Writable, and Executable (читаемый, записываемый и выполняемый) для пользователя веб-сервера httpd. В файле access_log в этом случае Вы можете наблюдать ошибку 403, хотя само сообщение, возвращаемое браузером не будет содержать код 403, а выглядеть, например, следующим образом:
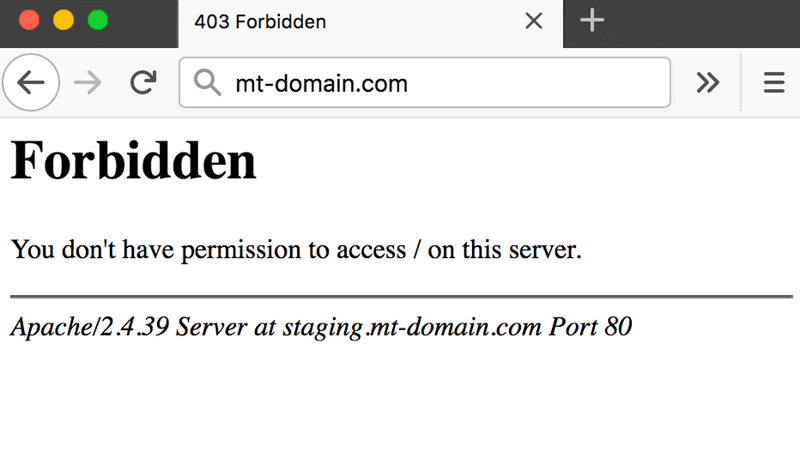
Forbidden
You don’t have permission to access /index.html on this server.
Мои коллеги сталкивались с этим уже несколько раз именно из-за того, что родительская директория для «виртуальных документов» не имела прав на Выполнение файлов для пользователя ‘www’ (под которым был запущен веб-сервер). К сожалению, в лог файле ошибок сервера об этом не будет явно указано и Вы можете потратить много времени на правку Вашего конфигурационного файла httpd.conf, поскольку будете думать, что это проблема в конфигурации веб-сервера.
Вторая причина действительно заключается в конфигурации, а именно в том, что Вы забыли разрешить доступ к каталогу в файле httpd.conf. В этом случае access_log покажет Вам ошибку 403, да и сам веб-сервер Aapche2 иногда выдаёт эту же ошибку Вашему браузеру:
HTTP 403 / client denied by server configuration error
Странно, что в некоторых случаях он выдает сообщение Forbidden без кода «403».
Forbidden
You don’t have permission to access /index.html on this server.
В Вашем error_log для каждой попытки доступа к любому файлу в каталоге «виртуального хоста» веб-сервера будет писаться примерно такое сообщение:
[Fri Jan 13 06:04:09 2012] [error] [client 192.168.1.1] client denied by server configuration: /var/www/vhosts/vhost1/
В данном случае, проблема заключается в том, что в файле extra/httpd-vhosts.conf (либо httpd.conf – для MS Windows) отсутствует директива, разрешающая доступ к каталогу, в котором лежит файл.
Чтобы его разрешить, Вам нужно добавить в конфигурационный файл:
<directory /vhost_document_root>
allow from all
<directory>
Ниже приведен пример, как это должно выглядеть в целом:
<VirtualHost *>
ServerName vhost1.example.com
ServerAlias vhost1.example.com
DocumentRoot /var/www/vhosts/vhost1
<directory /var/www/vhosts/vhost1>
allow from all
</directory>
</VirtualHost>
К сожалению, файл httpd-vhosts.conf , который присутствует в Apache2 по-умолчанию, или документация по работе с VirtualHost в Apache2 не дают нам ни одного реально работающего примера на этот счет.
Надеюсь данный материал Вам оказался полезен.
Хороших Вам проектов!
Introduction
Apache is a popular open-source app for running web servers, owing to its reliability and stability. Despite its ease of use, it’s not uncommon to encounter a ‘403 Forbidden’ error after setting up a website using Apache.
In this tutorial, we will go over potential causes of the Apache ‘403 Forbidden’ error and different ways you can fix it.

Prerequisites
- A user account with root or sudo privileges
- Access to the command line terminal
- An installed version of Apache web server
Apache 403 Forbidden: Effects and Possible Causes
The Apache ‘403 Forbidden’ error appears when you try to load a web page with restricted access. Depending on your browser and the website in question, there are different versions of the 403 error message:
- Forbidden
- Error 403
- HTTP Error 403.14 – Forbidden
- 403 Forbidden
- HTTP 403
- Forbidden: You don’t have permission to access the site using this server
- Error 403 – Forbidden
- HTTP Error 403 – Forbidden
There are several potential reasons why the Apache 403 error occurs:
- The first option is a permission error in the webroot directory, where users don’t have access to website files.
- The second possible reason for a 403 error is missing or incorrect settings in the Apache configuration files.
- Finally, failing to set up a default directory index also triggers a 403 error message in Apache.
How to Fix ‘403 Forbidden’ in Apache
If you have come across an Apache ‘403 Forbidden’ message, there are several ways to fix it:
Method 1: Setting File Permissions and Ownership
If you suspect the cause of the 403 error to be incorrect file permissions, use:
sudo chmod -R 775 /path/to/webroot/directoryThe chmod command sets the execute permission for the webroot directory and read permission for the index.html file.
To change directory ownership, use:
sudo chown -R user:group /path/to/webroot/directoryWhere:
useris the user account with root privileges on your web server.groupiswww-dataorapache.
Restart the Apache web server for the changes to take effect.
If you are working with Ubuntu, use the following command to restart Apache:
sudo systemctl restart apache2If you are working with Centos, use:
sudo systemctl restart httpdMethod 2: Setting Apache Directives
It is possible that the proper require directive is not configured and restricts access to resources. To fix it:
1. Access Apache’s main configuration file. For Ubuntu, use:
sudo nano /etc/apache2/apache2.confFor Centos, use:
sudo nano /etc/httpd/httpd.conf2. Once you open the configuration file, scroll down to the following section:
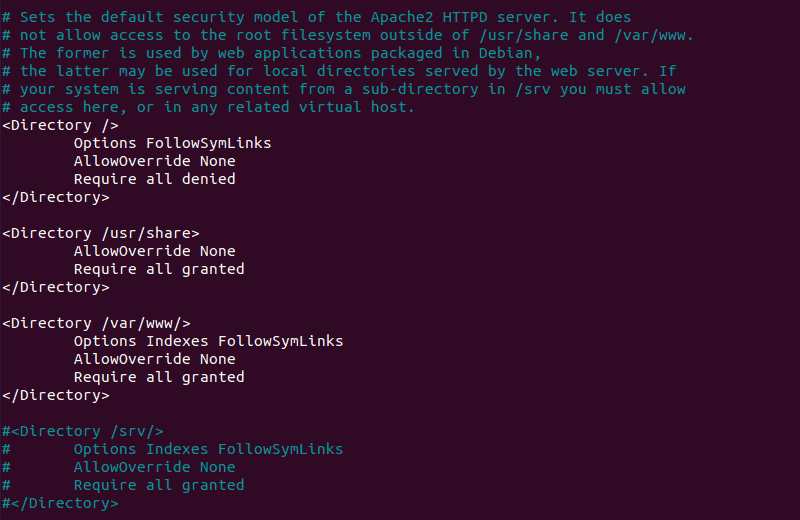
3. If the final line in the <Directory /var/www/> section contains Require all denied, change it to Require all granted.
4. Press Ctrl+X and then Y to save changes to the Apache configuration file.
5. Restart the Apache web server for the changes to take effect. For Ubuntu, use:
sudo systemctl restart apache2For Centos, use:
sudo systemctl restart httpdMethod 3: Adding a Default Directory Index
When a user visits a URL that requests a directory, the web server looks for a file in the given directory. If the file or any similar files are not found, and directory index listings are disabled, the web server displays the ‘403 Forbidden’ error message.
To fix the issue, add a default directory index.
1. Access Apache’s main configuration file by using:
sudo nano /etc/apache2/apache2.conf2. Scroll down to find out the default index file name:
DirectoryIndex index.html index.cgi index.pl index.php index.xhtml3. Make sure there is a file in the webroot folder with this name and upload it if it’s missing.
Conclusion
After following this tutorial, you should be able to determine the cause of an Apache ‘403 Forbidden’ error and fix any issues you may find.
If you want to find out more about 403 forbidden error, read our article 403 forbidden error — what is it and how to fix it.