Recently we’ve had some weird issues on one of our customers vCenter Servers. For starters the vMotion and Storage vMotion features weren’t working anymore because of time-outs. Which is weird and something I’ve never seen before. So we started troubleshooting the VCSA server and noticed that it couldn’t retrieve the installed licenses (VMware vSphere Enterprise Plus) from the production ESXi hosts anymore.
Going to the “Licensed Features” tab in the vSphere Client (VCSA version 6.0 GA) usually gives you a nice overview of what vSphere license is installed, but this time it was just empty. Going to the ESXi host directly you could however see that the license was present and activated. We also noticed that the License module in the vSphere client was also providing us with a timeout.
Once we dove into the log files from the license service in “/var/log/vmware/cis-license/license.log” we noticed some Security Token Service STS service, SSO service and web-client service issues in regards to certificates. Which got me thinking and looking at the certificates for this vCenter Server Appliance. Below you can find some snippets of logs which might be interesting for you to match your problem to the one I was having:
|
license.log: 2019-05-13T13:49:10.674Z Timer-3 WARN core.management.maint.service.AssetInventoryMaintainerTimerTaskImpl Maintanance of the asset inventory failed. com.vmware.cis.license.server.common.provider.ClientStubProviderException: com.vmware.vim.vmomi.client.exception.SslException: com.vmware.vim.vmomi.core.exception.CertificateValidationException: Server certificate chain not verified Caused by: javax.net.ssl.SSLPeerUnverifiedException: peer not authenticated at sun.security.ssl.SSLSessionImpl.getPeerCertificates(Unknown Source) at com.vmware.vim.vmomi.client.http.impl.ThumbprintTrustManager$HostnameVerifier.verify(ThumbprintTrustManager.java:296) ... 44 more 2019-05-13T13:22:43.443Z pool-3-thread-1 WARN common.vmomi.authn.impl.SsoAuthenticatorImpl STS signing certificates are missing or empty 2019-05-13T13:22:43.601Z pool-3-thread-1 ERROR server.common.sso.impl.SsoAdminProviderImpl Refetch STS certificates failed |
You can use the following cli cmdlets to check your certificate stores and the certificates that are in them:
|
/usr/lib/vmware-vmafd/bin/vecs-cli entry list —store MACHINE_SSL_CERT —text | less /usr/lib/vmware-vmafd/bin/vecs-cli entry list —store machine —text | less /usr/lib/vmware-vmafd/bin/vecs-cli entry list —store vpxd —text | less /usr/lib/vmware-vmafd/bin/vecs-cli entry list —store vsphere-webclient —text | less |
All certificates checked out but guess what, the “MACHINE_SSL_CERT” didn’t. Turns out it was expired. Funny thing though is that this particular vCenter Appliance should’nt even be working anymore because once the certificate is expired, most of the time it won’t even start all of the vCenter services once you reboot it. In our case somehow it did.
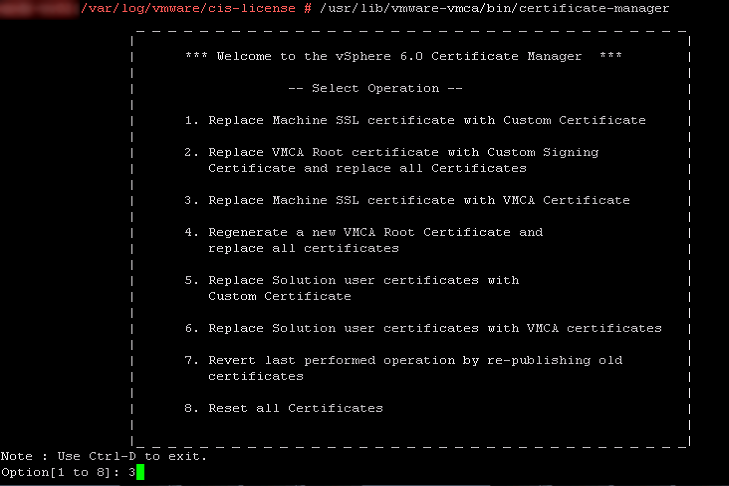
So we went ahead and fired up the “certificate-manager” tool which can be found in “/usr/lib/vmware-vmca/bin/certificate-manager”, picked option 3 to replace the the Machine SSL with a VMCA certificate (which is a self-signed certificate but that’s fine for this environment), entered the information which was present in the current certificate such as hostnames and IP-address information and accepted all changes.
Once you accepted the change it is proposing it will update the certificates in the locations it is needed and stop and start all services. Piece of cake. Our certificate-manager however decided it was time to throw an error:
|
ERROR certificate-manager Error while starting services, please see log for more details certificate-manager Error while replacing Machine SSL Cert, please see /var/log/vmware/vmcad/certificate-manager.log for more information. |
Once we checked that log we saw that the certificate-manager tooling couldn’t start the “vmware-eam” service, see the below log snippet which can be found in “/var/log/vmware/vmcad/certificate-manager.log”:
|
1 2 3 4 5 6 7 8 9 10 11 12 13 14 15 16 17 18 19 20 21 22 23 24 25 26 27 28 29 30 31 32 33 34 35 36 |
Waiting for VMware ESX Agent Manager....... WARNING: VMware ESX Agent Manager may have failed to start. Last login: Mon May 13 13:22:44 UTC 2019 on console Stderr = 2019-05-13T13:47:40.139Z { «resolution»: null, «detail»: [ { «args»: [ «Command: [‘/sbin/service’, u’vmware-eam’, ‘start’]nStderr: « ], «id»: «install.ciscommon.command.errinvoke», «localized»: «An error occurred while invoking external command : ‘Command: [‘/sbin/service’, u’vmware-eam’, ‘start’]nStderr: ‘», «translatable»: «An error occurred while invoking external command : ‘%(0)s'» } ], «componentKey»: null, «problemId»: null } ERROR:root:Unable to start service vmware-eam, Exception: { «resolution»: null, «detail»: [ { «args»: [ «vmware-eam» ], «id»: «install.ciscommon.service.failstart», «localized»: «An error occurred while starting service ‘vmware-eam'», «translatable»: «An error occurred while starting service ‘%(0)s'» } ], «componentKey»: null, «problemId»: null } |
Sure enough we were hitting a bug in our vCenter Server Appliance. This bug prevented the EAM service from starting after a vCenter reboot. This bug basically deletes the “eam.properties” file in the “/etc/vmware-eam/” directory. This file is crucial for the service to start and know what to do. Since this file was missing in our environment, the “vmware-eam” service was broken. This VMware KB explains how to fix this. Which basically means that you have to download the attachment called “Recreate_eam.properties.sh” and run it. This script recreates the eam.properties file so that your “vmware-eam” service can start again. Please not that you can only run this when you run the EAM service on the vCenter Server you are working on. The steps to run this script are described below:
|
1 2 3 4 5 6 7 8 9 10 11 12 13 14 15 16 17 |
Step 1: Download the script and upload it to your vCenter Server Step 2: Create a backup from the current eam.properties file (if present). Don‘t forget to create a VM snapshot either Step 3: Determine the host ID: cat /etc/vmware/install-defaults/sca.hostid Step 4: Determine the vCenter Server appliance hostname hostname -f Step 5: Set permissions on the Recreate_eam.properties.sh file chmod 777 Recreate_eam.properties.sh Step 6: Run the Recreate_eam.properties.sh file: ./Recreate_eam.properties.sh and enter the required information Step 7: Check the /eam.properties for the correct hostname and host ID which you collected earlier Step 8: Start the «vmware-eam» service. service-control vmware-eam start Step 9: re-run the certificate manager with your previously entered information /usr/lib/vmware-vmca/bin/certificate-manager and select Option 3 |
In our situation this almost fixed our issues. We were forced to break the certificate-manager procedure in the middle where it starts starting the services again after it updated the “MACHINE_SSL_CERT” in the places it has to. You can do this by just pressing CTRL+C on the right time in the procedure. To find this correct time you can open another putty session to the VMware vCenter server and using the following command:
|
tail -f /var/log/vmware/vmcad/certificate-manager.log |
Just press CTRL+C when the following log entries pass by:
|
1 2 3 4 5 6 7 8 9 10 11 12 13 14 15 16 17 18 19 20 21 22 23 24 25 26 27 28 29 30 31 32 33 34 35 36 |
2019-05-13T14:15:06.607Z INFO certificate-manager Running command :— service-control —stop —ignore —all 2019-05-13T14:15:06.608Z INFO certificate-manager please see service-control.log for service status INFO:root:Service: vmware-psc-client, Action: stop INFO:root:Service: vmware-syslog-health, Action: stop INFO:root:Service: vmware-vsan-health, Action: stop INFO:root:Service: applmgmt, Action: stop INFO:root:Service: vmware-eam, Action: stop INFO:root:Service: vmware-mbcs, Action: stop INFO:root:Service: vmware-netdumper, Action: stop INFO:root:Service: vmware-perfcharts, Action: stop INFO:root:Service: vmware-rbd-watchdog, Action: stop INFO:root:Service: vmware-sps, Action: stop INFO:root:Service: vmware-vapi-endpoint, Action: stop INFO:root:Service: vmware-vdcs, Action: stop INFO:root:Service: vmware-vpx-workflow, Action: stop INFO:root:Service: vmware-vsm, Action: stop INFO:root:Service: vsphere-client, Action: stop INFO:root:Service: vmware-vpxd, Action: stop INFO:root:Service: vmware-cis-license, Action: stop INFO:root:Service: vmware-invsvc, Action: stop INFO:root:Service: vmware-vpostgres, Action: stop INFO:root:Service: vmware-syslog, Action: stop INFO:root:Service: vmware-sca, Action: stop INFO:root:Service: vmware-vws, Action: stop INFO:root:Service: vmware-cm, Action: stop INFO:root:Service: vmware-rhttpproxy, Action: stop INFO:root:Service: vmware-stsd, Action: stop INFO:root:Service: vmware-sts-idmd, Action: stop INFO:root:Service: vmcad, Action: stop INFO:root:Service: vmdird, Action: stop INFO:root:Service: vmafdd, Action: stop 2019-05-13T14:15:52.728Z INFO certificate-manager Command executed successfully 2019-05-13T14:15:52.728Z INFO certificate-manager all services stopped successfully. 2019-05-13T14:15:52.728Z INFO certificate-manager None 2019-05-13T14:15:52.729Z INFO certificate-manager Running command :— service-control —start —all 2019-05-13T14:15:52.729Z INFO certificate-manager please see service-control.log for service status |
Once you are at this point just start the services yourself with:
|
service-control —start —all |
This should start all the services nicely. After this point we had our VMware vCenter Server Appliance working again with a new fresh “MACHINE_SSL_CERT” certificate. As a last check you can execute the following command and verify the expiration date:
|
/usr/lib/vmware-vmafd/bin/vecs-cli entry list —store MACHINE_SSL_CERT —text | less |
There you have it. I figured it would be easy enough and fix this quickly, turned out we were facing a bug in the “vmware-eam” service. I hope this post helps when you are finding the same issues we found.
Время прочтения
6 мин
Просмотры 9.8K
Всем привет!
Все кто используют продукты vmware, знают или не знают, что проблема с сертификатами может принести много боли и страдания. Поэтому чтобы нам не наступить на эти грабли, я покажу как сделать и поменять сертификаты для таких продуктов как:
- VMware Vcenter Server 6.7
- VMware Replication Server 8.3
- VMware Site Recovery Manager 8.3
Для этого нам понадобятся:
- Сертификаты
- Putty
- Немного терпения
Подготовка сертификатов, я буду использовать рядовой windows server 2019 с ролью Служба сертификатов Active Directory и openssl v1.1.1h
Скачать можно тут
1. Создание сертификатов
Я буду использовать локальный сервер выдачи сертификатов, но данный способ подойдет для выпуска сертификатов и на коммерческих площадках.
Подготовим запросы к центру сертификации.
Я дал имена типа FQDN:
- Vcenter Server имеет имя vc.home.local и ip 192.168.233.11
- VMware Replication Server я назвал как vr.home.local и ip 192.168.233.12
- VMware Site Recovery Manage также srm.home.local и ip 192.168.233.13
Для этих имен будем готовить запросы и закрытые ключи в программе openssl. Для этого изготовим небольшой конфигурационный файл vc.cfg с содержимым. Далее для каждого нового сервера я буду менять содержимое этого файла подставляя имена серверов и ip адреса:
[req]
default_bits = 2048
distinguished_name = req_distinguished_name
req_extensions = v3_req
prompt = no
[req_distinguished_name]
countryName = RU
stateOrProvinceName = RO
localityName = RnD
organizationName = HOME
commonName = vc.home.local (меняем)
emailAddress = root@home.local
[v3_req]
basicConstraints = CA:FALSE
keyUsage = digitalSignature, keyEncipherment, keyAgreement
subjectAltName = @alt_names
[alt_names]
DNS.1 = vc.home.local (меняем)
IP.2 = 192.168.233.11 (меняем)
Далее используем openssl
1.1 Делаем vc.home.local
openssl req -batch -new -newkey rsa:2048 -nodes -keyout vc.home.local.key -out vc.home.local.req -config vc.cfg1.2 Меняем имена и ip сервера в vc.cfg и выпускаем ключ и запрос для vr.home.local
openssl req -batch -new -newkey rsa:2048 -nodes -keyout vr.home.local.key -out vr.home.local.req -config vc.cfg1.3 Меняем имена и ip сервера в vc.cfg и выпускаем ключ и запрос для srm.home.local
openssl req -batch -new -newkey rsa:2048 -nodes -keyout srm.home.local.key -out srm.home.local.req -config vc.cfg1.4 Дополнительно понадобятся сертификаты для служб vcenter (vpxd, vsphere-webclient, vpxd-extension)
делаем их командой:
openssl req -new -newkey rsa:2048 -nodes -keyout vpxd.key -out vpxd.reqМы попадем в небольшой визард, там мы введем информацию о себе или о компании. Обязательно в поле «Common Name» мы пишем имя службы. Повторяем процедуру для оставшихся служб. На выходе у нас получается закрытый ключ и запрос на сертификат.

Генерация ключа и запроса на сертификат
Теперь все запросы и ключи готовы приступим к выдаче сертификата. Переходим в центр выдачи сертификатов. Запускаем консоль Центр сертификации.

Далее нажимаем правой кнопкой мышки (пкм) на корне сервера и выбираем выдать новый запрос.

Выбираем наш файл запроса, с расширением req.
Переходим в меню Запросы в ожидании. Если у вас там пусто, нажмите F5 и обновиться окно. Далее жмем пкм, и выбираем Выдать:

Далее переходим в меню Выданные сертификаты и открываем наш сертификат.

Далее нам нужно сохранить его на диск. Для этого переходим во вкладку Состав и нажимаем кнопку Копировать в файл. Далее появиться визард для сохранения файлы, нам нужно выбрать Base64 и имя файла в данном случае vpxd.crt:

Сохранение сертификата.
Повторяем процедуру выдачи для всех наших сертификатов/
Нам еще понадобится корневой сертификат. Для этого откроем любой сертификат, перейдем во вкладку Путь сертификации выберем наш корневой сертификат и нажмем кнопку Посмотреть сертификат. Далее также его сохраним как и все предыдущие.

И это еще не все для сервера VMware Replication Server и VMware Site Recovery Manager. Нам понадобиться контейнер сертификата и ключа. pfx файл, сделать его очень легко, нам понадобиться закрытый ключи и файл сертификата:
openssl pkcs12 -export -out vr.home.local.pfx -inkey vr.home.local.key -in vr.home.local.crt
OpenSSL попросить задать пароль, придумываем пароль и на выходе получаем заветный файл.
На этом создание сертификатов закончим перейдем к их установке.
2. Начнем менять с Vcenter
Для этого мы заходим в раздел администрирования, и переходим в раздел сертификаты. Логинимся администратором.

Раздел для управления сертификатами.
Далее попав в панель управления первым делом добавим корневой сертификат или Trusted Root Certificates. Прокручиваем в самый конец и жмем ADD. Выбираем наш сертификат ca.crt

Add Trusted Root Certificates
Далее меняем текущие сертификаты через пункт меню Replace:

Выбираем сертификаты которые мы создали для vcenter:
Для служб мы выбираем сертификаты служб созданных в пункте 1.4
Для сертификатов __MACHINE_CERT и machine сертификат vc.home.local, созданный в пункте 1.1

Мы заменили все сертификаты, которые нам доступны из панели управления. Если у вас
конфигурация, в которой отсутствую компоненты VMware Replication Server и VMware Site Recovery Manager, то на этом можно поставить точку и после перезагрузки сервера наслаждаться работой VCentre. Если вы используете автономный сервер по выдаче сертификатов, советую делать сертификаты на 10 лет и более. Если вы покупаете то тут смотреть по обстоятельствам.
Для корректного опознавания вашими браузерами сертификатов, необходимо корневой сертификат установить в хранилище сертификатов операционной системы.
3. Меняем сертификат на сервере VMware Replication Server
Начнем с того что на сервер vr необходимо установить корневой сертификат, т.к в штатном веб интерфейсе его нет. Для этого нам нужно зайти на сервер по ssh, но по умолчанию он выключен. Давай включим его. Открываем консоль виртуальной машины и логинимся рутом.
Активируем сервер ssh.
/usr/bin/enable-sshd.shПосле этого можно подключиться к серверу через putty.
Все root ca сертификаты лежать в контейнере jks по пути /opt/vmware/hms/security/hms-truststore.jks
Но контейнер имеет пароль, давайте узнаем его командой:
/opt/vmware/hms/bin/hms-configtool -cmd list | grep keystoreДалее на сервер сохраняем наш ca.crt, я обычно это делаю через текстовые редакторы, на локальном компьютере открываю сертификат блокнотом копирую в буфер обмена, на удаленной машине с помощью редактора vi вставляю и сохраняю. После этого мы можем наш сертификат записать в контейнер командой:
/usr/java/default/bin/keytool -import -trustcacerts -alias root -file /root/ca.crt -keystore /opt/vmware/hms/security/hms-truststore.jks -storepass тут пароль который мы узналиДалее на запрос добавления говорим yes. Все, мы успешно добавили наш корневой сертификат.
Заходим в панель управления сервером по адресу vr.home.local:5480
Переходим во вкладку Configuration, поле Upload PKCS12 (*.pfx) file
выбираем наш pfx файл. жмем upload and install

конфигурация vr сервера.
После рестарта веб сервера и логина, пытаемся сохранить конфигурацию кнопкой Save and Restart Service:

И получаем ошибку:
Unhandled exception com.vmware.vim.vmomi.client.exception.SslException: javax.net.ssl.SSLException: Certificate thumbprint mismatch, expected:
Сервер нам говорит что отпечатки сертификатов служб вцентра не совпадают.
Открываем putty и подключаемся к нашему вцентру vc.home.local
Запускаем bash командой shell:

Переходим в каталог:
cd /usr/lib/vmidentity/tools/scripts/И смотрим состояние данной службы:
./lstool.py list --url https://localhost/lookupservice/sdk --no-check-cert --ep-type com.vmware.cis.cs.identity.sso 2>/dev/null
Если открыть в текстовом редакторе наш сертификат vc.home.local.crt, и сравнить, то окажется что сертификаты разные. Дело в том что веб интерфейс вцентра меняет не все сертификаты.
Копируем содержимое сертификата в фаил /tmp/old.crt, не забываем что содержимое сертификата должно быть между тегов ——BEGIN CERTIFICATE—— и ——END CERTIFICATE——
Должно получиться вот так:

Теперь открываем в текстовом редакторе наш новый сертификат вцентра vc.home.local.crt
и копируем его на vc в фаил /tmp/new.crt
Далее выясняем хэш sha1 файла /tmp/old.crt, он там понадобиться чтобы заменить старые сертификаты на новый.
openssl x509 -in /tmp/old.crt -noout -fingerprint -sha1Далее запускаем скрипт по замене:
./ls_update_certs.py --url https://vc.home.local/lookupservice/sdk --fingerprint 86:0D:BB:---ВАШ ХЭШ----:C7:0E:D1:3E:17:39 --certfile /tmp/new.crt --user administrator@home.local --password ВашПарольВ конце работы скрипта в отчете будет количество замененных сертификатов.
После этого переходим на vr.home.local:5480 и сохраняем конфигурацию. Если вы сделали все правильно сервер должен успешно сохранить конфигурацию и запустить службу vr сервера.

3. Замена сертификата на VMware Site Recovery Manage
На этом сервере все делается из веб интерфейса в меню Certificate.
Заходим в административную панель srm.home.local:5480
- Добавляем наш root ca кнопкой ADD
- Меняем текущий сертификат кнопкой CHANGE


На этом мы закончили смену всех сертификатов.
Всем спасибо!
null
Недавно наш заказчик пришел с проблемой потери управления виртуализированной инфраструктурой.

При попытке авторизации в консоль vSphere
An error occurred during authentication
Ошибку следует диагностировать просмотром сертификата – который истек (видно из браузера).
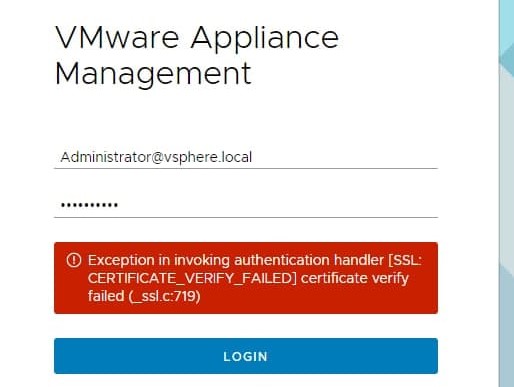
При попытке входа в vCenter консоль (Appliance Management) для просмотра состояния сервисов
Exception in invoking authentication handler
[SSL.CERTIFICATE_VERIFY_FAILED] certificate verify failed (_ssl.c:719)
Проблема в том, что при истекшем сертификате не попасть в консоль управления так как не может аутентифицировать, где по процедуре можно заменить сертификат из web- консоли.
Причину подтвердим просмотром трейса ошибки:
javax.net.ssl.SSLHandshakeException: com.vmware.vim.vmomi.client.exception.VlsiCertificateException:
Server certificate chain is not trusted and thumbprint verification is not configured
Ошибки при истекшем сертификате будут вида
Что такая-то служба не может соединиться (так как не устанавливается защищенное соединение с vCenter Appliance из-за невалидного сертификата)
Authentication failed, Update Manager server could not be contacted.

An unexpected error has occurred.
В том числе не будет работать и служба Аутентификации vSphere,
а это, сами понимаете, «привет» управлению инфраструктурой и работе служб vSphere.
Что делать?
Нужно заменить истекший сертификат в vCenter Appliance. Но есть ньюансы.
При отсутствии доступа в web-консоль vCenter Appliance Management
Exception in invoking authentication handler
[SSL.CERTIFICATE_VERIFY_FAILED] certificate verify failed (_ssl.c:719)
Остается доступ через коммандную строку в виртуальную машину.
В ситуации с истекшим сертификатом работоспособность запущенных виртуальных машин не затронута, и можно зайти на узлы гипервизора ESXi и временно поуправлять вручную запуском и выключением виртуальных машин.
Собственно этот путь (через подключения к ESXi) с вызовом консоли машины с vCenter Appliance и потребуется проделать для замены истекшего сертификата, если на машине выключен SSH в целях безопасности.
Но где лежит сертификат и как его правильно заменить?
Оказывается, что для генерации сертификата vCenter Server Appliance имеет утилиту Certificate Manager.
Для начала подключитесь к vCenter через ssh или через консоль виртуальной машины с vCenter через гипервизор ESXi где она функционирует.
Если у Вас много хостов в инфраструктуре, возможно придется поискать последовательно подключаясь на каждый пока не отыщите свой запущенный vCenter.
-
Запустите /usr/lib/vmware-vmca/bin/certificate-manager
-
Если Вам приемлем Self-Signed Certificate и нужно быстро восстановить доступ
- Выбирите пункт 4 Regenerate a new VMCA Root Certificate and replace all certificates и введите пароль для administrator@vsphere.local
- Далее последовательно заполните поля с учетом того, что Name, Hostname и VMCA должны соответствовать Primary Network Identifier PNID .
-
Значение PNID можно посмотреть выполнив /usr/lib/vmware-vmafd/bin/vmafd-cli get-pnid —server-name localhost
-
Please configure certool.cfg file with proper values before proceeding to next step.
Press Enter key to skip optional parameters or use Default value.
Enter proper value for 'Country' [Default value : US] : (Note: Value for Country should be only 2 letters)
Enter proper value for 'Name' [Default value : CA] :
Enter proper value for 'Organization' [Default value : VMware] :
Enter proper value for 'OrgUnit' [Default value : VMware Engineering] :
Enter proper value for 'State' [Default value : California] :
Enter proper value for 'Locality' [Default value : Palo Alto] :
Enter proper value for 'IPAddress' [optional] :
Enter proper value for 'Email' [Default value : email@acme.com] :
Enter proper value for 'Hostname' [Enter valid Fully Qualified Domain Name(FQDN), For Example : example.domain.com] :
Enter proper value for VMCA 'Name':
- Нажмите Y (Yes) для продолжения.
- В случае неактуального сертификата в веб-консоли vCenter перезагрузите vCenter.
-
Если Вы хотите валидный сертификат полученный через центр сертификации
- В меню выберите пункт 1. Replace Machine SSL certificate with Custom Certificate и введите пароль для administrator@vsphere.local
- Укажите директорию, где будут помещены запросы на выпуск,
например /tmp/ssl/ - Далее последовательно заполните поля с учетом того, что Name, Hostname и VMCA должны соответствовать Primary Network Identifier PNID .
-
Значение PNID можно посмотреть выполнив /usr/lib/vmware-vmafd/bin/vmafd-cli get-pnid —server-name localhost
-
Country      : Two uppercase letters only (Eg. US), the country where your company is located.
Name         : FQDN of the vCenter Server(This will be your Certificate Subject Alternate Name)
Organization : Company Name
OrgUnit      : The name of your department within the organization. Example: "IT"
State        : The state/province where your company is located
Locality     : The city where your company is located.
IPAddress    : IP Address of vCenter Server, this field is Optional
Email        : Email Address
Hostname     : FQDN of vCenter Server(This field accepts multiple entries separated by comma.
- Файл /tmp/ssl/vmca_issued_csr.csr передаем в центр сертификации для выпуска SSL сертификата.
- Помещаем выпущенный сертификат на систему, например, в /tmp/ssl/ в отдельной сессии
- Продолжаем импорт
Provide a valid custom certificate for Machine SSL.
File : /tmp/ssl/machine_name_ssl.cer

Provide a valid custom key for Machine SSL.
File : /tmp/ssl/machine_name_ssl.key

Provide the signing certificate of the Machine SSL certificate.
File : /tmp/ssl/Root64.cer
- Нажмите Y (Yes) для продолжения.
- В случае неактуального сертификата в веб-консоли vCenter перезагрузите vCenter.
-
By Pranay Jha
| Jan 24, 2020 | In Articles
| Update: Jan 24, 2020
| Total Views [ 46155 ]
Problem
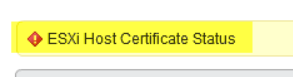
All hosts in vCenter server are showing Red Alert and notification is “ESXi Host Certificate Status”
Error: ESXi Host Certificate Status
Solution
This issue is related to certificate being used for vSphere environment. To reach to a conclude of this problem, we have to look into Self-Signed VMCA root certificate.
Please note that Certificates are managed by PSC server. If you are using external PSC, then you have to login to PSC server. If PSC and vCenter is running on same server, then you will use same server to login. Follow below steps to find PSC server if you don’t know.
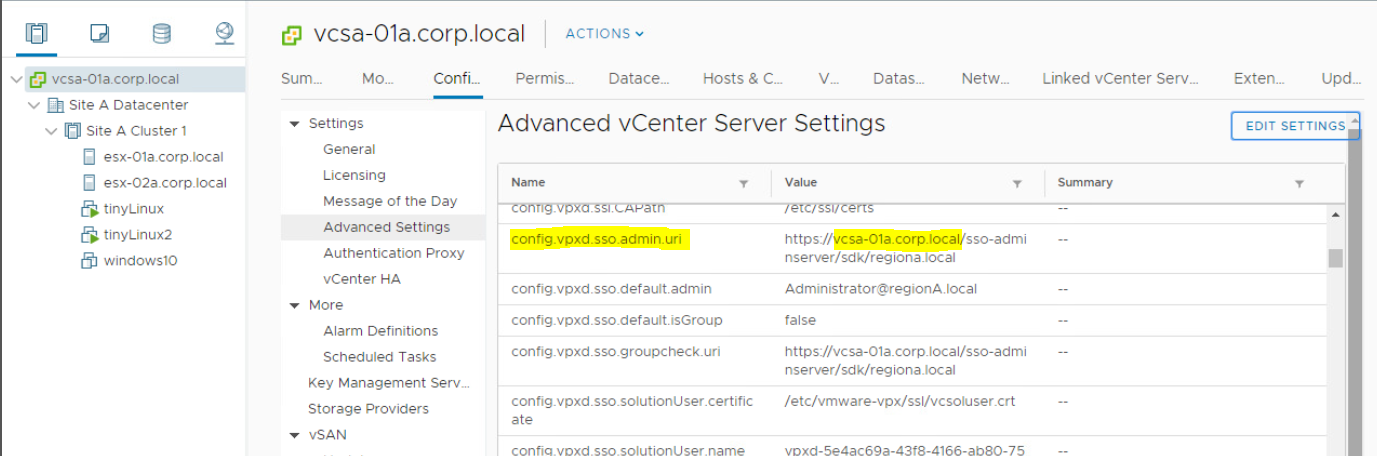
Step 1: To find PSC server, login to vCenter server using web client.
· Select vCenter Server Name > Configure > Advanced Settings
· In right side, you will get Search option. Type SSO in search option.
· Check the value of config.vpxd.sso.admin.uri
· This is your PSC Server.
Step 2: Check Existing Self-Signed Certificate Status
· Login to PSC server using Web Client. (https://vi-psc-01/psc)
· Under Certificates tab, Click on Certificate Store > At right panel under, drop down Store > Select TRUSTED_ROOTS. All existing certificates will be in this list.

· Select Certificate and Click on Show Details. You can see that certificate is not valid.
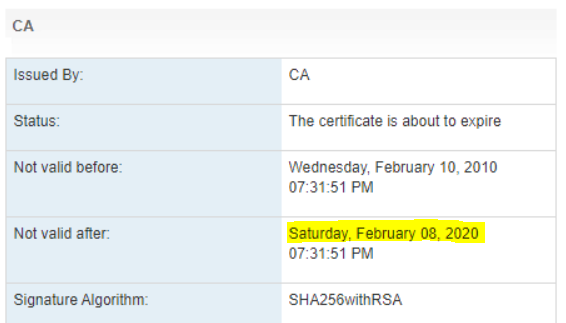
Step 3: Check Threshold for Certificate Expire Notification
Now you might have question that if above certificate is valid till February 08, then why its showing error notification now (20th Jan – in our case)?
This is because of threshold value set for the notification. When this threshold is reached, the vCenter Server system displays red alarm about the certificates which is about to expire.
· Login to vCenter Server. Click on vCenter Server > Configure > Advanced Settings > Check value for vpxd.cert.threshold

Step 4: Regenerate the VMCA Root Certificate with a new self-signed certificate
· Open Putty and SSH to PSC server. Use root credentials to login.
login as: root
VMware vCenter Server Appliance 6.5.0.32000
Type: VMware Platform Services Controller
root@vi-psc-01’s password:
Connected to service
* List APIs: «help api list»
* List Plugins: «help pi list»
* Launch BASH: «shell»
Command> shell
Shell access is granted to root
· Type below command to open certificate-manager for vCenter Server Appliance(VCSA)
o root@vi-psc-01 [ ~ ]# /usr/lib/vmware-vmca/bin/certificate-manager

· Select Option 4 to regenerate a new VMCA Root Certificate and replace all certificates
o Option[1 to 8]: 4
o Do you wish to generate all certificates using configuration file : Option[Y/N] ? : Y
· Please provide valid SSO and VC priviledged user credential to perform certificate operations.
o Enter username [Administrator@vsphere.local]:administrator@vsphere.local
o Enter password:
· Please configure certool.cfg with proper values before proceeding to next step.
When ask for values, you can simply press ENTER key to leave default value for default Self-Signed certificate. However, if you want to use your own values, that’s your choice as per requirement.
o Press Enter key to skip optional parameters or use Default value.
o Enter proper value for ‘Country’ [Default value : US] : US
o Enter proper value for ‘Name’ [Default value : CA] : CA
o Enter proper value for ‘Organization’ [Default value : VMware] : VMware
o Enter proper value for ‘OrgUnit’ [Default value : VMware Engineering] : VMware Engineering
o Enter proper value for ‘State’ [Default value : California] : California
o Enter proper value for ‘Locality’ [Default value : Palo Alto] : Palo Alto
o Enter proper value for ‘IPAddress’ (Provide comma separated values for multiple IP addresses) [optional] : 127.0.0.1
o Enter proper value for ‘Email’ [Default value : email@acme.com] : email@acme.com
o Enter proper value for ‘Hostname’ (Provide comma separated values for multiple Hostname entries) [Enter valid Fully Qualified Domain Name(FQDN), For Example : example.domain.com] : vi-psc-01.vinsight.com
o Enter proper value for VMCA ‘Name’ : vi-psc-01.vinsight.com
· You are going to regenerate Root Certificate and all other certificates using VMCA
o Continue operation : Option[Y/N] ? : Y
· Stop vCenter services using below command.
o root@vi-psc-01 [ ~ ]# service-control —stop –all
· Start vCenter services using below command.
o root@vi-psc-01 [ ~ ]# service-control —start –all
Step 5: Verify Certificate in PSC Server
· Login to PSC server using Web Client. (https://vi-psc-01/psc)
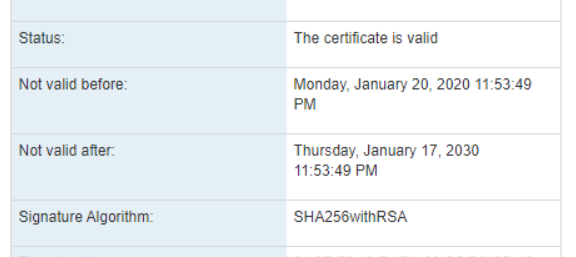
· Under Certificates tab, Click on Certificate Store > At right panel under, drop down Store > Select TRUSTED_ROOTS. All existing certificates will be in this list.

· Select Certificate and Click on Show Details. You can see that certificate is valid.
Step 6: Enforce New Generated Certificate to all ESXi hosts
· Login to vCenter Server using Web Client.
· Click on each ESXi hosts > Configure > Certificate
· Click on Renew Option.


Thank you for visiting my profile. I am Pranay Jha, bring along a total of 11+ years of extensive experience with me in Information Technology sector for organizations from small business to large enterprises, wherein my current assignment I am associated with IBM as a Technical Solution Architect for Virtualization platform. I am vExpert x 3 (16/17/18), VCIX-DCV, VCAP5/6-DCD, VCAP5-DCA, VCP7-CMA, VCP5/6-DCV, VCA-DCV, VCA-Cloud, VSP, VCE-CIA, MCITP, MCSE, MCSA(Messaging). I am also an Independent blogger and founder of http://vmwareinsight.com and https://cloudpathshala.com. I can be reached via email at pranay1988jha@gmail.com or Direct Message via Contact Us form.
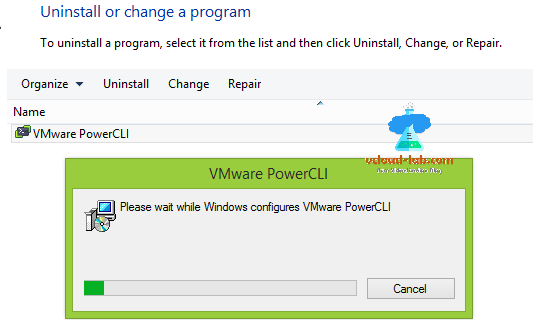
Way long back, After writing my my article VMWARE VSPHERE POWERCLI INSTALLATION AND CONFIGURATION STEP BY STEP, I decided today to upgrade my vSphere PowerCLI to newer version 10 in the office, I am choosing little bit different installation method instead of using exe installer, PowerCLI can be downloaded from Microsoft Powershell PSGallary instead from VMware.com site. Before installation that I will uninstall existing VMware PowerCLI version from Control Panel >> Programs (appwiz.cpl). This way I can ensure no conflict occur after installation from PSGallary and no merger happen. If you are doing fresh installation you can skip this step.
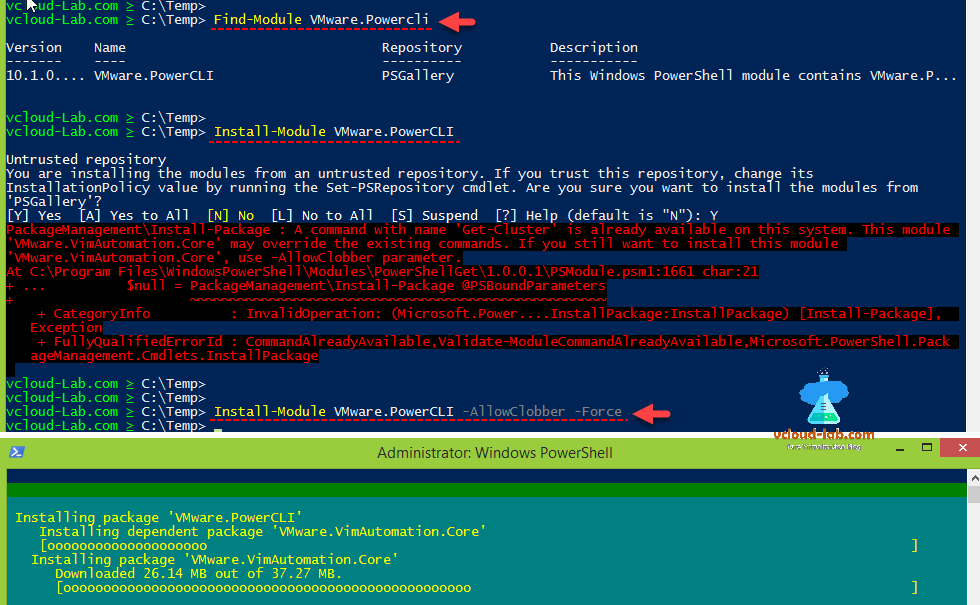
Once uninstallation of Powercli completed, Open Microsoft Powershell as Administrator. Next command require active internet. I am using my windows 10 desktop, Find the module online with command.
Find-Module VMware.PowerCLI
In the information it shows, latest version is 10.x and it is found on online Microsoft PSGallery Repository. Next command will start download the entire repo module, It will take some time as it is around 50 MB of space is required.
Install-Module VMware.PowerCLI
Although it shows untrusted repository, but it is safe and you can press Y to continue. (It shows untrusted because we have to explicitly add it to trusted repo using Set-PSRepository cmdlet), While Installation It shows progressbar, and in my case I received below error as shown on the console.
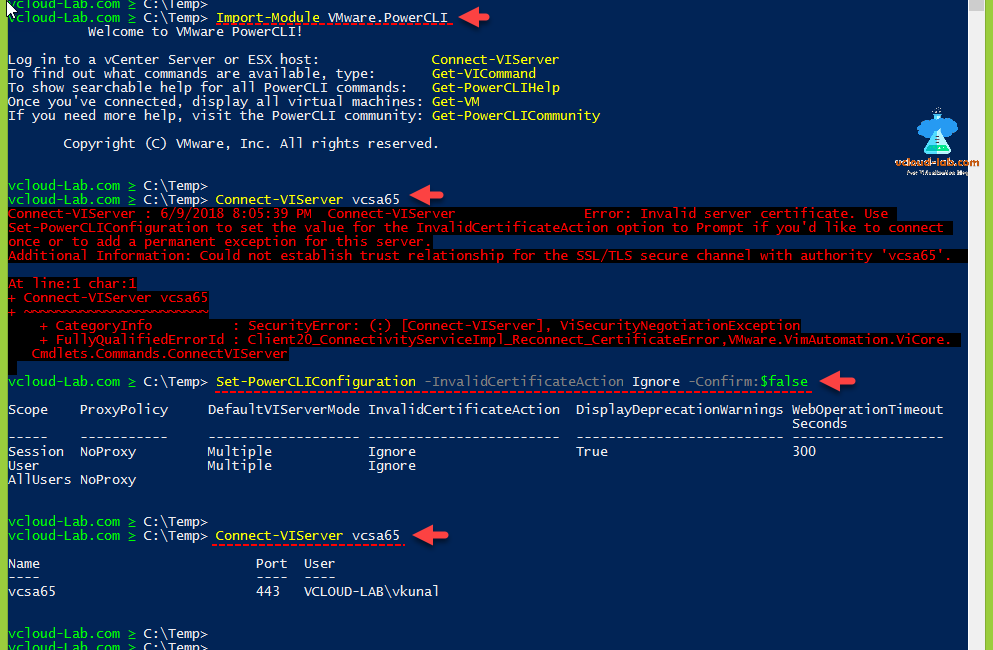
Connect-VIServer : 6/9/2018 8:05:39 PM Connect-VIServer Error: Invalid server certificate. Use Set-PowerCLIConfiguration to set the value for the InvalidCertificateAction option to Prompt if you’d like to connect once or to add a permanent exception for this server.
Additional Information: Could not establish trust relationship for the SSL/TLS secure channel with authority ‘vcsa65’.
At line:1 char:1
+ Connect-VIServer vcsa65
+ ~~~~~~~~~~~~~~~~~~~~~~~
+ CategoryInfo : SecurityError: (:) [Connect-VIServer], ViSecurityNegotiationException
+ FullyQualifiedErrorId : Client20_ConnectivityServiceImpl_Reconnect_CertificateError,VMware.VimAutomation.ViCore.
Cmdlets.Commands.ConnectVIServer
I need error free installation and for this I am running it again using below one-liner command. While Installation It again shows progressbar.
Install-Module VMware.PowerCLI -AllowClobber -Force
Here, After installation is complete, You will not find any vSphere Powercli icon on desktop. To use it open Powershell and type below command.
Import-Module VMware.PowerCLI
Actually this is a Manifest which will load all linked vmware modules in one go. A module manifest is a PowerShell script file you can use to include information about the module. For example, you can describe the author, specify files in the module (such as nested modules), run scripts to customize the user’s environment, load type and formatting files, define system requirements, and limit the members that the module exports.
ModuleType Version Name ExportedCommands
———- ——- —- —————-
Script 6.7.0.8… VMware.DeployAutomation {Add-DeployRule, Add-ProxyServer, Add-ScriptBundle, Copy-D…
Script 6.7.0.8… VMware.ImageBuilder {Add-EsxSoftwareDepot, Add-EsxSoftwarePackage, Compare-Esx…
Manifest 10.1.0…. VMware.PowerCLI
Script 6.7.0.8… VMware.Vim
Script 10.1.0…. VMware.VimAutomation.Cis.Core {Connect-CisServer, Disconnect-CisServer, Get-CisService}
Script 10.0.0…. VMware.VimAutomation.Cloud {Add-CIDatastore, Connect-CIServer, Disconnect-CIServer, G…
Script 10.1.0…. VMware.VimAutomation.Common
Script 10.1.0…. VMware.VimAutomation.Core {Add-PassthroughDevice, Add-VirtualSwitchPhysicalNetworkAd…
Script 6.5.4.7… VMware.VimAutomation.HA Get-DrmInfo
Script 7.1.0.7… VMware.VimAutomation.HorizonView {Connect-HVServer, Disconnect-HVServer}
Script 10.0.0…. VMware.VimAutomation.License Get-LicenseDataManager
Script 10.1.0…. VMware.VimAutomation.Nsxt {Connect-NsxtServer, Disconnect-NsxtServer, Get-NsxtService}
Script 10.0.0…. VMware.VimAutomation.PCloud {Connect-PIServer, Disconnect-PIServer, Get-PIComputeInsta…
Script 10.1.0…. VMware.VimAutomation.Sdk {Get-InstallPath, Get-PSVersion}
Script 10.0.0…. VMware.VimAutomation.Srm {Connect-SrmServer, Disconnect-SrmServer}
Script 10.1.0…. VMware.VimAutomation.Storage {Add-KeyManagementServer, Copy-VDisk, Export-SpbmStoragePo…
Script 1.2.0.0 VMware.VimAutomation.StorageUtility Update-VmfsDatastore
Script 10.1.0…. VMware.VimAutomation.Vds {Add-VDSwitchPhysicalNetworkAdapter, Add-VDSwitchVMHost, E…
Script 10.0.0…. VMware.VimAutomation.Vmc {Connect-Vmc, Disconnect-Vmc, Get-VmcService}
Script 10.0.0…. VMware.VimAutomation.vROps {Connect-OMServer, Disconnect-OMServer, Get-OMAlert, Get-O…
Script 6.5.1.7… VMware.VumAutomation {Add-EntityBaseline, Copy-Patch, Get-Baseline, Get-Complia…
While connecting to vCenter I faced below error and it didn’t allow me to login, because I was using default self singed vCenter certificate and it was not yet changed.
Connect-VIServer vcsa65
Connect-VIServer : 6/9/2018 8:05:39 PM Connect-VIServer Error: Invalid server certificate. Use Set-PowerCLIConfiguration to set the value for the InvalidCertificateAction option to Prompt if you’d like to connect once or to add a permanent exception for this server.
Additional Information: Could not establish trust relationship for the SSL/TLS secure channel with authority ‘vcsa65’.
At line:1 char:1
+ Connect-VIServer vcsa65
+ ~~~~~~~~~~~~~~~~~~~~~~~
+ CategoryInfo : SecurityError: (:) [Connect-VIServer], ViSecurityNegotiationException
+ FullyQualifiedErrorId : Client20_ConnectivityServiceImpl_Reconnect_CertificateError,VMware.VimAutomation.ViCore.
Cmdlets.Commands.ConnectVIServer
To fix this issue use below one time command, this sets powercli invalid certificate action configuration to ignore.
Set-PowerCLIConfiguration -InvalidCertificateAction Ignore -Confirm:$false
Next try using same Connect-VIServer command to connect vCenter and it will be successful. Another setting about Participate in Ceip (Join the Customer Experience Improvement Program in PowerCLI), annoying yellow warning shows you when importing module, You can suppress it with below 2 commands.
To join the CEIP, run the following command. Set-PowerCLIConfiguration -ParticipateInCeip $true
To leave the CEIP, run the following command. Set-PowerCLIConfiguration -ParticipateInCeip $false
Useful Articles
PART 1 : BUILDING AND BUYING GUIDE IDEAS FOR VMWARE LAB
PART 2 : BUILDING AND HARDWARE BUYING GUIDE IDEAS FOR VMWARE LAB
PART 3 : MY VSPHERE LAB CONFIGURATION ON VMWARE WORKSTATION
PART 4 : CONFIGURING VMWARE WORKSTATION NETWORKING IN HOME LAB
При подключении к серверу VMWare vCenter с помощью браузера появляется предупреждение об использовании самоподписанного сертификата, выданного недоверенным центром сертификации. В Firefox и других браузерах это предупреждение убирается простым добавление сайта vCenter в список исключений, в Internet Explorer все несколько сложнее.
SSL сертификаты, устанавливаемые по умолчанию с серверами ESXi и vCenter являются самоподписанными, и, соответственно, другие системы не доверяют им, выдавая предупреждение или блокируя соединение с такими сайтами. Чтобы отключить предупреждение о самоподписанном сертификате, можно добавить самоподписанный сертификат в список доверенных или заменить сертификат на собственный, выданный доверенным центром сертификации. Мы рассмотрим первый вариант, процедура в общем-то достаточно тривиальная, но есть несколько не вполне очевидных моментов.
Итак, при открытии веб страницы сервера vCenter в браузере появляется окно со следующим предупреждением:
There is a problem with this website’s security certificate.
The security certificate presented by this website was not issued by a trusted certificate authority.
The security certificate presented by this website was issued for a different website’s address.
Security certificate problems may indicate an attempt to fool you or intercept any data you send to the server.

Примечание. Предупреждение The security certificate presented by this website was issued for a different website’s address выводится, т.к. в нашем случае имя хоста отличается от CN имени, для которого выписан сертификат. Чтобы это предупреждение не выводилось, в браузере нужно открывать именно FQDN имя, на которое выписан сертификат. Кстати говоря, для удобства этот сертификат можно заменить на собственный, созданный с помощью командлета New-SelfSignedCertificate, позволяющего выписывать сертификат для произвольного набора CN.
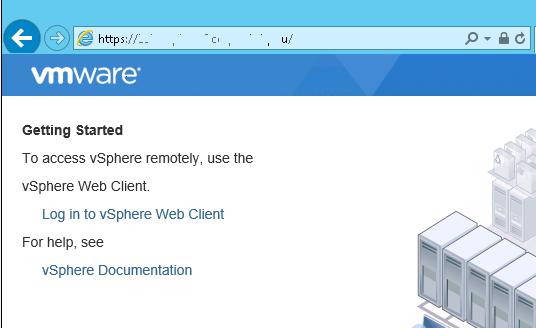
Нажав на ссылку Continue to this website link (not recommended), можно перейти на стартовую страницу vCenter. Чтобы скачать сертификат, нажмите на ссылку Download trusted root CA certificates.
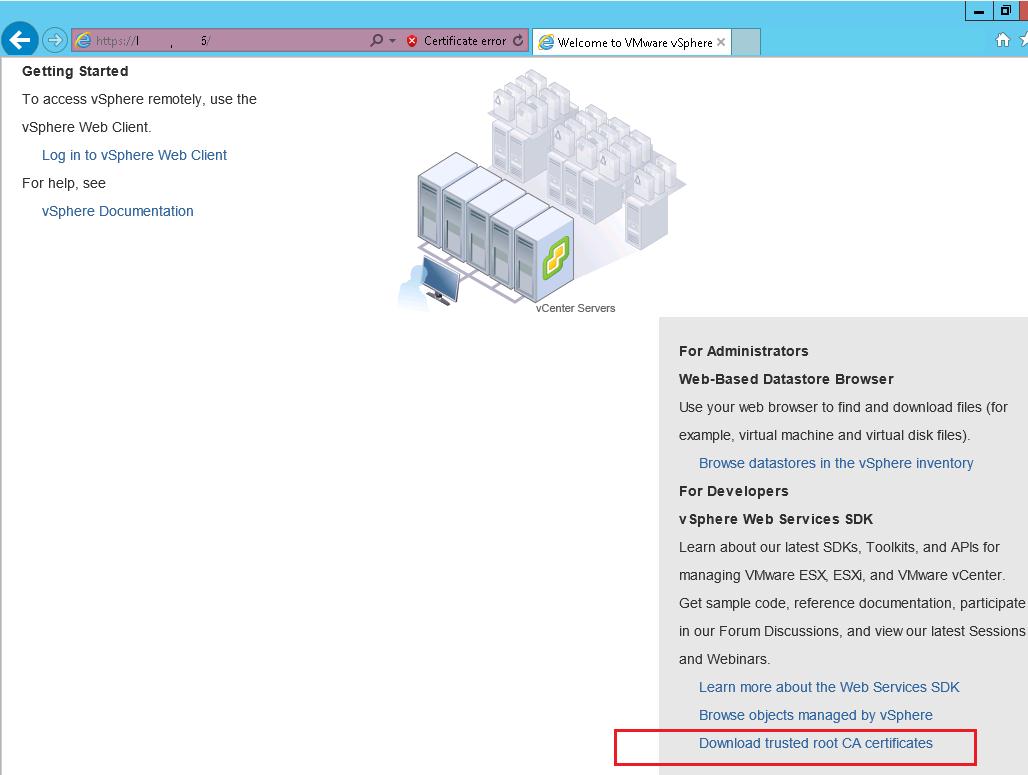 Сохраните файл в произвольный каталог. Имя файла download (у файла нет расширения).
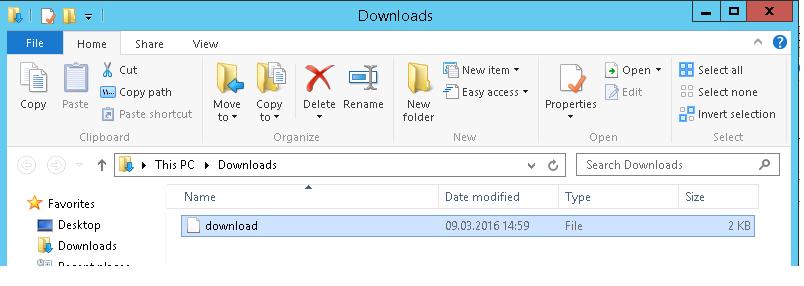 Затем меняем расширение файла download на download.zip и распакуем его с помощью встроенного архиватора (Extract All).
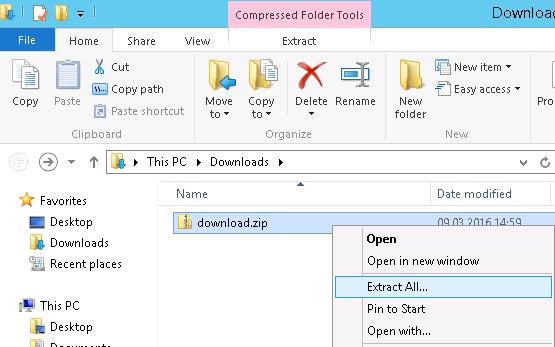
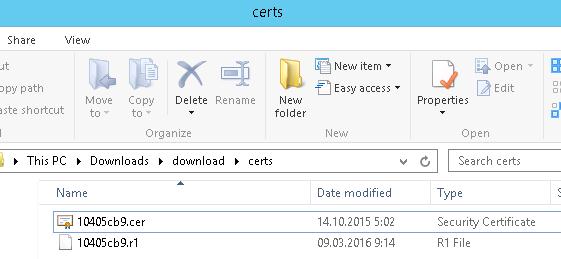
Внутри содержимого архива cert находиться 2 файла, у одного расширение .0 , у второго .r0. Изменим расширение файла .0 на .cer.
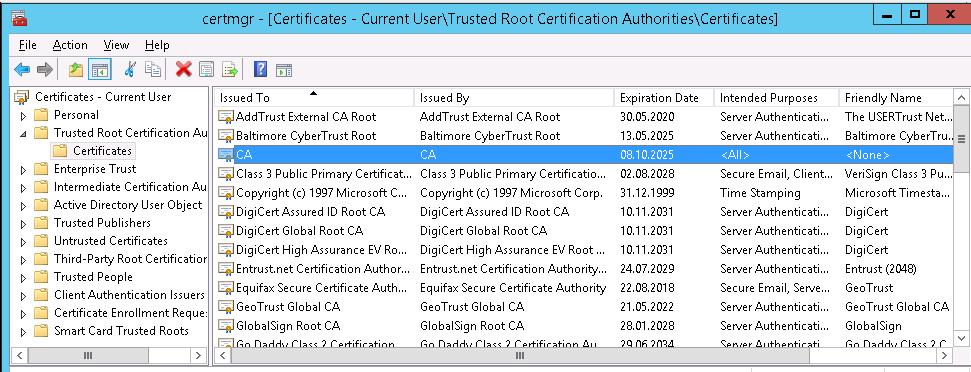
 Осталось добавить данный сертификат корневого CA в список доверенных. Предположим мы хотим, чтобы этому сертификату было доверие только у текущей учетной записи. Откроем консоль certmgr.msc, перейдем в раздел Certificates > Trusted Root Certification Authorities. И в контекстном меню откроем мастер импорта сертификата (Import).
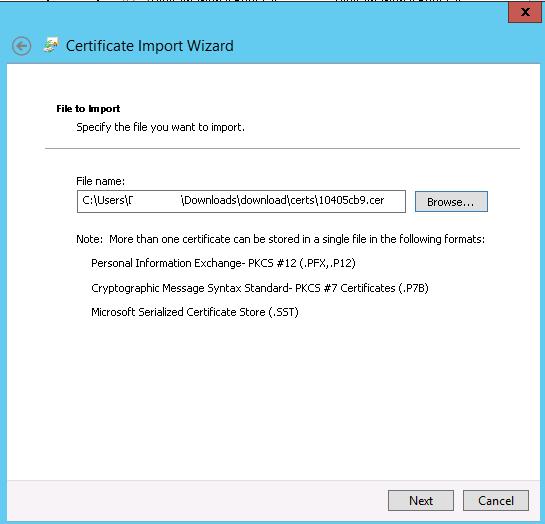
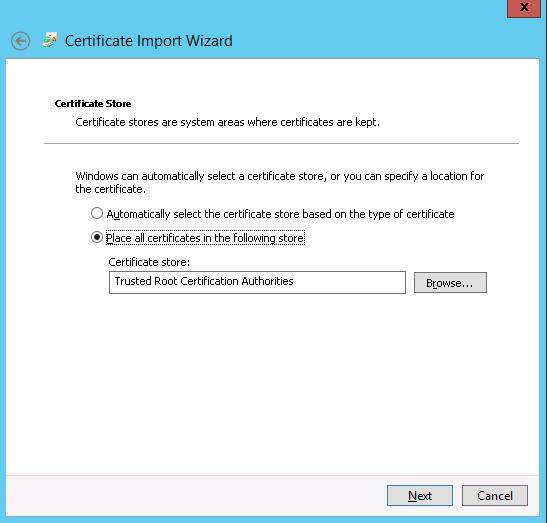
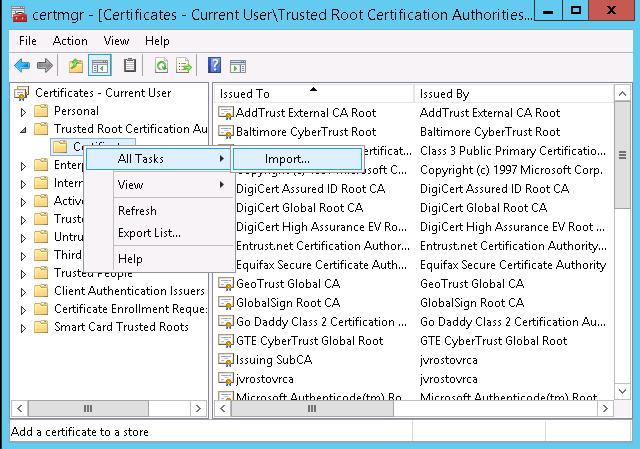 Выберем файл сертификата, полученный ранее, и поместим его в хранилище Trusted Root Certification Authorities.
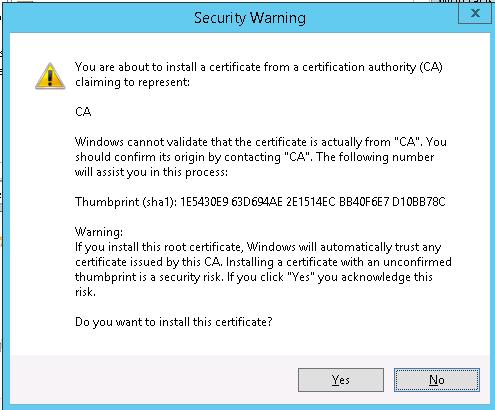
 Подтверждаем добавление сертификата.
 Новый сертификат с именем CA должен появиться в списке.
 Еще раз откроем страницу vCenter в браузере. Предупреждение не должно появиться.
Примечание. При необходимости, чтобы распространить данный сертификат на компьютеры домена, можно воспользоваться возможностями групповой политики (Установка сертификата на компьютеры с помощью GPO).
Указанная инструкция применима к vCenter Server Appliance, в случае использования Windows vCenter Server, скачать файл сертфиката таким образом не удастся, т.к. ссылка на загрузку архива с сертификатом будет отсутствовать. Этот файл хранится на сервере vCenter Server (под Windows) в каталоге C:ProgramDataVMwareSSL. (в более старый версиях C:ProgramdataVMwareVMware VirtualCenterSSL). Сертификат из этого каталога аналогичным образом нужно импортировать на клиенте.