Are you unable to access your SSD/HDD/USB due to fatal device hardware error? Well, if the answer is yes, then the blog is what you need right now. The fatal hardware device error may show up during, or after you try copying the content of the drive. The error would prevent you from accessing any data on the device. As the pop-up suggests, the hardware might be physically damaged, resulting in the error, but if it isn’t the case, then your problem won’t last long. In this blog, we’ll discuss everything you need to know regarding the «The request failed due to fatal device hardware» error and how to fix it without efforts.

Part 3. How to Recover Data from the Hard Drive with Fatal Hardware Error Hot
7 Ways to Fix The Request Failed Due to a Fatal Device Hardware Error without Losing Data
Part 1. What Causes the Prompt: The Request Failed Due to A Fatal Device Hardware
There are several reasons that may cause the prompt to be displayed. Some of them are mentioned below:
- A faulty hardware cable: In case of a malfunctioning data cable, the data transfer won’t take place, which might result in the error.
- Bad sectors: If your device is corrupted or has multiple bad sectors compiled, the error would be displayed.
- A fault in the hard drive: If your drive doesn’t have any of the above problems and displays the same error on every computer, it is a clear indication that your device is damaged and it needs to be repaired.
Part 2. Different Scenarios of the Fatal Hardware Error
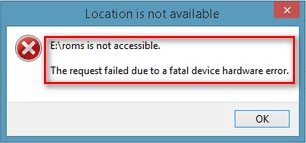
This fatal device hardware error happens most often to Western Digital (WD) and Seagate external hard drive users, with the exact expression «X: is not accessible. The request failed due to a fatal device hardware error». Sometimes, the fatal device hardware error seagate is followed by certain error codes, such as «0x800701E3». For many people, they have no idea about what went wrong with their devices but unfortunately, it’s in fact an emergency issue, which means that your hard drive is about to put an end to its service life.
«I have a portable WD Passport which connects to my Windows 10 laptop via USB. Now, whenever I even try to access my external hard drive, I get a message which says request failed due to a fatal device hardware error. This is starting to worry me, as I have 767GB of data on there. Is there any way for me to at least access my drive so I can move the data over to the new one?»
-WD: the request failed due to a fatal device hardware error ssd
«My Seagate 2TB external hard disk is not working, showing: H: is not accessible. The request failed due to a fatal device hardware error when double clicking on this. How can I fix this? It’s very urgent sir.»
Seagate: the request failed due to a fatal device hardware error
Part 3.How to Recover Data from the Hard Drive with Fatal Hardware Error
Tenorshare 4DDiG Data Recovery is an extremely secure and reliable application that can help you recover data from corrupted or damaged hard drives. This software offers a complete solution to recover deleted data, including pictures, videos, audios, and documents. Tenorshare 4DDiG is exceptionally easy-to-use and available for Mac as well as Windows. Additionally, it supports multiple devices, including hard drive, SSD, memory cards, and even digital cameras. Some of the exceptional features of Tenorshare 4DDiG include:
- Highest recovery rate & 100% security
- Recover data from Windows/Mac/USB/SD card/external hard drives like Seagate, WD passport, etc.
- User-friendly interface and fool-style operations.
- Recover 1000+ data types, including photos, videos, music, documents, etc.
- Recover data from any formatted or corrupted storage devices.
- Use copoun code 4DART30OFF to enjoy 30% OFF
- Use different cables and ports to connect the drive to the computer.
- Ensure that a unique drive letter is set for the drive.
- Launch Command Prompt on your system.
- Type cmd in the search bar and click Run as Administrator.
- Then type the commands: chkdsk C: /f /r.
Follow the steps to recover data using Tenorshare 4DDiG:
As we have already discussed, the error might be displayed due to a hardware flaw in the device, drive, or cable. Some basic things to try before we get into the more technical methods are labeled below. Try them before the others as the problem might lie in them.
Fix 1. Verify Hard Drive Status Using SMART Attributes
Windows Management Instruments Command-Line, abbreviated as WIMC, can be used to determine the status of the current drive. The steps below shall help you with the process.
Open the «Command Prompt» on your computer.
Type «wmic diskdrive get status» in the search box.
If all the checks turn out as «OK», it indicates that your device doesn’t have any problem, however, if the results are «Bad», «Unknown», or «Caution», you might need to fix your drive according to the corresponding instructions.
Fix 2. Run the Error Checking and CHKDSK Utility in Windows
Windows has some built-in tools that enable you to check for logical errors. One of them is Error-Checking. The Error-Checking feature scans the drive for file system errors. Now, let’s proceed to run Error-Checking by following the steps below.
Go to This PC/My Computer, right-click on the disk, and click «Properties».
In the Properties dialog, click on the «Tools» tab.
Now, click on the «Check» button. A confirmation dialog will open. Click on the «Scan Drive» option.
It would take a couple of minutes. In the end, the tool will display the errors, and it may fix them. However, if the error still exists, then make use of CHKDSK Utility to repair the errors.
Fix 3. Initialize Your Hard Drive
An uninitialized hard drive may also cause such error. Therefore, it’s recommended to check whether the hardware is initialized or not. If it isn’t initialized, follow the steps to initialize the hard drive.
Right-click on This PC/My Computer. Select «Manage».
From the left tab, click on «Disk Management».
Right click on your hard drive and click «Initialize Disk».
Select either MBR or GPT partition style to initialize the drive.
Fix 4. Format Your Hard Drive
If nothing has worked for you, then the last resort is formatting the hard drive. Formatting it will erase all of your data from the hard drive. Therefore, before formatting, it’s recommended to recover your data using a recovery tool, just like Tenorshare 4DDiG. Here is the stepwise guide on how to format the hard drive.
Go to This PC/My Computer. Right click on the disk and select the «Format» option.
Uncheck the «Quick Format».
Next, click on the «Start» button to initiate the process.
How to Fix External Hard Drive Not Initialized|Disk Unknow Not Initialized
Part 5. Extra Tips About Fatal Device Hardware Error Fix
1. How Do I Run CHKDSK on Uninitialized Disk
You can run CHKDSK on an uninitialized disk by executing the Mountvol command. It has helped a lot of users. Follow the step-by-step instructions given below to run CHKDSK on an uninitialized disk.
2.What Happens if I Initialize an External Hard Drive?
In order to view the disk in File Explorer, you are required to initialize it. Initializing the disk won’t erase data from the hard drive. However, only initializing it won’t be enough to make it useable again. You would need to create partitions and format the drive to use it. When you create partitions and format the drive, the data on the drive would be erased. So, consecutively, it can be said that initializing the hard drive will erase the data from it.
Conclusion
It’s really annoying when hard drives stop functioning correctly or become corrupted because it contains our essential data. However, if you got stucked in a similar problem, then consider using Tenorshare 4DDiG Data Recovery. It is one of the best data recovery tools available in the market as it has the highest success rate. So, now no more worrying about losing data. Just use Tenorshare 4DDiG and recover data with ease in a few clicks.
You May Also Like
-
Home>>
- Windows Fix >>
- Full Guide: How to Fix The Request Failed Due to A Fatal Device Hardware Error
“The request failed due to a fatal device hardware error” or “not accessible fatal device hardware error” arises frequently, leading to serious problems like data loss and unavailable drive. Here, in this section, I’ll show you the error and give you the best solution to it.
Section 1: The Request Failed Due To a Fatal Device Hardware Error
Have you ever met the fatal device hardware error? Do you know what does this mean exactly? And do you want to recover data from the device on which such error appears? I guess the answers to those questions are “yes”, “no” and “yes”.
What Does Fatal Device Hardware Error Mean
The error «The request failed due to a fatal device hardware error» usually appears when the operating system can’t access the HDD/SSD or unable to read/write files on it. This fatal device hardware error can also be resulted from a cable problem, hard drive/SSD physical damage, etc. Besides, you may found this error in removable drives like USB flash disk.
The not accessible fatal device hardware error (once this error occurs on a drive, that drive will become not accessible) shows up now and then on different devices (WD external hard drive and Seagate hard drive are two most common devices).
Hard Disk Fatal Error Appears on WD Drive & Seagate Drive
Now, let’s take a look at the following true cases.
1. WD fatal error device discovery:
Hi my name is Brianne and I’ve run into some issues with my WD my passport external hard drive and I’m unsure if purchasing your program will help. First off, I am computer illiterate! When I plug in my external drive, it shows up in my devices but I’m unable to view anything. After googling my issue I found that going to disk management and changing the letter would fix the problem however, my external drive shows up as ‘disk 1, unknown, not initialized’. After more googling I found that I need to initialize my hard drive by rebuilding mbr. Again, I have no idea what any of this means but I follow the instructions and I get an error message ‘The request failed due to a fatal device hardware error’. Your program was suggested but I’m not sure what needs to be done to fix my issue and if your program does whatever I need. Can you please help me?— from Ball, Brianne, a potential customer of MiniTool
2. Seagate fatal error device discovery:
I just bought a new hard drive because my last one ended up not working. It’s a 2 Terabyte Hard internal hard drive from Seagate. When I put it in my computer to install Windows 10, it said it had 0.0 space left. So I connect it to my laptop (with a sata cord I bought) to see what’s the issue and I can’t do anything to it. Can’t format it (I think it needs to be initialized first cause currently, disk management has it labeled as unknown), can’t initialize it (Says request failed due to fatal device hardware error) can’t delete anything either. I’m so perplexed because this is a new hard drive, why is this happening?— from Mr.Ashy, a visitor on Tech Support Guy Forums
The Best Fatal Device Hardware Error Solution
Few people know the reason why their drives become unavailable suddenly and give such a fatal error message — the request failed due to fatal device hardware error. But what they’re more concerned about is how they can recover data from inaccessible drive or how to fix the fatal device hardware error.
Considering that data is more important than the drive itself to most people and that there are often many valuable data on it when the hard drive is not accessible, I’ve made the decision to teach you how to recover data from the not accessible flash drive/hard drive. During this process, MiniTool Power Data Recovery could be a good assistant.
Advanced features of Power Data Recovery:
- It is really powerful (be able to recover data from both inaccessible partition and unallocated/initialized disk).
- It has high compatibility (gives support to USB flash drive, SD card, hard drive, and other common storage devices).
- What’s more, it is provided with wizard-style interfaces so that even inexperienced computer users can handle it effortlessly.
- Most important of all, you can get enough guarantees since you get one copy.

Section 2: Recover Files from Not Accessible Drive
Encountering the fatal device hardware error on SD card or any other devices is not the end of the world; on the contrary, you still have a chance to recover your important data from that problematic drive and then fix the error if possible.
No matter you want to fix fatal hardware error on a hard drive or on SD card, the first thing to do should always be data recovery from the not accessible drive. When all your needed files have been recovered successfully from the drive on which such an error occurs, you can try all sorts of possible ways to fix fatal device hardware error.
As for the data recovery, of course, you can get a trial edition to experience the performance of MiniTool Power Data Recovery at first by installing & launching it on your computer.
- If you are satisfied with this software, you may click here to buy a license for a full edition.
- If you are not content with it, just uninstall it from your computer and you won’t lose anything.
Free Download
Click to Tweet
How to Recover Data from Inaccessible Hard Disk
Since the Trial Edition is not able to recover any data for you, I’ll just take the Personal Edition as an example to show you how to recover data from not accessible drive in the following content.
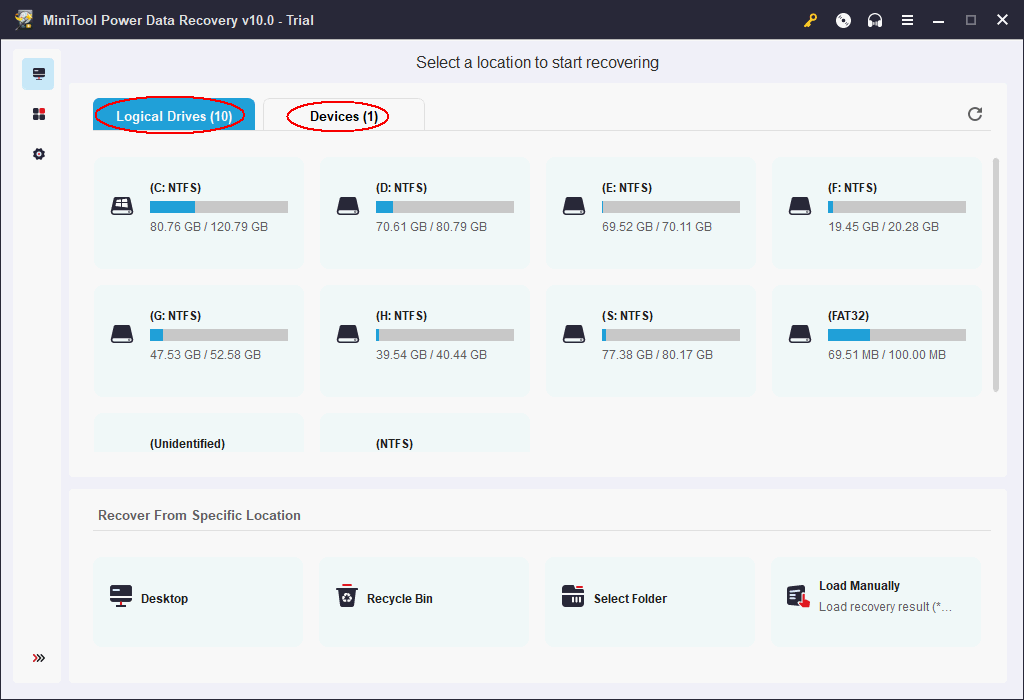
Step 1: choose a suitable tab.
If you can see the hard disk and its partitions in Windows Explorer, but receive an access is denied error when trying to access it, you should keep Logical Drives selected.
You need to connect your device to the computer first when it is not an internal hard drive, in order to see whether it appears in Windows Explorer or not.
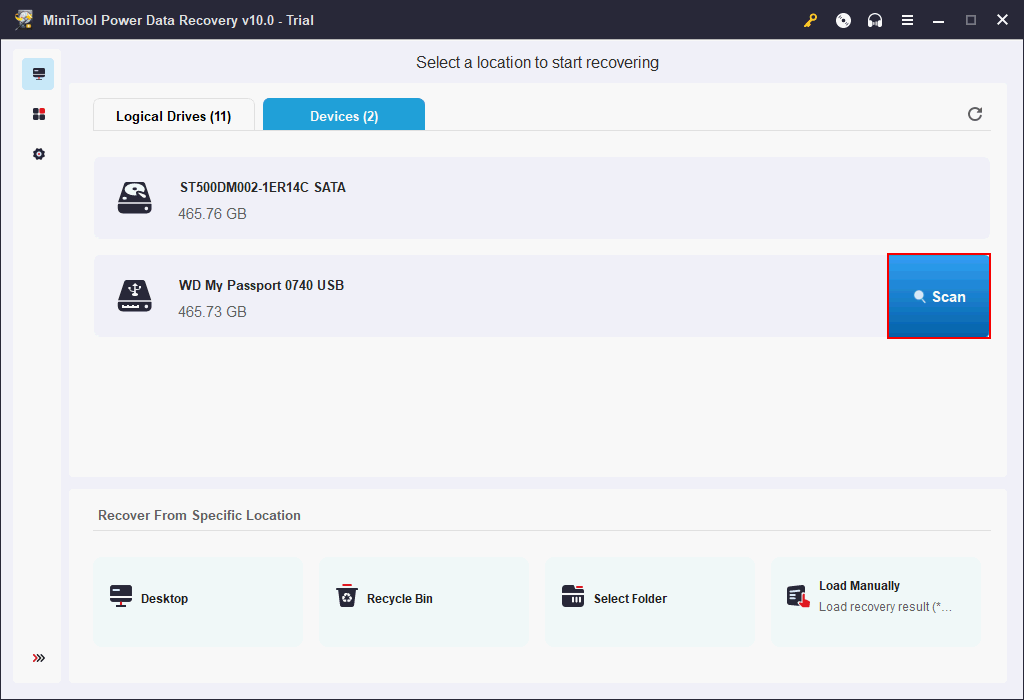
- If the flash drive shows up, but you fail to access it, you should run MiniTool Power Data Recovery and select Devices.
- If it doesn’t appear, you should read Fix USB Flash Drive Not Recognized & Recover Data – How To Do to try to figure out the problem and then fix it.
You must know that you are able to recover data from inaccessible flash drive only when it can be recognized by Windows Disk Management. If the disk doesn’t show up in Windows Explorer but does appear in Disk Management, marked with the label of Unallocated, Not Initialized or Unknown, you may resort to the following passage to solve disk unknown problem:
You can also read My Drive does not appear in Windows Explorer view to find proper resolutions provided by Microsoft.
Step 2: select the correct disk or partition to scan.
You need to select the exact partition/hard disk that becomes not accessible and gives you the not accessible fatal device hardware error when you tried to open it. Then, click on the Scan button next to the drive to start detecting files.
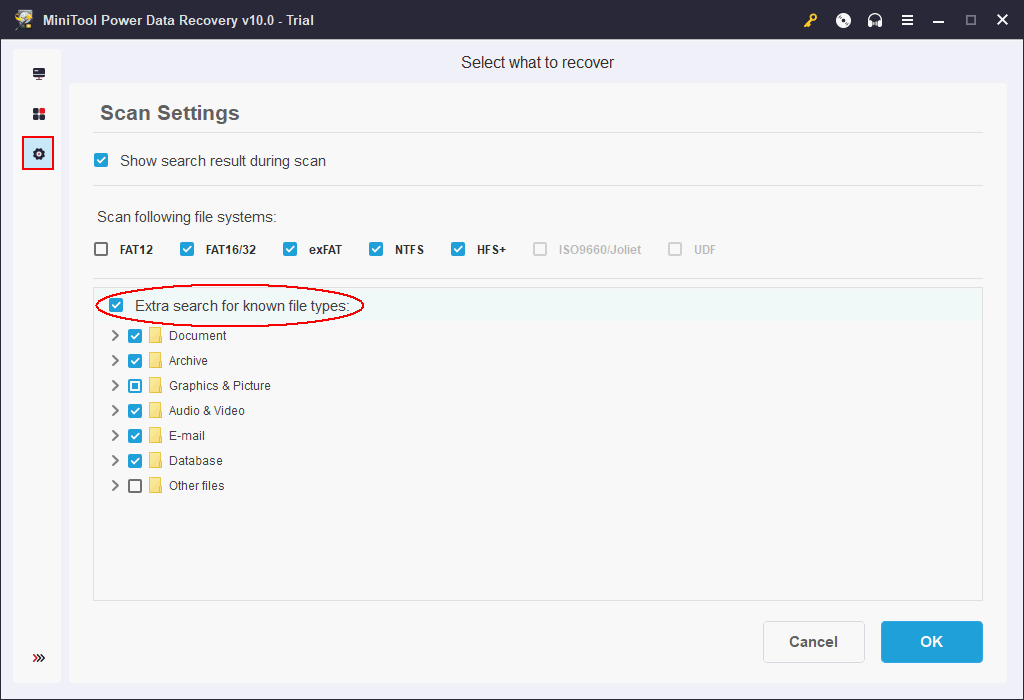
Note: The Scan Settings feature is able to help you select certain file types. You can click on the icon and choose the file types you need and then click on the OK button to confirm. Then, the software will only show you those kinds of files in the scan result.
Note: If you forget to connect the USB flash drive or external disk to computer, you should connect it now and shift to another option and then shift back to the original one in the left panel in order to refresh the list. This helps to show your removable devices.
Step 3: check all the needed files & folders to recover.
No matter what option you choose and which partition/disk you scan, you’ll be provided with more than one partition sometimes during the scan and when the scan is finished. At this time, you’ve got a lot of work to do:
- You have to open all the found partitions and folders inside one by one to browse the files.
- You should pick out which files are needed and which ones are not.
If you have ever stored large amounts of data on the disk, this process would be long and boring, but you need to be careful all the time.
Please note that the Preview, Find and Filter functions are able to help you locate a file more easily.
- Preview helps you to view the content of a picture/photo/text file before you check it.
- Find function is able to search for an exact file by typing filename.
- Filter function is useful when you prefer to search for files by file extension, file size or file creation/modification date.
Step 4: set a safe storage directory for the files waiting to be recovered.
After adding a check mark in the square box in front of all the files you plan to recover, you should click on the Save button in the lower right corner to see the Select a directory to save files window. Obviously, you need to select a storage path for the files you’ve checked.
And you must pay attention to the following two things:
- Please do not choose the original flash drive/hard drive with the fatal device hardware error as the destination of the file recovery.
- Please make sure that the target storage drive has enough free space to store all the files you’ve selected to recover.
After making your decision, you ought to click on OK button below to confirm.
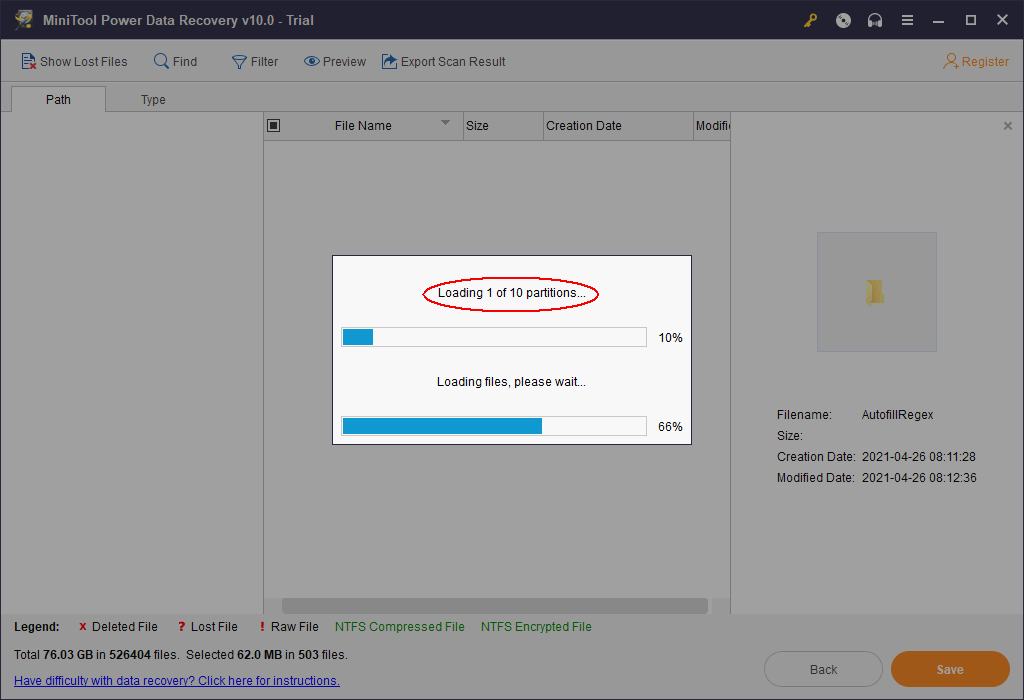
You’ll need to wait for a short time before all the files are saved to the destination drive. And when you see a pop-up window informing you that the files have been recovered, you can go to check them.
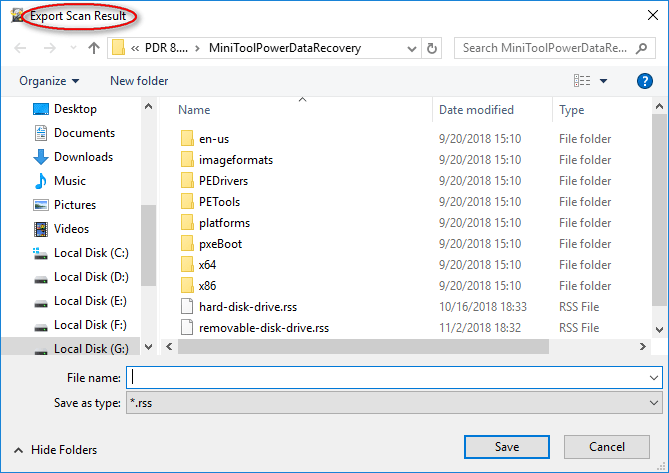
Note: If that’s all you need, you may close MiniTool Power Data Recovery now. If you’re worrying that there may be files that you need but forget to recover, you may click on the Export Scan Result (next to Preview) to save the current scan result to your drive, and then make use of the Load Manually function in the main interface of software to import the result whenever you want.
Section 3: Fix Fatal Device Hardware Error
After people have recovered all useful data from the not accessible drive or for people who don’t care about the data in that drive at all, how to fix the not accessible fatal device hardware error comes first in their to-do list. Here, I will talk about some of the commonly used repair methods.
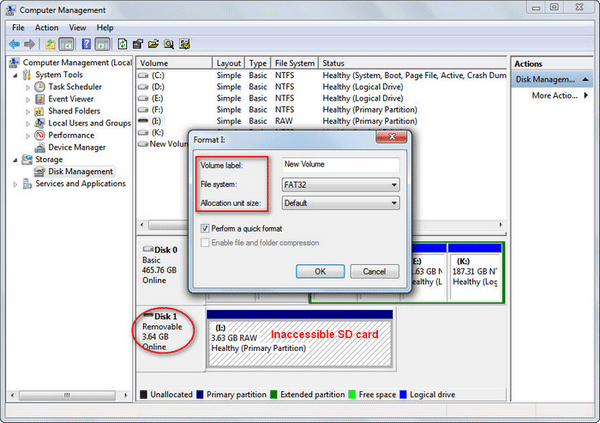
Reformat the Drive
- Open Windows Disk Management.
- Find the inaccessible flash drive/hard drive.
- Right click on it and choose Format….
- Set a proper volume label, file system and allocation unit size (you can also keep the default information provided by the system).
- Click on the OK button to confirm in the same interface
- Click on the OK button in another pop-up window to start formatting.
- Wait for the completion.
Tip: You can also make use of the Format Partition or Wipe Partition function of MiniTool Partition Wizard if above method ends up in failure.
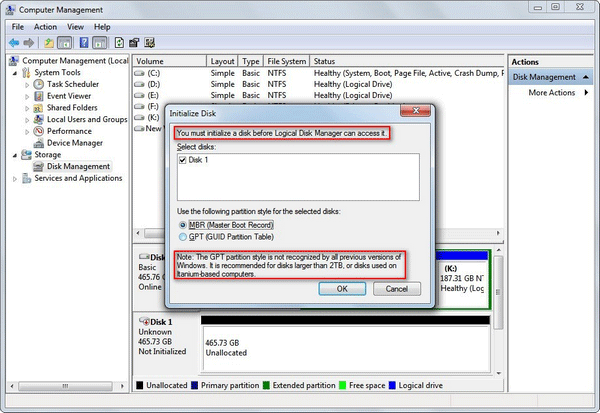
Initialize the Disk
- Open the Windows Disk Management.
- Right-click on the Unknown & Not Initialized disk if the Initialize Disk Window doesn’t pop up automatically.
- Choose a partition style (MBR or GPT) for the selected disk.
- Click on the OK button to confirm your selection.
Tip: You can also make use of the Initialize to MBR Disk, Initialize to GPT Disk or Wipe Disk function of MiniTool Partition Wizard if above method fails you.
In addition to above two methods, you can also try to change USB port or computer, check & shield bad sectors or replace the bad component (such as the magnetic head) to fix the fatal device hardware error.
Click to Tweet
Section 4: Draw a Conclusion
Though the request failed due to a fatal device hardware error is inevitable sometimes, I have the right way to deal with it. That is:
- Recover data from the not accessible drive.
- Make sure you have got back all the data you need.
- Try any possible ways to fix the error and make the drive work normally again.
So you shouldn’t get into panic immediately when encountering this hard disk fatal error. What you really need to do is staying calm & following the steps I have mentioned above to rescue your data and device as much as possible.
The Request Failed Due to A Fatal Device Hardware Error FAQ
What does fatal device hardware error mean?
The error message “The request failed due to a fatal device hardware error” may appear on your computer screen. When you see this error, it means your operating system can’t get access to the hard drive/SSD or unable to perform the read and write operations on it.
How do I check the health of my external hard drive?
- Click on Start in the lower left corner.
- Scroll down to find Windows System folder and expand it.
- Select Command Prompt under it.
- Type wmic and press Enter.
- Wait for the command to finish.
- Type diskdrive get status and press Enter.
- Wait for the command to finish.
How do I fix a fatal error on my external hard drive?
- Restart computer and programs.
- Change a USB port or USB cable.
- Make sure the power supply is enough and stable.
- Connect the external hard drive to another computer.
- Go to Device Manager to define hard drive problems.
- Run CHKDSK to check disk for errors.
- Use other third-party software.
How do I run CHKDSK on external drive?
- Connect the external drive to your computer.
- Open File Explorer and look for the external drive.
- Right click on it and choose Properties.
- Shift to the Tools tab.
- Look for the Error checking area.
- Click on the Check button and wait.
Здравствуйте, имеется уже неработающий внешний диск WDBPCK5000ABK01, системой не распознается и пишет как hardware error. Диск не ронял, на улицу в мороз не выносил, использовался только в домашних условиях на одном компьютере. Замена ЮСБ шнура и подключение к др компу не помогает. Но при подключении Лампочка мигает, диск внутри крутится, после проверки программой Data LifeGuard Diagnostics Tool не дает никаких тестов:
Test Option: QUICK TEST
Model Number: WD HARDWARE ERROR
Unit Serial Number: ….
Firmware Number: 1015
Capacity: 0.00 GB
SMART Status: Not Available
Test Result: PASS
Test Time: 11:54:52, January 09, 2014
Test Option: EXTENDED TEST
Model Number: WD HARDWARE ERROR
Unit Serial Number: ….
Firmware Number: 1015
Capacity: 0.00 GB
SMART Status: Not Available
Test Result: PASS
Test Time: 11:55:00, January 09, 2014
Как вы думаете, какая может быть на первый взгляд неполадка?
может есть какой совет починки в домашних условиях?
Спасибо заранее за ответ
Для начала надо демонтировать диск из коробки. Если USB подключение организовано посредством использования переходника SATA-USB, то нужно попробовать подключить диск напрямую к персональному компьютеру. Возможно на этой стадии ремонт жесткого диска и закончится, — выяснится что проблема в переходнике.
Если же USB разъем припаян непосредственно на плату электроники (контроллер HDD WDBPCK5000ABK01) то можно, убрав емкостные перемычки, подпаять SATA разъем напрямую к соответствующим выводам центрального процессора. Выход из строя микросхемы моста USB в портативных жестких дисках Western Digital, в том числе и у WDBPCK5000ABK01, — достаточно частое явление.
Если это тоже не приведет к успеху, то возможно у вашего диска приводит к зависанию процесс background activity. Для устранения этой проблемы накопитель надо перевести в safe mode, прогрузить в ОЗУ оврелеи для того, чтобы активизировать запись и внести необходимые правки в микрокод.
Если выяснится, что проблема в вышедшей из строя одной или нескольких головках чтениязаписи, то их можно будет отключить, инициировав после этой процедуры прохождение скрипты заводского самотестирования.
Все эти операции вполне можно выполнить в самых что ни на есть домашних условиях.
- 4.5
- 1
- 2
- 3
- 4
- 5
Похожие вопросы:
Внешний USB-диск Western Digital
Переносные жесткие диски – очень удобные носители информации. Это обычный жесткий диск внутри красивой коробки, который подключается к компьютеру по USB. Они больше по объему, чем флешки, поэтому активно используются для хранения и переноса больших объемов информации.
Все производители жестких дисков выпускают свои модели. Сами по себе жесткие диски – надежные носители информации. Но переносные модели чаще роняют и просто чаще подключают и отключают от компьютера. Поэтому к стандартным неисправностям добавляются и специфические для переносных USB-устройств.
Внешний диск не определяется
Когда к нам обращается клиент и говорит, что его внешний диск перестал работать, первый совет – попробуйте другой провод. Причины бывают разные, может сам провод неисправный или слишком длинный, и тогда не хватает питания жесткому диску. В любом случае это простое действие, поэтому первое, что нужно сделать – попробовать другой провод.
Следующий шаг попробовать подключить диск к другому компьютеру. На вашем компьютере может быть проблема с USB-портами или драйверами. Если компьютер увидел диск – отлично. А если ни замена провода, ни проверка на другом компьютере не помогли, тогда рекомендуем вытащить жесткий диск из коробки и подключить к компьютеру напрямую.
Внутри красивой коробки, как правило, обычный SATA-диск. И отдельно плата переходника с SATA на USB. Так как внешние диски часто подключают и отключают, то эти платы иногда выходят из строя. Даже если диск щелкает, это может быть не физическая неисправность, а проблема в контроллере на плате переходника, который подает неправильное напряжение на диск. В нашей практике такое было уже. Поэтому вытаскиваем диск из коробки и подключаем диск напрямую через SATA-интерфейс для проверки работы диска.
Настоящие USB-диски Western Digital
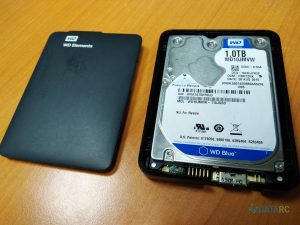
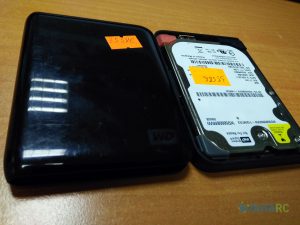
Владельцы внешних дисков Trancsend могут удивиться, увидев внутри корпуса жесткий диск фирмы Samsung. А еще сильнее могут удивиться владельцы WD Elements или WD My Passport Ultra, когда, вытащив диск из коробки, они обнаруживают внутри USB-диск.
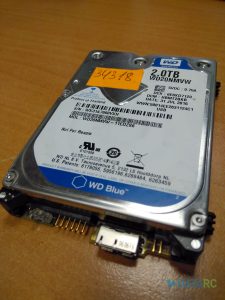
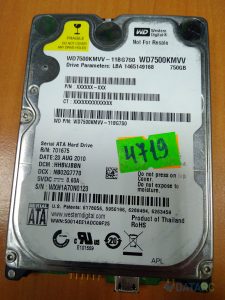
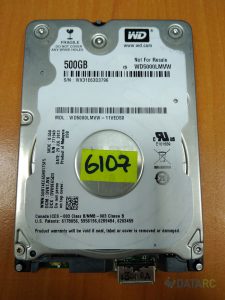
Если вы открыли коробку, а внутри WD10JMVW или WD5000BMVW, поздравляем, у вас самый настоящий USB-диск. У современных внешних моделей WD USB-разъем напаян непосредственно на внешнюю плату электроники и отсутствует привычный для остальных производителей переходник с SATA на USB. Вот только для восстановления данных нужно сначала адаптировать USB-разъем под SATA.
| Модель WD | Объем, Гб | Модель коробки | Количество пластин | Количество головок | Семейство |
|---|---|---|---|---|---|
| wd2500bmvu | 250 | нет | 2 | 3 | Venus |
| wd3200bmvu | 320 | нет | 2 | 4 | Venus |
| wd5000bmvu | 500 | нет | 2 | 4 | Dolphin |
| wd5000bmvv | 500 | wdbabv5000abk-00 | 2 | 4 | Zephyr |
| wd5000bmvw | 500 | wdbadb5000abk-u1 | 2 | 3 | FBLite / Firebird /Zephyr |
| wd10jmvw | 1000 | wdbuzg0010bbk-004 | 2 | 4 | FBLite / Firebird |
| wd5000kmvv | 500 | нет | 3 | 4 | Shasta 3D |
| wd6400kmvv | 640 | нет | 3 | 5 | Shasta 3D |
| wd5000kmvw | 500 | wdbpck5000abk-01 | 3 | 5 | Helios |
| wd7500kmvw | 750 | wdbpck7500adbk-01 | 3 | 5 | Helios |
| wd5000lmvw | 500 | нет | 1 | 2 | Hubble LT / Hubble |
| wd15nmvw | 1500 | нет | 4 | 7 | Shrek LT / Shrek |
| wd20nmvw | 2000 | wdbnfv0020bbl-u5 | 4 | 8 | Shrek LT / Shrek |
| wd30nmvw | 3000 | wdbnfv0030bwt-u5 | 5 | 10 | Pebbleb |
| wd10tmvv | 1000 | нет | 3 | 6 | Helios / Shasta 3D |
| wd10tmvw | 1000 | wdbgys0010bbk-u0 | 3 | 6 | Helios / Shasta 3D |
| wd3200bmvv | 320 | нет | 1 | 2 | Jamaica 4K |
| wd3200bmvw | 320 | нет | 2 | 2 | Zephyr |
| wd7500kmvv | 750 | нет | 3 | 6 | Shasta 3D |
Если вы нашли свой диск в этой таблице, значит у вас диск с USB-разъемом прямо на плате. И если ваш wd5000bmvw не определяется или wd10jmvw не инициализируется, то для диагностики и восстановления данных сначала нужно подключить диск по SATA.
Удобный пользователям интерфейс USB совершенно непригоден для работ по восстановлению данных. Он не позволяет передавать диску ATA-команды и работать с аппаратно неисправными жесткими дисками в особых технологических режимах.
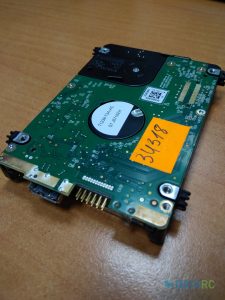
В компаниях по восстановлению данных, чтобы переделать wd10tmvw, wd20nmvw или любой диск из таблицы на обычный стандартный SATA-разъем подпаивают прям на плату провода. Мы тоже так делали раньше, а сейчас используем более надежный метод с заменой платы с контроллером и ПЗУ целиком.
Одно из наших преимуществ как крупнейшего центра восстановления данных в России – это собственный запас запчастей на все модели дисков WD. А второе преимущество, особенно если ваш диск новый и на гарантии, что мы являемся официальным партнером производителя жестких дисков Western Digital в области восстановления данных. Все диски WD, вскрытые в нашей лаборатории, не теряют гарантии.
Примеры из нашей практики восстановления USB-дисков
На чтение 5 мин. Просмотров 8.5k. Опубликовано 03.09.2019
Содержание
- Что делать, если Windows 10 не обнаруживает жесткий диск WD Passport Ultra
- Как исправить WD My Passport Ultra не обнаружен
- 1. Подключите диск с помощью альтернативного USB-кабеля
- 2. Откройте средство устранения неполадок оборудования и устройств.
- 3. Подключите жесткий диск My Passport Ultra к ноутбуку или компьютеру.
- 4. Отрегулируйте путь и букву диска для WD My Passport Ultra
- 5. Проверьте файловую систему диска с EaseUS Partition Manager
- 6. Обновите USB-контроллер и драйверы устройств WD My Passport Ultra.
Что делать, если Windows 10 не обнаруживает жесткий диск WD Passport Ultra
- Подключите диск с помощью альтернативного USB-кабеля
- Откройте средство устранения неполадок с оборудованием и устройствами
- Подключите жесткий диск My Passport Ultra к ноутбуку или компьютеру .
- Настройте путь и букву диска для WD My Passport Ultra
- Проверьте файловую систему диска с помощью EaseUS Partition Manager
- Обновите USB-контроллер и драйверы устройств WD My Passport Ultra
WD My Passport Ultra – это внешний жесткий диск, который пользователи могут использовать с настольными и портативными компьютерами Windows 10. Однако некоторые пользователи утверждают, что их подключенные настольные и портативные компьютеры не обнаруживают накопители WD My Passport Ultra.
Следовательно, диск не распознается и не отображается в проводнике Windows 10. Вот несколько возможных разрешений, которые могут исправить WD My Passport Ultra, если он не обнаружен.
Как исправить WD My Passport Ultra не обнаружен
1. Подключите диск с помощью альтернативного USB-кабеля
Сначала попробуйте подключить My Passport Ultra к настольному компьютеру или ноутбуку с помощью альтернативного USB-кабеля. Возможно, USB-кабель неисправен. Если это так, замена кабеля, вероятно, решит проблему.
Кроме того, подключите накопитель My Passport Ultra с альтернативным USB-разъемом. Некоторые пользователи утверждают, что диск распознается при подключении через разъемы USB 2.0, но не обнаруживается при подключении через порты USB 3.0. Таким образом, проблема может быть связана с одним из контроллеров USB.
2. Откройте средство устранения неполадок оборудования и устройств.

Средство устранения неполадок с оборудованием и устройствами обнаруживает и устраняет проблемы с внешним оборудованием. Поэтому стоит обратить внимание на проблему, когда устройство не распознается. Вот как пользователи могут открыть это средство устранения неполадок в Windows.
– СВЯЗАН: 5 лучших программ для восстановления внешних жестких дисков, которые будут использоваться в 2019 году
3. Подключите жесткий диск My Passport Ultra к ноутбуку или компьютеру.
- Откройте приложение Cortana, нажав кнопку Введите здесь для поиска на панели задач.
- Введите ключевое слово «устранение неполадок» в поле поиска.
- Нажмите Устранение неполадок, чтобы открыть список средств устранения неполадок, перечисленных в разделе «Настройки».

- Затем выберите «Оборудование и устройства» и нажмите кнопку «Запустить средство устранения неполадок».
- Откроется средство устранения неполадок и может предоставить исправление для жесткого диска My Passport Ultra. Нажмите кнопку Применить это исправление , чтобы применить предложенные разрешения.

4. Отрегулируйте путь и букву диска для WD My Passport Ultra
- Windows может обнаружить My Passport Ultra, когда пользователи изменяют его букву и путь к диску. Для этого откройте диалоговое окно «Выполнить», нажав клавишу Windows + горячая клавиша R.
- Введите «diskmgmt.msc» в «Выполнить» и нажмите кнопку ОК .

- Затем щелкните правой кнопкой мыши диск WD My Passport Ultra в окне «Управление дисками» и выберите параметр Изменить букву диска и пути .
- Чтобы назначить букву диска, нажмите Добавить и выберите параметр Назначить следующую букву диска . Затем выберите букву диска в раскрывающемся меню.

- Кроме того, пользователи могут нажать кнопку Изменить , чтобы выбрать альтернативную букву диска.
- Затем нажмите кнопку ОК , чтобы применить новую букву диска.
- Перезагрузите Windows 10 после изменения буквы диска.
– СВЯЗАН: внешний USB-накопитель не отображается на ПК: 10 способов решения этой проблемы
5. Проверьте файловую систему диска с EaseUS Partition Manager
Файловая система на диске My Passport Ultra может быть повреждена. Пользователи могут проверять и исправлять поврежденные системные файлы с помощью программного обеспечения EaseUS Partition Master. Нажмите Бесплатная загрузка на веб-странице программного обеспечения, чтобы добавить бесплатное программное обеспечение для раздела EaseUS в Windows.
После установки программного обеспечения подключите жесткий диск My Passport Ultra к настольному компьютеру или ноутбуку. Откройте EaseUS Partition Master и щелкните правой кнопкой мыши диск My Passport Ultra, чтобы выбрать Проверить файловую систему . Откроется окно проверки файловой системы. Нажмите кнопку Пуск , чтобы проверить файловую систему.
6. Обновите USB-контроллер и драйверы устройств WD My Passport Ultra.
Обновление драйверов устройств часто исправляет устройства, которые не распознаются. В этом случае пользователям может потребоваться обновить USB-контроллер или драйверы My Passport Ultra.Программное обеспечение для обновления драйверов обеспечивает быстрый и простой способ поиска устаревших или поврежденных драйверов, которые необходимо обновить.
Driver Booster 6 обнаруживает и обновляет миллионы драйверов. Так что это одна из лучших программ для обновления драйверов. Нажмите кнопку Бесплатная загрузка ниже, чтобы сохранить программу установки, с помощью которой пользователи смогут установить Driver Booster 6.
- Загрузить сейчас Driver Booster 6 Pro Free
Когда пользователи запускают Driver Booster 6, он сканирует и выводит список драйверов, которые необходимо обновить или заменить. Программное обеспечение перечисляет драйверы как устаревшие, отсутствующие или неисправные. В нем могут быть перечислены USB-контроллеры или жесткий диск My Passport Ultra как устройства с драйверами, которые необходимо обновить. Нажмите кнопку Обновить сейчас , чтобы обновить драйверы.

Если ни одно из приведенных выше решений не исправляет WD My Passport Ultra, когда он не обнаружен, возможно, диск нуждается в ремонте. My Passport Ultra поставляется с трехлетней гарантией. Таким образом, пользователи могут вернуть внешний жесткий диск в компанию Western Digital для возможного ремонта в течение этого гарантийного периода.