System Error Memory Dump Files or Win Dump Files are like reports created whenever your computer experiences a crash. As the name suggests, they are Dump Files that are created and stored with information about each crash event and can be used to diagnose the problem that caused the crash. There are two major types of memory dump files, Memory.dmp and minidump. Memory Dump Files are important; however, they do take up a bit of space, and that can be a problem for users, especially if the storage is small.

When Windows crashes, it collects information about the crash during the time that the Crash Screen is displayed. At this point, the OS collects information from running applications, drivers, memories, etc., to create the Win dump files, also known as crash dumps files. These files together can be used to determine the cause of the crash. It is like analyzing stores of data that are saved over some time, the data will contain patterns that can be used to diagnose the cause of the problems.
Types of Windows Dump Files

Five types of Memory Dump Files can be created during a crash. They are:
- Complete Memory Dump Files,
- Kernel Memory Dump Files,
- Small Memory Dump Files,
- Automatic Memory Dump Files, and
- Active Memory Dump Files.
Read: How to manually create a Crash Dump file in Windows
Complete Memory Dump Files in Windows
A Complete Memory Dump File is a copy of the entire Windows physical memory at the time that the crash occurred. This type of Memory Dump is the largest. The default location for the Complete Memory Dump File is %SystemRoot%Memory.dmp. The old file is overwritten each time a new file is created.
TIP: You can analyze Windows Memory Dump .dmp files with WhoCrashed.
Kernel Memory Dump Files in Windows
Kernel memory dump files contain Windows kernel and hardware abstraction level kernel-mode drivers. Kernel memory dump files have smaller sizes than complete memory dump files because they don’t contain unallocated memory and memory allocated to user-mode applications. The default location for kernel memory dump file is %SystemRoot%Memory.dmp. The old one is overwritten when a new one is created.
Read: How to manually create a Crash Dump file in Windows
Small Memory Dump Files (256 kb) in Windows
Small memory dump files contain information related to the list of loaded drivers, the running process, and the kernel. They are the smallest Win dump files and have lesser details and usefulness. The default location for the small memory dump file is %SystemRoot%Minidump. When a new file is created, the older file is preserved.
Read: How to open and read Small Memory Dump (DMP) files
Automatic Memory Dump Files in Windows
Automatic Memory Dump and Kernel Memory Dump contains the same information. The difference between the two is the way that Windows sets the size of the system paging file.
If the system paging file size is set to System managed size, and the kernel-mode crash dump is set to Automatic Memory Dump, then Windows can set the size of the paging file to less than the size of RAM. In this case, Windows sets the size of the paging file large enough to ensure that a kernel memory dump can be captured most of the time.
If the computer crashes and the paging file is not large enough to capture a kernel memory dump, Windows increases the size of the paging file to at least the size of RAM. The time of this event is recorded here in the Registry:
HKLMSYSTEMCurrentControlSetControlCrashControlLastCrashTime
The increased Paging file size stays in place for 4 weeks and then returns to the smaller size. If you want to return to the smaller paging file before 4 weeks, you can delete the Registry entry.
To see the Page file settings:
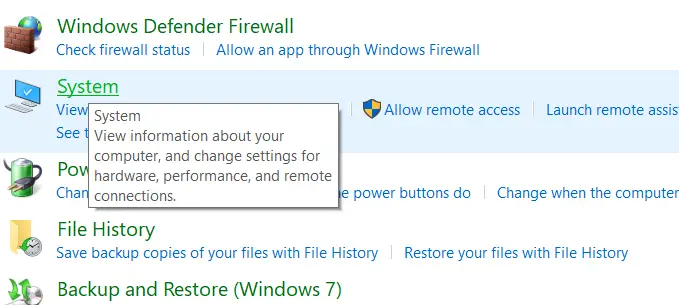
- Go to Control Panel > System > Advanced system settings.
- Under Performance, select Settings.
- On the Advanced tab, under Virtual memory, select Change.
- In the Virtual Memory dialog box, you can see the paging file settings.
By default the Automatic Memory Dump file is written to %SystemRoot%Memory.dmp.
Active Memory dump Files in Windows
An Active Memory Dump is similar to a Complete Memory Dump, but it filters out pages that are not likely to be relevant to troubleshooting problems on the computer. Because of this filtering, it is typically significantly smaller than a complete memory dump. This dump file does include any memory allocated to user-mode applications. It also includes memory allocated to the Windows kernel and hardware abstraction layer (HAL), as well as memory allocated to kernel-mode drivers and other kernel-mode programs.
An Active Memory Dump is particularly useful when Windows is hosting virtual machines (VMs). When taking a complete memory dump, the contents of each VM is included. When there are multiple VMs running, this can account for a large amount of memory in use on the host system. Many times, the code activities of interest are in the parent host OS, not the child VMs. An active memory dump filters out the memory associated with all child VMs. The default location for the Active Memory Dump File is %SystemRoot%Memory.dmp. The Active Memory Dump is available in Windows 11/10 and later.
Read: Free Crash Dump Analyzer software for Windows
What is the System Error Memory Dump Files Location?
The default location for the System Error Dump Files or Win Dump Files is on the drive that the Operating System is installed. In most cases that is the drive C:. you can search for:
- %systemroot%minidump
- %systemroot%memory.dmp
or
- C:Windowsminidump
- C:Windowsmemory.dmp
If the Operating System is installed on a drive with another drive letter, then that drive letter would replace C:.
In most cases, you will see both minidump and Memory.dmp on your computer. This is so because all other Memory Dump files will be stored in the memory.dmp while the small dump file will be stored in minidump file.
If you can’t find the Memory Dump Files it could mean that they were deleted possibly in a clean-up. It could also mean that no crash was recorded.
In Windows 11, dump files can also be stored as smaller memory dump files called Minidump. You can find minidump.dmp dump files in C:WindowsMinidump.dmp. Some minidump files will have their own names, usually numbers such as the date and time of the crash incident.
Read:
- Windows Memory Dump Settings
- How to change the number of Memory Dump Files, Windows creates and saves
Is it safe to delete System Error Memory Dump Files?
Yes, it is safe to delete System Error Memory Dump Files. All System Memory Dump Files contain some information about a system crash. Each time the system crashes a System Error Dump File is created. These files can be used to analyze the cause of the crash. Deleting these files will not directly affect the system, however, they might hold valuable data. It would be wise to make a backup of the System Error Memory Dump Files for future reference. Files that are older than 30 days may be deleted if you wish if there are no problems. The urge to delete the Dump Files is usually because of the space they take up on the computer. You can choose to backup the files externally for 30 days and delete them if there are no problems.
The files may also be sent to Microsoft for analysis. it is a good idea to report them to Microsoft before deleting them. Sending dump files to Microsoft is a good idea because there are teams that review them and try to investigate the cause and resolve it either through Windows Update or notify you about possible solutions in Action Center.
How to Delete Memory Dump Files in Windows?
To delete Memory Dump Files you can find them on the hard drive and delete them. You can also delete it using the Windows Disk Cleanup Tool.
Open This PC in the left panel.
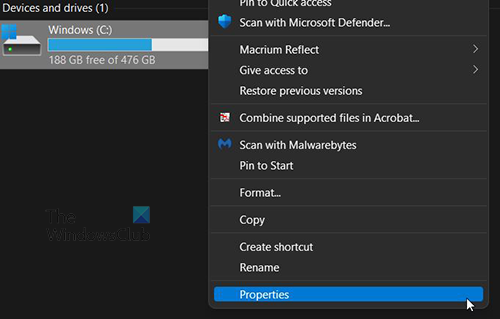
Right Click on the C: drive and click Properties.
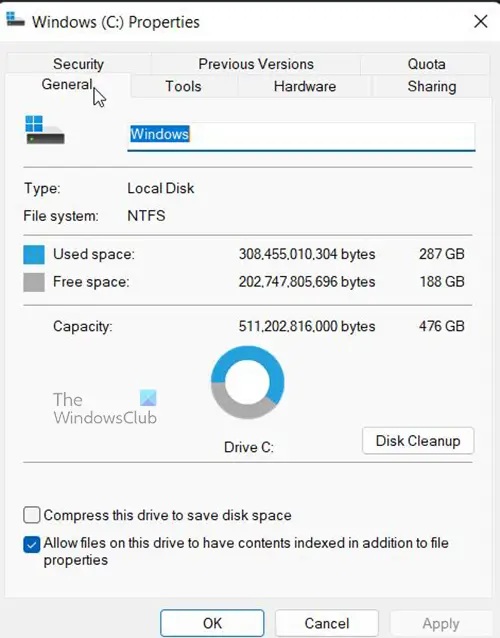
A window will appear. Click Disk Cleanup, and it will load.
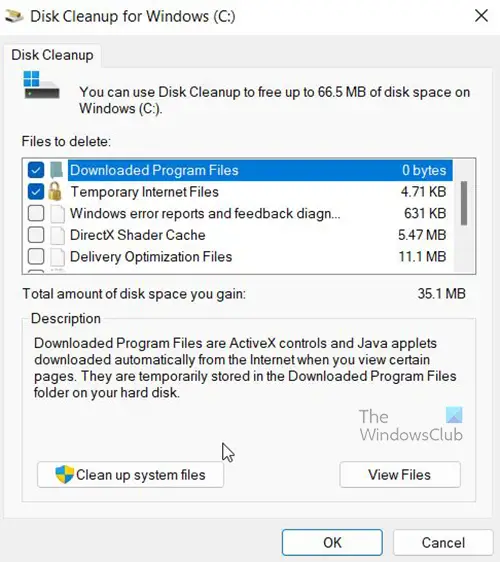
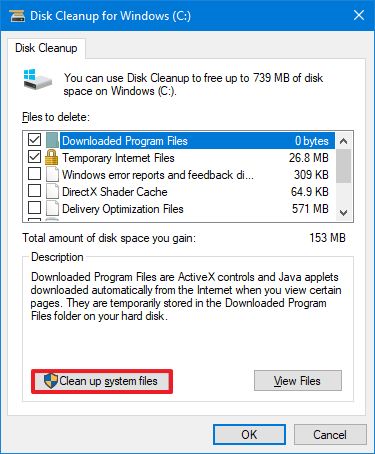
A window will appear, look to see that any files you need to delete are selected then click Clean Up System Files then wait for it to finish.
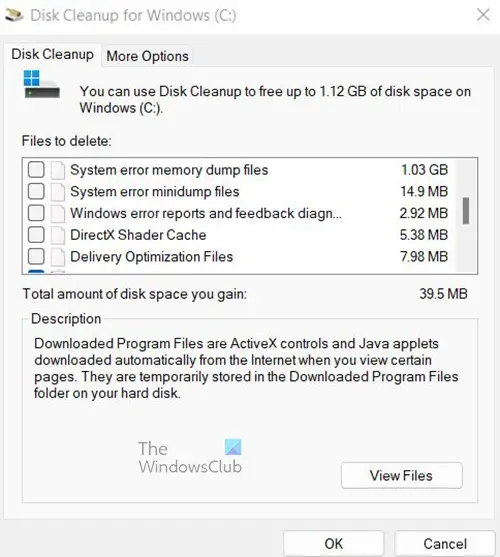
Another window will appear showing a list of things that can be cleaned up. You will notice some files selected and the amount of space that will be freed up if those files are deleted.
System Error Memory Dump files and System Error Minidump files are unselected. You can choose to delete them by selecting them and clicking ok,
You will be asked to confirm the delete. Confirm by clicking Delete Files.
What are System Error Memory Dump Files?
System Error Memory Dump Files are basically error logs that are created whenever your computer crashes. They can hold small amount of information about the crash or very large amounts of information. The System Error Memory Dump Files can be used by users or technicians to see why the crash happened and they can decide what to do. If these files are sent to Microsoft, they can use them to make corrections to whatever caused the crash.
Related reads:
- Physical Memory Limits in Crash Dump files
- Configure Windows to create Crash Dump Files on Blue Screen
How Long Should Error Memory Dump Files be Kept?
Error Memory Dump Files can be kept for 30 days or 60 days. They can be deleted after that time if the crash is not happening anymore. If the crash keeps happening then the larger Error Dump Files will get written over. The Complete Memory Dump File is the largest of the five types because it contains more data about the crash. This is usually the one that concerns users because of the size. If you want to keep them longer but you are low on disk space, you can choose to save them externally.
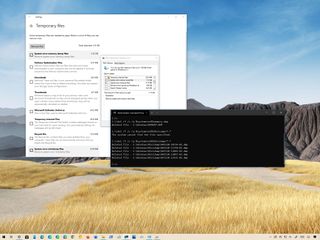
(Image credit: Windows Central)
On Windows 10, when a critical error occurs (such as Blue Screen of Death (BSoD)), the system creates memory dump files (also known as «crash dumps»). These files contain a copy of the system memory at the moment of the crash, which can help to diagnose and determine the reason for the problem.
Although these system error dump files can come in handy in many situations, unless you are a developer or planning to send the files to Microsoft support or software engineer for analysis, they will only be wasting space on the hard drive since they can be as large as the total size of the physical memory, and they can grow larger over time.
If you are running out of space on your computer, or you do not need these files because the problem has been resolved, Windows 10 includes at least three methods to safely delete them using the Settings app, Disk Cleanup, and Command Prompt.
In this Windows 10 guide, we will walk you through the steps to find and delete system error dump files wasting space on your device.
- How to delete system error dump files with Settings
- How to delete system error dump files with Disk Cleanup
- How to delete system error dump files with Command Prompt
How to delete system error dump files with Settings
To remove the system error dump files on Windows 10, use these steps:
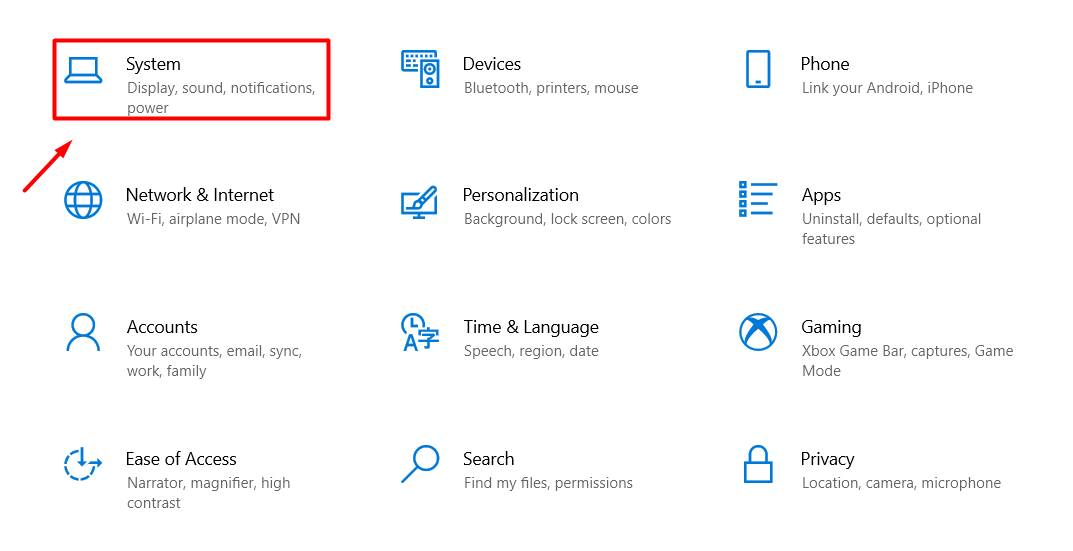
- Open Settings.
- Click on System.
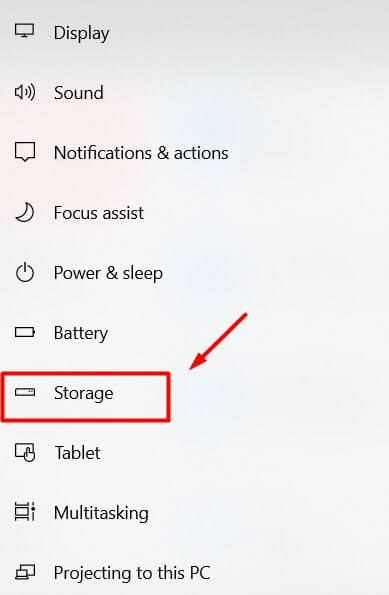
- Click on Storage.
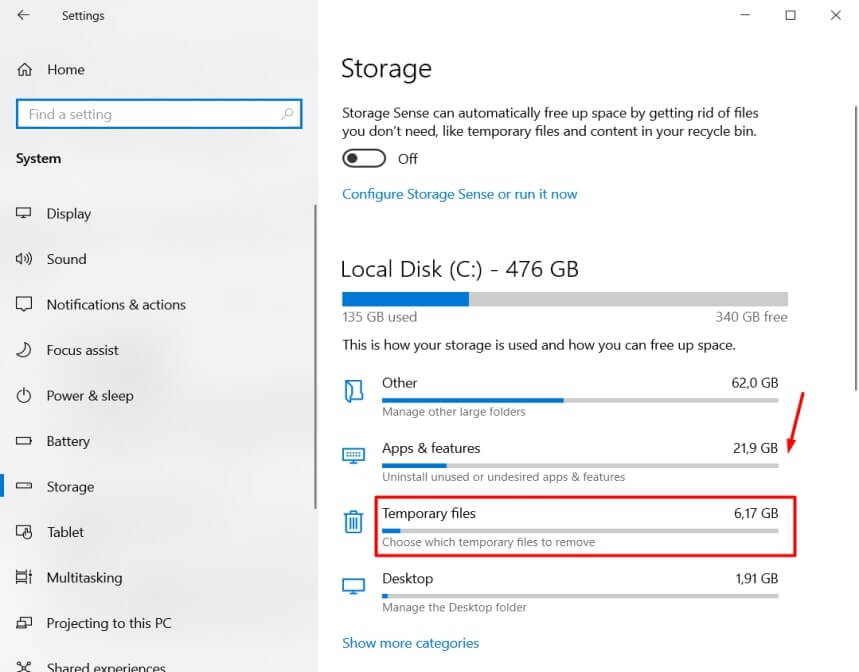
- Under the main drive section, click the Temporary files option.
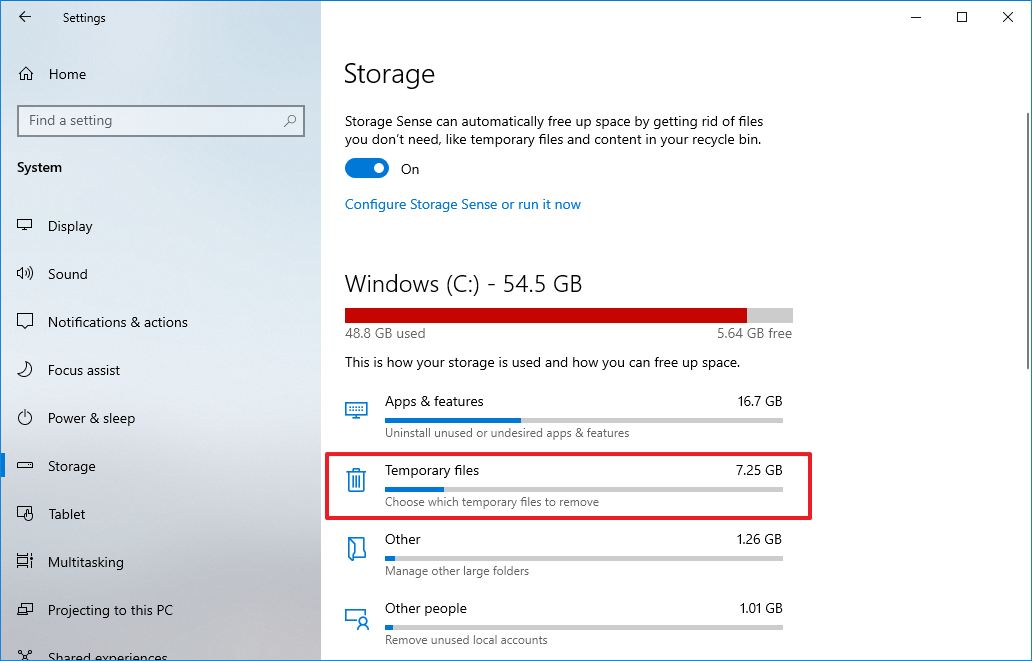
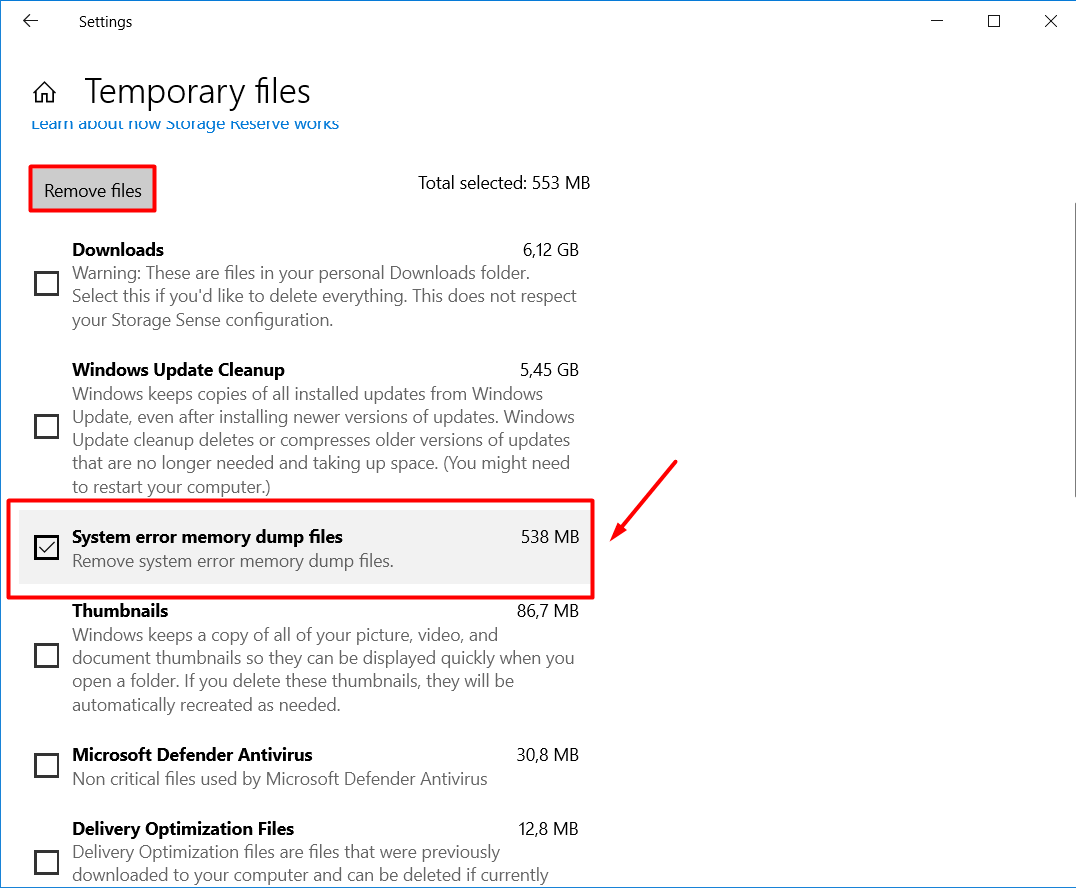
- Check the System error memory dump files option.
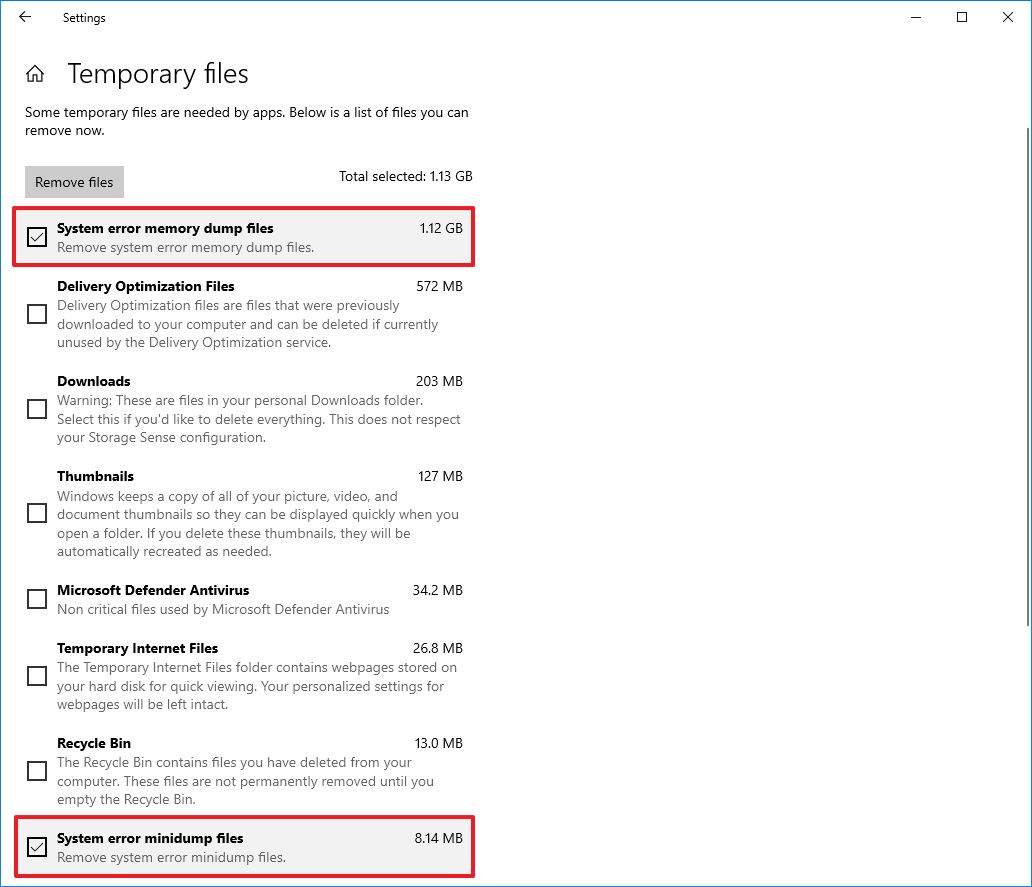
- (Optional) Check the System error minidump files option.Quick note: The memory dump files contain everything available in memory and are usually as large as the memory size. In contrast, the minidump files are only several megabytes in size, and they contain only basic information about the crash.
- Clear the other selected items.
- Click the Remove files button.
Once you complete the steps, the files will be deleted from your computer, making additional space for more important files.
How to delete system error dump files with Disk Cleanup
To delete the system dump files with Disk Cleanup, use these steps:
- Open Start.
- Search for Disk Cleanup and click the top result to open the app.
- Click the Clean up system files button.
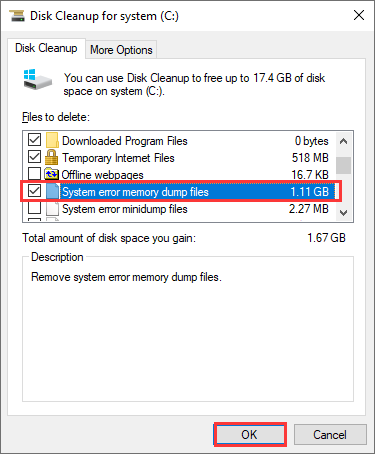
- Check the System error memory dump files option.
- (Optional) Check the System error minidump files option.
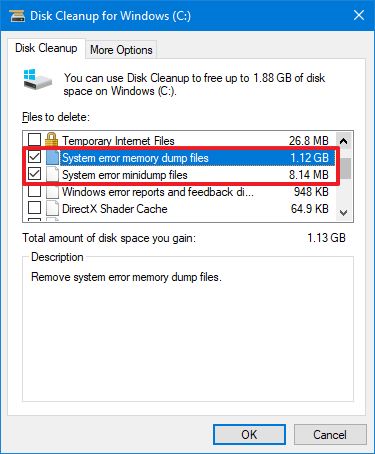
- Click the OK button.
After you complete the steps, the memory dump and minidump files will be removed from your device.
How to delete system error dump files with Command Prompt
To delete the error dump files with Command Prompt, use these steps:
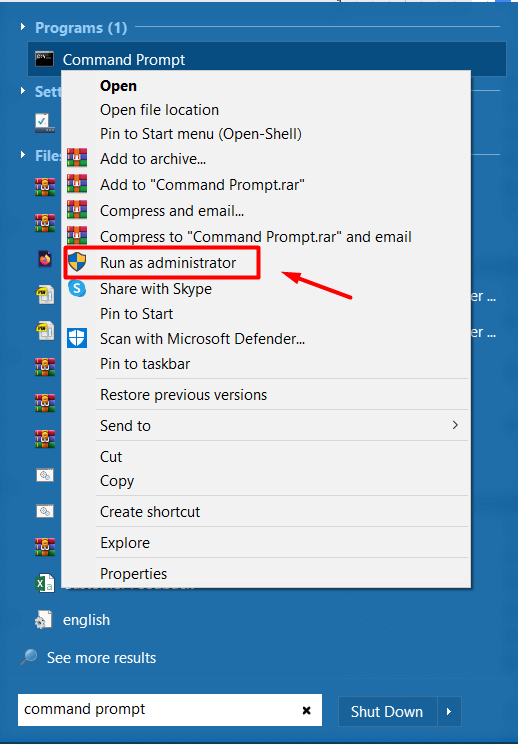
- Open Start.
- Search for Command Prompt, right-click the top result, and select the Run as administrator option.
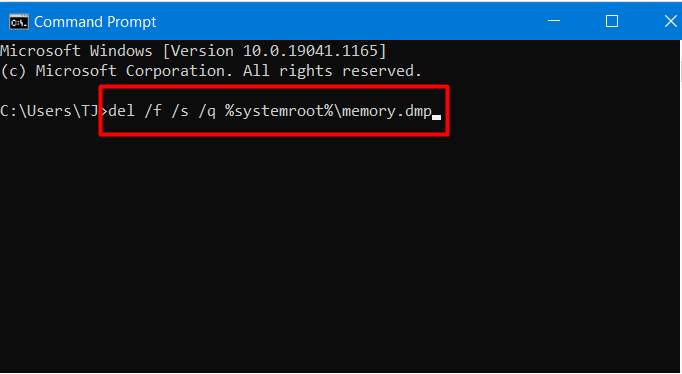
- Type the following command to delete the system error memory dump files and press Enter:
del /f /s /q %systemroot%memory.dmp
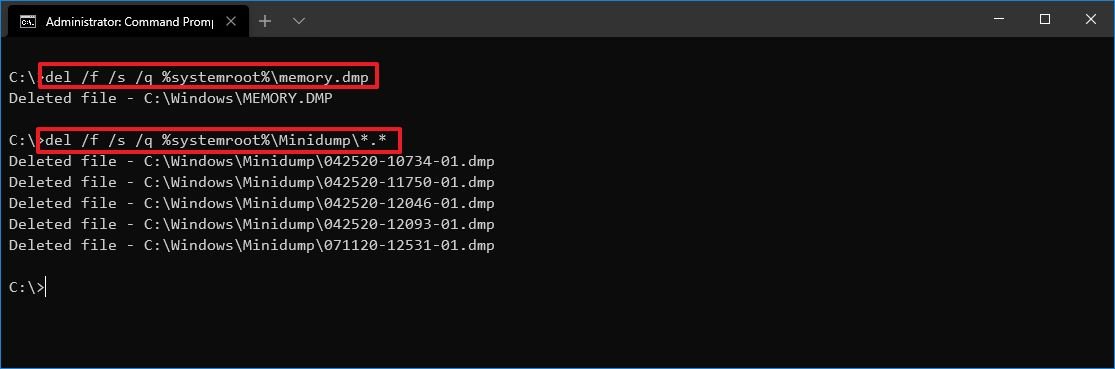
- (Optional) Type the following command to delete the system error minidump files and press Enter:
del /f /s /q %systemroot%Minidump*.*
Once you complete the steps, the commands will delete the «memory.dmp» and all the error dump files inside the Minidump system folder.
If the device has not run into a problem, or has recently performed some storage maintenance, there is a good chance that there are no dump files to delete. If this is the case, you won’t find the options in the Settings or Disk Cleanup, and nothing will be available in the Windows or Minidump folders.
Get the best of Windows Central in in your inbox, every day!
Mauro Huculak is technical writer for WindowsCentral.com. His primary focus is to write comprehensive how-tos to help users get the most out of Windows 10 and its many related technologies. He has an IT background with professional certifications from Microsoft, Cisco, and CompTIA, and he’s a recognized member of the Microsoft MVP community.
What are system error memory dump files? Is it safe to delete system error memory dump files? In this post from MiniTool, this article will show you what system error memory dump files are and how to delete them with detailed steps.
What Are System Error Memory Dump Files
After performing a disk cleanup on your PC, you may find that the system error memory dump files take up much space. You want to delete it to release some free space but you don’t know what it is and whether it is safe to delete it.
Actually, it is not hard to understand what the system error memory dump files are. When your Windows operating system crashes or encounters error like BSOD (Blue Screen of Death), Windows collects all available information stored in memory at the time of the crash and «dumps» it into a file, which is helpful to be used to diagnose the system error.
Here are four kinds of memory dump files. All of these dump files are stored on the drive where your operating system installed, normally the C drive.
- Complete memory dump: this type of memory dump file takes up the most disk space, as it contains a copy of all the data used by your operating system in the physical memory. Let me explain it to you with an example: If Windows uses 6GB at the time of the system crash, the memory dump will be of 4GB as well.
- Small memory dump (256 Kb): this type of memory dump takes up the least disk space. It contains very little information but it is very useful in the debugging process.
- Kernel memory dump: this type of memory dump is the 1/3rd the size of your physical memory. It includes the memory allocated to Windows kernel and hardware abstraction level.
- Automatic memory dump: this type of memory dump has the exact same size of memory of Kernel memory dump.
Is It Safe to Delete System Error Memory Dump Files?
Support engineers can use dump files to determine and diagnose the possible reasons for the system error. However, for ordinary users, they will not use the dump files for debugging.
Besides, as the dump files keep accumulating, they also take up a lot of disk space. Sometimes the system error memory dump files can even reach the size of 100GB, which may affect your computer performance.
At this, some users wonder: can I delete system error memory dump files? Is it safe to delete system error memory dump files? Well, deleting the files will not affect the normal use of your computer. So it is safe to delete system error memory dump files.
By deleting system error memory dump files, you can get some free space on your system disk. However, dump files can be recreated automatically every time when there is a system crash. So it is necessary to delete system error memory dump files on a regular basis.
However, some users report that they are unable to delete the system error memory dump files Windows 10 by using Disk Cleanup utility on Windows operating system. Is there any other way to delete system error memory dump files Windows 10/8/7? Don’t worry. The following will show you 5 effective methods to delete system error memory dump files with detailed steps and screenshots.
Method 1. Delete Dump Files via Elevated Disk Cleanup
If the normal disk cleanup utility cannot help you delete system error memory dump files, you can run elevated disk cleanup instead. Here are the detailed steps.
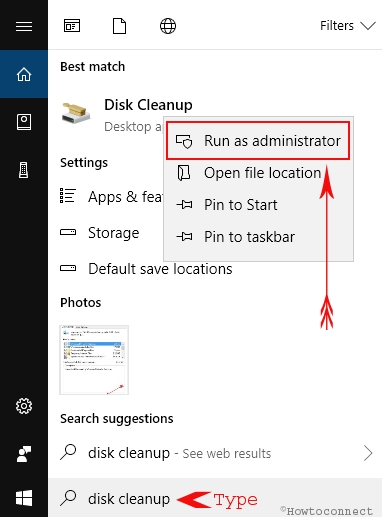
Step 1. Type disk cleanup in the Windows 10 Cortana search box. You can also press Windows + S keys on the keyboard to open the search box.
Step 2. Right click on the best match Disk Cleanup and choose Run as administrator.
Step 3. Select the drive you want to clean up. If your operating system is installed on C drive, just select C drive and click OK. Then wait patiently when the tool scans your drive.
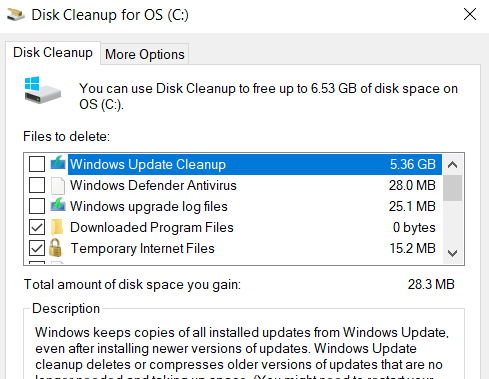
Step 4. Check all the boxes which you want to remove and press OK. Windows will automatically check some useless files by default. Scroll down and you will see the system error memory dump files listed, check it and click OK.
Method 2. Delete Dump Files via Third-party Space Analyzer
Using third-party space analyzer is also a simple way for you to delete the system error memory dump files on the C drive. And I recommend you to use the Space Analyzer embedded in MiniTool Partition Wizard Free Edition, for it is a piece of 100% safe and reliable partition and disk management software.
MiniTool Partition Wizard Free Edition is an all-in-one partition manager. It can help you extend C drive without data loss, migrate OS from HDD to SSD, convert MBR to GPT to enjoy the benefits of GPT disk, format partition, convert FAT to NTFS and so on.
And its Space Analyzer feature is extremely useful when your hard drive is running out of space, and you wonder which file is taking up too much space. The Space Analyzer uses graphics to give a better view of the hard drive space usage.
Next I will show you how to use the Space Analyzer feature to find and delete the system error dump files on your PC. Before proceeding, you can download the free software by clicking the following button.
Free Download
Then follow the steps below to go ahead.
Step 1. After downloading the MiniTool Partition Wizard Free Edition, install it on your PC and launch it to get the main interface. If you have not downloaded yet, click the following button.
Free Download
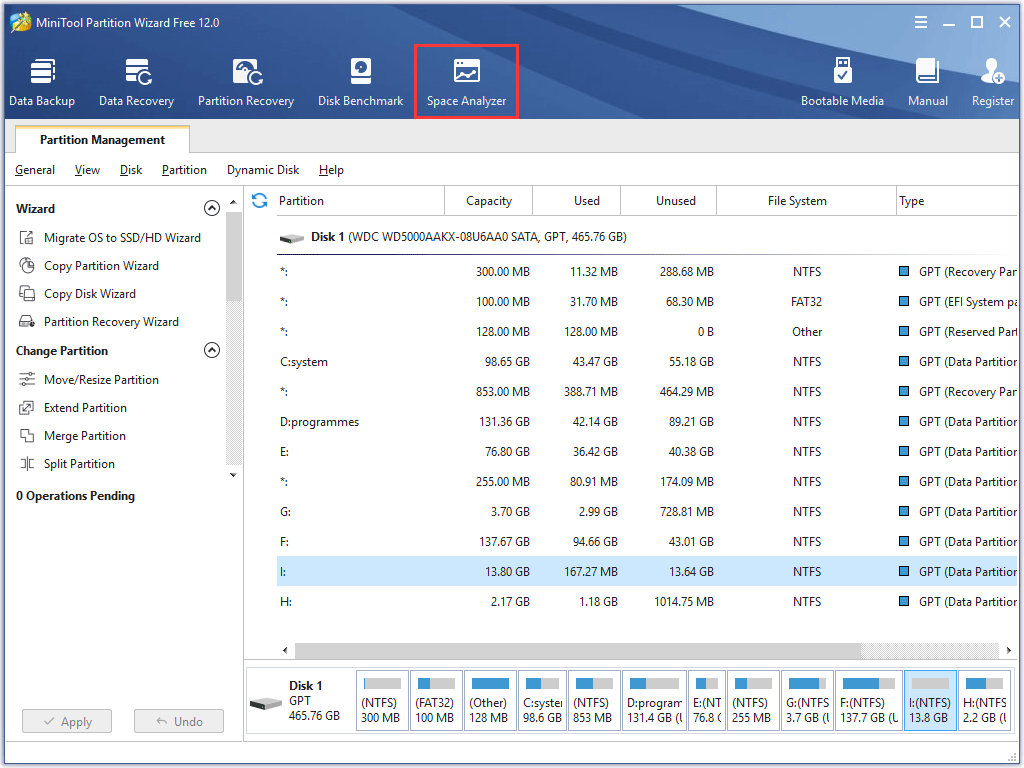
Step 2. On the main interface, select the Space Analyzer feature from the top toolbar to launch it.
Step 3. Choose a partition to scan from the drop-down menu and click Scan. To find the system error memory dump files, you should choose the drive where your operating system installed, usually C drive.
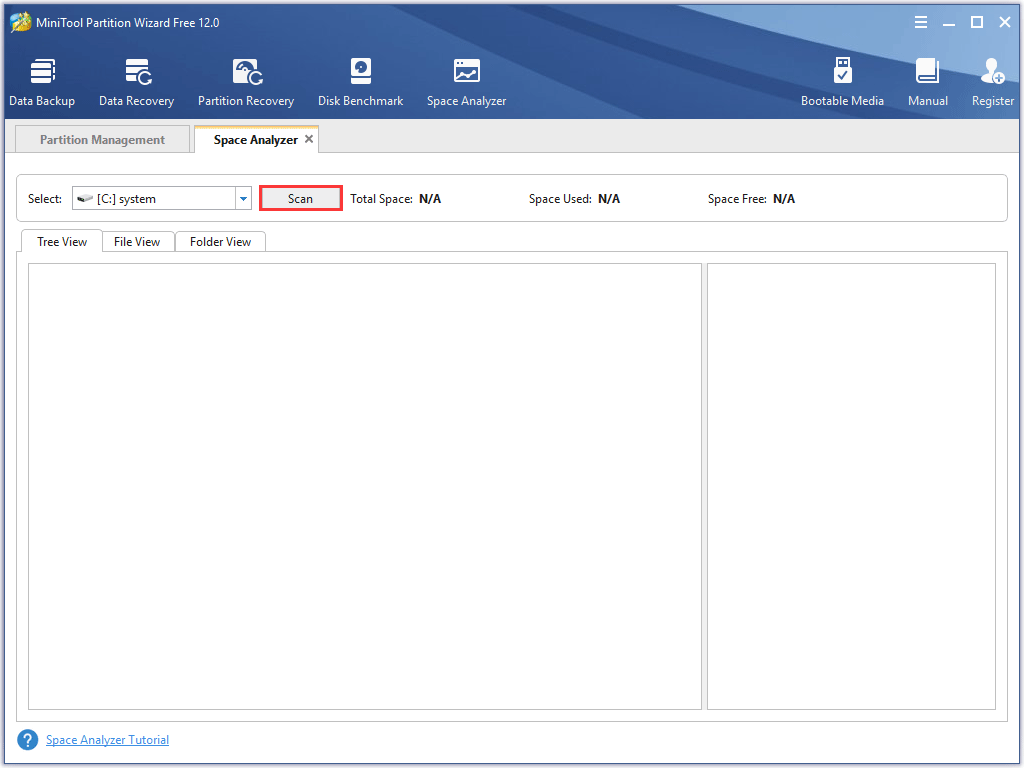
Step 4. Wait for the completion of the scanning. Depending on the number and size of files, the time for analyzing the disk usage may vary from a few minutes to hours for files.
Step 5. Here you might have noticed that the interface is divided into two parts. Double click the .dmp file extension from the right side of the panel.
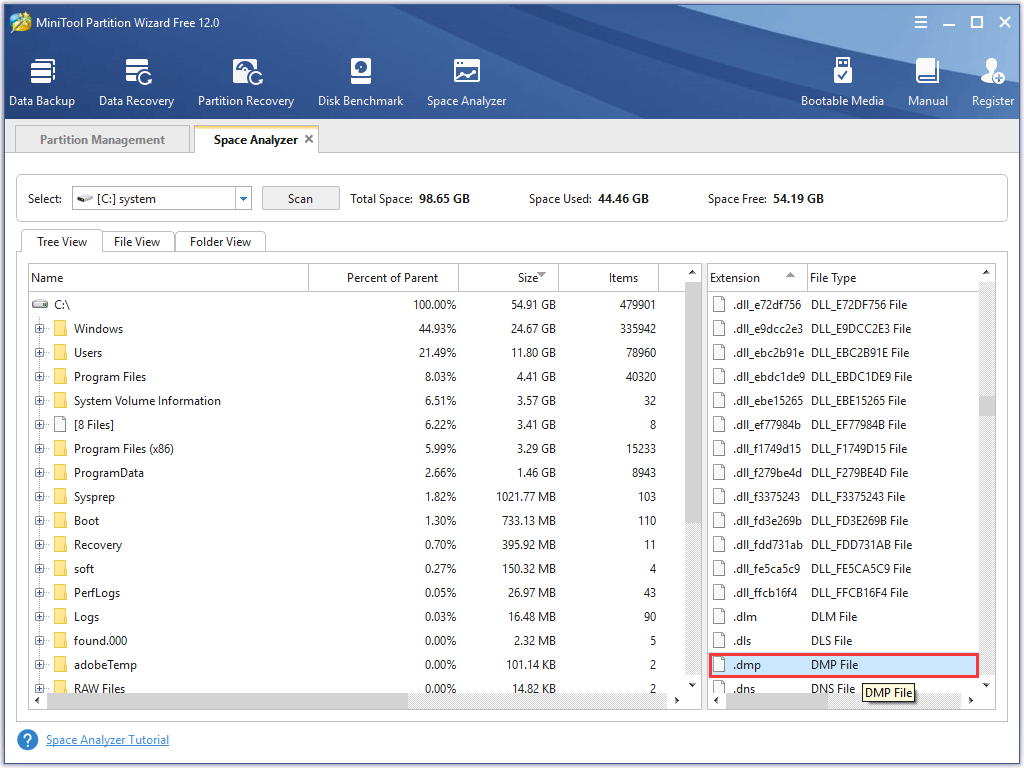
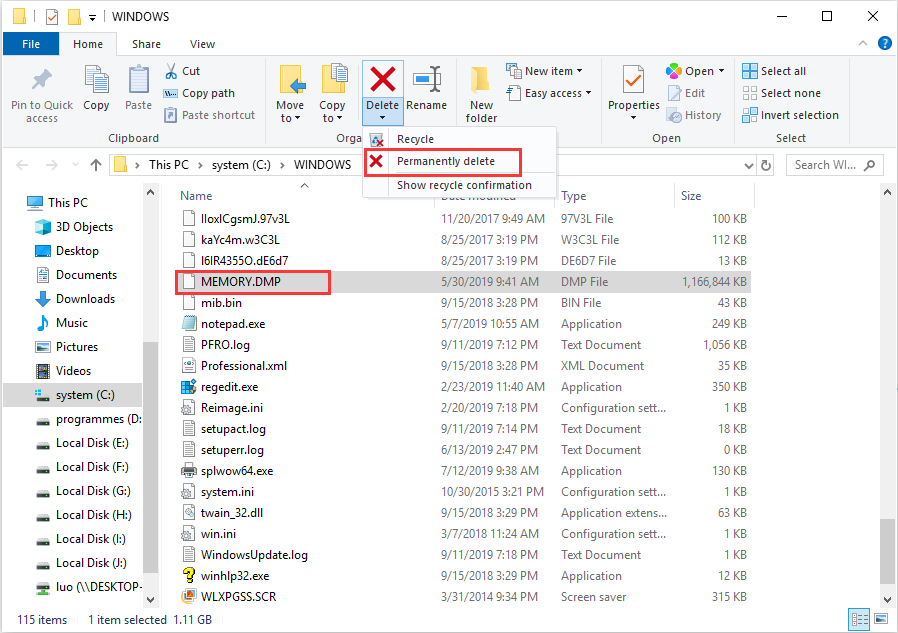
Step 6. Then you get the following interface. Right-click the MEMORY.DMP files from the list and choose Delete (Permanently) from the menu.
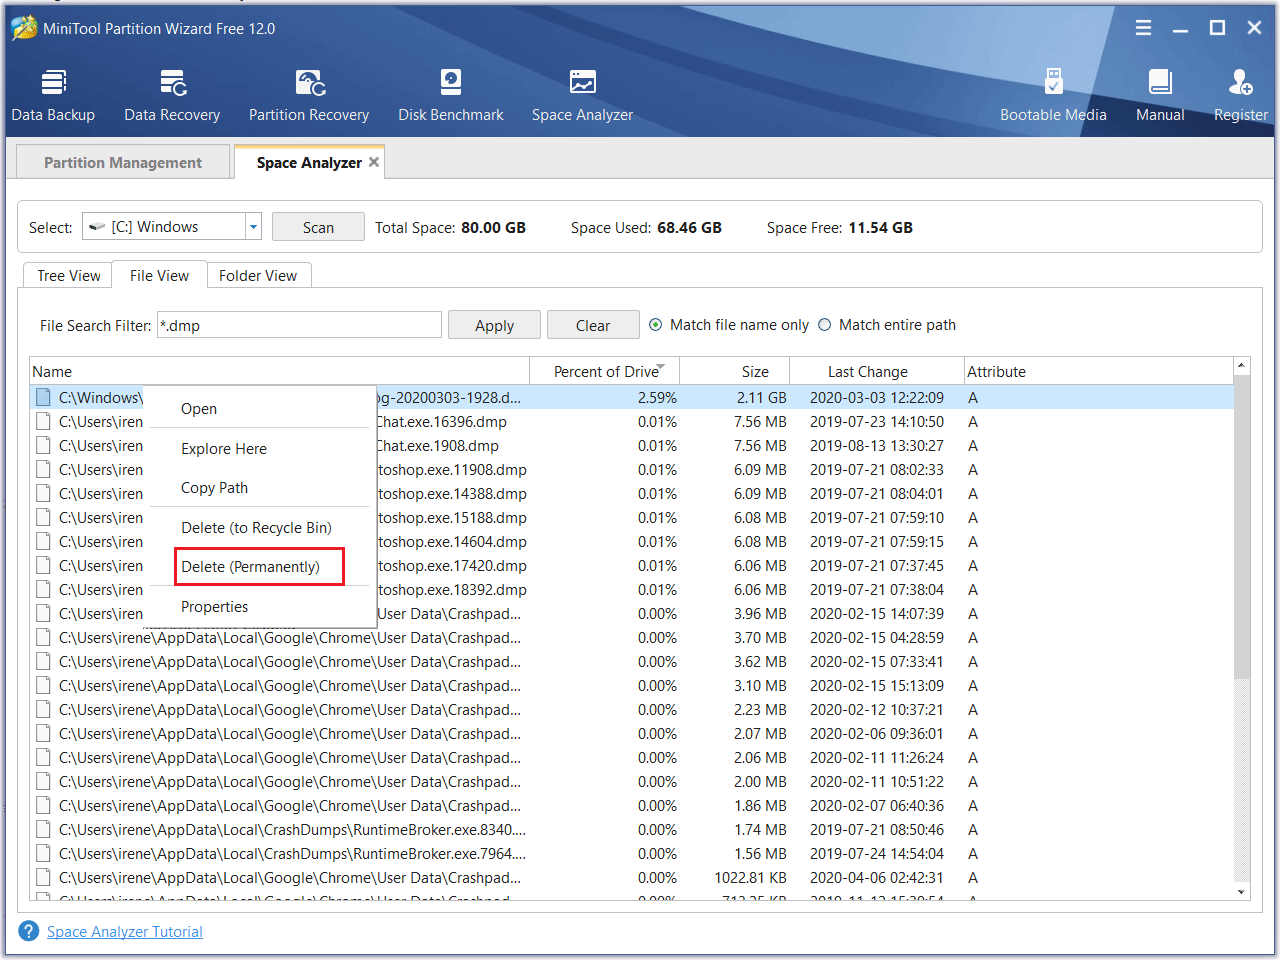
When the system error memory dump files are deleted successfully, you can close the Space Usage Analyzer. You can also delete other types of useless dump files on your PC if they take up too much disk space.
You see, how simple it is to delete system error memory dump files with this Space Analyzer. If you need to delete dump files or free up disk space on your Windows PC, you can download the free software.
Free Download
Method 3. Delete Dump Files via Extended Disk Cleanup Utility
You can use the Extended Disk Cleanup utility to clean system error memory dump files if the normal Disk Cleanup tool doesn’t work. Let’s see how to run this tool and delete system error memory dump files via it.
Step 1. Type command prompt in the dialogue box.
Step 2. Right click the best match Command Prompt and choose Run as administrator from the right-click menu.
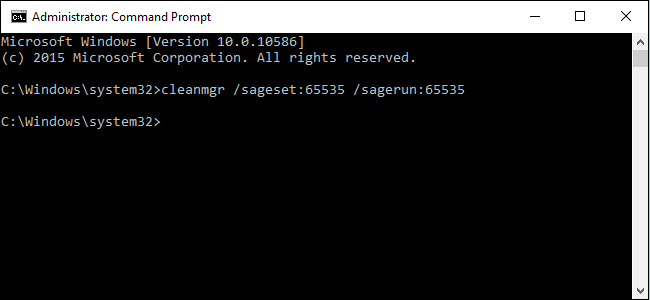
Step 3. In the command prompt window, copy and paste the following command and hit Enter.
cmd.exe /c Cleanmgr /sageset:65535 & Cleanmgr /sagerun:65535
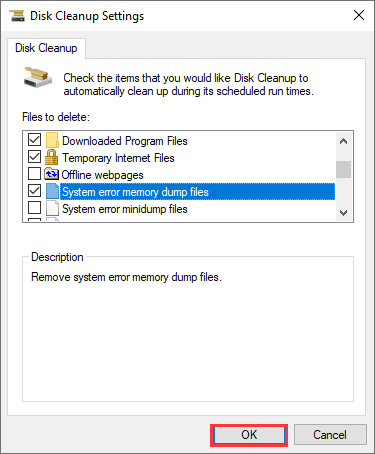
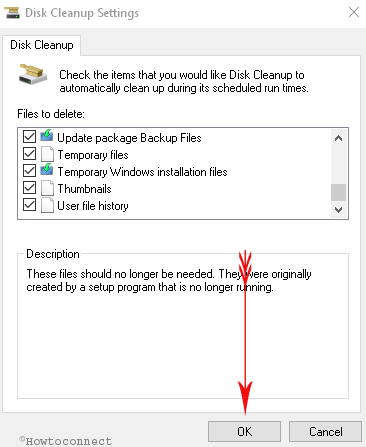
Step 4. Then the Disk Cleanup Settings window will pop up. Select the files you want to delete including the system error memory dump files and click OK.
Step 5. Restart your computer and check if system error memory dump files have been deleted.
Method 4. Delete the Dump Files from the File Location
If the above two solutions don’t work, you can try deleting the files physically. First, navigate to the dump file location via Windows File Explorer and then delete the system error memory dump files manually. Here are detailed steps.
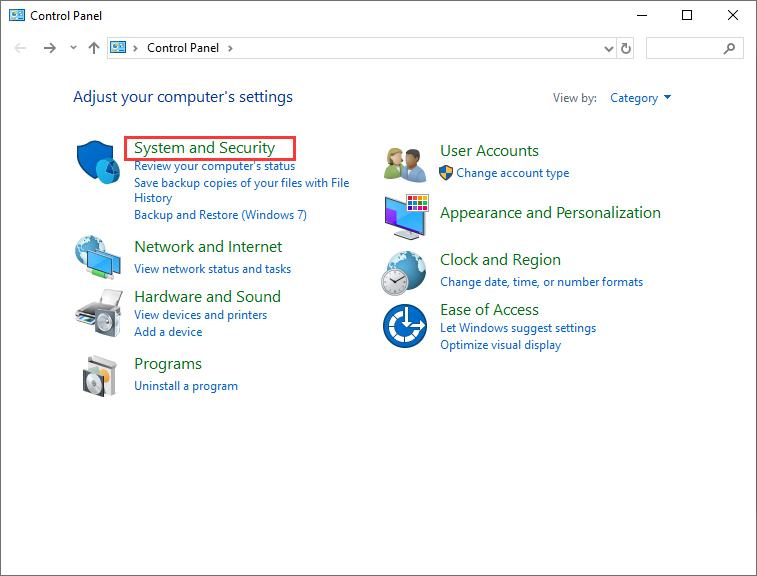
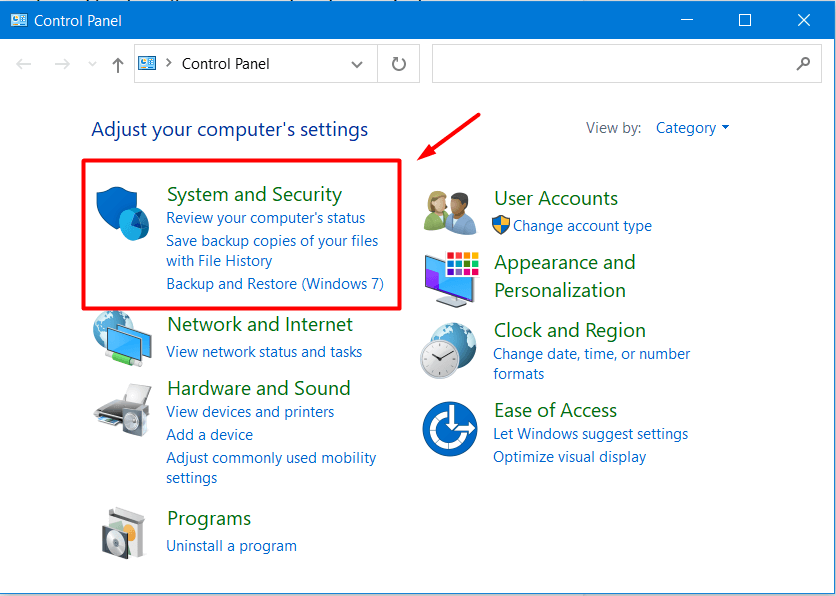
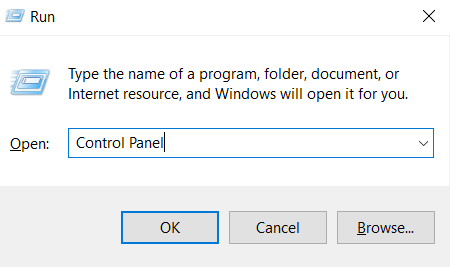
Step 1. Type Control Panel in the Windows 10 Cortana search box and click the best match to launch it.
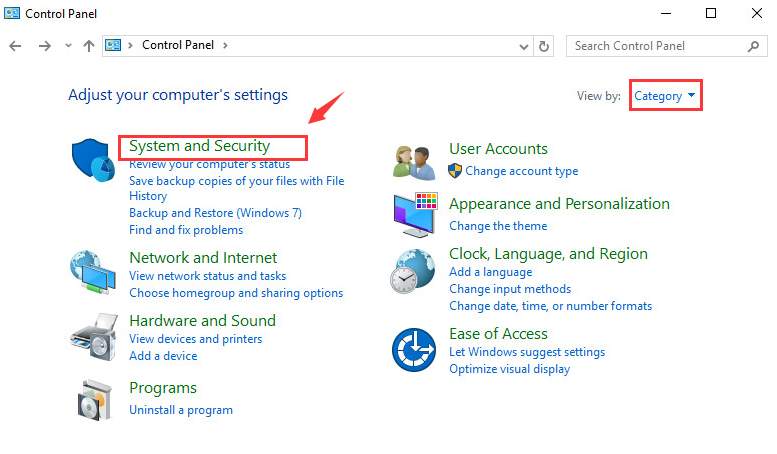
Step 2. Then select System and Security.
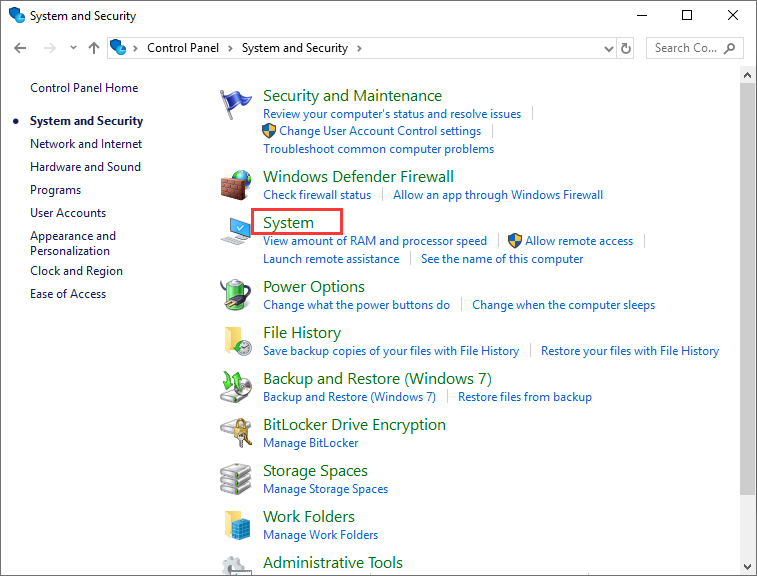
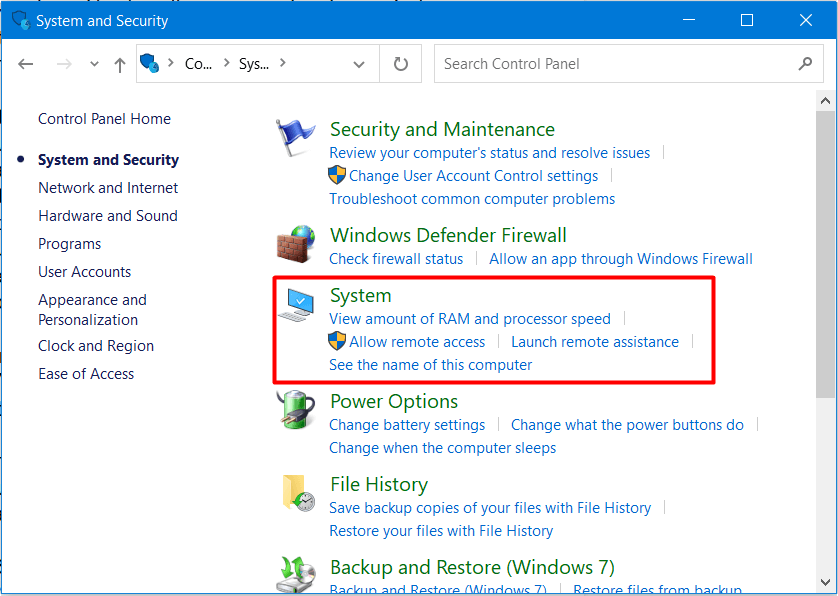
Step 3. Click the System category on the panel.
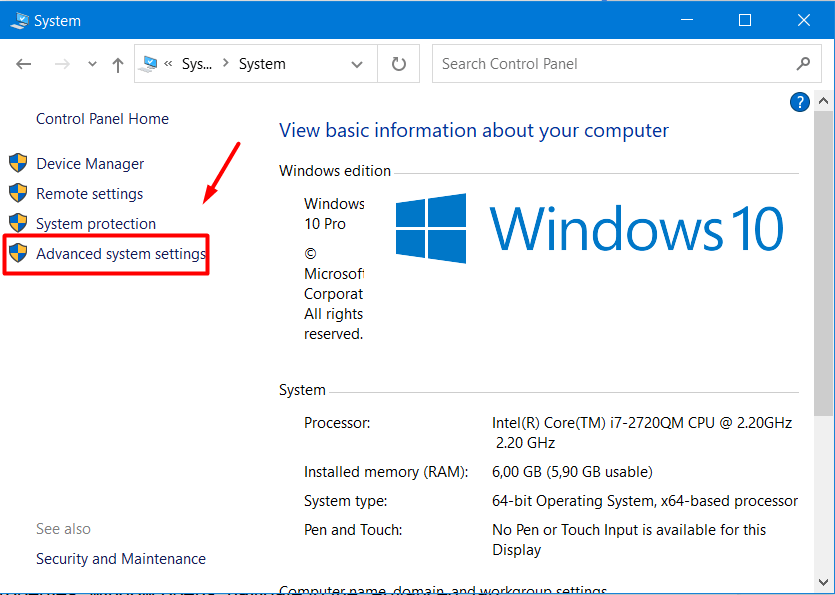
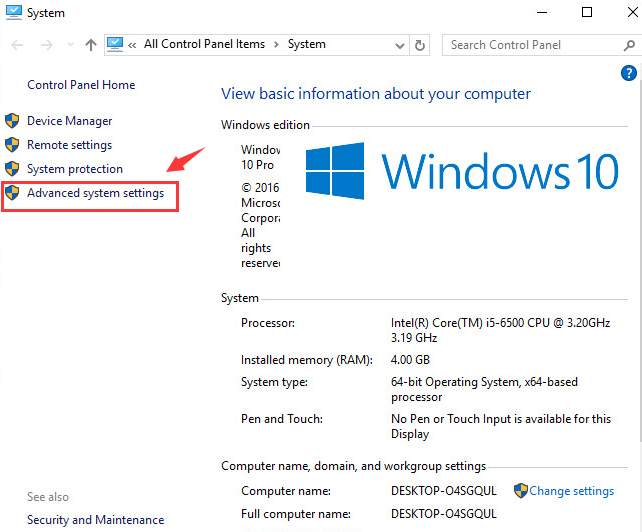
Step 4. Click Advanced system settings.
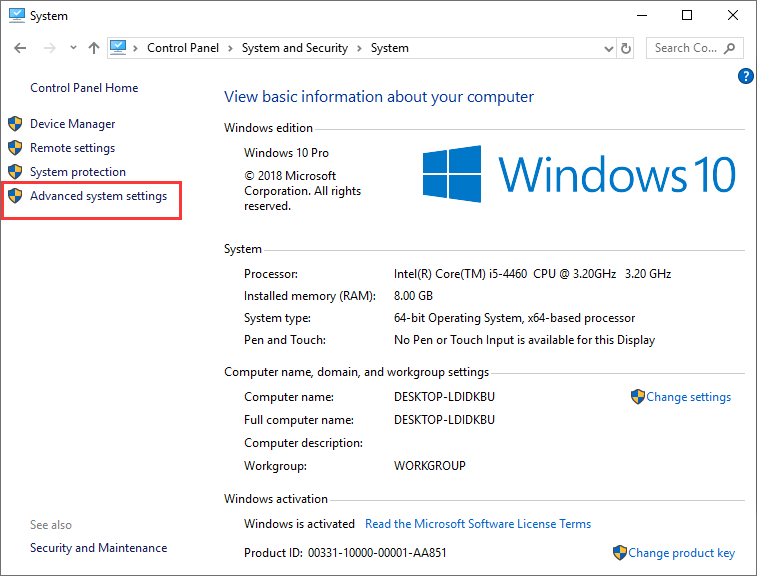
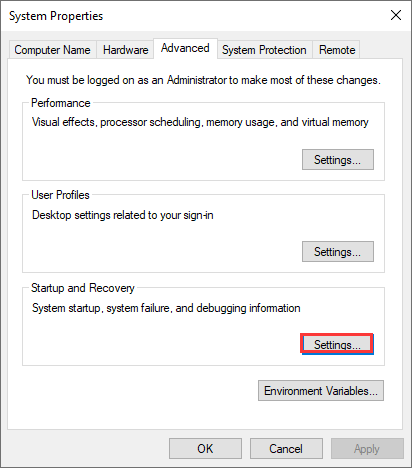
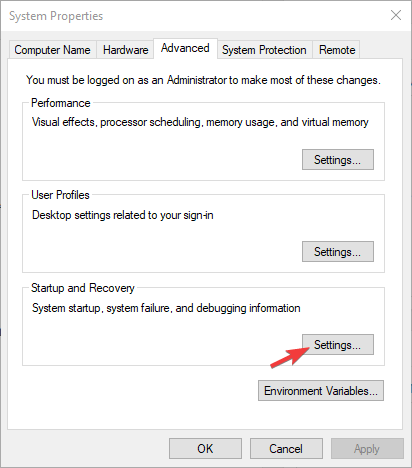
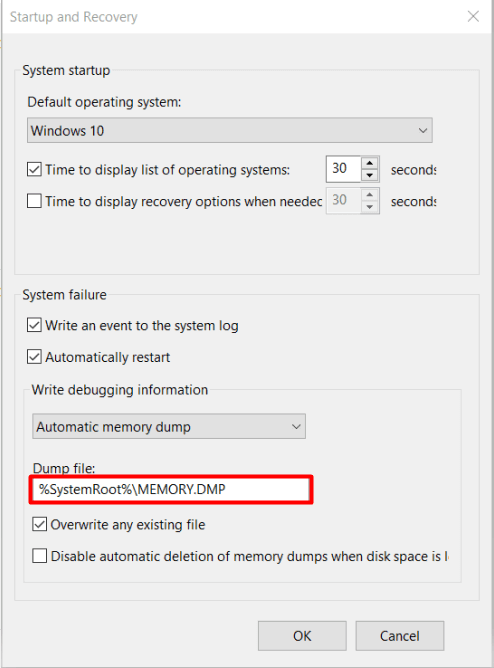
Step 5. Click Settings button under Startup and Recovery.
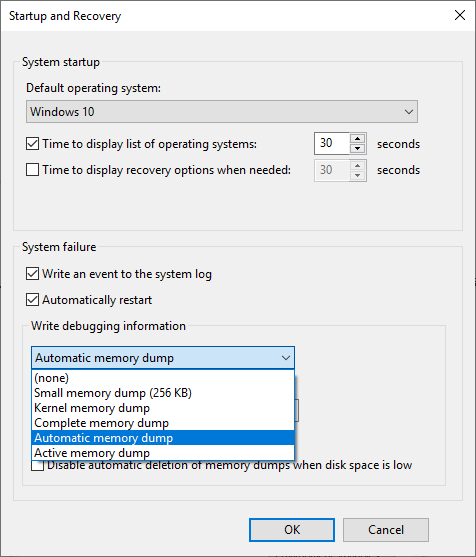
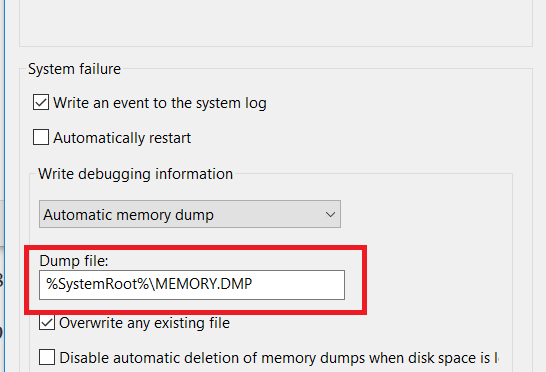
Step 6. Now you can see that the dump files are saved in the system root folder. Click on the drop-down menu under the Write debugging information; you can select a type of dump files and check where it is stored.
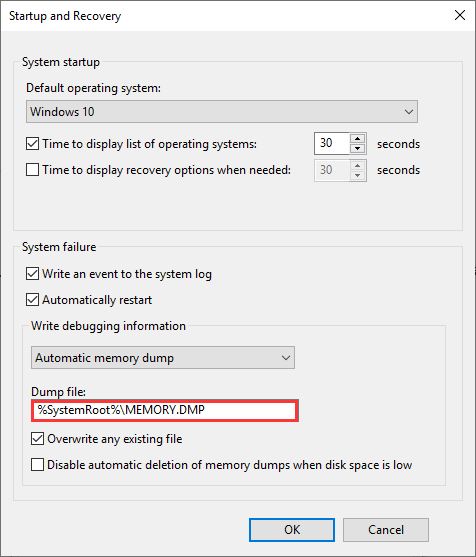
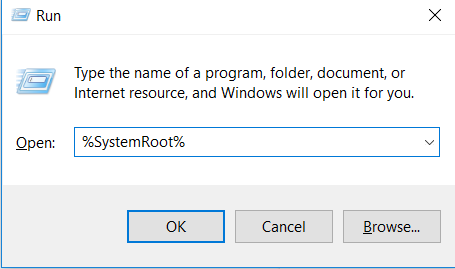
Step 7. Then copy the location of the dump file. Don’t copy and paste the whole path, as you just want to navigate to the location but not to open. As for the screenshot, you just need to copy %SystemRoot%.
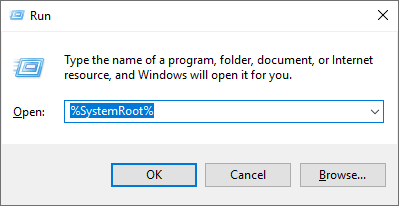
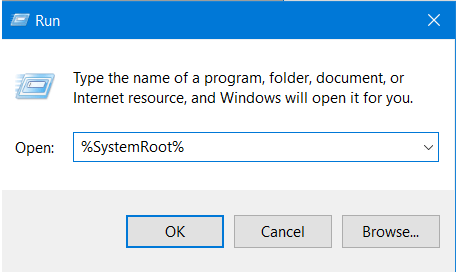
Step 8. Press Windows + R keys to open the Run dialog box. Then paste the dump file location to the Run box and hit Enter.
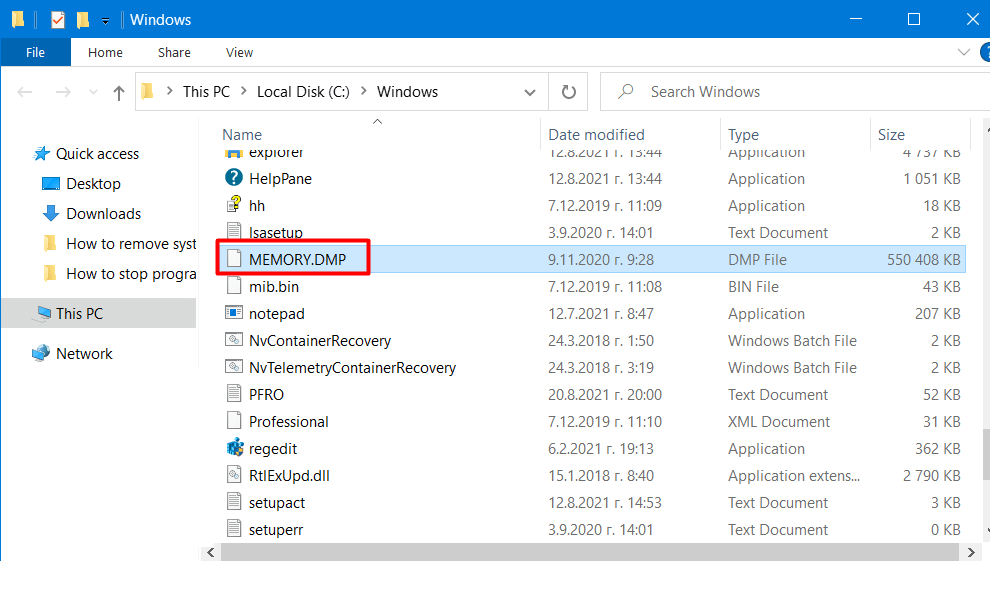
Step 9. Search for the file named MEMORY.DMP and delete it permanently.
Step 10. Restart your PC and the dump files will disappear.
Method 5. Delete Dump Files via CMD Commands
You can delete system error memory dump files via Command Prompt. By running commands listed in this part, you can remove dump files and other unnecessary files on your PC, such as system log files, temporary files, etc. Now follow the steps below.
Step 1. Type cmd in the Windows 10 search box. You can also press Windows + S keys on the keyboard to launch the search box.
Step 2. Right click the best match Command Prompt and select Run as administrator.
Step 3. On the Command Prompt window, type the following command one by one and hit Enter after each.
fsutil usn deletejournal /d /n c:
del “%temp%*” /s /f /q
del “C:$Recycle.bin*” /s /f /q
del “%systemroot%temp*” /s /f /q
vssadmin delete shadows /for=c: /all /quiet
Dism /Online /Cleanup-Image /StartComponentCleanup /ResetBase
Step 4. Restart your computer.
By following the steps in this post, I successfully deleted the system error memory dump files on my C drive. And Method 2 is awesome!Click to Tweet
Bottom Line
Now you should know what system error memory dump files are and how to delete it with 5 different methods if the normal Disk Cleanup utility doesn’t work. If you want to delete system error memory dump files Windows 10 to release some free space, try the above method right now!
If you have any question about how to delete system error memory dump file on a Windows PC, you can leave a message in the following comment zone and we will reply as soon as possible. If you have other better solutions, we are glad to have you share it with us. If you need any help when using MiniTool software, you may contact us via [email protected].
System Error Memory Dump Files FAQ
What are system error memory dump files in disk cleanup?
System error memory dump files are generated when your operating system crashes or encounters various blue screen errors. The dump files are stored on the C drive. If you run disk cleanup to scan C drive, you will find the system error memory dump files. You can delete them via disk cleanup.
How do I get rid of system error memory dump files?
The disk cleanup utility can be used to get rid of the system error memory dump files stored on the C drive. Besides, third-party space analyzer such as MiniTool Partition Wizard Free Edition can also help to find the memory dump files by the .dmp file extension and get rid of those memory dump files though its Delete option.
Where is system error memory dump files?
System error memory dump files are stored on the drive where the Windows operating system is installed. So, normally the system error memory dump files will be stored on the C drive.
How do I delete a win dump file?
- Type disk cleanup in the Windows search box.
- Right click on Disk Cleanup and choose Run as administrator.
- Select the drive (normally C drive) to clean up and click OK.
- Scroll down to find the system error memory dump files on the list.
- Check the box next the system error memory dump files and click OK to delete the win dump file.
Crash dump files offer insights into what caused errors on your device
by Matthew Adams
Matthew is a freelancer who has produced a variety of articles on various topics related to technology. His main focus is the Windows OS and all the things… read more
Updated on August 29, 2022
Reviewed by
Vlad Turiceanu

Passionate about technology, Windows, and everything that has a power button, he spent most of his time developing new skills and learning more about the tech world. Coming… read more
- The Windows system might just be man’s new best friend.
- On top of its numerous advantages, it also provides a process designed to store your RAM content in case of a system crash and dump it in a data file.
- The crash files are obviously useful and can help devs to further fix and prevent BSOD errors.
- However, they tend to pile up and claim quite a chunk of your storage space so you might want to delete them from time to time.

XINSTALL BY CLICKING THE DOWNLOAD FILE
This software will repair common computer errors, protect you from file loss, malware, hardware failure and optimize your PC for maximum performance. Fix PC issues and remove viruses now in 3 easy steps:
- Download Restoro PC Repair Tool that comes with Patented Technologies (patent available here).
- Click Start Scan to find Windows issues that could be causing PC problems.
- Click Repair All to fix issues affecting your computer’s security and performance
- Restoro has been downloaded by 0 readers this month.
Memory dump files, otherwise crash dumps, are system files saved during blue screen crashes. When a BSOD error message appears, Windows saves a copy of the system memory.
Those crash dump files can then assist developers to fix BSOD system crashes. Users can send the crash dumps to developers when they file support tickets.
Memory dump files can waste a lot of hard drive space. They can hog gigabytes of hard drive storage. Windows only automatically delete crash dump files when HDD space is limited.
However, users can also erase crash dumps with cleanup utilities.
How do I delete crash dump files in Windows?
1. Delete Crash Dumps Via the Command Prompt
- Users can erase crash dumps with a series of Command Prompt commands. To do so, open the Run accessory.
- Enter cmd in Run, and press the Ctrl + Shift + Enter keys.
- Then enter the following separate commands in the Prompt, and press Enter after entering each one.
fsutil usn deletejournal /d /n c:
del “%temp%*” /s /f /q
del “C:$Recycle.bin*” /s /f /q
del “%systemroot%temp*” /s /f /q
vssadmin delete shadows /for=c: /all /quiet
Dism /Online /Cleanup-Image /StartComponentCleanup /ResetBase
2. Turn Off Crash Dumps
- Users can turn off crash dumps to ensure they don’t hog any more HDD storage space. Enter Control Panel in Run’s Open text box and press Return.
- Then click System to open the Control Panel applet shown directly below.
- Click Advanced system settings on the left of the window to open an Advanced tab.
- Then press the Settings button under Startup and Recovery.

- Select the (none) option on the drop-down menu shown directly below to turn off crash dumps.
- Then click the OK button.
- How to open DMP files in Windows 10 [EASY STEPS]
- How to Disable Pagefile in Windows 7
- How to Resolve Microsoft Office Error Code 30204-44
3. Delete system error memory dump files in Disk Cleanup
Users can erase crash dumps with Windows’ built-in Disk Cleanup. This tool allows you to perform a clean and safe cleanup on your PC.
1. Launch Run with the Windows key + R keyboard shortcut.
2. Enter cleanmgr in Run’s Open text box.
3. Press Ctrl + Shift + Enter to open Disk Cleanup as administrator.
4. Select the C: drive on the Drive selection window, and click the OK button.
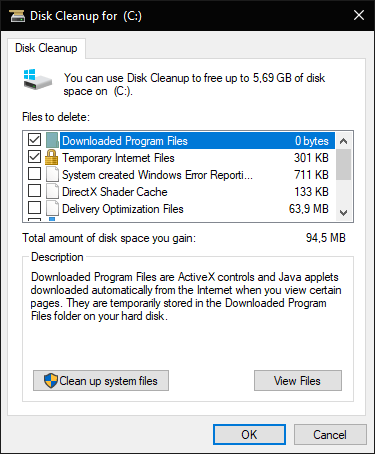
5. Select the System error memory dump files check box.
6. Then click the OK button.
7. Users who can’t find a System error memory dump files option in Disk Clean-up should open that utility via an elevated Command Prompt. To do that, enter the following line in cmd: %SystemRoot%System32Cmd.exe /c Cleanmgr /sageset:16 & Cleanmgr /sagerun:16
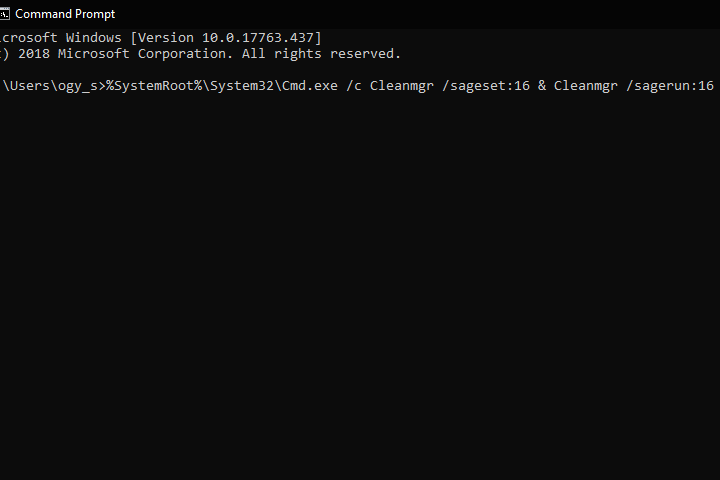
8. Press the Return key. Disk Cleanup will open with more checkbox options. Navigate to the System error memory dump files option and click to delete the files.
So, there are a few ways users can erase crash dumps in Windows. Deleting the crash dumps might free up quite a bit of hard drive storage space so make sure to do so.
Let us know which was your method of choice in the comments section below.
Still having issues? Fix them with this tool:
SPONSORED
If the advices above haven’t solved your issue, your PC may experience deeper Windows problems. We recommend downloading this PC Repair tool (rated Great on TrustPilot.com) to easily address them. After installation, simply click the Start Scan button and then press on Repair All.
![]()
Newsletter
If your system has crashed and experienced a Blue Screen of Death (BSoD), or a program or Windows feature suddenly crashes, Windows automatically generates a record of the conditions and circumstances under which the error occurred. This information is stored in dump files with the extension “.dmp.”
These dump files can help troubleshoot the root cause of the error so that it does not occur again.
This article contains everything you need to know about these dump files and how they can be opened in Windows, since there is no native method, so they can be analyzed to determine the cause of the error.
Table of contents
- Windows Crash Dump Files
- Types of Dump Files
- Complete Memory Dump
- Kernel Memory Dump
- Small Memory Dump/Mini Memory Dump
- Types of Dump Files
- How to Read and Analyze DMP Files
- Using WinDbg
- Download and Install WinDbg
- Open and Analyze dmp files using WinDbg
- Using WhoCrashed
- Using BlueScreenView
- Using WinDbg
- Final Thoughts
Crash dump files, also known as “mini-dump files,” are system-generated binary files that contain various information about a crash that may have occurred on your computer. Like Event Viewer, these files can be used to determine the cause of the error, and then use that data to fix it. Dump files can contain the following data in them, which can be helpful for the matter:
The list below highlights the content which can be found inside a mini-dump file.
- The Stop message (error code), its parameters, and other data.
- List of loaded drivers.
- The processor context (PRCB) for the processor that stopped.
- Process information and kernel context (EPROCESS) for the process stopped.
- Process information and kernel context (ETHREAD) for the thread stopped.
- Kernel-mode call stack for the thread that stopped.
Dump files are created by copying the data off the system memory and onto the computer’s storage. It uses the Windows Page File and requires at least 2MB of free space. With this information, you can understand how different dump files are created.
Windows can write debugging information in three types of dump files.
Types of Dump Files
Complete Memory Dump
Complete Memory Dump files are the largest of the dump files. In this case, the complete contents of the memory are written onto the dump file.
When generated by the system, all old Complete Memory Dump files are replaced and overwritten.
Complete Memory Dump files are saved to C:WindowsMEMORY.DMP file.
Kernel Memory Dump
Kernel Memory Dump files only contain data from kernel memory, which is why they are relatively smaller in size. Such files do not contain data from any unused, unallocated memory or the memory used by user-mode programs.
When generated by the system, all old Kernel Memory Dump files are replaced and overwritten.
Kernel Memory Dump files are also saved to C:WindowsMEMORY.DMP file, the same as Complete Memory Dump files. However, only one of these is saved at a time and is overwritten when another crash occurs.
Small Memory Dump/Mini Memory Dump
The minidump file, which we will discuss in this post, is the smallest kind of dump file. This file contains the information described above that can assist in determining the cause of the crash.
Minidump files generated by the system are not overwritten. Instead, a new one is generated.
Minidump files can be found at C:WindowsMinidump. If you do not find a directory named “Minidump,” it is likely because a dump file has not been created yet.
When a minidump file is created, Windows automatically includes the date it was created on. For example, in Windows 11, if a file is named “020322-18890-01.dmp,” “02” indicates the month, “03” indicates the date, and “22” indicates the year the file was created. “-01” at the end indicates it was the first dump file created that day.
The same is true for a minidump file created in Windows 10, which is automatically named something like “mini020322-01.dmp.”
Now let’s move on to opening and analyzing a dump file.
How to Read and Analyze DMP Files
As we mentioned, Windows does not allow you to open dump files directly. However, you can use other tools available online to open and analyze them. One of the most common tools to do so is through the Windows Debugging (WinDbg) tool, which can be downloaded through Microsoft Store. Continue reading the given guide below to use this tool to open and analyze memory dump files in Windows.
Using WinDbg
We have divided this section into 2 parts: Downloading and installing the WinDbg tool and then using it to analyze a dump file.
Download and Install WinDbg
- Open the WinDbg Preview page in the Microsoft Store and click Get.

- The browser will prompted you to open the Microsoft Store app, click Open Microsoft Store.
- From the Store app, click Get again.


The WinDbg tool will now begin to download and then install. We are now done with the installation phase. Let us now use the tool to open and analyze dump files.
Open and Analyze dmp files using WinDbg
- Open the WinDbg tool with administrative rights by searching for it through the search box, right-clicking it, and then clicking Run as administrator from the context menu.

- From the WinDbg tool, click File from the top menu.
- In the Start Debugging tab, click Open dump file.

- Now click Browse from the right pane within the tool and select the dump file that you want to analyze by navigating to
C:WindowsMinidump. When selected, click Open. - The tool will now open the dump file, which can take a few minutes. When the dump file successfully opens, type in the following command in the text field in front of “0: kd>“:
!analyze -v - WinDbg will now begin analyzing the dump file. This can take a few minutes to complete. Once completed, you should see the results in the top window.


In the example above, since we initiated a BSoD intentionally, it states “The user manually initiated this crash dump.” Otherwise, if it were an actual error, you would see different statements and information after performing the analysis of the dump file.
You can then use this information to troubleshoot the error that caused the crash.
Using WhoCrashed
Download WhoCrashed

WhoCrashed is available in both free and paid editions. However, the free edition is sufficient to open and analyze dump files. With this tool, you can obtain reports on the dump files with a single click. The tool will automatically scan your system files for any .dmp files and fetch the data within.
To do so, download WhoCrashed from the link given above, and run the .exe file to install in a few easy steps. Once installed, click Analyze from the ribbon menu at the top. The tool will then take a few seconds to scan any dump files and present the analysis. You can also view the .dmp files discovered from the Dump files tab.
Using BlueScreenView
Download BlueScreenView

BlueScreenView is a portable and small tool that can provide you with relevant information on minidump files. When you run this tool, it automatically picks up any .dmp files in the Minidump directory and displays the relevant information gathered from them. If there are multiple .dmp files, you can click on the one you want to analyze from the top field within the tool, and the information is presented in the bottom one.
Simply download the app from the link given above, extract the content and run the BlueScreenView application.
Final Thoughts
Dump files, regardless of their type, can be pretty useful when it comes to troubleshooting your operating system. However, the methods we have used above to analyze them may not be everyone’s cup of tea, as some of you may find them complex.
That said, there are more methods to analyze dump files using tools, but they involve using the Command prompt, not a Graphical User Interface (GUI). If you’d still like to learn more about it, you can read this detailed post by Microsoft on memory dump files.
Also see:
Subhan Zafar is an established IT professional with interests in Windows and Server infrastructure testing and research, and is currently working with Itechtics as a research consultant. He has studied Electrical Engineering and is also certified by Huawei (HCNA & HCNP Routing and Switching).
When your PC runs into a Blue Screen of Death (BSOD), it generates a dump file. These dumps get accumulated over time and again and consume a huge space of your drive. You can absolutely safely delete the items from your machine. So, today, we present you few simple ways to easily Remove System Error Memory Dump Files in Windows 11 or 10.
Let’s see –
Way-1: Conduct Extended Disk Cleanup
Extended Disk Cleanup utility provides more options than a conventional one. It also shows additional details like the edition of Windows and all. Follow the below-stated guidelines for accomplishing the task properly.
Step-1: Press Windows + S.
Step-2: Type cmd here and Command Prompt shows up below the Best match. Right-click on it and select “Run as Administrator“.
Step-3: Upon opening the elevated Command Prompt window, type or copy/paste the following at the blinking cursor:
cmd.exe/c Cleanmgr/sageset:65535 & Cleanmgr/sagerun:65535
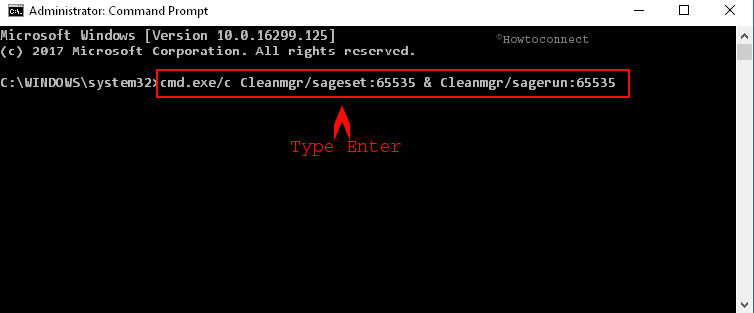
Step-4: Press Enter button and you come across a pop-up for Disc Cleanup Settings. Select the items in the list to clean and click OK afterward.
Step-5: Restart the PC and see if this made an impact on the machine as you successfully Remove System Error Memory Dump Files in Windows 11 or 10.
Way-2: Perform Elevated Cleanup
Here, you may raise a point as to why there is a need for an elevated cleanup. The regular cleanup fails to perform accurately when
1. The memory dump on your PC is waiting for the action to take.
2. The memory dump in the system is waiting to be examined.
In these cases. you need to carry out an elevated cleanup process and to do so, the steps are listed below.
Step-1: Launch the search bar from the taskbar and type in disk cleanup.
Step-2: You can notice Disk Cleanup as the result on top. Right-click on it and choose “Run as Administrator“.
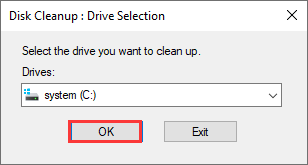
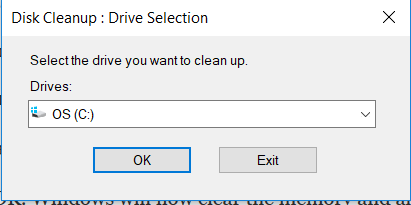
Step-3: Upon appearing the pop-up of Disk Cleanup: Drive Selection. Here, select (C:) and click the OK button. However, if your system drive letter is different, choose that.
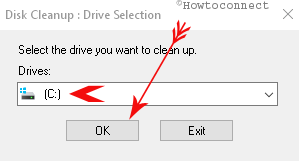
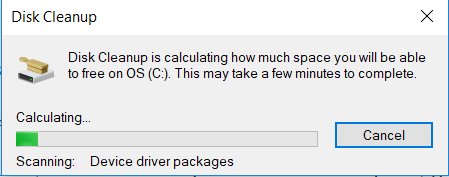
The system immediately scans all the files and checks what amount of space it can make free.
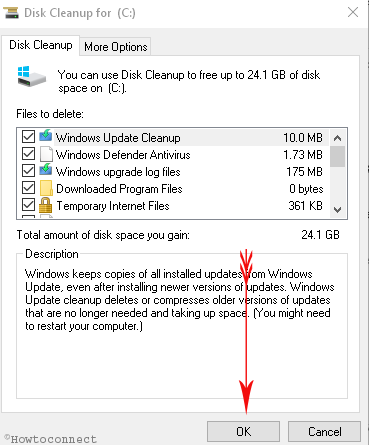
Step-4: Put the checkmark on the boxes you want to remove and click OK. These will be deleted and space will be freed as well.
To make this cleaning automatic, you can Schedule Disk Cleanup in Windows 10.
Way-3: Disable Indexing in Local Disk Drive C
Windows operating system maintains the index of the files using a service called Indexing. It is for recovery of files as well as improves searches. The system performs indexing automatically and keeps on updating its library too. But, sometimes, memory.dump occurs due to indexing too. This solution may come out effective if there is an existence of an unknown file(s) and that is occupying the space. So, pursue the below-given series of steps to disable indexing on your system drive.
Step-1: Click on This PC from desktop and select Local Disk C. If you installed the OS to any other drive, choose that one. Now right-click on this and reach out to Properties and click on it.
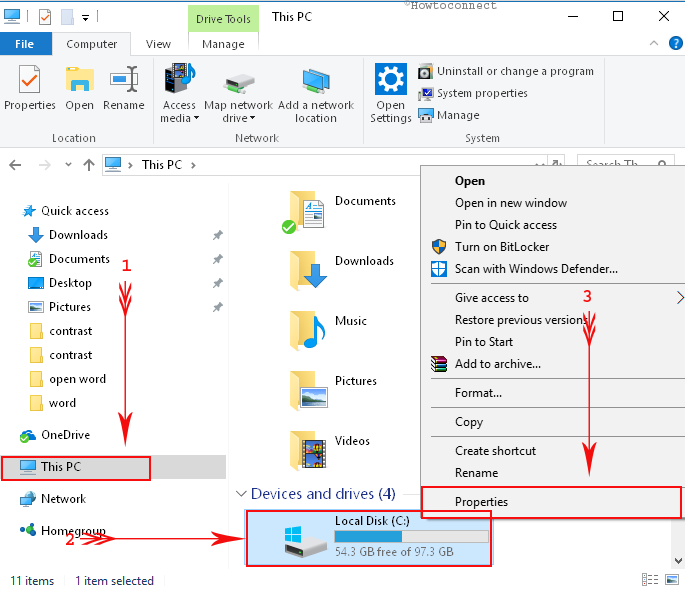
If you cannot see This PC on the desktop, read our tutorial to Bring This PC icon on Windows 10 Desktop Quickly.
Step-2: From the new dialog, select the General tab. Here, locate and uncheck the option namely ‘Allow files on this drive to have contents indexed in addition to file properties‘ (see screenshot).
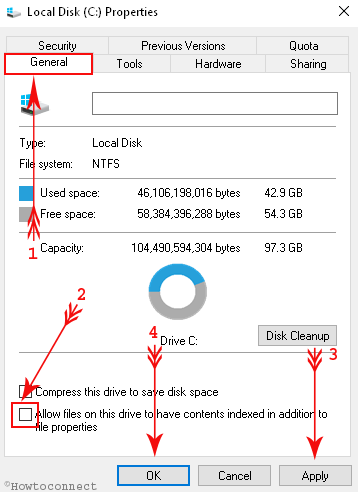
Step-3: Hit on Apply and then OK to make the changes effective.
Exit the Properties dialog and Reboot the PC.
Way-4: Through Command Prompt
Step-1: Launch the search box beside the Start menu from your computer and write cmd. When Search shows up Command Prompt on the top, put a hold on Ctrl + Shift keys and hit Enter key.
Step-2: Click Yes button at the prompt of UAC.
Step-3: On the following black window, copy/paste or type the given list of commands and press Enter key one after another.
fsutil usn deletejoumal /d /n c:
chkdsk /scan
compact /CompactOs:never
winmgmt /salvagerepository
del “%temp%*” /s /f /q
del “C:I$Recycle.binl*”/s /f /q
del “%systemroot%templ*” /s /f /q
vssadmin delete shadows /for—c: /all /quiet
Dism /Online /Cleanup -Image /StartComponentCleanup
/ResetBase
After finishing this task, leave the Command Prompt and Restart the computer. These commands will eventually Remove System Error Memory Dump Files in Windows 11 or 10.
Way-5: Manually Remove Dump Files
If you fail to resolve this issue by using the above solutions, you can try deleting them physically. At first, check the location of these files where the system created those. Navigate to the location using file explorer option and delete them. Follow these instructions to do so:
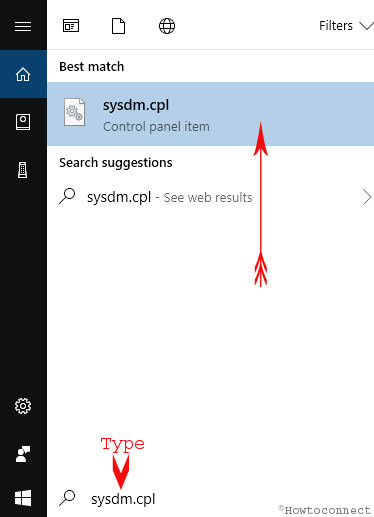
Step-1: Go to the search box, type sysdm.cpl, and hit Enter when you see the same command as the result.
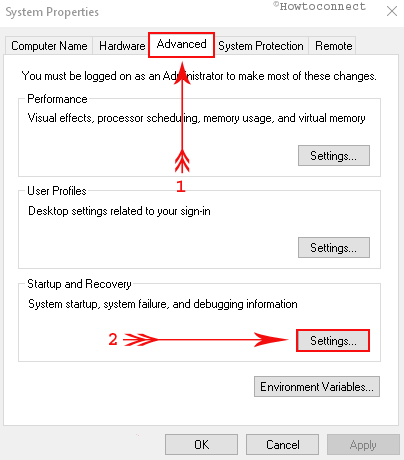
Step-2: This instantly shows up System Properties dialog on the PC screen. Switch to the Advanced tab and reach out to Startup and Recovery section. Click on Settings button as shown in the given picture.
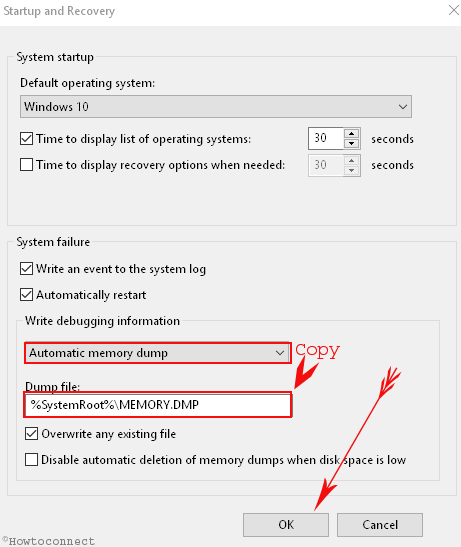
Step-3: From the new pop-up window, go to the Write debugging information section. Click the drop-down and choose Automatic memory dump.
Step-4: The next section Dump File displays the path by default. Copy this path and press OK button before leaving this window.
Step-5: Now, moving ahead, open the run dialog using Windows + R hotkeys. Paste the file path in the text field and press Enter key.
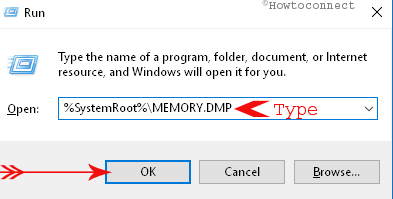
Step-6: Look for the files with name MEMORY.DMP and Delete it using the right-click option using the mouse. The system may prompt you for administrator rights for the sake of security, give permission for deletion.
However, users can try disk cleanup utility to eliminate this junk. Since it reaches out to a volume of 100 GB sometimes, you may need additional resolution methods. Therefore, we have discussed the best effortless ways to Remove System Error Memory Dump Files in Windows 11 or 10 OS.
Conclusion
So, you see that these dump files are a huge space-occupying element. Thus, it becomes a huge burden for you as they are piled up largely. So, you need to take care of these to avoid losing massive disk space. Therefore, you get to see certain effective methods to System Error Memory Dump Files in Windows 11 or 10. Read these methods properly and apply them carefully so that you can get rid of these dump files easily. If you are aware of any other methods, do write them to us.
If your PC gets a critical error(such as Blue Screen of Death(insert why my computer freezes link)) on Windows 10, the system creates a file called memory dump file. These files store data that contains information on why exactly did the critical error happen. It can help you to diagnose and determine the reason behind your problem.
The system error dump files can be very useful in situations where you plan to explore why you are getting errors on your PC or you plan to send them to the Microsoft support team for analysis. If that is not the case they are just wasting space on your hard drive. They can become as large as the total physical memory, and they will continue to grow larger over time.
In case you are running out of space on your PC(insert how to uninstall programs with Revo), or your problem is resolved, there are several methods that you can use to delete memory dump files on Windows 10
Methods to delete memory dump files Windows 10:
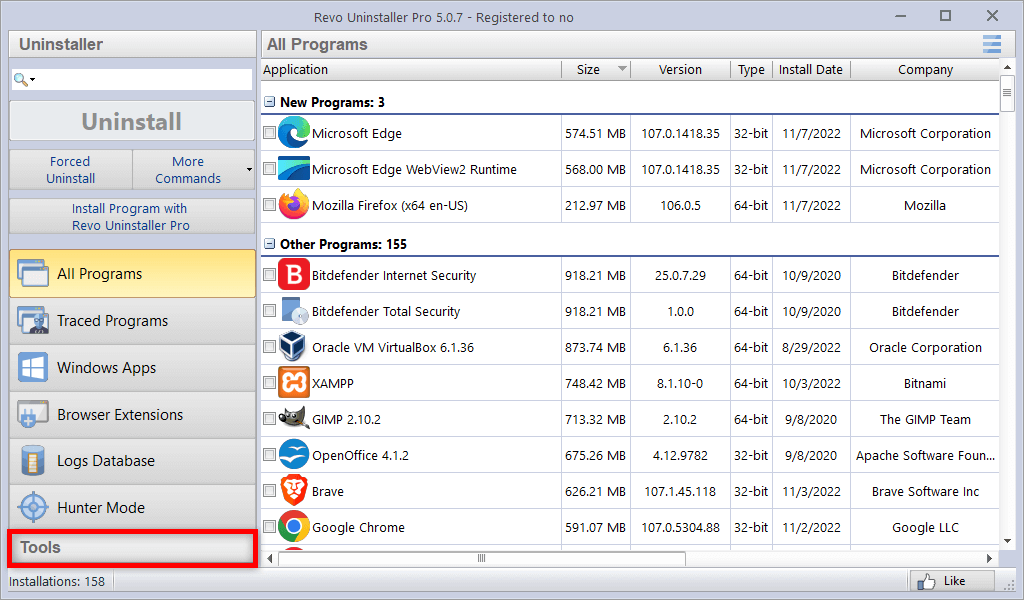
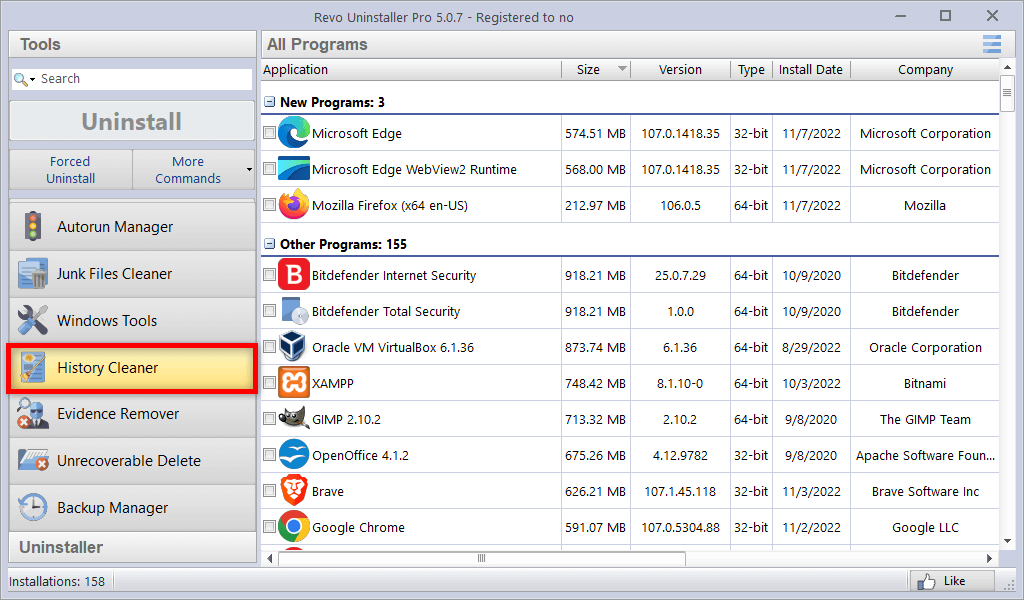
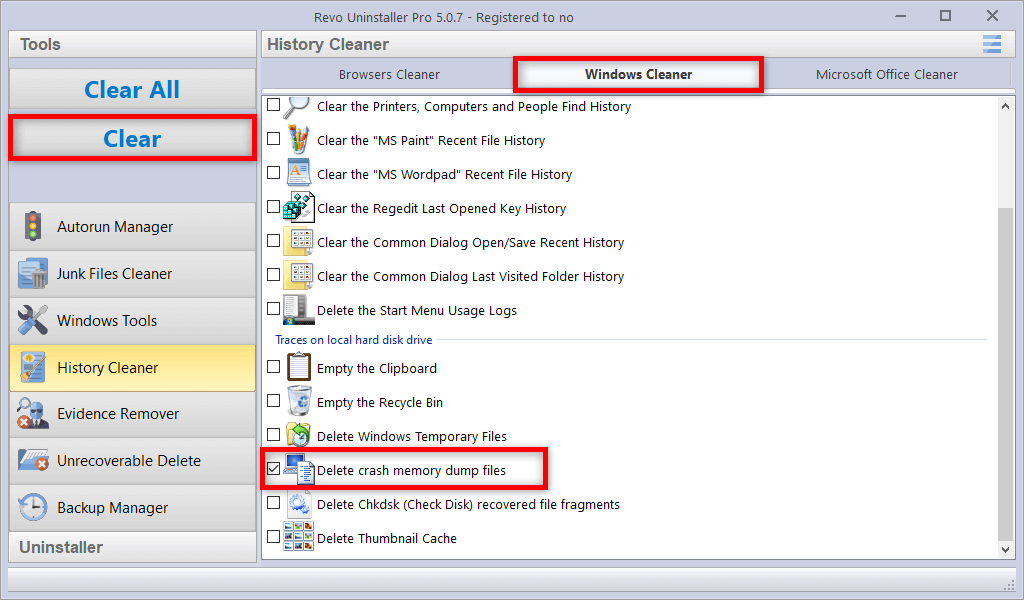
- Delete system error dump files with Revo Uninstaller Pro
- Clean system error dump files with Disk Cleanup
- Remove system error dump files with Windows Settings
- Erase system error dump files with Command Prompt
- Delete dump files from the File Location
- Turn off Crash Dumps
Delete system error dump files with Revo Uninstaller Pro
- Open Revo Uninstaller Pro
- Navigate to Tools

- Click on History Cleaner
- Select Windows Cleaner
- Select “Delete crash memory dump files”
- Click Clear
Clean system error dump files with Disk Cleanup
- Open the Start Menu
- In the search bar type Disk Cleanup and click the top result to open it
- Select the drive you want to clean(the system error dump files are stored in C:)
- Check the System error memory dump files option and the System error minidump files option
- Click the OK button
After the process is completed the memory dump and minidump files will be removed from your computer.
Remove system error dump files with Windows Settings
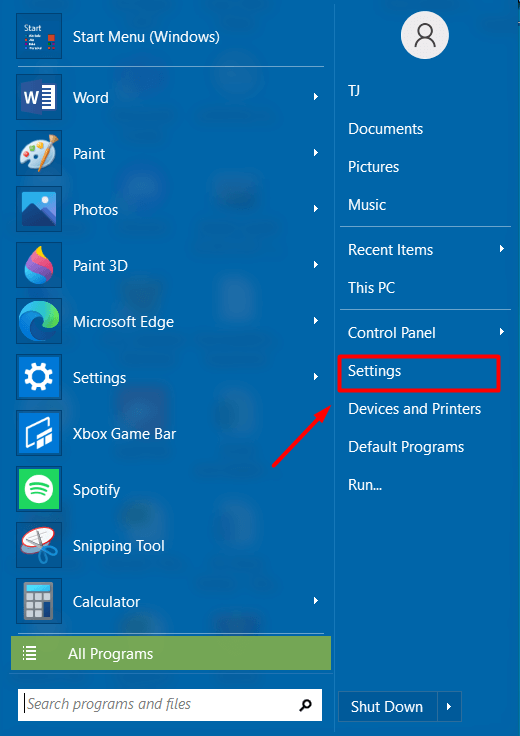
- Open the Start Menu and click PC Settings

- Click on System

- Click on Storage

- In the Storage, section select Temporary Files

- Check the System error memory dump file option
- Again optionally you can check the System error minidump files option

- Click the Remove files button
Erase system error dump files with Command Prompt
- Open the Start Menu
- Search for Command Prompt. Right-click the top result and select the Run as administrator option

- Type the following commands in the windows and press Enter:
del /f /s /q %systemroot%memory.dmp - To optionally delete the system error minidump files type this command and press Enter:
del /f /s /q %systemroot%Minidump*.*

Delete memory dump files from the File Location
- Open the Start Menu and type Control Panel in the search bar
- Click the top result and navigate to System and Security

- Click the System category

- Open the Advanced system settings

- Click the Settings button under Startup and Recovery

- Navigate to Write debugging information. Click on the drop-down menu and select a type of dump file. Now you can see where the files are stored.
- Copy the location of the dump file

- Open Run by pressing Win Key + R and paste the dump file location and hit Enter
- Select the MEMORY.dmp file and delete it permanently

- Restart your computer and the dump files will be removed

Turn off Crash Dumps
- Open the Start Menu and in the search bar type Settings
- Click the top result and click on System
- Click the “About” option
- Under the “Related Settings” section, click on the “Advanced System Settings” option
- Once the “System Properties” window opens, navigate to the “Advanced” tab
- Click “Settings” under the “Startup and Recovery” section
- Under the “Write debugging information” section, use the drop-down menu and select the “(none)” option
Once you complete the process, the system will no longer store system error memory dump files. If you change your mind, you can always revert the settings.
Deleting your system error memory dump files can free up a lot of storage space. In case that your device did not run into any problems recently or you like to regularly clean your junk files, there is a good chance that there won’t be any dump files to delete. Products such as Revo Uninstaller Pro give you the convenience to clean your computer easily and quickly with a couple of clicks.
Post Views: 2,048
System Error Memory Dump Files are created when your system encounters a crash or runs into some Blue Screen of Death error, it collects a copy of your computer’s memory at that time. It will help to diagnose the reason for the discrepancy.
There are different types of these dumps:
- Complete memory dump: The largest type of dump. Contains a copy of all data used by the operating system. If Windows was using 4GB at the time of the crash, the memory dump is of 4GB as well.
- Small memory dump: Smallest known of 256Kb only. Contains very little information, useful when debugging a problem.
- Kernel memory dump: It occupies 1/3rd of your physical memory size. It includes memory allocated to Windows kernel and hardware abstraction level.
- Automatic memory dump: Exact same size as of the kernel memory dump.
See Also: Fix The Error: ‘System Restore Does Not Appear To Be Functioning Correctly On This System’ Easily
The disk cleanup utility can be used to delete these files and free up space. Sometimes these dumps keep accumulating and reach a size up to 100GB. Many times, the disk cleanup utility fails. Below we have given specific solutions that will help you tackle the problem.
Method #0 Use Advanced System Repair Pro (Strongly Recommended)
Our tool will quickly repair common computer errors, protect you from file or data loss, malware, trojans, hardware failure and optimize your PC to boost for maximum performance. Fix PC issues now using 3 easy steps:
- Download this PC Repair Tool rated as «Excellent» on TrustPilot.com.
- Click on Start Scan button to find errors related to Windows.
- Click Repair All to fix all issues with Patented Technologies.
Using Elevated Cleanup
You can use the elevated clean-up utility to delete system error memory dump files. If memory dump is in the process to be analyzed, normal clean-up utility will not help.
1. At First, press the Windows and S keys simultaneously. It will open the Search bar.
2. Then type in “disk cleanup.” Afterward, hit Enter.
3. Then right-click on the result that comes up. Then select Run as administrator.
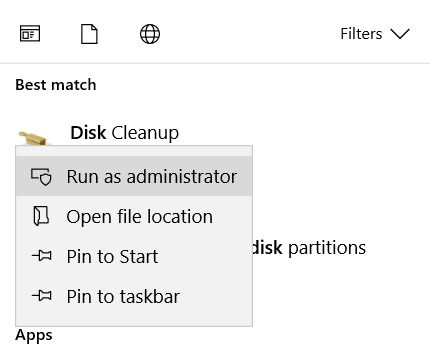
4. A small window will ask which drive you to want to clean up. Then select local disk C if your operating system exists in it. Afterward, press OK.
5. Windows will scan all files. Then it shows how much space can be freed.
6. Check all those boxes which you want to remove. Then Click OK. Windows will now clear the memory and allocate free space.
You can again check for space by running the clean-up utility. Elevated cleanup and normal cleanup may give different values. Larger values in elevated version is not a thing to worry. You can still remove the files.
Solutions to other errors –
- 11 Ways to Fix This App Can’t Open in Windows 10
- 10 Ways to Fix Critical Process Died Error in Windows 10
- What is RAVBg64.exe? 8 Ways to Fix it
- 8 Ways to Fix the Default Gateway is Not Available
Make Use Of The Extended Disk Cleanup
The extended disk cleanup utility gives you more options to choose when deleting system error memory dump files. It also provides you with increased details. You need administrator privileges for this solution.
1. At First, press the Windows and S keys together. The search bar comes up.
2. Then type in Command Prompt. Afterward, Right click on the result that shows, and select Run as administrator.

3. In the command prompt window, type in the following message & hit Enter.
Cleanmgr /sageset:65535 & Cleanmgr /sagerun:65535
4. You will be able to see various other options available in the extended disk clean-up utility.
5. Then select all those which you want to remove and click OK.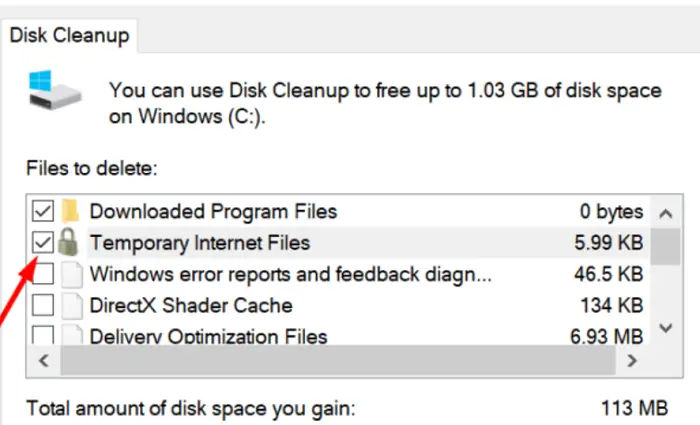
6. Finally, reboot your system.
Check if this solution works for you.
Check Out: 5 Ways to Fix Critical Structure Corruption Error in Windows 10
Deleting The Dump Files Physically
Now you can try to delete the system error memory dump files physically. First, we find the location of dump files. Then we navigate to that folder and delete the files manually.
1. At First, press the Windows and R keys simultaneously. It will open the Run dialog box.

2. Then type in Control Panel and hit Enter.
3. When in the Control Panel, go to System and Security.
4. Afterward, keep navigating through the options until you find the System category.
5. Then inside this, click on Advanced system settings. It is present on the left side.
6. Then under the Startup and Recovery tab, select Settings.
7. Then in the Dump file dialogue box, you can see where the dump files are being stored. Also in the drop-down list, you can check the storage for each type of dump files.
8. Afterward, press the Windows + R keys. Soon paste in the copied storage location of the dump file.
9. Then search for the file named as MEMORY.DMP. Delete it with administrator privilege confirmed.
Also, read –
- 3 Ways to Fix Error Code 0x8007000D in Windows
- {Solved} Fix Program Can’t Start Because d3dx9_43.dll is Missing
- 8 Ways to Fix Kernel Security Check Failure in Windows 10
- {Solved} Fix Unmountable Boot Volume (STOP: 0x000000ED)
Finally, restart your system to see if you have resolved System Error Memory Dump Files.
Disabling Indexing In Local Disk C
Indexing maintains an index for most of the files in the computer. This is done for easier searching and file retrieval. But, in some cases, indexing eats up a lot of space. Then this solution here is helpful if some unknown object occupies space.
1. At First, within your file explorer, go to This PC.
2. Then right-click on local disk C, or whichever drive has your operating system. Afterward, click on Properties.
3. In the Properties window, there will be an option at the bottom that says Allow files on this drive to have contents indexed in addition to filing properties. Uncheck this option.
4. Then click on Apply to save the changes.
5. Finally, reboot your system and see if the system error memory dump files exist.
Executing Commands In The Command Prompt
You can try a few commands in the Command Prompt which can help you free the System Error Memory Dump Files. You need an administrator account to follow this solution.
1. At First, press the Windows and S keys together. The search bar comes up.
2. Then type in Command Prompt. Afterward, right-click on the result that shows, and select Run as administrator.
3. In the command prompt window, type in the following commands. Then press Enter after typing in each command.
fsutil usn deletejournal /d /n c:
chkdsk /scan
compact /CompactOs:never
winmgmt /salvagerepository
del “%temp%*” /s /f /q
then del “C:$Recycle.bin*” /s /f /q
del “%systemroot%temp*” /s /f /q
vssadmin delete shadows /for=c: /all /quiet
Dism /Online /Cleanup-Image /StartComponentCleanup /ResetBase
4. Finally, restart your system and check if the current problem is solved.
Verdict
So, these were a few methods that should help in deleting the system error memory dump files. Also, do share and comment below if either of these methods helped you.
See Also: Should I Delete Windows Setup Files? (10 Step Guide)

Gravit Sinha is the founder of ValidEdge. Ever since he was a kid, he has been a problem fixer and that passion is what inspired him to start and grow this website! 🙂