Summary: You may have noticed that Windows 10 operating system tries to fix the disk errors when you boot your PC; but sometimes due to severe disk errors, your PC might get stuck while repairing the hard drive. Read this blog to get detailed information about hard error in Windows 10 & its Solutions.

Disk errors in Windows can be annoying and equally devastating if not fixed in time. Disk errors aren’t common in Windows 10 yet sometimes these errors can be caused due to bad sectors, sudden power failure, power surge, malware or virus infection, corruption, physical damage, etc. Due to this error, the internal or external hard drive connected to your Windows 10 system becomes inaccessible and files present in the affected hard drive become prone to corruption that can lead to data loss.

Solutions to Fix Disk Error in Windows 10
Below we have explained few fixes (step-by-step) to repair disk errors in Windows 10.
1. Startup Repair
For startup repair, you need a Windows 10 system repair or installation disc. You can use a tool like Rufus or Win32DiskImager to create a Windows 10 bootable USB drive. Then:
- Plug the bootable USB drive or disc to your system
- Press the power button to turn on the system and immediately start pressing the Boot Menu option key, usually F12, to enter the boot menu.
- Use up/down key to select the bootable USB drive or system repair/installation disc and hit Enter.
- On Windows setup screen, click ‘Next’ and then click ‘Repair your Computer’.
- Select Troubleshoot > Advanced Option > Startup Repair. Wait until the system is repaired.
- Then remove the installation/repair disc or USB drive and restart the system and let Windows 10 boot normally.
2. Check Security and Maintenance
Under Security and Maintenance, the Windows OS keeps you informed about the issues that pertain to your system’s health. It can help you pinpoint problems with the hardware and software. If your system is able to boot Windows 10 then perform the following:
- Go to Control Panel > Security and Maintenance. Click Maintenance to expand and then look for Drive Status
- If there is an issue with the hard drive, it is shown here otherwise you see all drives are working properly.
3. Use CHKDSK
Windows has a CHKDSK (check disk) utility that helps in fixing the logical file system and bad sectors that are causing disk errors. CHKDSK helps fix most issues with the hard drive and makes it accessible.
Follow the below steps to run CHKDSK on your affected hard disk.
- Press ‘Windows + S’ and type cmd.
- Right-click on Command Prompt and select ‘Run as Administrator’. When prompted, click ‘YES’.
- In the Command Prompt window, type chkdsk X: /r /f where X is the external hard drive letter and /r & /f are the CHKDSK parameters. Hit ‘Enter’ to start the scan and repair process.
Wait till CHKDSK finishes its job. Later, reconnect the external hard drive to use it or restart the system (if the internal hard drive is scanned) and check if your system still tries to repair the disk.
4. Use PowerShell
Windows 10 has a powerful shell called PowerShell that can be used to check and repair the drive errors using the Repair-Volume command.
- Press ‘Windows + S’ and type PowerShell. Right-click on ‘Windows PowerShell’ and select ‘Run as administrator’.
- In the PowerShell command line, type Repair-Volume C –Scan where C is the volume or drive letter. This command scans the hard drive volume for errors. If errors are found, run next command.
- Type Repair-Volume C –OfflineScanAndFix and hit ‘Enter’ to perform an offline scan and fix errors found on the drive. Wait till the process is finished
- Or type Repair-Volume C –SpotFix to fix an issue by taking the volume offline
Restart the system after repair and type Repair-Volume C –Scan in PowerShell to check if the errors are fixed.
5. Data Recovery Tool
If your system is not able to boot and gets stuck in disk repair process, you should immediately stop using it instead of rebooting again and again, as it may further damage your system. Immediately remove the hard drive from your Windows 10 system and get an HDD enclosure to connect the affected hard drive to another PC.
Then,
- Download the Stellar Data Recovery- Standard for Windows software.

- Connect the affected hard drive to the system via USB port and launch the program.
- Select what files you want to recover from the given options and click ‘Next’.

- Under Connected Drives, select your affected drive and turn on the Deep Scan toggle switch that appears at the bottom-left corner.

- Click ‘Scan’ and wait until the process is finished.
- After the scan, the folders containing the scanned files are displayed in the left tree-view pane. Click on ‘File Type’ tab to sort them according to file type.

- Click on a folder in the left tree-view pane to display the folder content in the right panel of the software window. You can click on any file to preview it and use the search box to find and recover specific files and folders from the scanned results.
- Click the checkbox of the files and folders that you want to recover and then click the ‘Recover’ button. A pop up appears.
- Click ‘Browse’ to select the location to save recovered files. Make sure not to select the same drive from where data is to be recovered. Click ‘Save’ and wait till the saving process is completed.

Now that you have successfully recovered your important files and other data, you can format the hard drive. You must perform full/normal/low-level format on the hard drive to fix the issue. Quick Format is not recommended.
Conclusion
To avoid disk errors, it’s important to check the hard drives on a regular basis (once a week or month) using tools like CHKDSK and S.M.A.R.T. – the hard drive monitoring system. This helps in determining exact disk errors and fix them with ease before the drive becomes inaccessible or corrupt. As always, use Stellar Data Recovery- Standard for Windows tool to recover data from a corrupt, inaccessible, formatted, and even reformatted hard drive or its partitions. The tool supports recovery from exFAT, FAT(FAT16, FAT32), and NTFS formats.
About The Author
Aruna
Aruna Attri is a Senior Data Recovery Expert at Stellar®. She is a technology blogger and Windows expert. She has experience in Windows data recovery domain. She loves to troubleshoot Windows issue and write technical tips and tutorials.
Best Selling Products

Stellar Data Recovery Professional
Stellar Data Recovery Professional softw
Read More

Stellar Data Recovery Premium
Stellar Data Recovery Premium for Window
Read More

Stellar Data Recovery Technician
Stellar Data Recovery Technician intelli
Read More

Stellar Data Recovery Toolkit
Stellar Data Recovery Toolkit is an adva
Read More
Windows has a built-in test tool which often warns you of errors regarding your hard drive or partition. Among the many kinds of warnings, an extremely dreadful one is «A disk read error occurred». If this error happened to you, you have come to the right place — we have 7 useful solutions for you to fix this problem.
Help, a Disk Read Error Occurred Windows 10/8/7/XP!
A disk read error is very common; it usually occurs as soon as your computer boots up from SSD, HDD or another hard drive and has affected a large number of users of Windows 10/8/7/XP.
This error has the message «A disk read error occurred. Press Ctrl+Alt+Del to restart» on the screen like the picture below:
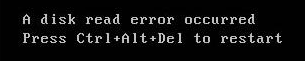
This message indicates that your hard drive has a problem when the operating system attempts to read the disk. That is, the disk is preventing the computer from entering into its operating systems.
Simply put, a disk error could be caused by several reasons such as incorrect boot order, BIOS issue, IDE cables failure, incorrect MBR configuration, faulty hard drive, etc.
When meeting such an issue, no matter how many times you restart your computer by pressing “Ctrl+Alt+Del” keys, this error still exists.
In the presence of this issue, it will still exist regardless of how many times you restart your computer by pressing “Ctrl+Alt+Del”. In fact, a disk read error is not a problem that can be solved by a simple restart. But don’t worry, this post will tell you top seven useful solutions to a disk read error occurred SSD.
How to Fix Disk Read Error Windows XP/7/8/10
Solution 1: Boot OS from Hard Drive
If a disk error occurred, the first thing to do is to check whether the boot order is correct in BIOS.
There are different ways to get into BIOS in different computer models and operating systems. When turning on the computer, the first boot screen will usually show you what key to press to go into the BIOS.
You can refer to this guidance How to Enter The BIOS On Your Computer. Once you are in BIOS, find the boot order section. In the boot order section, check to make sure the correct hard drive is placed as the first boot priority before any others in the listing.

Changing this setting might be enough to help your computer boot normally. If it is still unbootable, try the next solution to fix disk error occurred.
Solution 2: Reset or Upgrade BIOS
Resetting your computer BIOS to default or upgrading to the latest version might be able to solve «A disk read error occurred» in Windows XP/7/8/10.
Here is the step-by-step guide to reset BIOS:
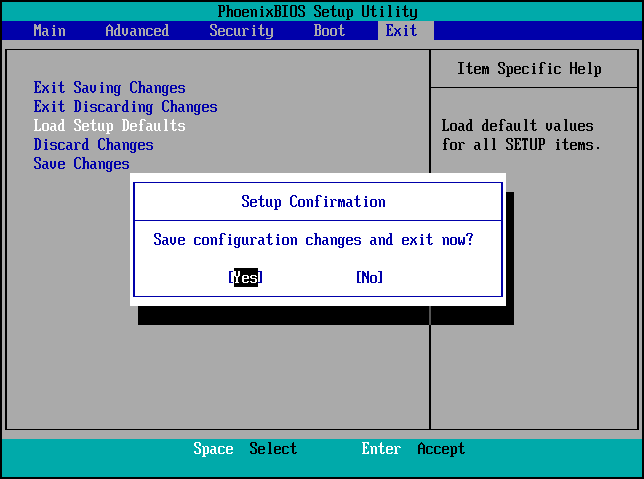
- Press a specific key (F2, F8, F12, Esc or Del) according to your computer model and OS to enter into BIOS.
- Find the option to reset BIOS to default.
Tip: The option name is different depending on different computer manufacturers and BIOS versions, which can be «Load BIOS Defaults», «Load Default Settings», «Load Fail-Safe Defaults», «Load Setup Default» or «Get Default Values». Choose one according to the real case, then save this change.
If the disk read error on boot up persists, try the following solution.
Solution 3: Repair Master Boot Record and Boot Sector
A corrupted or damaged Master Boot Record or boot sector could cause disk errors. Therefore, repairing the MBR or boot sector might be able to fix the issue»A disk read error occurred» with USB boot.
You can use a professional and reliable partition and disk management tool — MiniTool Partition Wizard — to repair your MBR in Windows XP/7/8/10.
As a dedicated partition manager, MiniTool Partition Wizard could be used for many operations such as resize/move/extend/copy/wipe partition, rebuild MBR, migrate OS to SSD/HD, copy disk, recover lost partition, perform data recovery, and so on.
Here we strongly recommend MiniTool Partition Wizard Professional Ultimate Edition. This edition has a feature called «Bootable Media» based on Win-PE; it is designed to manage disks and partitions when the operating system fails to boot or when there is no operating system.
Note: MiniTool Partition Wizard Free Edition doesn’t support Win-PE Bootable Media. In order to repair MBR quickly and effectively, a license is needed..
Buy Now
Follow the steps in these two articles to create bootable media using MiniTool software:
- How to Build Boot CD/DVD Discs and Boot Flash Drive with Bootable Media Builder?
- How to Boot from Burned MiniTool Bootable CD/DVD Discs or USB Flash Drive?
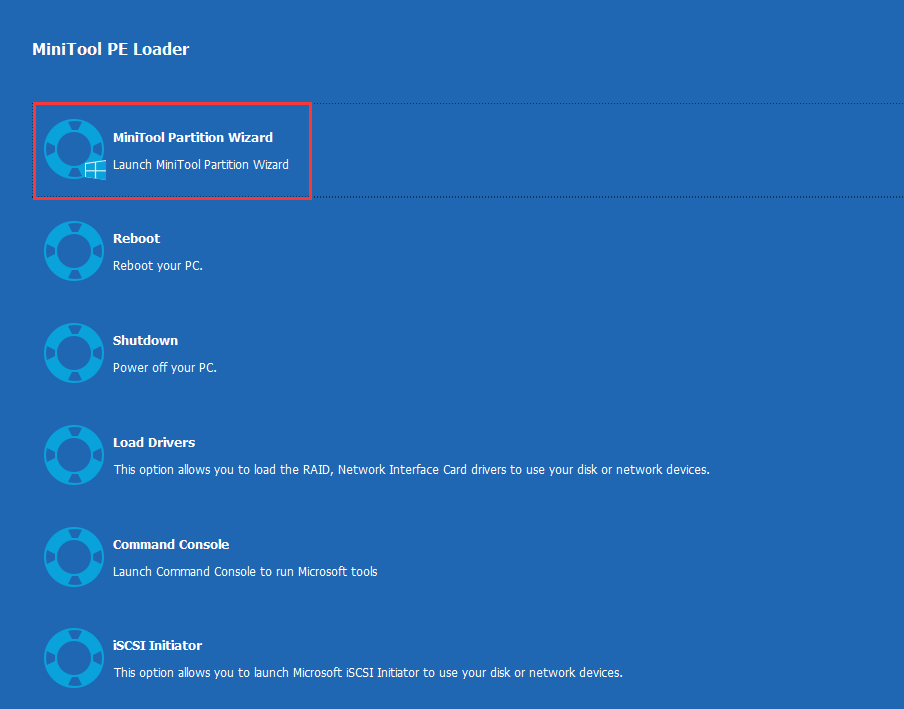
Step 1: After booting your computer from a MiniTool Partition Wizard Bootable Disc, you will enter the MiniTool PE Loader interface. Click «MiniTool Partition Wizard» to continue.
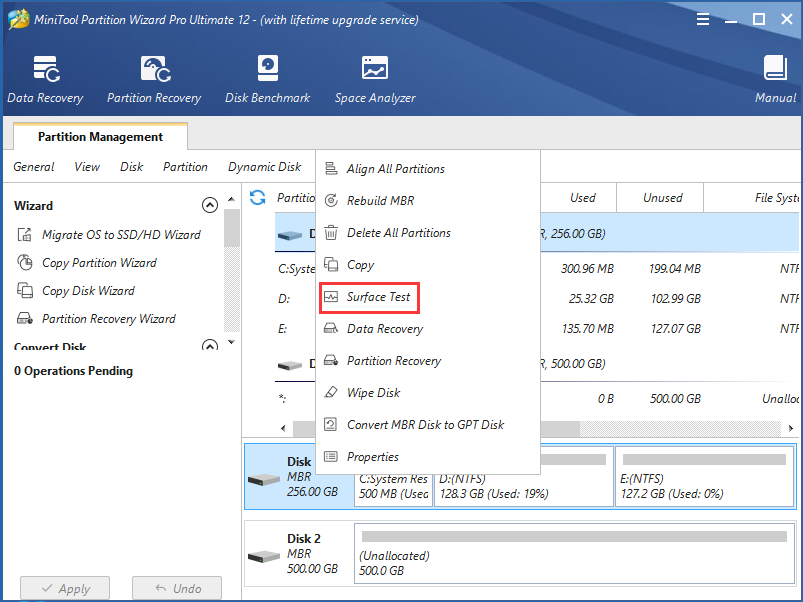
Step 2: In the main interface of MiniTool Partition Wizard, select the target hard drive with the operating system and click «Rebuild MBR» from the «Check Disk» menu. Or, choose this feature from the context menu.
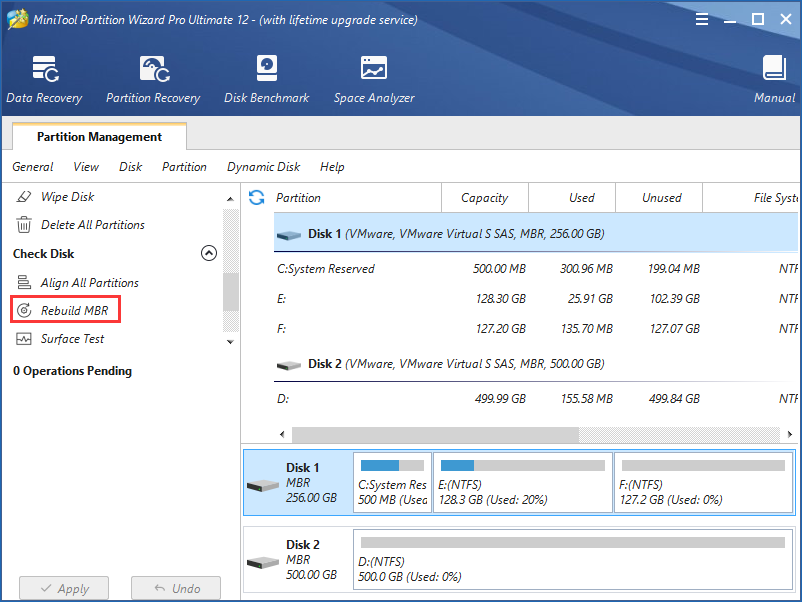
Step 3: Then click «Apply» to execute this change.
Tip: After repairing MBR, please remember to change the boot order before restarting your computer. Your computer should be bootable now.
Solution 4: Test Your Hard Drive
If your hard drive has a bad sector, it could cause the issue “a disk read error occurred” during the process of computer startup as well.
This issue appears quite frequently in Windows XP/7/8/10, so you should check the disk surface to see if there are any bad sectors.
To do this, purchase MiniTool Partition Wizard Pro Ultimate Edition and use «Bootable Media» to create a bootable USB flash drive or CD/DVD. After that, restart the computer from the bootable device you just created.
Buy Now
Step 1: Right-click the target hard drive (SSD or HDD) that contains the Windows XP, 7, 8 or 10 operating system and then click «Surface Test«. This feature is designed to scan and test each sector of the hard disk.
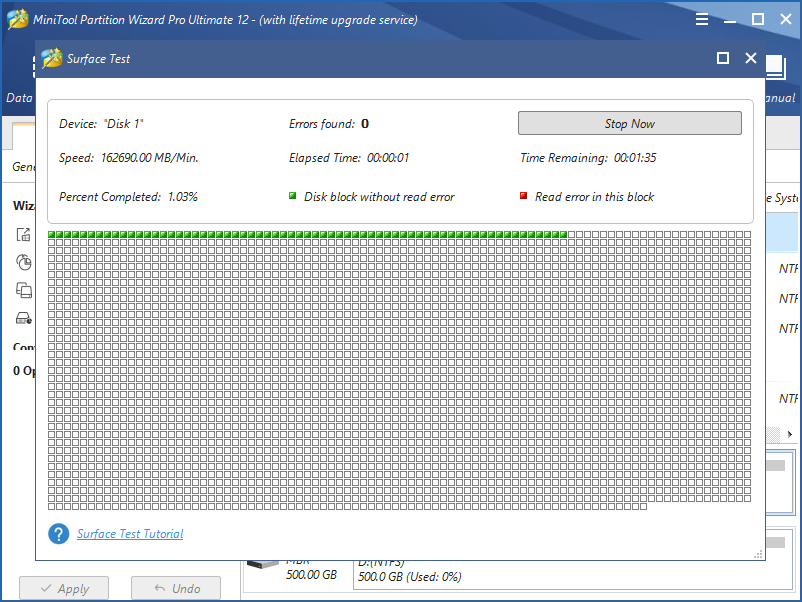
Step 2: Click «Start Now» to start scanning all sectors of your disk. Refer to the following screenshot: MiniTool Partition Wizard will mark «disk block without read error» in green, and mark «read error in this block» in red.
All sectors of your disk should be tested completely within a few minutes.
A: Shield Bad Blocks
After finishing the disk test, if there are some bad sectors, you should take a measure to shield them. Unfortunately, MiniTool Partition Wizard doesn’t have this feature. Instead, we find What to Do If I Find Bad Sectors on Hard Drive in Windows 10/8/7?.
Tip: When there are bad sectors in the disk, Windows is telling you that it might have detected a hard disk problem. Click this post for more information.
B: Back up Important Files
When there are bad sectors on your hard drive, due to data security reasons, you should back up your important files after shielding them. Otherwise, the data could be lost.
How to make a backup while the system is unbootable with «A disk read error occurred» message? Don’t worry, you can also ask MiniTool Partition Wizard Bootable CD for help.
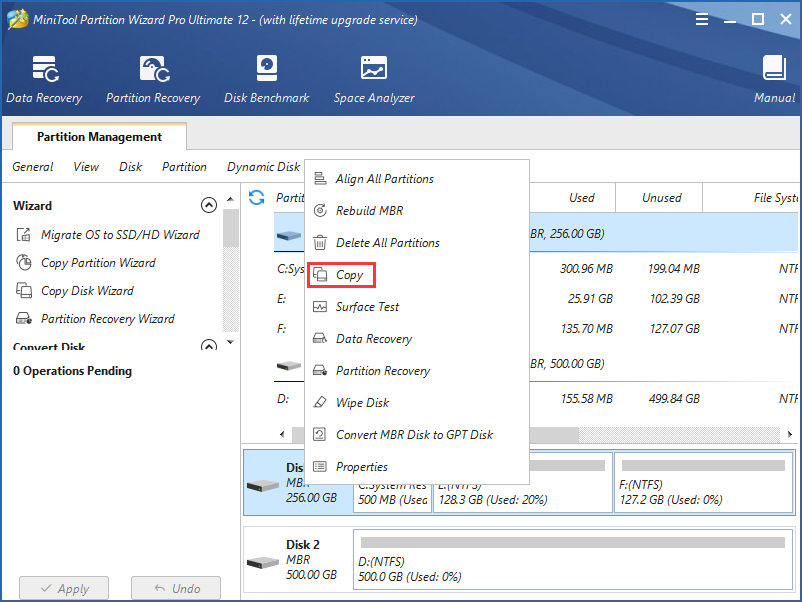
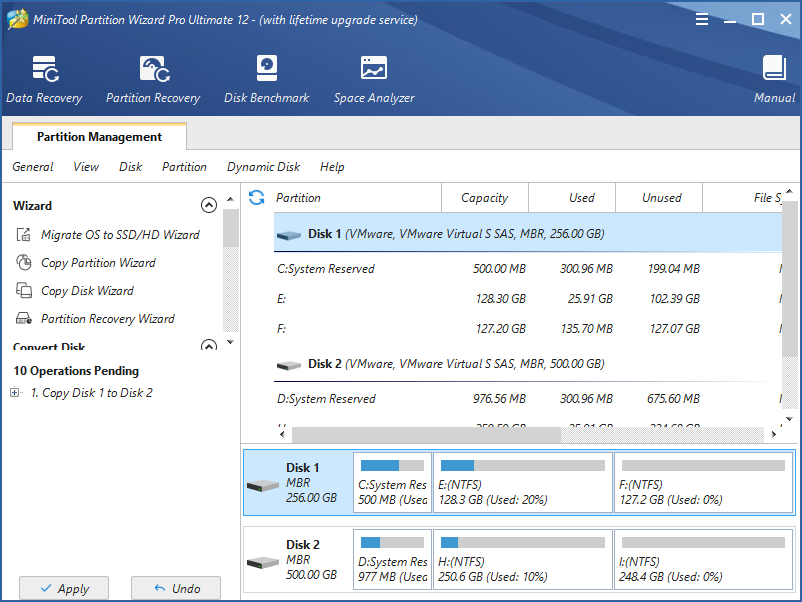
Step 1: In the main interface of MiniTool Partition Wizard, right-click the disk and select «Copy Disk» from the context menu.
Step 2: Select a destination disk to copy all data on the source disk to.
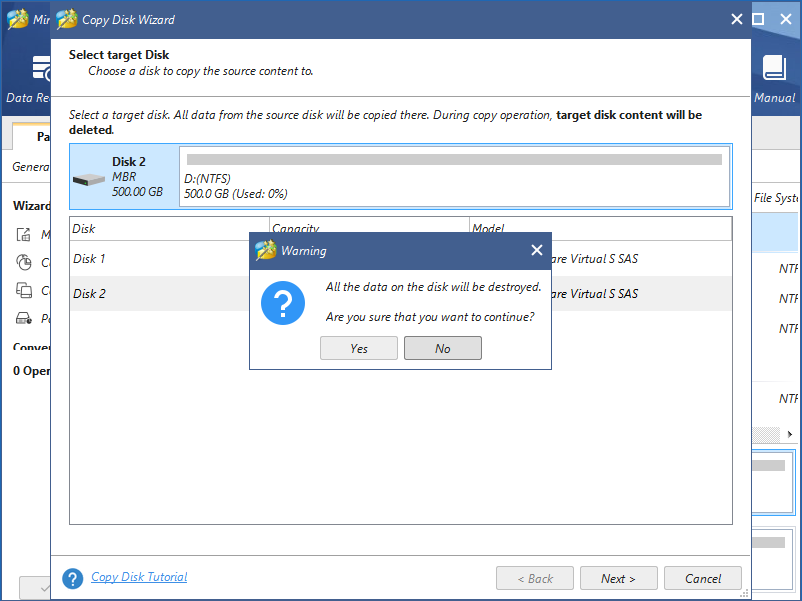
Warning:
- During the process, the content of the target hard drive will be deleted, so an empty disk would work the best. If the target disk contains data, please ensure the important data has been backed up.
- The target disk size should be larger than the used disk space on the source disk.
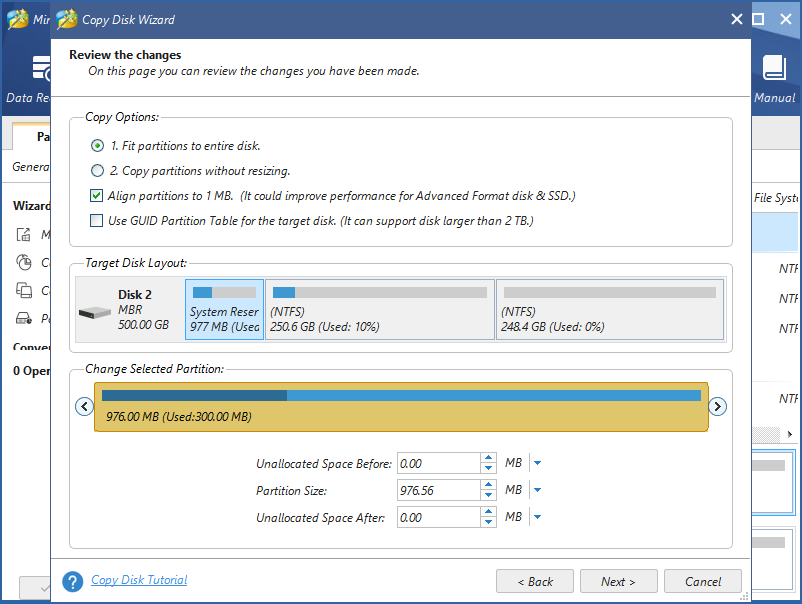
Step 3: Choose a copy option between «Fit partitions to entire disk» and «Copy partition without resizing«.
Attention:
- You can check the «Align partitions to 1MB » option to improve the performance for advanced format disk & SSD.
- To change the target disk to GPT, check «Use GUID Partition Table for the target disk«.
Step 4: MiniTool Partition Wizard will advise you to modify BIOS boot order. Feel free to ignore it since it is unnecessary for a backup in this case.
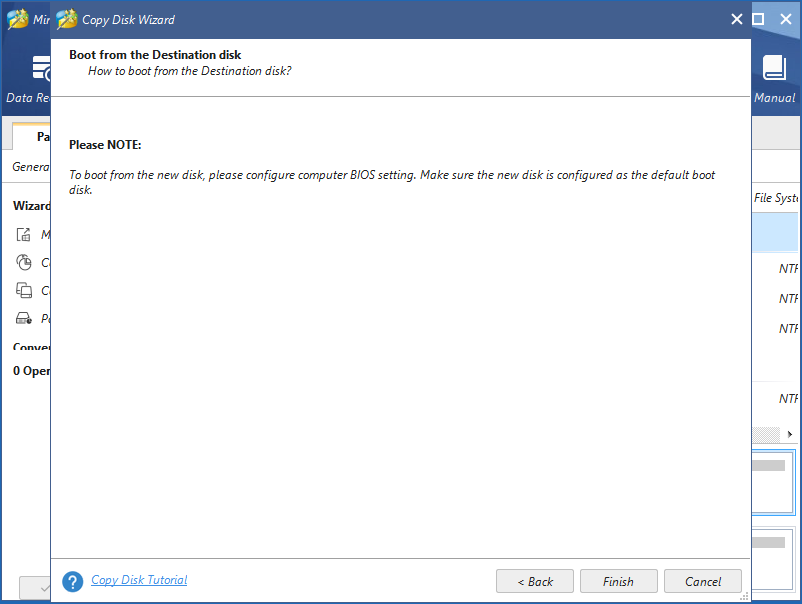
Step 5: Finally click «Apply» to finish all changes.
With the help of MiniTool Partition Wizard Bootable Edition, you can easily fix the disk read error. To boot your computer, get the Professional Ultimate Edition and use “Bootable Media” to create a bootable disc now.
Buy Now
Tip: In addition to MiniTool Partition Wizard, you can also use the professional Windows backup software, MiniTool ShadowMaker, to back up files on the hard drive in Windows XP/7/8/10. It also has Bootable Edition to fix the «A disk read error» issue.
Free Download
Solution 5: Check Your Hard Disk IDE Cables
A disk read error can be caused by bad or incorrect IDE cables that are loose or defective.
To rule out this possibility, you can open the computer’s hood and check whether each IDE cable is fastened completely on both ends. If there is something wrong, the faulty cables will need to be replaced to fix «A disk read error occurred».
Solution 6: Test RAM
Sometimes, read disk error is related to a faulty RAM stick or RAM slot. In this case, it is necessary to make a completely non-destructive and exclusively informative test on your computer’s RAM.
You can download an appropriate version of Memtest86+ to check the RAM. Follow the guidance here: How to Test PC Ram with MemTest86.
If this tool finds errors, try inserting your current RAM sticks into different RAM slots to confirm whether that the problem exists in the RAM stick or a RAM slot. Then you can take corresponding measures to fix it.
Solution 7: Rescue Data
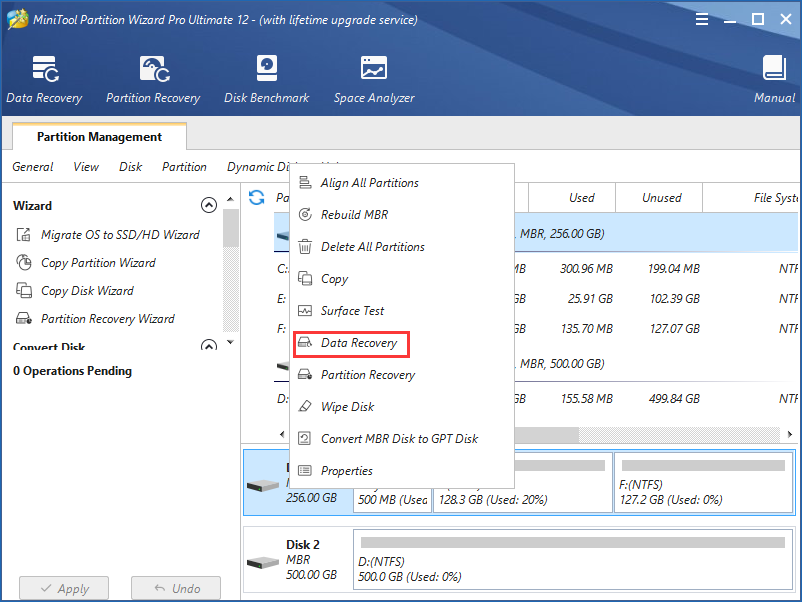
If you have tried all the above solutions but still receive disk read error on boot up, you can consider recovering data from your hard drive. Your partition can get lost, so try MiniTool Partition Wizard with its «Partition Recovery» feature in the toolbar to retrieve the lost partition as well as data.
If your partition isn’t lost but fails to boot your computer while showing an error message, your disk might be damaged. In this case, please try «Data Recovery» in at least a MiniTool Partition Wizard Ultimate Edition. With this feature, you can retrieve data from the damaged partition in Windows XP/7/8/10.
Buy Now
Another data recovery software, MiniTool Power Data Recovery, is also helpful for retrieving data from a corrupted hard drive.
After recovering data, then reinstalling operating system is a good choice. Please prepare a Windows installation disc and then insert it into your computer. Next start to install a new OS according to the wizards.
Click to Tweet
Bottom Line
Has «A disk read error occurred» message taken over the screen of your Windows XP/7/8/10 on desktop/laptop upon boot up? Take it easy now! Try these solutions above to fix the disk read error.
If you have any suggestion or advice, welcome to email us via [email protected] or leave a comment below.
A Disk Read Error Occurred FAQ
How do I fix a disk read error?
- Check the boot order
- Reset or upgrade BIOS
- Repair MBR and boot sector
- Test your hard drive
- Check the hard disk IDE cables
- Test RAM
- Rescue data
What does a disk read error occurred mean?
“A disk read error occurred” is a common error that you can encounter and it indicates that Windows detects a hard disk problem or the process of reading hard disk goes wrong. Restart the computer by pressing Ctrl + Alt + Del cannot fix the error and you can still get the same screen.
How long can repairing disk errors take?
| Workable Solutions | Step-by-step Troubleshooting |
|---|---|
| Fix 1. Use system file checker to fix hard disk error | Step 1: Type cmd in the search bar and click Enter; Step 2:Type sfc /scannow and hit Enter…Full steps |
| Fix 2. Run CHKDSK to fix the hard disk problem |
Method 1: Step 1: Press «Win+R» keys to open Run and type cmd and hit Enter to open Command Prompt…Full steps (Clean Genius) Method 2: Step 1: Click «File Showing» to enter the next step…Full steps |
| Fix 3. Use partition manager software to check and repair hard disk/drive errors | Step 1: Right-click the target partition that has a problem; Step 2: Choose «Advanced» > «Check File System»….Full steps |
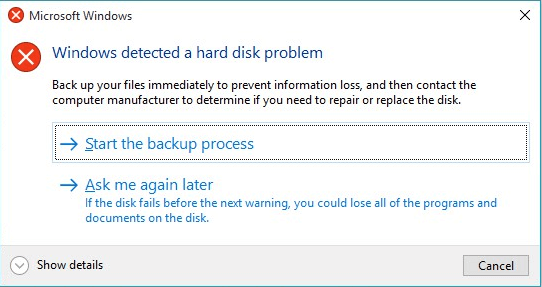
Windows Detected a Hard Disk Problem, Help!
«Have you ever met this issue that your computer suddenly pops up an error message, warning you ‘Windows detected a hard disk problem’?
This morning after I started my PC, the error message keeps popping up, telling me that ‘Windows detected a hard disk problem’ and asking me to start the backup process. It was quite confusing, and I don’t know how did this problem happen to my computer. And I’m wondering what reasons can cause a hard disk problem and how to fix this issue. Please do help me if you know how to fix the hard disk problem on Windows PC. And I’m using Windows 8. Thank you in advance.»
It seems that the hard disk error/problem is no longer a new question. Instead, this problem has been bothering almost all Windows users for quite a long period. Even Windows 10 users also have ‘Windows detected a hard disk problem’ issue in their PCs. So how to fix such an issue? Let’s find the reasons and causes of why hard disk problems occurred and solutions to fix hard disk problems right here now.
Why Hard Disk Problem/Error Occurs?
Before finding solutions to fix the hard disk problem, we highly recommend you find out the causes of the problem. This would be very helpful for you to avoid a similar issue from happening again.
1. Causes of hard disk problem — How did problems occur?
- Hard drive/disk failure;
- System errors such as registry error etc;
- Logical/mechanical error;
- File system corruption/damaged;
- Bad sectors occur on hard disk partition;
- Virus attack;
- False operation/human error etc.
If any one of those issues mentioned above happens to your hard drive on PC, Windows would detect the problems and remind you of the error message — ‘Windows detected a hard disk problem’.
3 Fixes to ‘Windows Detected a Hard Disk Problem’ Error
So how can you exactly fix the error in your PC? If you are looking for methods to fix the hard disk problem, continue reading and you’ll get what you want here now.
1. Use system file checker to fix hard disk error
Windows provides some basic tools to help repair errors, for example, the system file checker. This simple tool can help users check the system file status and solve many other seemingly serious problems. Most important, it is not complicated to use. Here are the detailed steps of how to use the Windows system file checker:
- Type: cmd in the search bar and click Enter.
- Type: sfc /scannow and hit Enter.

This command will scan all protected system files and replace all corrupted files with a backup copy. After the process is finished, your hard disk would work properly again.
2. Run CHKDSK to fix the hard disk problem
CHKDSK is a system tool and command in computer operating systems. It verifies the file system integrity of a volume and attempts to fix logical file system errors. To run chkdsk command to check and fix your system problems, please follow the steps below.
- Press «Win+R» keys to open Run and type: cmd and hit Enter to open Command Prompt.
- Type: chkdsk C: /f /r /x and hit Enter.

CHKDSK alternative
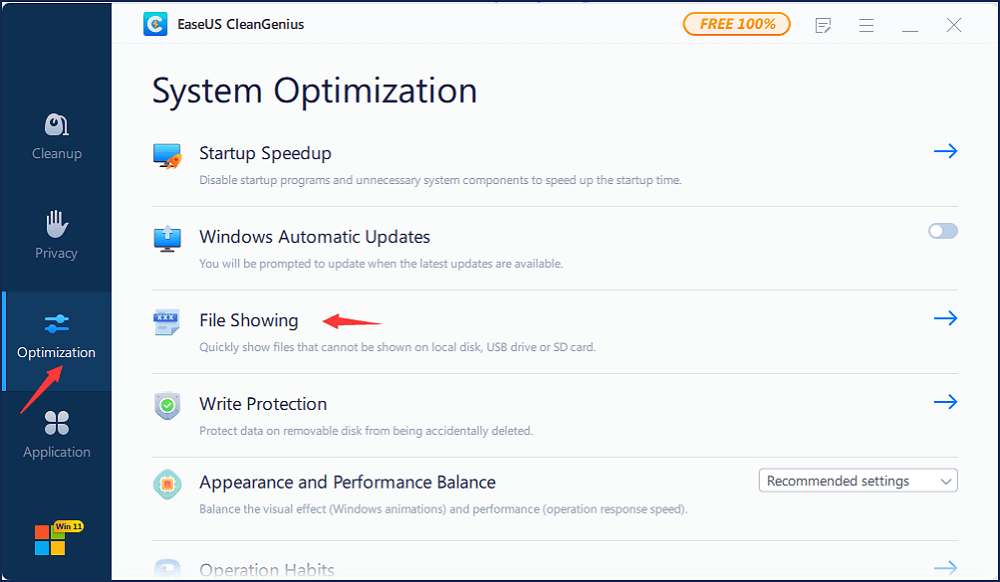
Download EaseUS CleanGenius and install it on your computer. Let’s start checking and refixing file system error on your device now.
Step 1. Click «File Showing» to enter the next step.
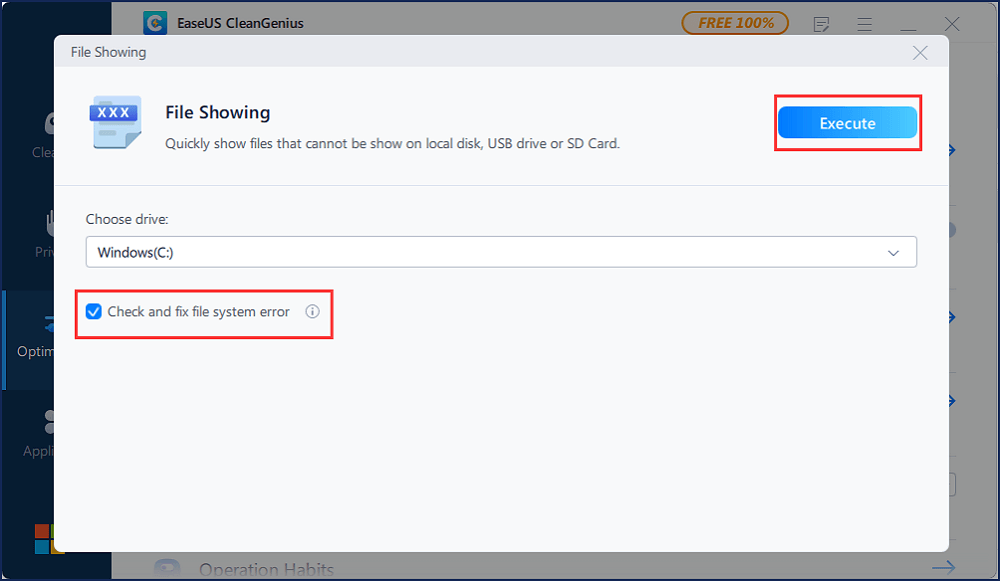
Step 2. Choose the target device and tick the box of «Check and fix file system error». Click «Execute» to start fixing the problematic device.
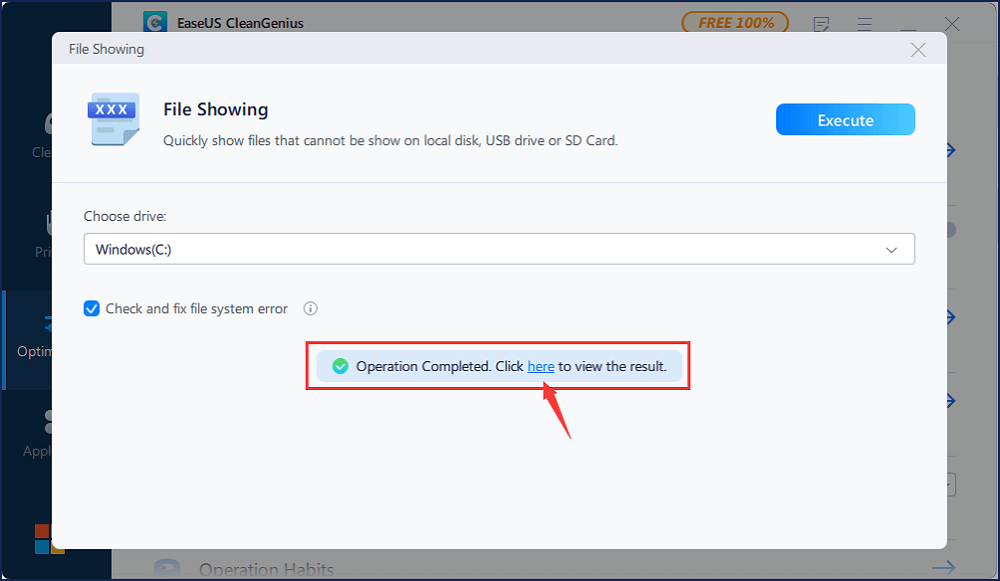
Step 3. When the fixing process completes, click «here» to open and use your device.
3. Use partition manager software to check and repair hard disk/drive errors
If you are not familiar with Windows administration, you can try a free and professional partition manager software from EaseUS. It is named EaseUS Partition Master Free, which supports you to check, find and repair bad sectors in hard disk/drive.
Download this tool for free and follow the below tips to check and fix hard disk drive errors/problems right now:
Step 1. Right-click the target partition that has a problem.
Step 2. Choose «Advanced» > «Check File System».
Step 3. Confirm if you want to hide the partition or not.
Step 4. In the Check File System window, check the «Try to fix errors if found» option.
Step 5. Click «Start» to check errors on your partition.
Now that you’ve successfully fixed the hard disk partition problem and all data are securely saved.
Stop Computer Reporting Error Message if No Hard Disk Error Exists
The reason why Windows pops up error messages is when the system deems an existing or potential error exist on your hard disk, it will remind you to backup data. But if no hard disk error or problem exists at all, you can follow the tips below to stop the computer from reporting error message:
Step 1. Type: gpedit.msc in the search bar and hit Enter.
Step 2. Go to «Administrative Templates» > «System» > «Troubleshooting and Diagnostics» > «Disk Diagnostics».
Step 3. Click Disk Diagnostic: Configure execution level and disable it.
Step 4. Click «Apply» and «OK».
Step 5. Restart the computer, and the error message won’t pop up again.

What Can You do When an Unexpected Hard Disk Problem Happen?
So you may wonder what can I do if a hard disk problem happens? What Windows reminds you of an error message? The computer would pop up this message to ask you: Windows detected a hard disk problem. Start the backup process or Ask me later?
Yes, it is to backup data in advance. You can selectively copy and paste single files and documents one by one into another secure storage device.
But if you think it’s too slow or you need to back up the entire hard disk data, you can try third-party software to clone/copy disk data with ease. Here you can also apply EaseUS Partition Master. With its disk copy/clone feature, you can clone the data on one disk to another.

Disk errors are one of the most common errors on Windows 11/10. It is also scary because all our data are on the disk drives, and even with backup in place, its time consuming to restore all of them. That said, most of these disk errors can be resolved, and this is exactly what we are going to talk about in this post. Check out the best tips for troubleshooting common Disk Management error messages on Windows 11/10.

This post will help you fix Disk Management errors like:
- A disk’s status is Not Initialized or the disk is missing,
- A basic or dynamic disk’s status is Unreadable,
- A dynamic disk’s status is Foreign,
- A dynamic disk’s status is Online (Errors),
- A dynamic disk’s status is Offline or Missing,
- A basic or dynamic volume’s status is Failed,
- A basic or dynamic volume’s status is Unknown,
- A dynamic volume’s status is Data Incomplete,
- A dynamic volume’s status is Healthy (At Risk),
- Cannot manage striped volumes using Disk Management or DiskPart,
- Disk Management cannot start the Virtual Disk Service.
Before we start, remember two things. First, you need an account with administrator privileges. Second, be very very careful using the disk management tools. One mistake, and you can lose all your data, and there is no way to undo things without losing the data on those drives.
To open Disk Management tool, follow the below steps:
- In the Run prompt, type
compmgmt.msc, and hit Enter. - This will launch the Computer Management console.
- Select Storage > Disk management. This will list all the drives and partitions inside them.
Pre-checks:
- I am assuming that your drive is properly connected to the PC, and if it’s an external drive, it is connected properly to the USB port.
- Make sure to check this before starting, and always try connecting to another PC to see if it works there.
- If the device works on another PC, try running the Disk Error Checker.
A disk’s status is Not Initialized or the disk is missing
Many a time your partition or drive does not appear in File Explorer. To check if it’s physically there, open the Disk management. Check if you see it as Not Initialized. If yes, then it simply means that the disk doesn’t have a valid signature, i.e., it’s not properly registered with the system. A disk is registered when you format it at least once. If the disk was available before, then it’s probably corrupted somehow.
If it is a new drive, you can simply initialize it; however, if that’s not the case, we need to try other solutions.

Bring it Online & Add Drive Letter:
- If in the Disk Management, it appears to be offline, then right-click, and select Online.
- If the disk is already online but has no drive letter (e.g., C, D, E, etc.) then right-click, and select change drive letter, and path. Choose a letter that is not already allocated.
- Lastly, you can choose to format it in either NTFS or FAT32. If you are using 64bit, make sure to use NTFS. This will remove all the data from your disk.
Check Device Manager for issues.
It is possible that because of driver issues, the hard drive is not working properly. It’s always a good idea to check on the Drive Manager to see that the drive listing has a yellow exclamation mark next to it. If that’s the case:
- Right-click on the hard drive listing and select uninstall the drive.
- Next, click on Action, and run Scan for hardware changes.
A basic or dynamic disk’s status is Unreadable
If you are facing this problem, the chances are that your hard drive has experienced a hardware failure or some irreversible corruption. It is also possible that the system’s disk configuration database might be corrupted, and the error message you will get in that case is ‘Unreadable’. You can try it on some other computer, but replacing your hard drive is the only solution here.
Read: SSD not showing up in Disk Management or BIOS in Windows.
A dynamic disk’s status is Foreign
When you move a dynamic disk from one computer to another, you will get a warning icon next to it with Foreign status. Dynamic disks offer the ability to create fault-tolerant volumes that may even span multiple disks – which Basic disks cannot. When you create a dynamic disk, the configuration disk is stored on all dynamic disks, and the information of who owns is lost when switching between PCs.
The solution is to make use of the Import Foreign Disks option. All you need to do is right-click on the disk and use the option. After you import the disk any existing volumes on the foreign disk become visible and accessible when you import the disk.
Now that you know of Dynamic Disk, here is the list of errors, and their solution around Dynamic Disk.
A dynamic disk’s status is Online (Errors)
To resolve this, you need to reactivate the disk to return it to Online status. Just right-click, and you will have that option. This works if the I/O errors are temporary.
A dynamic disk’s status is Offline or Missing
In case the dynamic disk has been corrupted or intermittently unavailable, it will appear as offline. Also, the disk name changes to missing. It is possible that it is either powered down or disconnected. Make sure that the disk has power. Plug it back in, and if it appears in the tool, right-click Reactivate Disk.
If this doesn’t work, nothing can be done. All you can do is right-click and choose Remove Disk. However, before doing that, delete all volumes (or mirrors) on the disk. To save the data, you can save any mirrored volumes on the disk by removing the mirror instead of the entire volume.
To bring a disk that is Offline and is still named Disk # (not Missing) back online:
- Try to Reactivate Disk to bring the disk back online
- Check-in Event Viewer if you have an error that says “No good config copies”. If yes, the Microsoft Product Support team might help you.
- Try connecting to another computer, especially with that which has dynamic disks. If it gets online, import the disk on that computer, and bring it back to the PC on which it wasn’t working.
A basic or dynamic volume’s status is Failed
Again, this is a clear case of a damaged disk or corrupt file system. You need to check on the power status or try the steps we shared for ‘A disk’s status is Not Initialized or the disk is missing’. This applies to basic disks, but if that’s a dynamic disk, then right-click and see if you can get it online.
That said, if the dynamic volume is a mirrored or RAID-5 volume with old data, bringing the underlying disk online will not automatically restart the volume. You will need to bring the other connected disks online first, so it makes sure the data is in sync, and then restarts the mirrored or RAID-5 volume manually, and then run the Error-checking tool or Chkdsk.exe.
A basic or dynamic volume’s status is Unknown
In this state, the boot sector of the volume is corrupted, and the data is no longer available. It is also possible that the new disk setup wasn’t complete. To resolve, you need to Initialize it again.
- In Disk Management make sure to check if the status is Online, else you need to bring it online first.
- Then right-click on that disk and click Initialize Disk.
- Then click on Ok to accept the default partition style
- After the wizard completes its job, you should have access to it.
A dynamic volume’s status is Data Incomplete
Windows 10 supports multi-disk volume. If you have removed one of the disks and moved it to another computer, it will not work, and will also destroy all the data unless you move and import the remaining disks that contain this volume.
So the solution is to move all the disks which are part of the multi-disk volume to the computer and import it. The disks will be marked as a Foreign disk. We have already stated above on how you can import, and activate those disks.
A dynamic volume’s status is Healthy (At Risk)
If one of your dynamic volumes is marked as at Risk, even if they are healthy, it indicates that there are some IO errors on the underlying part. It could be because of the one on the disk, but it makes all the volumes are Risk. One of the disks must have gone offline.
To resolve this, you will need to bring back the disk to Online Status, and it will restore the status, but if that doesn’t work, you will need to replace that disk
Cannot manage striped volumes using Disk Management or DiskPart
There are tons of Disk Management tools available. If you are using one of them, it is possible those products might have replaced the Microsoft Logical Disk Manager (LDM) for advanced disk management. Sadly, you need to connect with the support team to get this resolved.
Disk Management cannot start the Virtual Disk Service
This usually appears when the remote computer is blocking the Virtual Disk Service (VDS) because of the Firewall or the remote computer doesn’t support VDS at all. VDS service allows one to remotely connect to another computer Disk Management tool, and then let the admin configure it.
You can either configure Windows Defender Firewall to enable the Remote Volume Management Exception or remote login to that computer and then use Disk Management.
Source: Microsoft.com.
На чтение 4 мин. Просмотров 37.6k. Опубликовано 03.09.2019
Жесткие диски подвержены случайным сбоям, которые могут привести к полному отказу жесткого диска и, как следствие, к дорогостоящей потере данных. К счастью, современные жесткие диски имеют встроенные самопроверки и интеллектуальные механизмы предотвращения сбоев, которые выдают предупреждения каждый раз, когда обнаруживают, что ваш диск находится в опасности.
Что касается проблем с жестким диском, многие пользователи сообщали, что Windows обнаружила ошибки на этом диске, которые необходимо исправить , предупреждающее сообщение. И точно так же, как и проблема с внешним жестким диском, приводящая к фатальной ошибке, важно действовать до того, как диск подвергнется серьезному повреждению, заставив полностью заменить жесткий диск.
Вопрос заключается в следующем: какие действия следует предпринять, чтобы спасти данные и диск, как только вы получите Windows обнаружил ошибки на этом диске, которые необходимо исправить , уведомление о проблеме? Ну, это то, что мы обсуждаем в оставшейся части статьи.
Содержание
- Как я могу исправить найденные Windows ошибки на этом диске, которые нужно исправить ошибку?
- 1. Проверьте диск
- 2. Используйте PowerShell
- 3. Проверка безопасности и обслуживания
- 4. Использование вашего установочного диска
Как я могу исправить найденные Windows ошибки на этом диске, которые нужно исправить ошибку?
- Проверить диск
- Используйте PowerShell
- Проверка безопасности и обслуживания
- Использование установочного диска
1. Проверьте диск
Chkdsk (Check Disk in full) – утилита командной строки, используемая в операционных системах DOS и Windows для проверки метаданных файловых систем и общего состояния жестких дисков вашей системы. Он перечисляет и автоматически исправляет существующие ошибки диска. Попробуйте запустить операцию chkdsk.
-
Нажмите Пуск и введите Командная строка в окне поиска Windows 10.

- Найдите в результатах опцию Командная строка (настольное приложение) и нажмите ее. Кроме того, выберите Да в ответ на запрос UAC.
-
В следующем окне введите chkdsk d:/f/r/x (обратите внимание на пробелы), затем выберите Y , чтобы принять процедуру (замените D буквой, обозначающей ваш диск ).


Параметр f указывает утилите исправлять найденные ошибки, а r советует обнаруживать и восстанавливать все поврежденные сектора. И наконец, x говорит, что ваш жесткий диск должен быть размонтирован, чтобы начать упражнение.
Вы также можете запустить проверку ошибок из графического интерфейса пользователя следующим образом.
- Откройте проводник ( CTRL + E ).
- Нажмите этот компьютер , чтобы развернуть его (см. Скриншот ниже).
-
Нажмите правой кнопкой мыши на целевом жестком диске (C, D и т. д.).
- Выберите Свойства , затем выберите Инструменты .
-
Нажмите Проверить.
-
Теперь нажмите Сканировать диск и дождитесь его завершения.


- ТАКЖЕ ЧИТАЙТЕ: 100% использования диска в Windows 10: как это исправить в 2019 году
2. Используйте PowerShell
Windows 10 PowerShell – это еще один основанный на задачах язык командной строки и сценариев, разработанный для помощи системному администрированию, включая выполнение процедур обслуживания жесткого диска. Вы также можете использовать его для проверки вашего диска и устранения возможных ошибок.
-
Нажмите кнопку Пуск , затем введите PowerShell .
- Нажмите правой кнопкой мыши на Windows PowerShell и выберите Запуск от имени администратора . Кроме того, выберите да, когда предложено UAC.
-
После загрузки командной строки введите Repair-Volume C –Scan (замените C буквой собственного диска) и нажмите Enter . Вам необходимо будет выполнить следующую команду, если обнаружены какие-либо ошибки.
-
Теперь введите Repair-Volume C –OfflineScanAndFix , а затем нажмите Enter , чтобы начать сканирование в автономном режиме и удалить ошибки на диске.
- Перезагрузите компьютер и проверьте, устранена ли проблема.


3. Проверка безопасности и обслуживания
Раздел «Безопасность и обслуживание Windows 10» информирует вас о проблемах, влияющих на общее состояние вашего компьютера. Таким образом, он может помочь вам определить проблемы с аппаратным и программным обеспечением жесткого диска, пока ваш компьютер загружается.
-
В окне поиска Windows 10 (рядом с кнопкой «Пуск») введите панель управления .
- Нажмите Панель управления из результатов.
-
Выберите систему и безопасность.
-
Перейдите на страницу Безопасность и обслуживание .
-
Нажмите, чтобы развернуть вкладку Техническое обслуживание , а затем найдите Состояние диска , параметр .


Все проблемы, касающиеся вашего жесткого диска, будут перечислены здесь.
- ТАКЖЕ ЧИТАЙТЕ: исправлено: панель управления не открывается в Windows 10
4. Использование вашего установочного диска
Вот как можно восстановить диск, если Windows не загрузится из-за сообщения Windows об обнаруженных на этом диске ошибках, которые необходимо исправить .
- Вставьте установочный диск Windows 10/флэш-накопитель USB, а затем перезагрузите компьютер.
-
Нажмите любую клавишу (при появлении запроса) и следуйте последующим инструкциям.
-
Откроется страница установки Windows. Выберите Восстановить компьютер (в левом нижнем углу экрана). Это открывает различные параметры восстановления системы .
-
Выберите Устранение неполадок в разделе Выберите вариант.
-
Нажмите Дополнительные параметры на новом экране Устранение неполадок .
-
Нажмите Командная строка .
- Теперь введите chkdsk c:/f/r и нажмите Enter.


Подождите, пока он запустится, и перезагрузите компьютер после завершения сканирования.
Это оно. Ваша Windows обнаружила ошибки на этом диске, которые необходимо исправить . Ошибка должна быть устранена.