Некоторые пользователи Windows сталкиваются с кодом ошибки 10053 при попытке подключить свой компьютер с помощью почты SMTP или при попытке выполнить команду Winsock. Эта проблема обычно связана с ограничениями маршрутизатора, чрезмерно защищающими брандмауэрами или прокси-серверами и VPN.
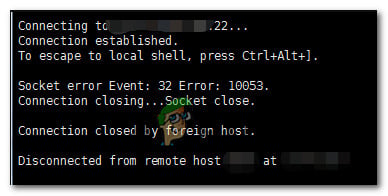
Ошибка асинхронного сокета 10053
После изучения этой конкретной проблемы выяснилось, что существует несколько различных причин, которые могут вызывать этот код ошибки. Вот краткий список потенциальных виновников:
- Прерывание соединения из-за вашей машины. Как оказалось, эта проблема может возникнуть из-за того, что в очереди сокета нет места, поэтому сокет не может получить дальнейшее соединение. Этот тип проблемы часто связан с активным прокси-сервером или сетью VPN, которые в конечном итоге занимают всю драгоценную очередь сокетов. В этом случае отключение или удаление прокси-сервера или VPN-клиента должно позволить вам решить проблему.
- Недавно прерванное соединение — при определенных обстоятельствах эта проблема также может возникнуть, если система локальной сети прерывает соединение после сбоя передачи данных. В этом случае получатель никогда не подтверждает данные, отправленные через сокет данных. Обычно это вызвано чрезмерной защитой антивируса или брандмауэра.
- Сценарий TCP / IP — проблемное соединение также может быть причиной этого кода ошибки, если оно истекает после того, как локальная система не получает подтверждения для отправленных данных. Если этот сценарий применим, сброс данных TCP / IP должен решить проблему и устранить код ошибки. Если это не сработает, вам следует перезагрузить или перезагрузить маршрутизатор или модем.
Метод 1. Отключение или удаление избыточных антивирусных программ (если применимо)
Если вы используете сторонний пакет, вы сталкиваетесь с кодом ошибки 10053 при попытке выполнить определенное действие, связанное с вашим почтовым клиентом (например, загрузка или отправка электронной почты через VPOP3), скорее всего, эта проблема вызвана вашим программа-антивирус.
По словам некоторых затронутых пользователей, эта проблема часто вызвана определенными версиями McAfee VirusScan и Norton Antivirus — это всего лишь две сторонние антивирусные программы, которые мы обнаружили, но может быть и другое программное обеспечение, вызывающее такую же проблему.
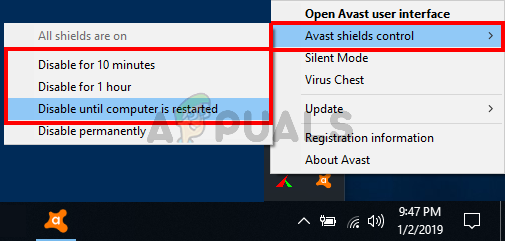
Если этот сценарий выглядит так, как будто он может быть применим, вы должны начать с отключения защиты в реальном времени и посмотреть, перестает ли возникать код ошибки — в большинстве пакетов AV вы можете отключить защиту в режиме реального времени, щелкнув правой кнопкой мыши панель в трее. значок и ищет параметр, который отключит экраны в реальном времени.
Щелкните правой кнопкой мыши значок Avast на панели задач, чтобы временно отключить Avast
Если отключение защиты в реальном времени не привело к устранению проблемы, следуйте приведенным ниже инструкциям, чтобы удалить проблемный пакет со своего компьютера и удалить все остаточные файлы, чтобы устранить проблему:
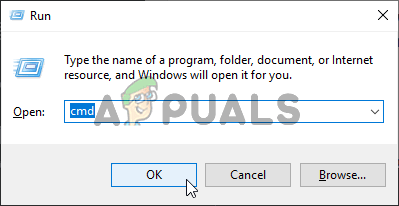
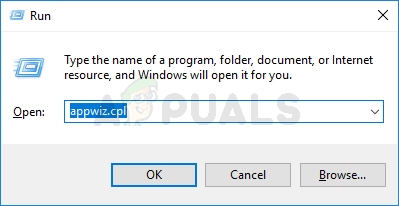
- Откройте диалоговое окно «Выполнить», нажав клавиши Windows + R. Затем введите «appwiz.cpl» в текстовое поле и нажмите Enter, чтобы открыть меню «Программы и файлы».
Введите appwiz.cpl и нажмите Enter, чтобы открыть страницу установленных программ.
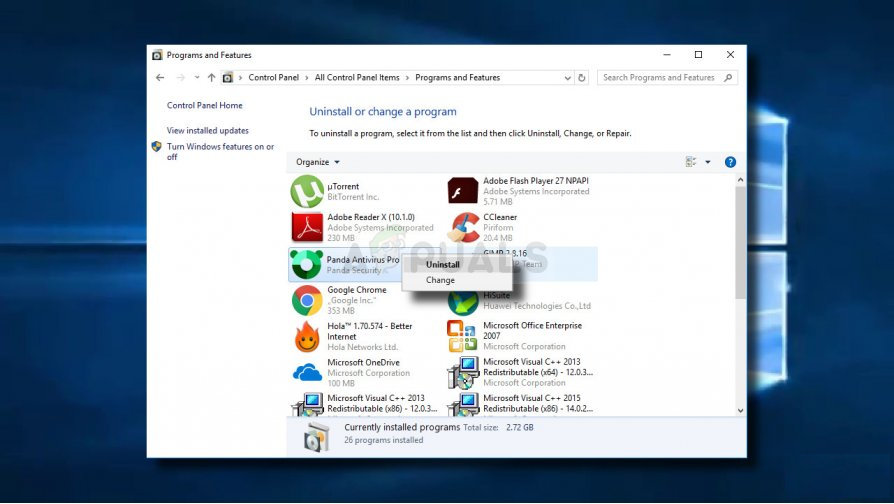
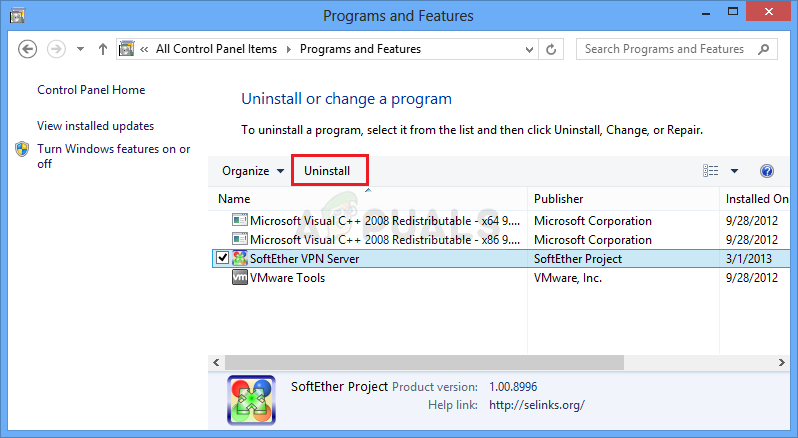
- Зайдя в меню «Программы и компоненты», прокрутите список установленных программ и найдите проблемный антивирус или брандмауэр, вызывающий конфликт.
- Когда вы его увидите, щелкните его правой кнопкой мыши и выберите «Удалить» из появившегося контекстного меню, чтобы начать процесс удаления.
Удаление антивируса
- После завершения операции перезагрузите компьютер и дождитесь завершения следующего запуска.
- После того, как компьютер загрузится, следуйте инструкциям, относящимся к вашему антивирусу, чтобы удалить все остаточные файлы, оставшиеся после установки стороннего антивируса.
- Как только вам удастся полностью удалить сторонний пакет безопасности из вашего AV, перейдите к следующему потенциальному исправлению ниже.
Если та же проблема все еще возникает после удаления вашего стороннего пакета или этот метод не применим, перейдите к следующему потенциальному исправлению ниже.
Метод 2: Выполнение полного сброса TCP / IP
Если код ошибки 10053 возникает сразу после разрыва соединения TCP / IP в Windows, скорее всего, это проблема с тайм-аутом передачи данных или ошибкой протокола. Как выясняется, это, скорее всего, вызвано сбоями в работе сетевого адаптера или классическим случаем неправильного диапазона DNS.
По словам некоторых затронутых пользователей, эту проблему иногда можно решить, выполнив полный сброс TCP / IP на каждом компьютере, входящем в состав локальной мастерской.
Если вы не знаете, как это сделать, следуйте приведенным ниже инструкциям, чтобы выполнить полный сброс TCP / IP из командной строки с повышенными привилегиями:
- Откройте диалоговое окно «Выполнить», нажав клавиши Windows + R. Затем введите cmd внутри текстового поля и нажмите Ctrl + Shift + Enter, чтобы открыть командную строку с повышенными правами. По запросу UAC (Контроль учетных записей пользователей) нажмите Да, чтобы предоставить доступ администратора.
Запуск командной строки
- Как только вы войдете в командную строку с повышенными привилегиями, введите следующие команды по порядку и нажмите Enter после каждой, чтобы выполнить полный сброс TCP / IP: ipconfig / flushdns nbtstat -R nbtstat -RR netsh int reset all netsh int ip reset netsh winsock сброс настроек
- После успешной обработки каждой команды закройте командную строку с повышенными привилегиями и перезагрузите компьютер.
- После завершения следующего запуска повторите действие, которое ранее вызывало код ошибки 10053, и посмотрите, устранена ли проблема.
Метод 3: перезагрузка или сброс маршрутизатора / модема
Если приведенные выше команды Winsock не устранили проблему в вашем случае, вам следует продолжить, исключив текущую сеть из списка потенциальных виновников.
По мнению некоторых затронутых пользователей, эта проблема также может возникать в тех случаях, когда ваш интернет-провайдер назначает динамический IP-адрес, который конфликтует с определенными параметрами SMTP.
В случае, если этот сценарий применим, есть два способа решить проблему и избежать получения кода ошибки 10053:
- Перезагрузка сетевого устройства — эта операция завершит обновление TCP- и IP-соединения и заставит ваш маршрутизатор / модем назначить новую информацию, связанную с вашим подключением.
- Сброс сетевого устройства — это очистит все пользовательские настройки, которые в настоящее время применяются вашим маршрутизатором или модемом, и вернет ваше сетевое устройство к заводским настройкам.
Если вы планируете или применяете этот метод, мы советуем начать с простого перезапуска и переходить ко второй процедуре только в том случае, если первое вспомогательное руководство (A) не решает проблему:
A. Перезагрузка роутера / модема
Если вы хотите решить проблему без сброса каких-либо конфиденциальных данных, которые в настоящее время хранятся на вашем маршрутизаторе или модеме, это способ сделать это.
Чтобы выполнить перезагрузку (перезагрузку) маршрутизатора, обратите внимание на заднюю часть сетевого устройства и нажмите кнопку включения / выключения, чтобы выключить устройство. После этого также отсоедините кабель питания от розетки, к которой он в данный момент подключен, и подождите целую минуту, чтобы убедиться, что силовые конденсаторы полностью разряжены.
Перезагрузка роутера
После того, как вам удастся перезапустить маршрутизатор, обязательно отключите кабель питания и подождите целую минуту, чтобы убедиться, что силовые конденсаторы полностью разряжены, прежде чем возобновлять питание.
По истечении этого периода повторно подключите кабель питания и дождитесь восстановления доступа к Интернету, прежде чем повторять действие, которое ранее вызывало код ошибки.
Если та же проблема все еще возникает, перейдите к следующему потенциальному исправлению ниже.
Б. Сброс маршрутизатора / модема
Если в вашем случае первый метод не сработал, скорее всего, вы имеете дело с более серьезным несоответствием, которое коренится в меню настроек вашего маршрутизатора или модема.
В этом случае вам следует сбросить маршрутизатор или модем до заводского состояния, восстановить доступ в Интернет и посмотреть, закончится ли эта операция исправлением ошибки 10053.
Важно: прежде чем принудительно выполнить эту операцию, имейте в виду, что в конечном итоге будут удалены все настройки, которые вы ранее установили для своего маршрутизатора. Это будет включать любые сохраненные учетные данные PPPoE, внесенные в белый список или заблокированные сообщения и перенаправленные данные TCP / IP.
Чтобы инициировать сброс маршрутизатора или модема, найдите кнопку сброса (обычно она находится на задней панели маршрутизатора). Когда вам удастся найти его, нажмите кнопку сброса и удерживайте ее нажатой в течение 10 секунд или пока не заметите, что все светодиоды устройства мигают одновременно.
Сброс маршрутизатора
Примечание. Для большинства моделей маршрутизаторов вам понадобится острый предмет, чтобы можно было нажать и удерживать кнопку сброса.
После завершения процедуры сброса дождитесь восстановления доступа к Интернету, затем посмотрите, исправлен ли теперь код ошибки 10053. Имейте в виду, что если ваш интернет-провайдер использует PPPoE, вам нужно будет повторно вставить правильные учетные данные, прежде чем доступ в Интернет будет восстановлен.
Если этот сценарий неприменим или вы уже пробовали это безуспешно, перейдите к следующему потенциальному исправлению ниже.
Метод 4: отключите прокси или VPN-соединение (если применимо)
Если ни один из вышеперечисленных методов не устранил проблему в вашем случае, и вы используете VPN-клиент или прокси-сервер, чтобы скрыть происхождение вашего подключения, это, скорее всего, является источником ошибки 10053.
Нам удалось найти множество пользовательских отчетов, в которых утверждалось, что эта конкретная ошибка была вызвана либо клиентом VPN, либо прокси-сервером, который был принудительно применен на системном уровне.
В зависимости от используемого вами решения по обеспечению анонимности вы сможете решить проблему, отключив прокси-сервер или полностью удалив VPN на системном уровне.
Мы рассмотрели оба возможных сценария, поэтому не стесняйтесь следовать одному из нижеприведенных руководств, чтобы отключить прокси-сервер системного уровня или удалить VPN-клиент:
A. Удаление VPN на уровне системы
- Нажмите клавишу Windows + R, чтобы открыть диалоговое окно «Выполнить». Как только вы окажетесь внутри, введите appwiz.cpl в текстовое поле и нажмите Enter, чтобы открыть меню «Программы и компоненты». Когда вам будет предложено UAC (Контроль учетных записей пользователей), нажмите Да, чтобы предоставить доступ администратора.
Введите appwiz.cpl и нажмите Enter, чтобы открыть страницу установленных программ.
- Как только вы окажетесь на экране «Программы и компоненты», найдите VPN-клиент в списке установленных приложений. Когда вы найдете его, щелкните его правой кнопкой мыши и выберите «Удалить» из появившегося контекстного меню.
Удаление инструмента VPN
- Находясь внутри экрана установки, следуйте инструкциям на экране, чтобы завершить процесс установки, затем перезагрузите компьютер после завершения операции и посмотрите, будет ли проблема устранена после завершения следующего запуска.
Б. Отключение прокси-сервера
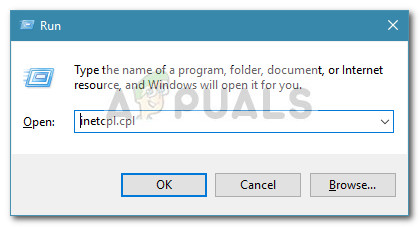
- Откройте диалоговое окно «Выполнить», нажав клавиши Windows + R. Внутри текстового поля введите inetcpl.cpl и нажмите Enter, чтобы открыть вкладку «Свойства Интернета». Когда вам будет предложено UAC (Контроль учетных записей пользователей), нажмите Да, чтобы предоставить доступ администратора.
Диалог запуска: inetcpl.cpl
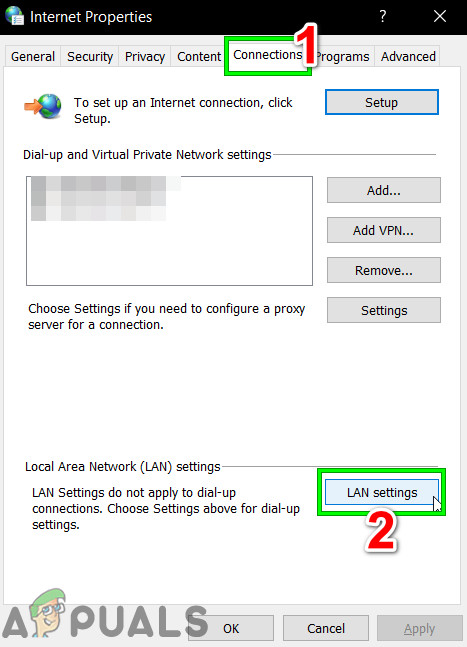
- Как только вы окажетесь на экране свойств Интернета, перейдите на вкладку «Подключение» в горизонтальном меню в верхней части экрана, затем нажмите «Настройки локальной сети» (прямо под настройками локальной сети).
Откройте настройки LAN в Internet Options
- Как только вы войдете в настройки локальной сети (LAN), войдите в категорию прокси-серверов и снимите флажок, связанный с Use a proxy server for your LAN.
Отключение прокси-сервера
- После успешного отключения прокси-сервера перезагрузите компьютер и посмотрите, будет ли проблема устранена после завершения следующего запуска.
Some Windows users are encountering the 10053 error code while trying to connect their computer with an SMTP mail or when trying to perform a Winsock command. This problem is typically linked to router restrictions, overprotective firewalls or Proxies, and VPNs.
After investigating this particular issue, it turns out that there are several different causes that might be causing this error code. Here’s a shortlist of potential culprits:
- Connection abort caused by your machine – As it turns out, this problem might occur because there is no space in the socket’s queue, so the socket cannot receive further connection. This type of issue is often related to an active Proxy or VPN network that end up taking up all the precious socket queue. In this case, disabling or uninstalling the Proxy server or VPN client should allow you to fix the issue.
- Recently aborted connection – Under certain circumstances, this problem can also occur if the local network system aborts a connection after data transmission fails. In this case, the receiver never acknowledges data sent on a data socket. This is typically caused by an overprotective antivirus or firewall.
- TCP / IP scenario – A troublesome connection can also be responsible for this error code if it timeouts after the local system doesn’t receive an acknowledgment for data sent. If this scenario is applicable, resetting your TCP / IP data should fix the problem and eliminate the error code. If this doesn’t work, you should reboot or reset your router or modem instead.
Method 1: Disabling or Uninstalling Overprotective AV suites (if applicable)
If you’re using a 3rd party suite you’re encountering the 10053 error code when trying to perform a certain action having to do with your email client (like downloading or sending email via VPOP3), chances are this issue is being caused by your antivirus software.
According to some affected users, this problem is often caused by certain versions of McAfee VirusScan and Norton Antivirus – These are just two 3rd party AV that we discovered, but there might be other software causing the same kind of problem.
If this scenario looks like it could be applicable, you should start by disabling the real-time protection and seeing if the error code stops occurring – with most AV suites, you can disable the real-time protection by right-clicking the tray-bar icon and looking for an option that will disable the real-time shields.
If disabling the real-time protection didn’t end up fixing the issue, follow the instructions below to uninstall the problematic suite from your computer and clear any remnant file to fix the problem:
- Open up a Run dialog box by pressing Windows key + R. Next, type ‘appwiz.cpl’ inside the text box and press Enter to open up the Programs and Files menu.

Type appwiz.cpl and Press Enter To Open Installed Programs Page - Once you’re inside the Programs and Features menu, scroll down through the list of installed programs and locate the problematic Antivirus or Firewall solution that’s causing the conflict.
- When you see it, right-click on it and choose Uninstall from the newly appeared context menu to begin the uninstallation process.

Uninstalling your antivirus - Once the operation is complete, reboot your computer and wait for the next startup to complete.
- After your computer boots back up, follow the instructions specific to your Antivirus to remove any remnant files left behind by your 3rd party Antivirus installation.
- Once you manage to completely remove your 3rd party security suite from your AV, move down to the next potential fix below.

If the same problem still occurs after uninstalling your 3rd party suite or this method is not applicable, move down to the next potential fix below.
Method 2: Performing a Complete TCP / IP reset
If the 10053 error code occurs right after the TCP / IP connection is aborted by Windows, this is most likely a problem with the data transmission timeout or protocol error. As it turns out, this is most likely caused by a glitch with the network adapter or a classic case of bad DNS range.
According to some affected users, this problem can sometimes be fixed by performing a complete TCP / IP reset on every computer that’s part of the local workshop.
If you’re not sure how to do this, follow the instructions below to perform a complete TCP / IP reset from an elevated Command Prompt:
- Open up a Run dialog box by pressing Windows key + R. Next, type ‘cmd’ inside the text box and press Ctrl + Shift + Enter to open up an elevated Command Prompt. When prompted by the UAC (User Account Control), click Yes to grant admin access.
Running the Command Prompt - Once you’re inside the elevated Command Prompt, type the following commands in order and press Enter after each one to do a complete TCP / IP reset:
ipconfig /flushdns
nbtstat -R
nbtstat -RR
netsh int reset all
netsh int ip reset
netsh winsock reset
- After every command is processed successfully, close the elevated Command Prompt and reboot your computer.
- Once the next startup is complete, repeat the action that was previously causing the 10053 error code and see if the problem is now fixed.
Method 3: Rebooting or Resetting your router/modem
If the Winsock commands above didn’t fix the problem in your case, you should proceed by excluding your current network from the list of potential culprits.
According to some affected users, this problem is also expected to occur in instances where your ISP (Internet Service Provider) assigns a dynamic IP that conflicts with certain SMTP options.
In case this scenario is applicable, there are 2 ways to fix the problem and avoid getting the 10053 error code:
- Restarting the network device – This operation will end up refreshing the TCP and IP connection and force your router/modem to assign new information related to your connection.
- Resetting the network device – This will clear any custom settings your router or modem is currently enforcing and return your network device to its factory settings.
If you’re planning or enforcing this method, our advice to start with a simple restart and move out to the second procedure only if the first sub-guide (A) doesn’t fix the problem:
A. Restarting your router/modem
If you want to fix the problem without resetting any sensitive data that’s currently stored by your router or modem, this is the way to do it.
In order to perform a router reboot (restart), turn your attention to the rear part of your network device and press the On / Off button to power off the device. After you do this, also disconnect the power cable from the power outlet it’s currently connected to and wait for a full minute in order to ensure that the power capacitors are completely drained.

After you manage to restart your router, make sure to disconnect the power cable and wait for a full minute to ensure that the power capacitors are completely drained before restoring power.
Once the period is passed, re-connect the power cable and wait until the Internet access is re-established before repeating the action that was causing the error code before.
If the same problem is still occurring, move down to the next potential fix below.
B. Resetting your router/modem
If the first method didn’t work in your case, chances are you’re dealing with a more serious inconsistency that is rooted inside the settings menu of your router or modem.
In this case, you should reset your router or modem to its factory state, restore internet access, and see if this operation ends up fixing the 10053 error.
Important: Before you enforce this operation, keep in mind that it will end up clearing any settings that you have previously established for your router. This will include any saved PPPoE credentials, whitelisted or blocked posts, and forwarded TCP / IP data.
To initiate a router or modem reset, look for the reset button (typically located on the back of your router). When you manage to locate it, press the Reset button and keep it presses for 10 seconds or until you notice all the device LEDs flashing at the same time.

Note: With most router models, you will need a sharp object in order to be able to press and hold on the Reset button.
After the reset procedure is complete, wait until the Internet access is re-established, then see if the 10053 error code is now fixed. Keep in mind that if your ISP is using PPPoE, you will need to re-insert the correct credentials before Internet access is restored.
If this scenario was not applicable or you already tried this with no success, move down to the next potential fix below.
Method 4: Disable Proxy or VPN connection (if applicable)
If none of the methods above have fixed the issue in your case and you’re using a VPN client or a Proxy server to hide the origin of your connection, this is most likely the source of the 10053 error.
We managed to find a lot of user reports claiming this particular error was caused either by a VPN client or a proxy server that was enforced at a system level.
Depending on the anonymity solution that you’re using, you should be able to fix the problem either by disabling the proxy server or by uninstalling the system level VPN altogether.
We’ve covered both potential scenarios, so feel free to follow one of the sub-guides below to either disable the system-level proxy server or uninstall the VPN client:
A. Uninstalling System-level VPN
- Press Windows key + R to open up a Run dialog box. Once you’re inside, type ‘appwiz.cpl’ inside the text box and press Enter to open up the Programs and Features menu. When you are prompted by the UAC (User Account Control), click Yes to grant admin access.
Type appwiz.cpl and Press Enter To Open Installed Programs Page - Once you’re inside the Programs and Features screen, find the VPN client among the list of installed applications. When you find it, right-click on it and choose Uninstall from the newly appeared context menu.

Uninstalling a VPN tool - From the insides of the installation screen, follow the on-screen prompts to complete the installation process, then reboot your computer once the operation is complete and see if the issue is fixed once the next startup is complete.
B. Disabling the Proxy Server
- Open up a Run dialog box by pressing Windows key + R. Inside the text box, type ‘inetcpl.cpl’ and press Enter to pen up the Internet Properties tab. When you’re prompted by the UAC (User Account Control), click Yes to grant admin access.

Run dialog: inetcpl.cpl - Once you’re inside the Internet Properties screen, go over the Connection tab from the horizontal menu on the top of the screen, then click on LAN Settings (right under Local Area Network LAN settings).

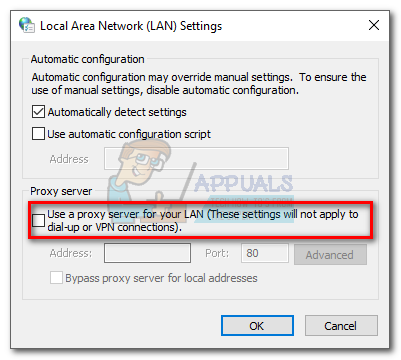
Open LAN settings in Internet Options - Once you’re inside the Local Area Network (LAN) settings, access the Proxy server category and uncheck the box associated with Use a proxy server for your LAN.

Disabling the Proxy server - After you have successfully disabled the Proxy server, reboot your computer and see if the problem is fixed once the next startup is complete.
Содержание
- Рекомендации по локализации причины ошибки 10053
- How to Fix Asynchronous Socket Error 10053 on Windows Operating System?
- Method 1: Disabling or Uninstalling Overprotective AV suites (if applicable)
- Method 2: Performing a Complete TCP / IP reset
- Method 3: Rebooting or Resetting your router/modem
- A. Restarting your router/modem
- B. Resetting your router/modem
- Method 4: Disable Proxy or VPN connection (if applicable)
- A. Uninstalling System-level VPN
- B. Disabling the Proxy Server
Рекомендации по локализации причины ошибки 10053
Приведем описание ошибки:
Описание Беркли : Произошел разрыв соединения на локальном компьютере. Причиной разрыва послужило отсутствие места в очереди сокета, вследствие чего сокет не может принимать данные.
Описание Winsock : Эта ошибка может возникнуть, когда обрывается связь в локальной сети. WinSock обрывает установившееся соединение после неудачной попытки повторной передачи данных (получатель не получает подтверждения отправки данных).
Протоколы обмена почтовыми сообщениями (SMTP и POP3) для передачи данных используют прикладной протокол TCP. Для повышения надежности передачи данных протокол TCP ожидает подтверждения на каждый отправленный пакет данных. Иногда пакеты подтверждения могут теряться. В таком случае TCP будет отправлять не доставленные пакеты повторно, автоматически увеличивая время ожидания подтверждения, до тех пор, пока не истечет некоторый промежуток времени. По его истечении генерируется данная ошибка. Происхождение этой ошибки можно описать так: она возникает в том случае, когда локальный хост в течение длительного времени не получает подтверждения отправки пакета.
Подобная ошибка может возникать по множеству разнообразных причин. Приведем некоторые рекомендации по локализации источника проблемы:
- Воспользуйтесь утилитой ping для проверки соединения с удаленным хостом, на который отправляется почтовое сообщение. Если ответа нет, возможно, хост отключен от сети или имеются проблемы в сети на пути доставки сообщения. Если ответ есть, то, возможно, ошибка носит кратковременный характер. Попытайтесь отправить почтовое сообщение еще раз. Если сообщение по-прежнему не отправляется, то, возможно, что принимающий сервер не готов к его приему (например, на запущено приложение, отвечающее за прием сообщений на сервере).
- Воспользуйтесь утилитой ping для проверки соединения с локальным хостом для проверки функциональности локальной сети.
- Воспользуйтесь утилитой ping для проверки соединения с локальным маршрутизатором.
- Воспользуйтесь утилитой ping для проверки соединения с хостом подсети, в которую отсылается почтовое сообщение (если известен адрес). Это позволит установить факт работоспособности сети получателя.
- Воспользуйтесь утилитой tracert , в качестве параметра укажите хост, на который отправляется почтовое сообщение. Возможно, это поможет идентифицировать проблему на пути следования пакетов данных.
Источник
How to Fix Asynchronous Socket Error 10053 on Windows Operating System?
Some Windows users are encountering the 10053 error code while trying to connect their computer with an SMTP mail or when trying to perform a Winsock command. This problem is typically linked to router restrictions, overprotective firewalls or Proxies, and VPNs.
Asynchronous Socket Error 10053
After investigating this particular issue, it turns out that there are several different causes that might be causing this error code. Here’s a shortlist of potential culprits:
- Connection abort caused by your machine – As it turns out, this problem might occur because there is no space in the socket’s queue, so the socket cannot receive further connection. This type of issue is often related to an active Proxy or VPN network that end up taking up all the precious socket queue. In this case, disabling or uninstalling the Proxy server or VPN client should allow you to fix the issue.
- Recently aborted connection – Under certain circumstances, this problem can also occur if the local network system aborts a connection after data transmission fails. In this case, the receiver never acknowledges data sent on a data socket. This is typically caused by an overprotective antivirus or firewall.
- TCP / IP scenario – A troublesome connection can also be responsible for this error code if it timeouts after the local system doesn’t receive an acknowledgment for data sent. If this scenario is applicable, resetting your TCP / IP data should fix the problem and eliminate the error code. If this doesn’t work, you should reboot or reset your router or modem instead.
Method 1: Disabling or Uninstalling Overprotective AV suites (if applicable)
If you’re using a 3rd party suite you’re encountering the 10053 error code when trying to perform a certain action having to do with your email client (like downloading or sending email via VPOP3), chances are this issue is being caused by your antivirus software.
According to some affected users, this problem is often caused by certain versions of McAfee VirusScan and Norton Antivirus – These are just two 3rd party AV that we discovered, but there might be other software causing the same kind of problem.
If this scenario looks like it could be applicable, you should start by disabling the real-time protection and seeing if the error code stops occurring – with most AV suites, you can disable the real-time protection by right-clicking the tray-bar icon and looking for an option that will disable the real-time shields.
Right Click Avast Icon From System Tray To Disable Avast Temporarily
If disabling the real-time protection didn’t end up fixing the issue, follow the instructions below to uninstall the problematic suite from your computer and clear any remnant file to fix the problem:
- Open up a Run dialog box by pressing Windows key + R. Next, type ‘appwiz.cpl’ inside the text box and press Enter to open up the Programs and Files menu.
 Type appwiz.cpl and Press Enter To Open Installed Programs Page
 - Once you’re inside the Programs and Features menu, scroll down through the list of installed programs and locate the problematic Antivirus or Firewall solution that’s causing the conflict.
- When you see it, right-click on it and choose Uninstall from the newly appeared context menu to begin the uninstallation process. Uninstalling your antivirus
- Once the operation is complete, reboot your computer and wait for the next startup to complete.
- After your computer boots back up, follow the instructions specific to your Antivirus to remove any remnant files left behind by your 3rd party Antivirus installation.
- Once you manage to completely remove your 3rd party security suite from your AV, move down to the next potential fix below.
If the same problem still occurs after uninstalling your 3rd party suite or this method is not applicable, move down to the next potential fix below.
Method 2: Performing a Complete TCP / IP reset
If the 10053 error code occurs right after the TCP / IP connection is aborted by Windows, this is most likely a problem with the data transmission timeout or protocol error. As it turns out, this is most likely caused by a glitch with the network adapter or a classic case of bad DNS range.
According to some affected users, this problem can sometimes be fixed by performing a complete TCP / IP reset on every computer that’s part of the local workshop.
If you’re not sure how to do this, follow the instructions below to perform a complete TCP / IP reset from an elevated Command Prompt:
- Open up a Run dialog box by pressing Windows key + R. Next, type ‘cmd’ inside the text box and press Ctrl + Shift + Enter to open up an elevated Command Prompt. When prompted by the UAC (User Account Control), click Yes to grant admin access. Running the Command Prompt
- Once you’re inside the elevated Command Prompt, type the following commands in order and press Enter after each one to do a complete TCP / IP reset:
- After every command is processed successfully, close the elevated Command Prompt and reboot your computer.
- Once the next startup is complete, repeat the action that was previously causing the 10053 error code and see if the problem is now fixed.
Method 3: Rebooting or Resetting your router/modem
If the Winsock commands above didn’t fix the problem in your case, you should proceed by excluding your current network from the list of potential culprits.
According to some affected users, this problem is also expected to occur in instances where your ISP (Internet Service Provider) assigns a dynamic IP that conflicts with certain SMTP options.
In case this scenario is applicable, there are 2 ways to fix the problem and avoid getting the 10053 error code:
- Restarting the network device – This operation will end up refreshing the TCP and IP connection and force your router/modem to assign new information related to your connection.
- Resetting the network device – This will clear any custom settings your router or modem is currently enforcing and return your network device to its factory settings.
If you’re planning or enforcing this method, our advice to start with a simple restart and move out to the second procedure only if the first sub-guide (A) doesn’t fix the problem:
A. Restarting your router/modem
If you want to fix the problem without resetting any sensitive data that’s currently stored by your router or modem, this is the way to do it.
In order to perform a router reboot (restart), turn your attention to the rear part of your network device and press the On / Off button to power off the device. After you do this, also disconnect the power cable from the power outlet it’s currently connected to and wait for a full minute in order to ensure that the power capacitors are completely drained.
Rebooting Router
After you manage to restart your router, make sure to disconnect the power cable and wait for a full minute to ensure that the power capacitors are completely drained before restoring power.
Once the period is passed, re-connect the power cable and wait until the Internet access is re-established before repeating the action that was causing the error code before.
If the same problem is still occurring, move down to the next potential fix below.
B. Resetting your router/modem
If the first method didn’t work in your case, chances are you’re dealing with a more serious inconsistency that is rooted inside the settings menu of your router or modem.
In this case, you should reset your router or modem to its factory state, restore internet access, and see if this operation ends up fixing the 10053 error.
Important: Before you enforce this operation, keep in mind that it will end up clearing any settings that you have previously established for your router. This will include any saved PPPoE credentials, whitelisted or blocked posts, and forwarded TCP / IP data.
To initiate a router or modem reset, look for the reset button (typically located on the back of your router). When you manage to locate it, press the Reset button and keep it presses for 10 seconds or until you notice all the device LEDs flashing at the same time.
Resetting Router
Note: With most router models, you will need a sharp object in order to be able to press and hold on the Reset button.
After the reset procedure is complete, wait until the Internet access is re-established, then see if the 10053 error code is now fixed. Keep in mind that if your ISP is using PPPoE, you will need to re-insert the correct credentials before Internet access is restored.
If this scenario was not applicable or you already tried this with no success, move down to the next potential fix below.
Method 4: Disable Proxy or VPN connection (if applicable)
If none of the methods above have fixed the issue in your case and you’re using a VPN client or a Proxy server to hide the origin of your connection, this is most likely the source of the 10053 error.
We managed to find a lot of user reports claiming this particular error was caused either by a VPN client or a proxy server that was enforced at a system level.
Depending on the anonymity solution that you’re using, you should be able to fix the problem either by disabling the proxy server or by uninstalling the system level VPN altogether.
We’ve covered both potential scenarios, so feel free to follow one of the sub-guides below to either disable the system-level proxy server or uninstall the VPN client:
A. Uninstalling System-level VPN
- Press Windows key + R to open up a Run dialog box. Once you’re inside, type ‘appwiz.cpl’ inside the text box and press Enter to open up the Programs and Features menu. When you are prompted by the UAC (User Account Control), click Yes to grant admin access. Type appwiz.cpl and Press Enter To Open Installed Programs Page
- Once you’re inside the Programs and Features screen, find the VPN client among the list of installed applications. When you find it, right-click on it and choose Uninstall from the newly appeared context menu. Uninstalling a VPN tool
- From the insides of the installation screen, follow the on-screen prompts to complete the installation process, then reboot your computer once the operation is complete and see if the issue is fixed once the next startup is complete.
B. Disabling the Proxy Server
- Open up a Run dialog box by pressing Windows key + R. Inside the text box, type ‘inetcpl.cpl’ and press Enter to pen up the Internet Properties tab. When you’re prompted by the UAC (User Account Control), click Yes to grant admin access. Run dialog: inetcpl.cpl
- Once you’re inside the Internet Properties screen, go over the Connection tab from the horizontal menu on the top of the screen, then click on LAN Settings (right under Local Area Network LAN settings).
 Open LAN settings in Internet Options
Once you’re inside the Local Area Network (LAN) settings, access the Proxy server category and uncheck the box associated with Use a proxy server for your LAN.
 Disabling the Proxy server
Источник
Socket Error 10053 — An established connection was aborted by the software in your host machine.
Error 10053 means that an established connection has been dropped.
There are three descriptions of this error message we know about, but the descriptions are given by Windows, so they may vary depending on your version of Windows:
-
An established connection was aborted by the software in your host machine.
-
The TCP/IP Connection was aborted by Windows. This was possibly due to a data transmission timeout or protocol error.
-
The virtual circuit was terminated due to a time-out or other failure. The application should close the socket as it is no longer usable.
In the first of these, the ‘software in your host machine’ that is referred to is actually ‘Winsock’ — the TCP/IP component of Windows, not VPOP3. The ‘protocol error’ referred to in the second text is the TCP protocol, not POP3 or SMTP, etc protocol.
10053 errors are actually quite rare usually, but there are a couple of cases we know of which can cause them:
-
if the 10053 error is being reported by your email client or by VPOP3 when downloading and/or sending email, it could be a problem with your antivirus software. Both McAfee VirusScan 8 and Norton Antivirus 2004 have been found to give these errors sometimes, but other virus scanners or versions may also cause these errors. See below for more information.
-
if the 10053 error is reported in the VPOP3 Status Monitor program, then this usually means that the VPOP3 server has stopped for some reason. It may be that it was stopped by someone else, or it may have failed with an application error.
-
some early releases of version 2 of vPOP3 use the recycle bin quite extensively. Windows is sometimes unable to deal with these requests and this can result in 10053 errors. To eliminate this as a possible cause of 10053 errors, ensure you are running at least version 2.5.0b of vPOP3.
I have a Server and a Client Application, both on the same System.
The client connects to the system via a TCP-Socket, which works fine.
The Server has a loop in which it keeps accepting clients on a non-blocking listen socket.
The function body for the accepting loop:
std::unique_ptr<Connection> p_conn(nullptr);
    		bool connection_establish_pending = false;

    		while(!StopCondition_)
    		{
    			if(!connection_establish_pending)
    				p_conn.reset(new Connection);

    			// accept new connection
    			auto stat = p_conn->Accept(ListenSocket_);
    			if(stat == Connection::Error)
    				break;	// listen socket is unusable
    			if(stat  == Connection::Wouldblock)
    			{
    				connection_establish_pending = true;
    				std::this_thread::sleep_for(std::chrono::milliseconds(300));
    				continue;
    			}
    			// connection has been established
    			connection_establish_pending = false;

    			// create client handling thread
    			std::thread t(_connection_handler_thread, p_conn.release(), this);
    			this->ThreadList_.push_back(std::move(t));	// add to list
    		}
`Connection` is a simple wrapper around a socket.
After the connection was accepted a new thread is started to handle communications with the client:
void ConnectionHandler(std::unique_ptr<Connection> pConn)
    {
    	Message msg;
    	std::vector<char> buf;

    	try
    	{
    		// main loop
    		while(pConn->Recv(msg))		// receive a message
    		{
    			switch(msg.RequestCode())
    			{
    			case 1:
    				{
    					// prepare answer msg...
    					pConn->Send(msg);
    				}
    				break;
    			case 2:
    				// ...
    			}
    		} // while(recv)
    	}
    	catch(...)
    	{
    	}
    }
At the moment, the client is nothing more than the following:
  std::string ip = "localhost", port = "12345";

            // Connect to server
            cout << "Establishing connection..." << endl;;
            Server.Connect(ip, port);
            cout << "Connection established to: " << ip << ":" << port << endl;

            /* Send a message to host*/
            const char Data[] = "Counter"; const size_t data_size = strlen(Data);
            cout << "Sending Message "" << Data << """ << endl;
            auto ret = Server.SendRequest(1, Data, data_size);
            if(!ret)
                cout << "Connection closed serverside" << endl;
            else
            {
                if(!Server.RecvAnswer(rq, vecData))
                    cout << "Connection closed serverside" << endl;
                else
                {
                    cout << "Answer:ntCode = " << rq  << "ntData:" << std::string(vecData.data(), vecData.size()) << endl;
                }

                // Now try to get the module info for "Counter"
                cout << "Requesting module info now... " << endl;
                ret = Server.SendRequest(2, Data, data_size);
                if(!ret)
                    cout << "Connection closed serverside" << endl;
                else
                {
                    if(!Server.RecvAnswer(rq, vecData))
                        cout << "Connection closed serverside";
                    else
                        cout << "Answer:ntCode = " << rq  << "ntData:" << std::string(vecData.data(), vecData.size()) << endl;
                }

            }
Following are my wrappers for receiving and sending data via a socket:
 //prepare a buffer to be used in calls to 'recv'
        std::unique_ptr<char[]> pBuf(new char[BytesToRecv]);

        int Ret = 0;
    size_t BytesReceived = 0;


    do
    {
        //clear the buffer
        memset(pBuf.get(), '', BytesToRecv);

        Ret = recv(Get(), pBuf.get(), BytesToRecv - BytesReceived, 0);
        if(Ret == 0)    // Graceful shutdown
            return Status::Closed;
        if (Ret == SOCKET_ERROR)
        {
            auto ret_code =  GetErrorStatus();    // Wouldblock, Disconnected/Unreachable, Aborted
            if(ret_code == Status::Error)
                throw(socket_exception(Get(), "Failed to recv"));
            return ret_code;
        }


        //Append to the Data-Buffer
        //Data.append(inc::StringToWString(std::string(pBuf.get(), Ret)));
        memcpy_s(&pData[BytesReceived], BytesToRecv - BytesReceived, pBuf.get(), Ret);


        //Count bytes received
        BytesReceived += static_cast<size_t>(Ret);


        //reset the return code
        Ret = 0;

    } while (BytesReceived < BytesToRecv);
And here my sending code:
size_t total = 0;                //total sent
        size_t bytesleft = DataSize;    //bytes left to be sent
        int ret = 0;

        //as long as there is data to send...
        while (total < DataSize)
        {
            //...send what's left
            ret = send(Get(), pData + total, bytesleft, 0);
            if(ret == SOCKET_ERROR)
            {
                auto ret = GetErrorStatus();    // Aborted, Wouldblock, Unreachable/Disconnected
                if(ret == Status::Error)
                    throw(socket_exception(Get(), "Failed to send"));
                return ret;
            }

            total += ret;
            bytesleft -= ret;
        }
And here is the code to RecvAnswer: (it makes a call to the recv-code above and extracts the data to a buffer (nothin really network related except from the call to the recv)
 bool RecvAnswer(request_type& Request, std::vector<char>& vecData)
    {
        Message Msg;
        if(!pimpl->Connection_.Recv(Msg))
            return false;

        vecData = Msg.Data();
        Request = Msg.RequestCode();

        return true;
    }
The problem that occurs is, that when i run the client without breakpoints, step-through, etc it successfully sends the first request and receives data from the server. After the second request when i call recv it returns the 10053-Error.
Funnily, when i step through the code i get the 10053-error right on the first call to recv.
Turning off firewall and antivirus software does not help.
Strange thing to me is, that it workswhen i put the listening(!) socket into blocking mode.
Any help would be greatly appreciated.
Thank You!
If required, i could also add someone to my visualstudio.com-project (if she/he as an visualstudio-account) so the full code could be read.
by
·
Published
· Updated

10053 Error
Winsock 10053 Error is a network related problem that automatically aborts connection to the local network as a result of the remote host not acknowledging data even after retrying multiple times. The error notifications usually appear when a client is attempting to connect to the Internet using the network. This 1005 3error will prevent you from accessing the Internet and the local network. You need to repair this error to be able to gain access to the network. This tutorial will help you fix the WinSock 10053 error.
What Causes This Error?
The 10053 error is primarily caused by the way in which your system is unable to properly read or load files that are required by the WinSock application, which is a centralized process that enables your computer to gain access to other machines in the network or the Internet. The problem can also be caused by improper network settings, virus infections and errors inside the registry. You need to identify the source of the problem to be able to fix the error – which can be performed using the steps below:
How To Fix The 10053 Error On Your PC
Step 1 – Delete Your PC’s Proxy Server IP Addresses
To repair the error, you need to delete the IP address that corresponds to the PC’s Proxy server’s external adapter, and then disable the external adapter’s WINS support. Here’s how to do this:
- Click Start> Control Panel> Network> Bindings tab.
- Inside the Show Binding For box, click All Adapters, and expand all of the adapters.
- Click WINS Client (TCP/IP)> Disable.
- Reboot the server.
This process will unbind the WINS client (TCP/IP) interface.
Step 2 – Add The Client IP To Your System
After rebooting your server, you can then add the IP address of the client that is receiving the error message to the LAT table on the Proxy server. Here’s how you can do this:
- Start the Internet Service Manager tool.
- Right-click on the Web Proxy and click Properties.
- Click Local Address Table.
- Add the appropriate range that encompasses the IP address of the client.
- Click OK> OK.
Step 3 – Clean Out Any Viruses On Your PC
The error can also be caused by malicious software (malware) specifically a virus infection that negatively affects your system. You need to use a powerful “anti-malware” program like XOFTSPY to clean out hard-to-remove viruses. It is important that you will be able to use your computer without any malicious piece of software.
Step 4 – Clean Out The Registry Of Windows
- Download This Registry Cleaner
The “registry” is a large central database that serves a very important purpose of storing all the settings and options for all files and programs needed by Windows to load or execute them properly. However, this Windows component keeps on accumulating errors just like the 10053 errors as you keep using your computer due to the way it uses and saves multiple registry keys causing them to become corrupted or damaged. To fix the problem, you need to repair the errors inside the registry by using a legitimate ‘registry cleaner’ application which can accurately detect broken registry entries after scanning your system and effectively repairs the errors.