Вы когда-нибудь задумывались, как изменить страницы входа и регистрации в WooCommerce?
Если вы используете WooCommerce для своего интернет-магазина, то вы уже хорошо знакомы с последним. На сегодняшний день это одна из лучших платформ электронной коммерции.
Нельзя игнорировать тот факт, что им очень удобно пользоваться и он может принести большую пользу вашему интернет-магазину. Есть много коллекций Темы WordPress et Плагины и расширения WooCommerce чтобы помочь вам в этом.
Но все же некоторые из его функций, такие как вход в WooCommerce или форма регистрации WooCommerce, весьма ограничены. Об этом мы и поговорим в этой статье.
Тогда вернемся к тому, почему мы здесь.
Зачем настраивать формы входа и регистрации WooCommerce?
Ограниченные варианты полей:
Форма регистрации и входа в WooCommerce по умолчанию имеет соответствующие поля для создания учетной записи пользователем. Но если вы хотите добавить еще несколько полей, вы не можете этого сделать по умолчанию. Вы не могу добавлять и отображать поля, такие как флажки, раскрывающиеся меню, а также адрес для выставления счетов и доставки, когда это необходимо или желательно.
Отдельные страницы входа и регистрации
По умолчанию формы входа и регистрации WooCommerce отображаются на одной странице. Хотя это тоже очень полезно, вы не можете создавать отдельные страницы для форм входа и регистрации, если хотите. Вы должны использовать код или какой-либо другой плагин, чтобы преодолеть это.
Ограничения дизайна
Для некоторых пользователей визуальное представление форм входа и регистрации WooCommerce по умолчанию может быть немного скучным и утомительным. К сожалению, WooCommerce не дает вам возможности настраивать их. Таким образом, вы не можете использовать разные цвета, текстовые форматы или границы в форме по умолчанию.
Настройте формы входа и регистрации в WooCommerce:
Большинство настроек вашей страницы входа в WooCommerce и формы регистрации можно легко выполнить с помощью всего одного плагина, Регистрация Пользователя. Это плагин, специально предназначенный для создания эффективных форм входа и регистрации для вашего сайта. Оно имеет интерфейс, поддерживающий функцию перетаскивания с помощью которого вы можете легко вносить изменения без кодирование.
Все, что вам нужно сделать, это установить и активировать его.

Вам также необходимо добавить некоторые его расширения.WooCommerce Аддон может помочь продолжить дальше. Благодаря этому надстройке вы можете легко интегрировать свои пользовательские формы регистрации в WooCommerce и преодолеть ограничения WooCommerce.

После этого вы можете использовать его для создания форм входа или регистрации WooCommerce и начать их редактировать.
1. Добавьте дополнительные поля в свой логин или регистрационную форму WooCommerce.
Le Плагин WordPress Регистрация Пользователя дает вам возможность добавить больше полей в вашу регистрационную форму. Прежде всего вам нужно создать новую регистрационную форму, оттуда перейдите в Регистрация Пользователя >> Добавить новый в панели управления WordPress.
Откройте для себя тоже Как добавить фоновое изображение в WordPress
Вы можете использовать поля Выставление счетов и доставка WooCommerce дополнительно из вкладки Поля в левой части экрана.
При необходимости вы даже можете добавить дополнительные поля с раскрывающимися меню, флажками и переключателями.

Эти поля можно легко добавить с помощью функции перетаскивания Плагин WordPress Регистрация пользователя. Ваши новые поля формы будут видны в регистрационной форме, когда ваши пользователи захотят создать новую учетную запись.
2. Замените стандартные формы входа и регистрации WooCommerce.
После того, как вы создали новую форму входа в WooCommerce или регистрационную форму, вы должны заменить ее формой WooCommerce по умолчанию.
Смотрите также наше руководство по Как добавить WooCommerce магазин на Facebook
Все, что вам нужно сделать, это продолжить WooCommerce >> Настройки и откройте вкладку Аккаунты и конфиденциальность. Под разделом Создание аккаунта, проверка Разрешить клиентам создавать учетные записи на странице «Моя учетная запись» и сохраните изменения.

Затем перейдите к Регистрация Пользователя >> Настройки и откройте вкладку WooCommerce. Здесь выберите регистрационную форму, которую хотите интегрировать. Затем отметьте опцию Заменить страницу регистрации и сохраните изменения.
Читайте также нашу статью о Как отобразить меню для ваших WooCommerce условных абонентов
Теперь отобразятся ваша персонализированная форма входа в WooCommerce и форма регистрации.
И формы входа в WooCommerce, и регистрационные формы по умолчанию будут отображаться на одной странице. Но если ты хотите отображать их на разных страницах, вы также можете сделать это с помощью плагина Регистрация Пользователя. Сначала создайте отдельные страницы для страниц регистрации и входа.
Чтобы отобразить страницу входа отдельнодобавьте следующий шорткод на страницу, которую хотите отобразить. Вы также должны перенаправить его на ссылку страницы учетной записи после входа пользователя. Просто добавьте параметр REDIRECT_URL по ссылке страницы и опубликуйте последнюю.
[user_registration_my-account redirect_url = "ссылка на страницу аккаунта"]

Чтобы отобразить страницу регистрации отдельно, у вас должен быть созданный вами шорткод для регистрации WooCommerce. Вы можете получить это, продолжая Регистрация Пользователя >> Регистрация пользователя из панели управления WordPress.

Теперь скопируйте и вставьте шорткод в то место, где вы хотите отобразить регистрационную форму. Затем опубликуйте страницу.
Ou
Вы можете просто использовать редактор блоков, чтобы просмотреть созданную вами регистрационную форму. Просто ищите блок Регистрация Пользователя и выберите регистрационную форму, которую хотите просмотреть. Затем опубликуйте страницу.

3. Показать дополнительные поля на странице аккаунта.
После входа в систему или регистрации новой учетной записи пользователь перенаправляется на страницу Моя учетная запись. Но дополнительные сведения на странице входа или регистрации WooCommerce могут не отображаться на странице учетной записи.
Вот 10 плагинов WordPress для добавления калькулятора на ваш сайт
Но после того, как вы успешно заменили формы входа и регистрации, вы можете просмотреть дополнительную информацию на странице учетной записи. Просто иди Моя учетная запись >> Детали учетной записи.
Примечание: Внешний вид страницы «Моя учетная запись» может отличаться от темы к теме.
4. Интегрируйте учетную запись WooCommerce на странице оформления заказа.
Для удобства ваших клиентов вы также можете отобразить персонализированную форму регистрации на странице оформления заказа с помощью плагина регистрации пользователей. Вы даже можете выбрать, какие поля вы хотите, чтобы они заполняли на странице оформления заказа. Чтобы добавить свою учетную запись WooCommerce на страницу оформления заказа, вам просто нужно выполнить указанные шаги.
Читайте также нашу статью о 10 плагинов WordPress WooCommerce для использования в своем блоге
Просто иди WooCommerce >> Настройки и откройте вкладку Аккаунты и конфиденциальность. Тогда в разделе Аккаунт и конфиденциальность, проверьте вариант Разрешить клиентам создавать учетные записи во время проверки заказа.

Снова перейдите к Регистрация пользователя >> Настройки, и под вкладкой WooCommerce, вы увидите раздел Синхронизация регистрации на кассе. Здесь достаточно отметьте опцию: отметьте эту опцию, чтобы синхронизировать регистрацию пользователя с регистрацией оформления заказа WooCommerce. Будут отображаться дополнительные поля, недоступные в форме регистрации WooCommerce.

Затем вам просто нужно выбрать поля, которые вы хотите отображать для своих клиентов в форме регистрации для оформления заказа. Он даже включает поля адреса для выставления счетов и доставки.
В следующий раз, когда ваш клиент захочет оформить заказ, он получит форму с дополнительными специальными полями, которые нужно будет заполнить.
5. Измените дизайн форм входа и регистрации WooCommerce.
User Registration — отличный плагин для создания форм WordPress, который даже позволяет полностью настраивать формы входа и регистрации WooCommerce.
Вы можете использовать его Аддон Настройщик стилей чтобы помочь вам изменить внешний вид всей регистрационной формы по вашему желанию. Его довольно легко использовать, так как он имеет интерфейс, который поддерживает функцию перетаскивания с возможностью предварительного просмотра в реальном времени.

Все, что вам нужно сделать, это приобрести надстройку Style Customizer и отредактировать существующую форму WooCommerce или создать новую. Затем нажмите на кнопка со значком кисти в правом нижнем углу экрана.

Теперь вы сможете увидеть панель настройки.
Здесь вы можете изменить всевозможные элементы дизайна для форм входа и регистрации. Некоторые из них касаются общего внешнего вида формы, меток полей, описания и стилей переключателей или флажков. Он даже имеет дополнительные параметры для заголовков разделов, сообщений и дополнительного CSS.

Когда вы закончите настраивать их, сохраните их. Каждое изменение, которое вы вносите в настройку стиля, будет автоматически интегрировано в форму входа или регистрации WooCommerce.
Откройте для себя тоже Как защитить паролем ваши формы WordPress
Таким образом, вы сможете увидеть эти изменения, где бы вы ни разместили форму в своем интернет-магазине.
Дополнительная информация:
Вот некоторые из наиболее полезных советов о том, как вы можете использовать и настраивать различные аспекты ваших форм входа и регистрации WooCommerce. Это может оказать большую помощь в привлечении ряда клиентов на ваш веб-сайт с помощью простого интерфейса, который позволяет им создавать или входить в свою учетную запись WooCommerce.
Другие дополнительные премиальные плагины WordPress
Также откройте для себя другие WordPress плагины премиум, которые оптимизируют производительность вашего блога или веб-сайта WordPress.
MapSVG est l’un des plugins WordPress de création d’annuaire les plus puissants et les plus performants. Il vous permet de transformer n’importe quel fichier SVG en cartes vectorielles interactives et en cartes entièrement personnalisables. Il vous permet de créer un répertoire d’entreprises местные, списки поставщиков и т. д. 
Il propose une carte pour tous les principaux pays du monde. Ses principales fonctionnalités sont : l’édition des cartes SVG dans n’importe quel éditeur de vecteurs afin de pouvoir facilement dessiner vos propres cartes, une base de données intégrée pour afficher tout type d’objet, des outils puissants de création de formulaire, pour renseigner la base de données, l’ajout des marqueurs de géolocalisation et autres.
Читайте также нашу статью о Как дольше держать посетителей на вашем сайте
скачать| Демонстрация | веб-хостинг
Этот плагин позволяет вам легко добавлять функцию панорамирования для изображений на вашем WordPress блог через шорткод. Например, вы можете интегрировать его в свою статью или на свою страницу.
В качестве функциональных возможностей вы будете иметь среди прочего: панорамный зум одного изображения или галерею с неограниченным количеством изображений, положение панели управления может быть верхним, правым, нижним и левым, дно контейнера может быть темным, светлым и ничего из этого; предварительный просмотр на панели инструментов, пример многократного панорамного масштабирования одной страницы и т. д.
Этот премиальный плагин WordPress обеспечивает простой и гибкий пользовательский интерфейс, целью которого будет поможет вам легко создать мощный информационный бюллетень на вашем сайте. Его гибкость позволит вам управлять широким спектром событий, условий и действий, поэтому вы можете легко настроить свою маркетинговую стратегию электронной почты для отправки, отслеживания и получения прибыли.
Его основные функции: возможность применения условной логики, основанной на реакции и поведении посетителей, отслеживание действий посетителей веб-сайта, идеально подходит для всех программ лояльности, отлично подходит для маркетинговых стратегий, которые делают ставки. о наградах, интуитивно понятная панель инструментов, сегментация посетителей сайта, возможность проведения опросов, смс уведомления и по электронной почте, всплывающие окна, основанные на поведении посетителей, рекламные баннеры, основанные на поведении посетителей и многое другое.
Рекомендуемые ресурсы
Узнайте о других рекомендуемых ресурсах, которые помогут вам создать и управлять своим сайтом.
Whether you use WooCommerce or not, you may already be aware that it’s one of the most popular open-source eCommerce solutions available today. As with any software however, it does have certain limitations and drawbacks. In this article we’re going to address one of these… the inability to fully customize and/or separate the login and registration pages.
One of the most common requests from WooCommerce users is to be able to update and customize both the login and registration pages. Ideally, many users would also like to be able to separate these pages rather than have them as an ‘all in one’ page. In this article we’re going to look at how you can achieve both of these things… a fully customized AND separated login/registration page for your WooCommerce website.
Let’s get started!
Using a Plugin
Perhaps unsurprisingly, the easiest way to solve the logon/registration page customization dilemma is by using a plugin. We’ve selected a few of the best that you might like to consider using. Let’s take a look at them.
Woocommerce Login / Signup Lite
Go to your WordPress admin menu and in the “Plugins -> Add New” area, install and activate the plugin.
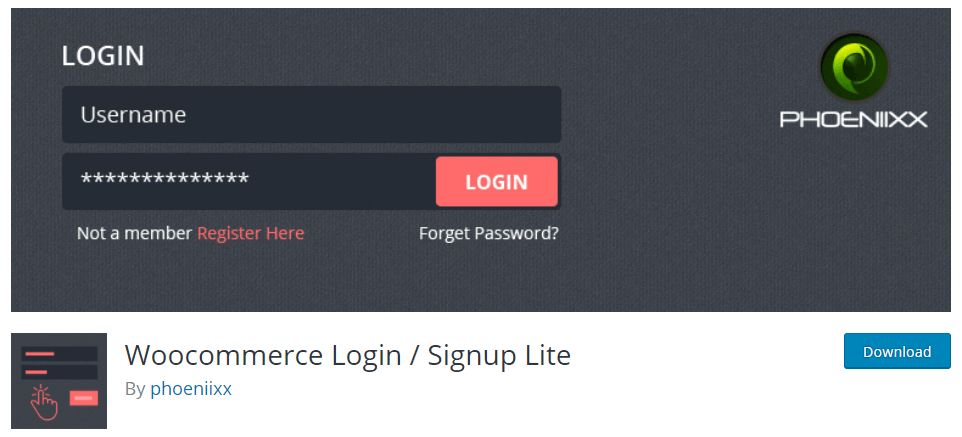
The Woocommerce Login / Signup Lite plugin is a free plugin that also offers a premium version. For our needs however the free version should be just fine. It’s pretty easy to use. Once installed, you’ll be able to create shortcodes that correspond to the kind of form you require (e.g. a login or registration form). You’re then able to paste this shortcode onto any page you wish. Shortcodes include:
- The
[lsphe-login-form]shortcode to create a login form. - The
[lsphe-signup-form]shortcode to create a registration form. - The
[lsphe-header]shortcode to create a form that will include both login & registration forms.
You can see the available Shortcodes in the plugin’s admin area.
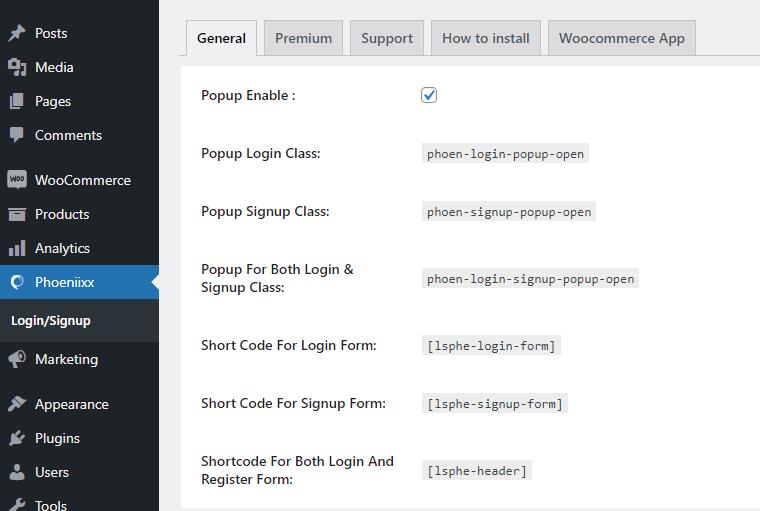
One other great feature this plugin offers is the ability to create a popup login/registration window from a menu item. This looks pretty neat and provides further flexibility when it comes to offering login options to your customers. To create on of these follow these steps:
- Click Appearance > Menus to enter the menu admin screen.
- Use the arrow in the top right to open the screen options and enable the ‘CSS classes’ in the ‘Show Advanced Menu properties’.

- Create a Custom link Menu item and give a “#” URL. Name the item whatever you want and add it to the menu.
- Once it appears in the menu list, open its accordion section and, in the CSS class, add the following:
phoen-login-popup-open
To do the same for a registration popup, follow the same steps and use the phoen-signup-popup-open class and to display both forms use the phoen-login-signup-popup-open class.
User Registration
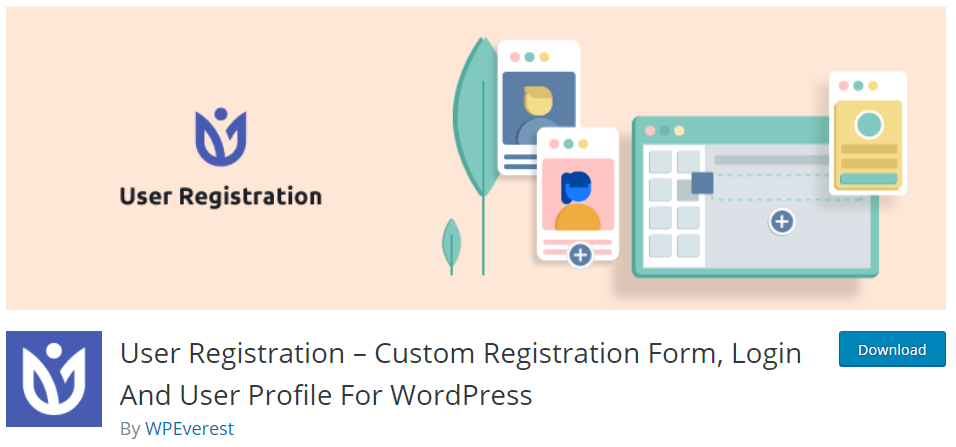
The User Registration plugin allows you to create frontend forms using drag ‘n’ drop fields which allow for easy form design and reordering.
After you’ve installed the plugin head to the ‘User Registration’ where you can get started building your bespoke registration form for your WooCommerce store. You will notice there is a pre-built form that has a shortcode you can copy and paste into your website at a location of your choice. The form will look something like this:
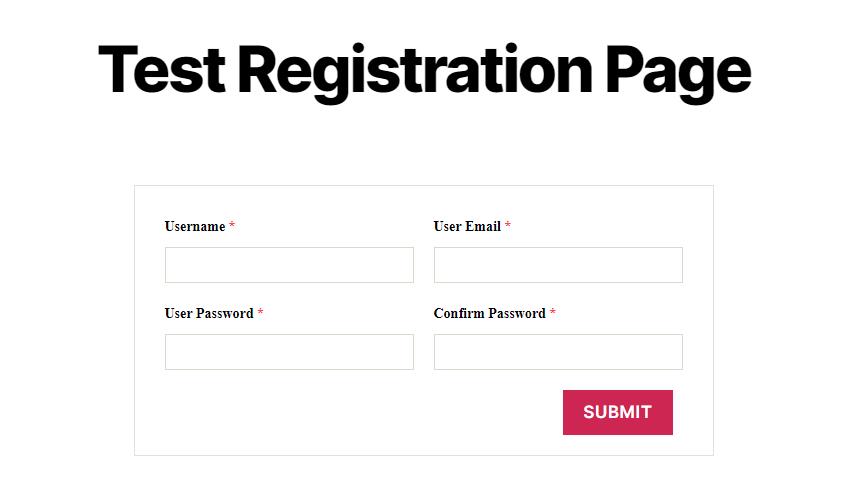
You can of course edit the form or create a new one really easily. Just follow the prompts within the plugin and you’ll be up and running with a form of your choice in no time.
Another plugin that is worth considering is the Login/Signup Popup (Inline Form + Woocommerce). Rather than on-page forms, the plugin (as the name suggests) helps you create popup login forms that can be triggered from a link or button on your website. Popups can be great and can help save space on the page as well as give people the oportunity to login from any point on your site without being redirected to a specific login or registration page.
As with all the plugins listed, you are free to fully customize the design of the forms. Other notable features include things like ‘Social’ logins which allow users to login using their Google or Facebook logins. This is done with a paid Custom Registration Field addon.
Code Your Own WooCommerce Registration & Login Pages
If you don’t want to use a plugin to create your own WooCommerce login/registration pages then why not code your own! As always, coding provides the ultimate in control over features, design and function and so is the perfect option if you need to achieve a specific task or want to avoid the potential bloat that comes with a plugin.
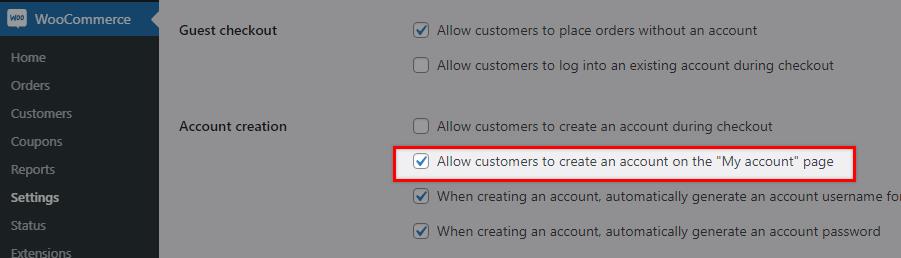
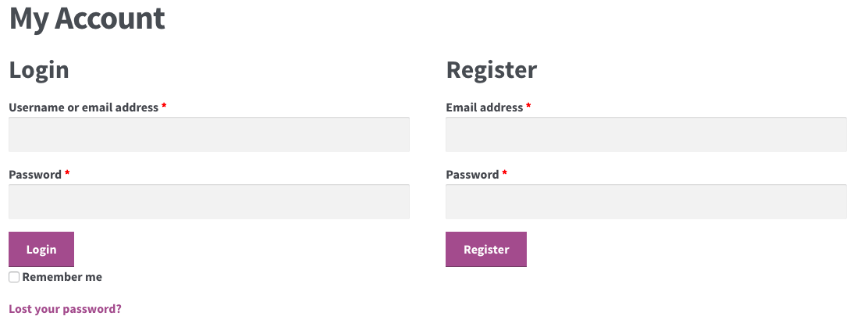
To get started with this tutorial first setup a menu item that links to the standard WooCommerce ‘My Account’ page. Now if you visit this menu link on the front end of the website you will either see the login form or a two column layout which contains both the registration form and the login form. Which will depend on what you’ve set in the WooCommerce Account creation option shown below.
Using a SFTP Client, login to your web server so you can see your website folders. Under /wp-content/plugins/woocommerce/templates/myaccount/ you ‘ll find the form-login.php file. Open that file with your favorite editor.
The code in this file includes both the login and registration forms. You can see the content of this file on the official git page. There you will notice that there is an if condition <?php if ( 'yes' === get_option( 'woocommerce_enable_myaccount_registration' ) ) : ?> which refers to the admin option in the screenshot above.
Using this we’ll be able to separate the login and registration pages as well as customize the forms with just a few tweaks.
Customize the Login Form
To begin, you’ll want to make sure any changes you make to the login/registration form are done in a safe way so they cannot be reverted when future updates take place.
![]()
Host your website with Pressidium
60-DAY MONEY BACK GUARANTEE
SEE OUR PLANS
If you are already logged in via your SFTP client, go to wp-content/themes/__my__theme__. and create a ‘woocommerce’ folder. Inside this folder, create a copy of the Woocommerce templates. It is important that you keep the file structure but remove the /templates/ subdirectory. For example, we have the Twenty Twenty theme installed and the WooCommerce form-login.php is under plugins/woocommerce/templates/myaccount/. That means that in order to override the form, we have to create an hierarchy like this: /themes/twentytwenty/woocommerce/myaccount/ and inside place the form-login.php file.
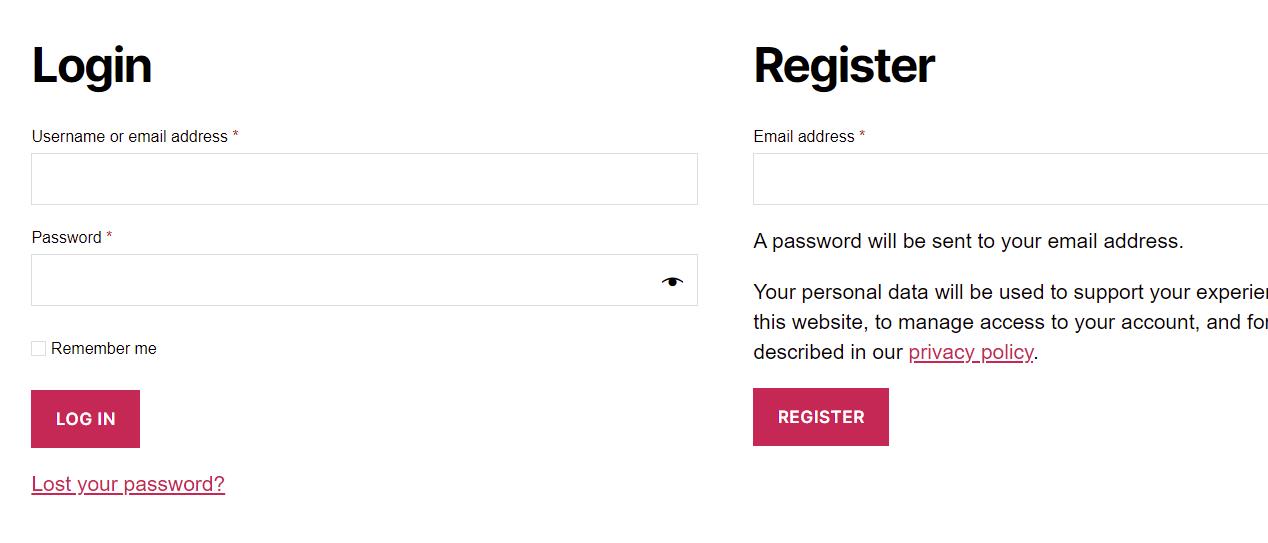
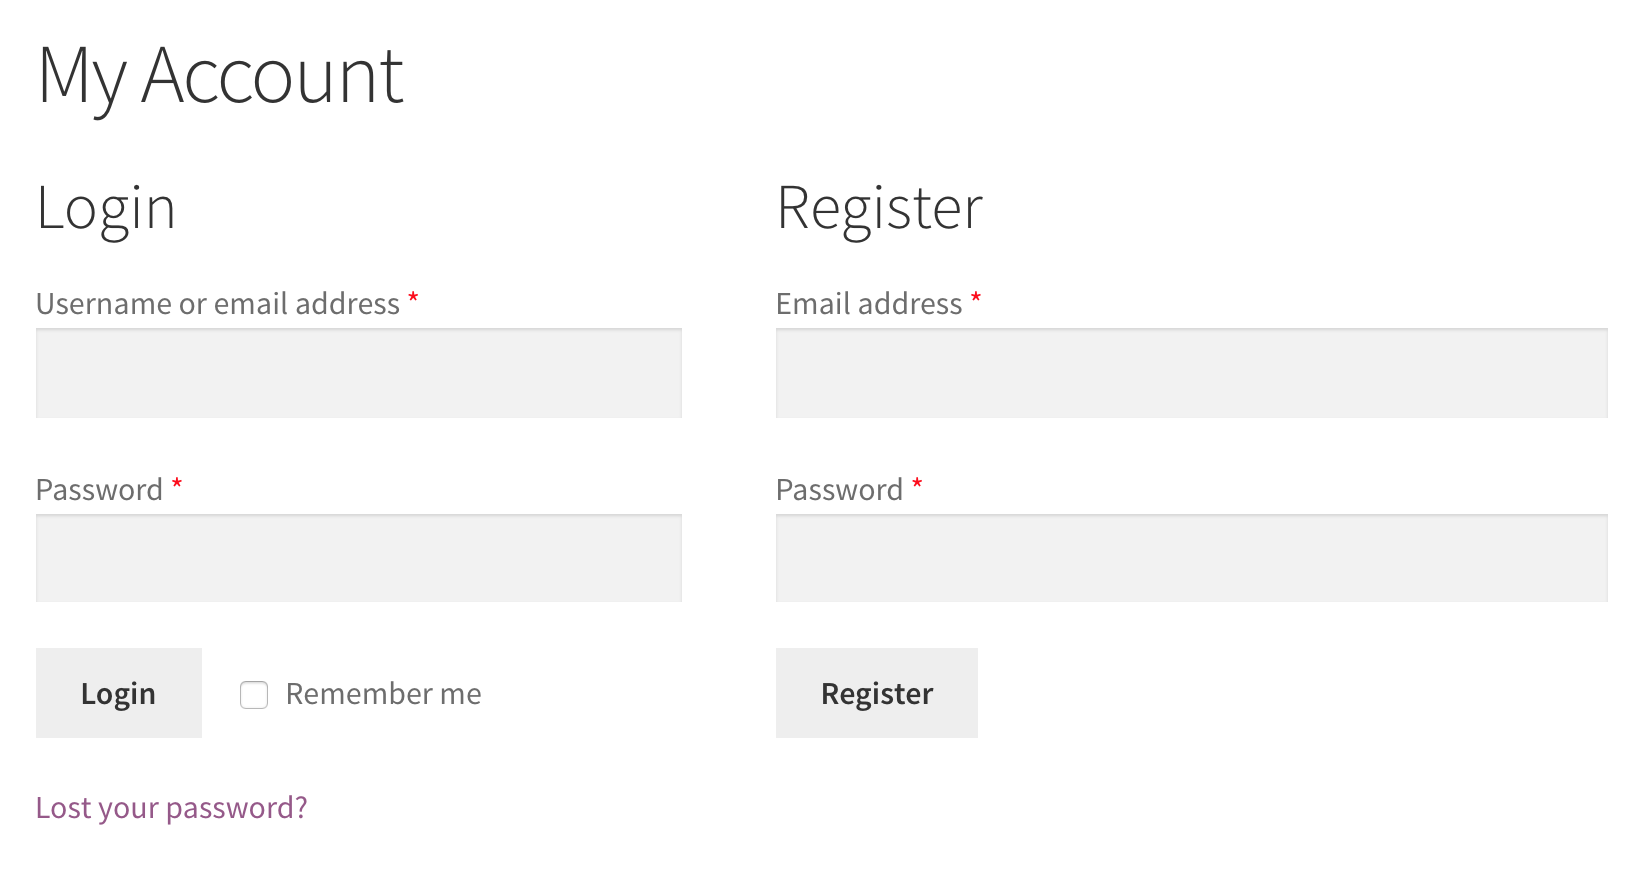
Let’s test it. At this point we see this output when visiting the Account page on the front end of our website:
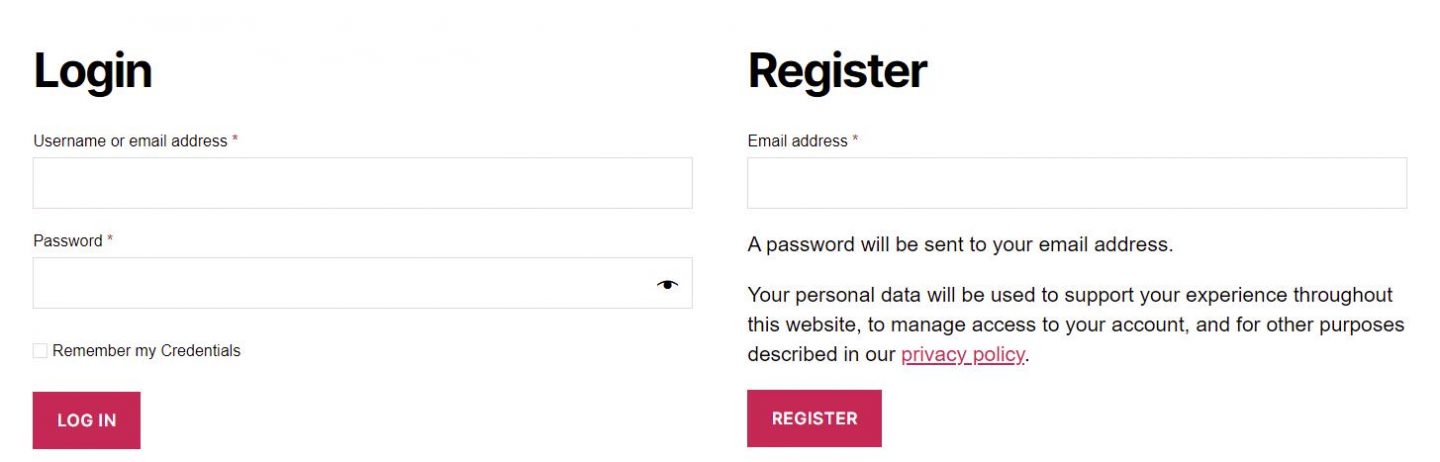
Now if we try to change anything in the code inside the form-login.php duplicate, we will notice that it will affect the layout as expected. Let’s try a minor change just to check this is working. We’ll change the ‘Remember me’ text to ‘Remember my Credentials’ and voila, if we refresh the front end page we should see that update has taken effect.
Separate Login/Registration
Here are the steps you need to follow in order to separate login and register pages:
To begin we will register a new custom template. To do this, create a new file called register.php and place it in the templates folder. Inside this file we will insert the following code:
<?php
/*
* Template name: Registration Form
*/
?>
<?php if(is_user_logged_in()){
wp_redirect(get_permalink(get_option('woocommerce_myaccount_page_id')));
} ?>
<?php get_header();?>
<?php do_action( 'woocommerce_before_customer_login_form' ); ?>
<div class="custom-registration">
<h2><?php esc_html_e( 'Register', 'woocommerce' ); ?></h2>
<form method="post" class="woocommerce-form woocommerce-form-register register" <?php do_action( 'woocommerce_register_form_tag' ); ?> >
<?php do_action( 'woocommerce_register_form_start' ); ?>
<?php if ( 'no' === get_option( 'woocommerce_registration_generate_username' ) ) : ?>
<p class="woocommerce-form-row woocommerce-form-row--wide form-row form-row-wide">
<label for="reg_username"><?php esc_html_e( 'Username', 'woocommerce' ); ?> <span class="required">*</span></label>
<input type="text" class="woocommerce-Input woocommerce-Input--text input-text" name="username" id="reg_username" autocomplete="username" value="<?php echo ( ! empty( $_POST['username'] ) ) ? esc_attr( wp_unslash( $_POST['username'] ) ) : ''; ?>" /><?php // @codingStandardsIgnoreLine ?>
</p>
<?php endif; ?>
<p class="woocommerce-form-row woocommerce-form-row--wide form-row form-row-wide">
<label for="reg_email"><?php esc_html_e( 'Email address', 'woocommerce' ); ?> <span class="required">*</span></label>
<input type="email" class="woocommerce-Input woocommerce-Input--text input-text" name="email" id="reg_email" autocomplete="email" value="<?php echo ( ! empty( $_POST['email'] ) ) ? esc_attr( wp_unslash( $_POST['email'] ) ) : ''; ?>" /><?php // @codingStandardsIgnoreLine ?>
</p>
<?php if ( 'no' === get_option( 'woocommerce_registration_generate_password' ) ) : ?>
<p class="woocommerce-form-row woocommerce-form-row--wide form-row form-row-wide">
<label for="reg_password"><?php esc_html_e( 'Password', 'woocommerce' ); ?> <span class="required">*</span></label>
<input type="password" class="woocommerce-Input woocommerce-Input--text input-text" name="password" id="reg_password" autocomplete="new-password" />
</p>
<?php else : ?>
<p><?php esc_html_e( 'A password will be sent to your email address.', 'woocommerce' ); ?></p>
<?php endif; ?>
<?php do_action( 'woocommerce_register_form' ); ?>
<p class="woocommerce-form-row form-row">
<?php wp_nonce_field( 'woocommerce-register', 'woocommerce-register-nonce' ); ?>
<button type="submit" class="woocommerce-Button woocommerce-button button woocommerce-form-register__submit" name="register" value="<?php esc_attr_e( 'Register', 'woocommerce' ); ?>"><?php esc_html_e( 'Register', 'woocommerce' ); ?></button>
</p>
<?php do_action( 'woocommerce_register_form_end' ); ?>
</form>
</div>
<?php do_action( 'woocommerce_after_customer_login_form' ); ?>
<?php get_footer();?>What we’ve done initially in this code is defined the template name in the Template name: Registration Form comment. Then we check if the user is already logged in. The rest of the code is essentially a copy of the part of the login-form.php content that is related to the registration form wrapped within a <div class="custom-registration"> element.
Next, we add a new Page in the wp-admin Pages screen and name it what we like. It would perhaps make sense to call it something like ‘Registration Page’. Then, make sure you select the right template (the one we just created) using the template selector in the right sidebar.

Now all we have to do is to provide a way for uses to access this page. You could create a ‘Register’ menu item and link it to the Registration Page you just created or you can edit the form-login.php and replace the registration code with just a link to the Registration Page.
If we did this we’d modify the form-login.php file under themes/twentytwenty/woocommerce/myaccount/ so that is content looks like this:
<?php
/**
* Login Form
*
* This template can be overridden by copying it to yourtheme/woocommerce/myaccount/form-login.php.
*
* HOWEVER, on occasion WooCommerce will need to update template files and you
* (the theme developer) will need to copy the new files to your theme to
* maintain compatibility. We try to do this as little as possible, but it does
* happen. When this occurs the version of the template file will be bumped and
* the readme will list any important changes.
*
* @see https://docs.woocommerce.com/document/template-structure/
* @package WooCommerceTemplates
* @version 4.1.0
*/
if ( ! defined( 'ABSPATH' ) ) {
exit; // Exit if accessed directly.
}
do_action( 'woocommerce_before_customer_login_form' ); ?>
<h2><?php esc_html_e( 'Login', 'woocommerce' ); ?></h2>
<form class="woocommerce-form woocommerce-form-login login" method="post">
<?php do_action( 'woocommerce_login_form_start' ); ?>
<p class="woocommerce-form-row woocommerce-form-row--wide form-row form-row-wide">
<label for="username"><?php esc_html_e( 'Username or email address', 'woocommerce' ); ?> <span class="required">*</span></label>
<input type="text" class="woocommerce-Input woocommerce-Input--text input-text" name="username" id="username" autocomplete="username" value="<?php echo ( ! empty( $_POST['username'] ) ) ? esc_attr( wp_unslash( $_POST['username'] ) ) : ''; ?>" /><?php // @codingStandardsIgnoreLine ?>
</p>
<p class="woocommerce-form-row woocommerce-form-row--wide form-row form-row-wide">
<label for="password"><?php esc_html_e( 'Password', 'woocommerce' ); ?> <span class="required">*</span></label>
<input class="woocommerce-Input woocommerce-Input--text input-text" type="password" name="password" id="password" autocomplete="current-password" />
</p>
<?php do_action( 'woocommerce_login_form' ); ?>
<p class="form-row">
<label class="woocommerce-form__label woocommerce-form__label-for-checkbox woocommerce-form-login__rememberme">
<input class="woocommerce-form__input woocommerce-form__input-checkbox" name="rememberme" type="checkbox" id="rememberme" value="forever" /> <span><?php esc_html_e( 'Remember me', 'woocommerce' ); ?></span>
</label>
<?php wp_nonce_field( 'woocommerce-login', 'woocommerce-login-nonce' ); ?>
<button type="submit" class="woocommerce-button button woocommerce-form-login__submit" name="login" value="<?php esc_attr_e( 'Log in', 'woocommerce' ); ?>"><?php esc_html_e( 'Log in', 'woocommerce' ); ?></button>
</p>
<p class="woocommerce-LostPassword lost_password">
<a href="<?php echo esc_url( wp_lostpassword_url() ); ?>"><?php esc_html_e( 'Lost your password?', 'woocommerce' ); ?></a>
</p>
<?php do_action( 'woocommerce_login_form_end' ); ?>
</form>
<a href="/?p=202">Sign Up</a>
<?php do_action( 'woocommerce_after_customer_login_form' ); ?>The number 202 is the id of the custom registration page. As a quick reminder, you can see the page id in the URL when it is open in the backend editor.
Now if you take a look at the page from the front end, you should see something like this when you visit the account details page:
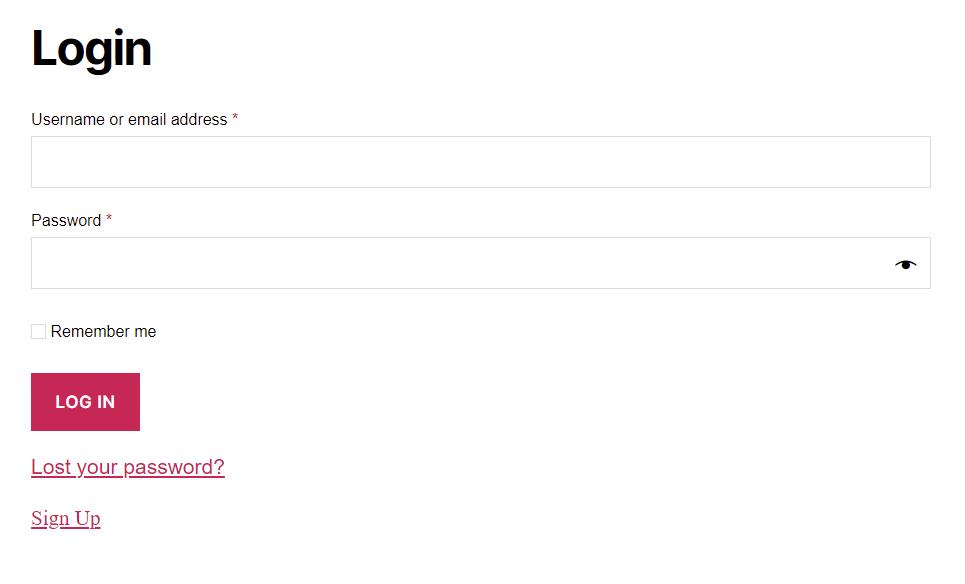
If you click on the Sign Up link you should be redirected to the registration page we created like the one shown below:
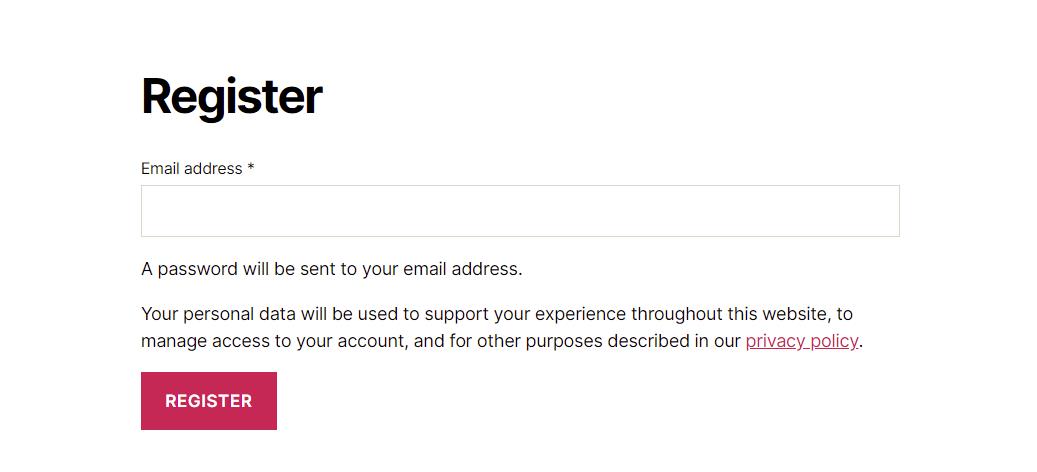
Pretty easy isn’t it?
Creating a Shortcode
The WooCommerce account page contains the [woocommerce_my_account] shortcode which can be used to outputs the forms using the form-login.php file. In this section we will see how we can create our own shortcodes, one for the login form and one for the registration form that we created above.
WooCommerce Registration Shortcode
Open your theme’s functions.php file with your editor and insert the following lines:
// REGISTRATION SHORTCODE
function wc_registration_form_function() {
   if ( is_admin() ) return;
   if ( is_user_logged_in() ) return;

 // OUR REGISTRATION FORM CONTENT

}
add_shortcode( 'wc_registration_form', 'wc_registration_form_function' );
By doing this we avoid the need to use a separate custom template. Instead, we will include the contents of the template we created earlier like this:
// REGISTRATION SHORTCODE
function wc_registration_form_function() {
if ( is_admin() ) return;
if ( is_user_logged_in() ) return;
ob_start();
do_action( 'woocommerce_before_customer_login_form' );
?>
<form method="post" class="woocommerce-form woocommerce-form-register register" <?php do_action( 'woocommerce_register_form_tag' ); ?> >
<?php do_action( 'woocommerce_register_form_start' ); ?>
<?php if ( 'no' === get_option( 'woocommerce_registration_generate_username' ) ) : ?>
<p class="woocommerce-form-row woocommerce-form-row--wide form-row form-row-wide">
<label for="reg_username"><?php esc_html_e( 'Username', 'woocommerce' ); ?> <span class="required">*</span></label>
<input type="text" class="woocommerce-Input woocommerce-Input--text input-text" name="username" id="reg_username" autocomplete="username" value="<?php echo ( ! empty( $_POST['username'] ) ) ? esc_attr( wp_unslash( $_POST['username'] ) ) : ''; ?>" /><?php // @codingStandardsIgnoreLine ?>
</p>
<?php endif; ?>
<p class="woocommerce-form-row woocommerce-form-row--wide form-row form-row-wide">
<label for="reg_email"><?php esc_html_e( 'Email address', 'woocommerce' ); ?> <span class="required">*</span></label>
<input type="email" class="woocommerce-Input woocommerce-Input--text input-text" name="email" id="reg_email" autocomplete="email" value="<?php echo ( ! empty( $_POST['email'] ) ) ? esc_attr( wp_unslash( $_POST['email'] ) ) : ''; ?>" /><?php // @codingStandardsIgnoreLine ?>
</p>
<?php if ( 'no' === get_option( 'woocommerce_registration_generate_password' ) ) : ?>
<p class="woocommerce-form-row woocommerce-form-row--wide form-row form-row-wide">
<label for="reg_password"><?php esc_html_e( 'Password', 'woocommerce' ); ?> <span class="required">*</span></label>
<input type="password" class="woocommerce-Input woocommerce-Input--text input-text" name="password" id="reg_password" autocomplete="new-password" />
</p>
<?php else : ?>
<p><?php esc_html_e( 'A password will be sent to your email address.', 'woocommerce' ); ?></p>
<?php endif; ?>
<?php do_action( 'woocommerce_register_form' ); ?>
<p class="woocommerce-form-row form-row">
<?php wp_nonce_field( 'woocommerce-register', 'woocommerce-register-nonce' ); ?>
<button type="submit" class="woocommerce-Button woocommerce-button button woocommerce-form-register__submit" name="register" value="<?php esc_attr_e( 'Register', 'woocommerce' ); ?>"><?php esc_html_e( 'Register', 'woocommerce' ); ?></button>
</p>
<?php do_action( 'woocommerce_register_form_end' ); ?>
</form>
<?php
return ob_get_clean();
}
add_shortcode( 'wc_registration_form', 'wc_registration_form_function' );As you can see, we named the Shortcode [wc_registration_form] and wrapped our HTML in an ob_start() function. This way we turn on output buffering so that the HTML is stored and returned as a string.
We are now ready to go into our admin area and edit our Registration page. When you’ve opened the Registration page, just insert the [wc_registration_form] shortcode. In this instance you can use whichever template you wish as we’re not reliant on the template itself to generate the registration form.
Now, when you open the Registration page on the front end you should see the registration form.
Using shortcodes provides us with more flexibility that using a templated page as we can change the design of the overall page on the fly without having to re-code the template file. This in itself explains why shortcodes are so popular in WordPress.
WooCommerce Login Shortcode
Now we’ve got a shortcode for the registration form we can move on and create one for the login form. Once again, open the functions.php file and insert the following code:
// LOGIN SHORTCODE
function wc_login_form_function() {
if ( is_admin() ) return;
if ( is_user_logged_in() ) return;
ob_start();
?>
<form class="woocommerce-form woocommerce-form-login login" method="post">
<?php do_action( 'woocommerce_login_form_start' ); ?>
<p class="woocommerce-form-row woocommerce-form-row--wide form-row form-row-wide">
<label for="username"><?php esc_html_e( 'Username or email address', 'woocommerce' ); ?> <span class="required">*</span></label>
<input type="text" class="woocommerce-Input woocommerce-Input--text input-text" name="username" id="username" autocomplete="username" value="<?php echo ( ! empty( $_POST['username'] ) ) ? esc_attr( wp_unslash( $_POST['username'] ) ) : ''; ?>" /><?php // @codingStandardsIgnoreLine ?>
</p>
<p class="woocommerce-form-row woocommerce-form-row--wide form-row form-row-wide">
<label for="password"><?php esc_html_e( 'Password', 'woocommerce' ); ?> <span class="required">*</span></label>
<input class="woocommerce-Input woocommerce-Input--text input-text" type="password" name="password" id="password" autocomplete="current-password" />
</p>
<?php do_action( 'woocommerce_login_form' ); ?>
<p class="form-row">
<label class="woocommerce-form__label woocommerce-form__label-for-checkbox woocommerce-form-login__rememberme">
<input class="woocommerce-form__input woocommerce-form__input-checkbox" name="rememberme" type="checkbox" id="rememberme" value="forever" /> <span><?php esc_html_e( 'Remember me', 'woocommerce' ); ?></span>
</label>
<?php wp_nonce_field( 'woocommerce-login', 'woocommerce-login-nonce' ); ?>
<button type="submit" class="woocommerce-button button woocommerce-form-login__submit" name="login" value="<?php esc_attr_e( 'Log in', 'woocommerce' ); ?>"><?php esc_html_e( 'Log in', 'woocommerce' ); ?></button>
</p>
<p class="woocommerce-LostPassword lost_password">
<a href="<?php echo esc_url( wp_lostpassword_url() ); ?>"><?php esc_html_e( 'Lost your password?', 'woocommerce' ); ?></a>
</p>
<?php do_action( 'woocommerce_login_form_end' ); ?>
</form>
<?php
return ob_get_clean();
}
add_shortcode( 'wc_login_form', 'wc_login_form_function' );Now, as for the registration page, you can go ahead and create a ‘Login’ page, insert the shortcode [wc_login_form] and you’re good to go.
If you want to take things a step further and dictate the page users are directed to when they log out of your site you could use a wp_logout hook like this:
add_action('wp_logout','my_redirect_after_logout');
function my_redirect_after_logout(){
         wp_redirect( '/?p=207' );
         exit();
}
The /?p=207 URL used above references the ID of the page we want to direct people to on logout. Substitute this for the ID of your chosen logout page.
An Important Note!
It’s worth remembering that anyone can visit your new login and/or registration pages… and by anyone we mean bots too! It’s therefore really important that you protect your website from fake registrations and brute force logins. For more information on how to protect your site we strongly recommended you take the time to read our guide on How to secure your WordPress website and also How to Deal With Spam Activity on Your WordPress Website.
Hopefully this article has given you some ideas on how you can re-imagine your WooCommerce registration and login pages and given you the tools to make changes where you see fit.
Host your WordPress Website with Pressidium!
View our price plans
The default WooCommerce registration fields are fairly limited; you simply enter an email address and a password and that’s it.
In some ways this is great, as there’s little friction for your customers to create an account, but there are a number of cases where you may want to add some additional fields. For example, you could add fields to populate the rest of their profile, like their website address or social media information. Or perhaps you want to add some custom fields relevant only to your specific WooCommerce store to make it easier to purchase WooCommerce products.
In this tutorial, I’m going to show you how to add a number of different WooCommerce registration fields, and then save this information to the customer’s profile. As a bonus, I will also show you how to add these fields when your customers sign up for an account at the checkout page, and to their account page once logged in.
How to Add Custom WooCommerce Registration Fields
It might be a long one, so I’ll index the important sections:
Where do I add this code?
The code from this WooCommerce registration fields tutorial should be added to your WooCommerce website as a feature plugin. You can download an example plugin below or at the end of this post. Simply upload the files in Plugins > Add New, or to the wp-content/plugins directory. You can then modify the code to suit your needs.
[content_upgrade id=”853581″ title=”Want to download the code from this tutorial as an example plugin?” content=”Simply enter your name and email to receive the complete and formatted version of this code as a feature plugin for FREE.”]
Note: The code I provide here as an example plugin will not be supported or updated.
Enable the Account Registration Form
Firstly, you’ll want to ensure the registration form is enabled on the account login page.
Go to WooCommerce > Settings > Accounts and check Enable customer registration on the “My account” page as shown in the screenshot below.

Now the account login page should look like this:
To ease ourselves into this, we’ll start by adding a single text field to the registration form. As it already exists in the WordPress user profile, let’s start with the Website field.
Overview of the woocommerce_form_field() Function
WooCommerce comes with a fantastic function for outputting form field HTML. The function is named woocommerce_form_field().
Rather than writing our own HTML (with a minor exception, explained shortly), we might as well use this function.
The function accepts 3 parameters:
$key
String. This is your field key which will be used for the input field name parameter and ID. The ID can also be overridden in the$argsparameter.$args
Array. This is an array of options for your field. It is here where you can set the field type, placeholder, options, class, and more. The available arguments are:$args = array( 'type' => 'text', 'label' => '', 'description' => '', 'placeholder' => '', 'maxlength' => false, 'required' => false, 'autocomplete' => false, 'id' => $key, 'class' => array(), 'label_class' => array(), 'input_class' => array(), 'return' => false, 'options' => array(), 'custom_attributes' => array(), 'validate' => array(), 'default' => '', 'autofocus' => '', 'priority' => '', );
$value
Mixed. This is the default value for the field.
This function sets us up nicely to be able to create custom WooCommerce account registration fields without repeating ourselves.
Setup Additional Registration Fields
We’re going to reference our WooCommerce custom fields in multiple functions; displaying the field names, saving the fields, and getting the saved field data.
As such, it makes sense for us to build an array of fields containing all the data we need for every scenario; then all of our data is easily accessible in a single place.
We’ll start by building the array with our single Website field.
/**
 * Get additional account fields.
 *
 * @see https://iconicwp.com/blog/the-ultimate-guide-to-adding-custom-woocommerce-user-account-fields/
 *
 * @return array
 */
function iconic_get_account_fields() {
	return apply_filters( 'iconic_account_fields', array(
		'user_url' => array(
			'type'        => 'text',
			'label'       => __( 'Website', 'iconic' ),
			'placeholder' => __( 'E.g. https://iconicwp.com', 'iconic' ),
			'required'    => true,
		),
	) );
}
There are a few things going on here. Firstly, we set up a function which we can then reference later on, iconic_get_account_fields().
Within this function, we’re returning a multi-dimensional array. You’ll notice we’re also running the array through a filter, iconic_account_fields. This means we can modify the array later on to update the field values.
Let’s strip it back a bit. The array contains one value (line 10) with a key of user_url (this is the key used for the Website field in WordPress). Its associated value is an array of data which we’ll be passing to the $args parameter of the woocommerce_form_field() function. We will also be adding some additional key/value pairs for use in our own functions.
Add Additional User Account Fields to WooCommerce
There are 4 areas where we want our additional user account fields to be displayed; the registration form, the edit account page, the checkout, and the WordPress admin area.
Add Custom Fields to the Registration Form
Now that we’ve set up our Website field, we want to add it to the registration form.
To do that, we’re going to hook into the registration form layout using the woocommerce_register_form hook. This will add our new field(s) just before the Register button.
/**
 * Add fields to registration form and account area.
 *
 * @see https://iconicwp.com/blog/the-ultimate-guide-to-adding-custom-woocommerce-user-account-fields/
 */
function iconic_print_user_frontend_fields() {
	$fields = iconic_get_account_fields();

	foreach ( $fields as $key => $field_args ) {
		woocommerce_form_field( $key, $field_args );
	}
}

add_action( 'woocommerce_register_form', 'iconic_print_user_frontend_fields', 10 ); // register form
I’ll walk you through what’s going on here. We’ve created a function named iconic_print_user_frontend_fields(). At the end of the code, we’re calling the function when the woocommerce_register_form hook is called.
Within the function, we firstly assign our fields to the $fields variable using the function we created previously. We know that this will return an array, so we jump straight in and loop through the array of fields.
We’re using the array key (which will be url) as the form key, and then passing the array value as our $field_args. Let’s take a look at the registration form now:
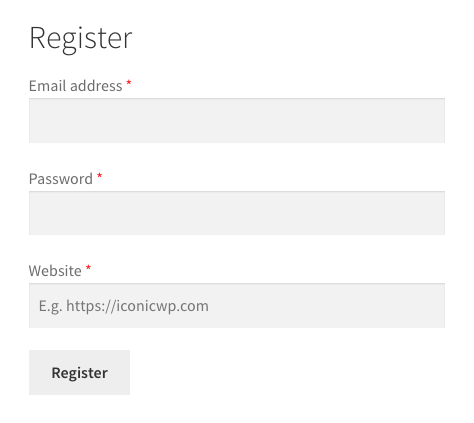
Great! Our Website field has been added. However, currently, it won‘t do anything.
We’ll need to validate the input when the form is submitted, and then save it to the user profile. We’ll also want to display this field once the customer is logged in so they can edit it later on.
For the sake of keeping things together in this post, let’s take a look at how we can display this field once the customer has logged into their account.
Add Custom Fields to the Account Area
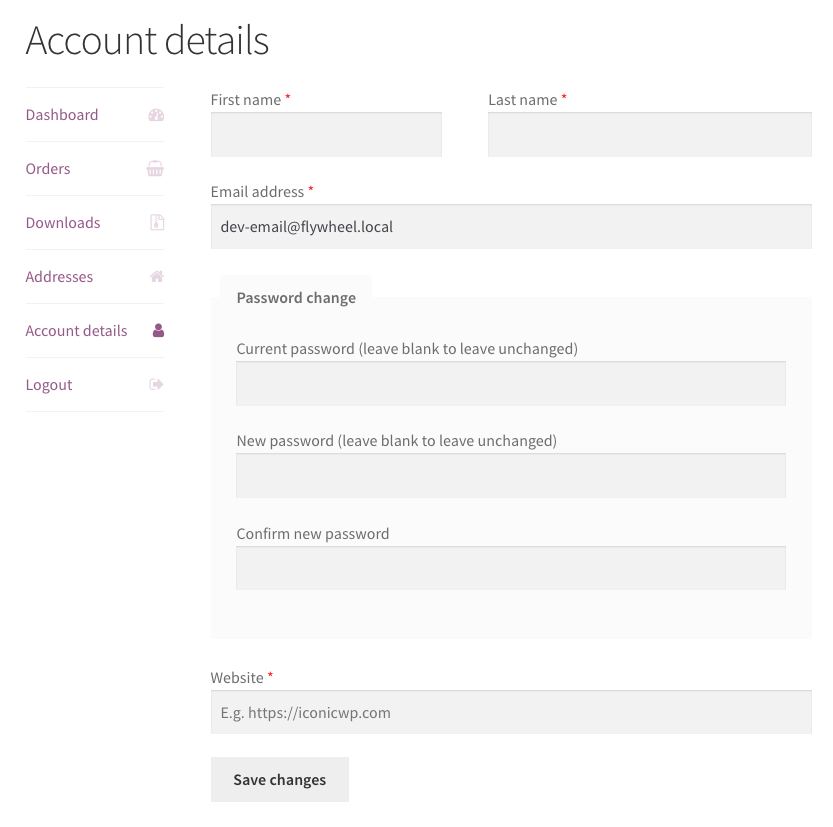
This is actually very simple. We can use exactly the same function we created before, iconic_print_user_frontend_fields(), and just call it on a different hook.
add_action( 'woocommerce_edit_account_form', 'iconic_print_user_frontend_fields', 10 ); // my account
Again, this hook is triggered just before the form’s submit button. This particular form is located in My Account > Account Details, or /my-account/edit-account/ by default.
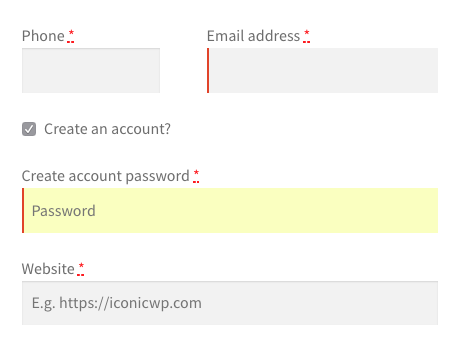
Add Custom WooCommerce Registration Fields to the Checkout
When a customer is checking out after purchasing WooCommerce products, they have the option to create an account (assuming you have that setting enabled). We probably want to show our additional fields there too.
We do this in a slightly different way. The checkout fields in WooCommerce are run through a filter; woocommerce_checkout_fields. They are split into groups, billing, shipping, and account. We want to add our fields to the account group.
Fortunately, the array of fields we built up earlier makes it easy for us to hook into the aforementioned filter and add our fields to the checkout.
/**
 * Show fields at checkout.
 *
 * @see https://iconicwp.com/blog/the-ultimate-guide-to-adding-custom-woocommerce-user-account-fields/
 */
function iconic_checkout_fields( $checkout_fields ) {
	$fields = iconic_get_account_fields();

	foreach ( $fields as $key => $field_args ) {
		// Make sure our fields have a default priority so
		// no error is thrown when sorting them.
		$field_args['priority'] = isset( $field_args['priority'] ) ? $field_args['priority'] : 0;

		$checkout_fields['account'][ $key ] = $field_args;
	}

	// Default password field has no priority which throws an
	// error when it tries to order the fields by priority.
	if ( ! empty( $checkout_fields['account']['account_password'] ) && ! isset( $checkout_fields['account']['account_password']['priority'] ) ) {
		$checkout_fields['account']['account_password']['priority'] = 0;
	}

	return $checkout_fields;
}

add_filter( 'woocommerce_checkout_fields', 'iconic_checkout_fields', 10, 1 );
woocommerce_checkout_fields provides one parameter. As with any filter in WordPress, the first parameter is also what any function that hooks in should be expected to return.
Note: It was pointed out that in WooCommerce 3.5.1 the fields require a priority parameter. As such, I’ve updated the code above to include a method of setting the default priority to 0. The password field in WooCommerce core has no priority either, so I’ve ensured it’s set in the above function too.
We fetch our fields array, loop through it, and assign each of our fields to the account group. Then we return the new $checkout_fields variable.
Add Custom Fields to the WordPress Admin Area
Finally, we want to add the WooCommerce custom fields to the WordPress admin area, when editing a user’s profile (or your own profile).
The layout is slightly different in the WordPress admin, as the fields are presented in tables. As such, we need a new function for displaying the fields in the admin area; but don’t forget, we can still use the same fields array we built earlier.
/**
 * Add fields to admin area.
 *
 * @see https://iconicwp.com/blog/the-ultimate-guide-to-adding-custom-woocommerce-user-account-fields/
 */
function iconic_print_user_admin_fields() {
	$fields = iconic_get_account_fields();
	?>
	<h2><?php _e( 'Additional Information', 'iconic' ); ?></h2>
	<table class="form-table" id="iconic-additional-information">
		<tbody>
		<?php foreach ( $fields as $key => $field_args ) { ?>
			<tr>
				<th>
					<label for="<?php echo $key; ?>"><?php echo $field_args['label']; ?></label>
				</th>
				<td>
					<?php $field_args['label'] = false; ?>
					<?php woocommerce_form_field( $key, $field_args ); ?>
				</td>
			</tr>
		<?php } ?>
		</tbody>
	</table>
	<?php
}

add_action( 'show_user_profile', 'iconic_print_user_admin_fields', 30 ); // admin: edit profile
add_action( 'edit_user_profile', 'iconic_print_user_admin_fields', 30 ); // admin: edit other users
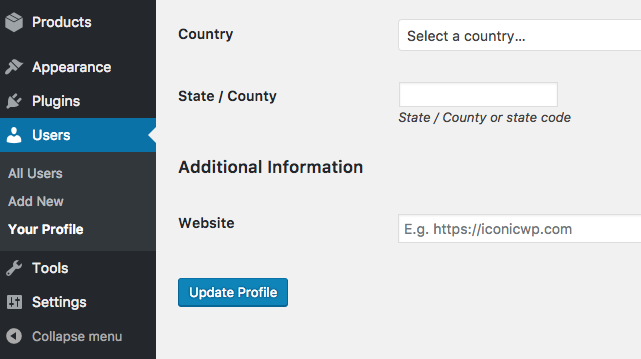
As usual, we fetch our custom fields right at the start. Then we jump into the HTML layout.
I’ve added a title of Additional Information so the fields are easily identifiable in the admin area. below that, we’re going to use a table layout to list the fields. It’s a 2 column table where the left cell is the field label, and the right cell is the field.
Before we output the field, we’re setting the label to false to prevent the label from showing in the right cell, as it already appears in the left.
We’re then using 2 actions to display the fields when editing a user profile. The first, show_user_profile, will add the custom fields to the current user’s profile, and the second, edit_user_profile, will add it to other users’ profiles.
Adding Conditionals to the Custom Fields
OK, so we’ve got our custom field showing in all the places we want it to. However, you may have noticed; we don’t really need to add it to the admin area, as the field already exists there. And what if we didn’t want to add it to the checkout, or the account area?
Well, because we used an array right at the start for building our custom fields list, we’ve made it super easy to add in some conditionals.
Let’s add some extra key/value pairs to our initial fields array to indicate the following conditions:
- Hide in registration
- Hide in account
- Hide in admin
- Hide in checkout
If any of these values are true, the field should not be displayed in that location. For the purpose of our Website field, we only want to hide it in admin, as it already exists there.
/**
 * Get additional account fields.
 *
 * @see https://iconicwp.com/blog/the-ultimate-guide-to-adding-custom-woocommerce-user-account-fields/
 *
 * @return array
 */
function iconic_get_account_fields() {
	return apply_filters( 'iconic_account_fields', array(
		'user_url' => array(
			'type'                 => 'text',
			'label'                => __( 'Website', 'iconic' ),
			'placeholder'          => __( 'E.g. https://iconicwp.com', 'iconic' ),
			'required'             => true,
			'hide_in_account'      => false,
			'hide_in_admin'        => true,
			'hide_in_checkout'     => false,
			'hide_in_registration' => false,
		),
	) );
}
Now we need to modify the functions that display the fields on the registration form, account area, checkout, and WordPress admin area.
/**
 * Add fields to registration form and account area.
 *
 * @see https://iconicwp.com/blog/the-ultimate-guide-to-adding-custom-woocommerce-user-account-fields/
 */
function iconic_print_user_frontend_fields() {
	$fields            = iconic_get_account_fields();
	$is_user_logged_in = is_user_logged_in();

	foreach ( $fields as $key => $field_args ) {
		if ( $is_user_logged_in && ! empty( $field_args['hide_in_account'] ) ) {
			continue;
		}

		if ( ! $is_user_logged_in && ! empty( $field_args['hide_in_registration'] ) ) {
			continue;
		}

		woocommerce_form_field( $key, $field_args );
	}
}

/**
 * Add fields to admin area.
 *
 * @see https://iconicwp.com/blog/the-ultimate-guide-to-adding-custom-woocommerce-user-account-fields/
 */
function iconic_print_user_admin_fields() {
	$fields = iconic_get_account_fields();
	?>
	<h2><?php _e( 'Additional Information', 'iconic' ); ?></h2>
	<table class="form-table" id="iconic-additional-information">
		<tbody>
		<?php foreach ( $fields as $key => $field_args ) { ?>
			<?php
			if ( ! empty( $field_args['hide_in_admin'] ) ) {
				continue;
			}
			?>
			<tr>
				<th>
					<label for="<?php echo $key; ?>"><?php echo $field_args['label']; ?></label>
				</th>
				<td>
					<?php $field_args['label'] = false; ?>
					<?php woocommerce_form_field( $key, $field_args ); ?>
				</td>
			</tr>
		<?php } ?>
		</tbody>
	</table>
	<?php
}

/**
 * Show fields at checkout.
 *
 * @see https://iconicwp.com/blog/the-ultimate-guide-to-adding-custom-woocommerce-user-account-fields/
 */
function iconic_checkout_fields( $checkout_fields ) {
	$fields = iconic_get_account_fields();

	foreach ( $fields as $key => $field_args ) {
		if ( ! empty( $field_args['hide_in_checkout'] ) ) {
			continue;
		}

		$checkout_fields['account'][ $key ] = $field_args;
	}

	return $checkout_fields;
}
I’ve highlighted the modifications to those functions above. We’re essentially adding stoppers, so if any of our conditionals are not empty (i.e. they are “true”) then we skip that field.
As the registration form and account area use the same function to display the fields, we’re also checking whether the user is logged in. if the user is logged in, it’s the account area, if not, it’s the registration form.
Adding Other Field Types to the Fields Array
Now we have full control over where our fields appear; awesome! But what about adding other field types?
There are a number of fields available for us to add by default, and I’ll also add some modifications so we can add radios/checkboxes. Radio buttons are actually already available, but I wasn’t pleased with the way they were presented.
The fields available to add already are:
- Text
- Textarea
- Select (or dropdown)
- Country
- Checkbox
- Number
- Password
- Tel
We’ll then add:
- Radio
- Checkboxes
Let’s update our fields array with an example of each field type.
/**
 * Get additional account fields.
 *
 * @see https://iconicwp.com/blog/the-ultimate-guide-to-adding-custom-woocommerce-user-account-fields/
 *
 * @return array
 */
function iconic_get_account_fields() {
	return apply_filters( 'iconic_account_fields', array(
		'iconic-register-text'       => array(
			'type'  => 'text',
			'label' => __( 'Text Field', 'iconic' ),
		),
		'iconic-register-textarea'   => array(
			'type'  => 'textarea',
			'label' => __( 'Textarea', 'iconic' ),
		),
		'iconic-register-select'     => array(
			'type'    => 'select',
			'label'   => __( 'Select Field', 'iconic' ),
			'options' => array(
				'' => __( 'Select an option...', 'iconic' ),
				1  => __( 'Option 1', 'iconic' ),
				2  => __( 'Option 2', 'iconic' ),
				3  => __( 'Option 3', 'iconic' ),
			),
		),
		'iconic-register-country'    => array(
			'type'  => 'country',
			'label' => __( 'Country Field', 'iconic' ),
		),
		'iconic-register-checkbox'   => array(
			'type'  => 'checkbox',
			'label' => __( 'Checkbox', 'iconic' ),
		),
		'iconic-register-number'     => array(
			'type'  => 'number',
			'label' => __( 'Number Field', 'iconic' ),
		),
		'iconic-register-password'   => array(
			'type'  => 'password',
			'label' => __( 'Password Field', 'iconic' ),
		),
		'iconic-register-email'      => array(
			'type'  => 'email',
			'label' => __( 'Email Field', 'iconic' ),
		),
		'iconic-register-tel'        => array(
			'type'  => 'tel',
			'label' => __( 'Tel Field', 'iconic' ),
		),
		'iconic-register-radio'      => array(
			'type'    => 'radio',
			'label'   => __( 'Radio Fields', 'iconic' ),
			'options' => array(
				1 => __( 'Option 1', 'iconic' ),
				2 => __( 'Option 2', 'iconic' ),
				3 => __( 'Option 3', 'iconic' ),
			),
		),
		'iconic-register-checkboxes' => array(
			'type'    => 'checkboxes',
			'label'   => __( 'Checkboxes', 'iconic' ),
			'options' => array(
				1 => __( 'Option 1', 'iconic' ),
				2 => __( 'Option 2', 'iconic' ),
				3 => __( 'Option 3', 'iconic' ),
			),
		),
	) );
}
Pretty straight forward, right?
It’s worth noting that multiple-choice fields like select, radio, and checkboxes, have an additional options key. Here we can set which options are available for the field.
How does this look on the registration form?
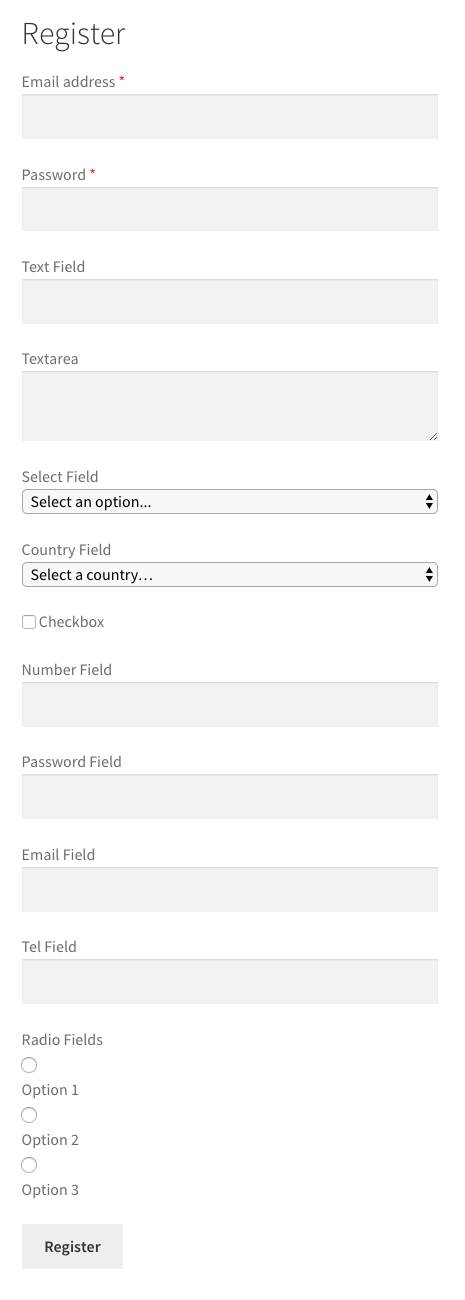
There you can see most of our WooCommerce registration fields working nicely. However, you’ll notice that the radio field (radio buttons) doesn’t look great, and the checkboxes field is completely missing. Let’s correct that by adding some of our own field types.
Add Custom Field Types to woocommerce_form_field()
The woocommerce_form_field() function has a hook within it that allows us to override or add new field types. Let’s take a look at how that’s done.
The hook we’re after is named woocommerce_form_field_{$field_type). So for our circumstances we want 2 filters named wocommerce_form_field_checkboxes and woocommerce_form_field_radio.
You know by now that I don‘t like to repeat code, so we’re going to call the same function for both of these filters.
/**
 * Modify checkboxes/radio fields.
 *
 * @param string $field
 * @param string $key
 * @param array  $args
 * @param string $value
 *
 * @see https://iconicwp.com/blog/the-ultimate-guide-to-adding-custom-woocommerce-user-account-fields/
 *
 * @return string
 */
function iconic_form_field_modify( $field, $key, $args, $value ) {
	ob_start();
	iconic_print_list_field( $key, $args, $value );
	$field = ob_get_clean();

	if ( $args['return'] ) {
		return $field;
	} else {
		echo $field;
	}
}

add_filter( 'woocommerce_form_field_checkboxes', 'iconic_form_field_modify', 10, 4 );
add_filter( 'woocommerce_form_field_radio', 'iconic_form_field_modify', 10, 4 );
The filter accepts 4 arguments:
$field
This is the field HTML that is returned.$key
This is the field key. We set this in our fields array.$args
This is the field data we associated to the field key in our fields array.$value
This is the default value for the field.
Within the function, we’re using ob_start() and ob_get_clean(). This allows us to assign code that is usually echoed or printed to a variable for returning.
You can see we’re also calling a new function, iconic_print_list_field(). I’ve decided that checkboxes and radios follow the same format; a list.
/**
 * Print a list field (checkboxes|radio).
 *
 * @param string $key
 * @param array  $field_args
 * @param mixed  $value
 *
 * @see https://iconicwp.com/blog/the-ultimate-guide-to-adding-custom-woocommerce-user-account-fields/
 */
function iconic_print_list_field( $key, $field_args, $value = null ) {
	$value = empty( $value ) && $field_args['type'] === 'checkboxes' ? array() : $value;
	?>
	<div class="form-row">
		<?php if ( ! empty( $field_args['label'] ) ) { ?>
			<label>
				<?php echo $field_args['label']; ?>
				<?php if ( ! empty( $field_args['required'] ) ) { ?>
					<abbr class="required" title="<?php echo esc_attr__( 'required', 'woocommerce' ); ?>">*</abbr>
				<?php } ?>
			</label>
		<?php } ?>
		<ul>
			<?php foreach ( $field_args['options'] as $option_value => $option_label ) {
				$id         = sprintf( '%s_%s', $key, sanitize_title_with_dashes( $option_label ) );
				$option_key = $field_args['type'] === 'checkboxes' ? sprintf( '%s[%s]', $key, $option_value ) : $key;
				$type       = $field_args['type'] === 'checkboxes' ? 'checkbox' : $field_args['type'];
				$checked    = $field_args['type'] === 'checkboxes' ? in_array( $option_value, $value ) : $option_value == $value;
				?>
				<li>
					<label for="<?php echo esc_attr( $id ); ?>">
						<input type="<?php echo esc_attr( $type ); ?>" id="<?php echo esc_attr( $id ); ?>" name="<?php echo esc_attr( $option_key ); ?>" value="<?php echo esc_attr( $option_value ); ?>" <?php checked( $checked ); ?>>
						<?php echo $option_label; ?>
					</label>
				</li>
			<?php } ?>
		</ul>
	</div>
	<?php
}
This function is essentially replicating the format of other WooCommerce registration fields, however, we’re spitting our options out into a list ( <ul> ).
So how do those fields look now on the registration page?

That’s better!
Save the Additional Field Data to the User
There are a few situations where we want to save the data; during registration, during checkout, when editing your own profile via admin, when editing another users profile in admin, and editing your account via the WooCommerce “My Account” area.
Fortunately, we can save the data in all of these scenarios with 1 function. Let’s take a look.
/**
 * Save registration fields.
 *
 * @param int $customer_id
 *
 * @see https://iconicwp.com/blog/the-ultimate-guide-to-adding-custom-woocommerce-user-account-fields/
 */
function iconic_save_account_fields( $customer_id ) {
	$fields = iconic_get_account_fields();
	$sanitized_data = array();

	foreach ( $fields as $key => $field_args ) {
		if ( ! iconic_is_field_visible( $field_args ) ) {
			continue;
		}

		$sanitize = isset( $field_args['sanitize'] ) ? $field_args['sanitize'] : 'wc_clean';
		$value    = isset( $_POST[ $key ] ) ? call_user_func( $sanitize, $_POST[ $key ] ) : '';

		if ( iconic_is_userdata( $key ) ) {
			$sanitized_data[ $key ] = $value;
			continue;
		}

		update_user_meta( $customer_id, $key, $value );
	}

	if ( ! empty( $sanitized_data ) ) {
		$sanitized_data['ID'] = $customer_id;
		wp_update_user( $sanitized_data );
	}
}

add_action( 'woocommerce_created_customer', 'iconic_save_account_fields' ); // register/checkout
add_action( 'personal_options_update', 'iconic_save_account_fields' ); // edit own account admin
add_action( 'edit_user_profile_update', 'iconic_save_account_fields' ); // edit other account admin
add_action( 'woocommerce_save_account_details', 'iconic_save_account_fields' ); // edit WC account
Here we’re using a single function, iconic_save_account_fields(), and we’re calling it 4 times.
woocommerce_created_customer
This hook is called when a user registers using the form on the login page, and also when a user registers during checkout.personal_options_update
This hook is called when you edit your own profile in the WordPress admin area.edit_user_profile_update
This hook is called when you edit another user’s profile in the WordPress admin area.woocommerce_save_account_details
This hook is called when a customer edits their profile via the WooCommerce “My Account” area.
Within the iconic_save_account_fields() function, we start off by fetching the field data.
We also create an array named $sanitized_data. We do this because there are 2 ways we can add data to a user; those that are predefined by WordPress, and our own custom fields. In a moment you’ll see which fields are predefined by WordPress.
We then loop through the fields and prepare the data for saving.
The first thing we do is check whether this field should be saved by seeing if it should be visible on the current page. This will prevent hidden fields from saving with blank data. To do this, we’re using iconic_is_field_visible().
/**
 * Is field visible.
 *
 * @param $field_args
 *
 * @return bool
 */
function iconic_is_field_visible( $field_args ) {
	$visible = true;
	$action = filter_input( INPUT_POST, 'action' );

	if ( is_admin() && ! empty( $field_args['hide_in_admin'] ) ) {
		$visible = false;
	} elseif ( ( is_account_page() || $action === 'save_account_details' ) && is_user_logged_in() && ! empty( $field_args['hide_in_account'] ) ) {
		$visible = false;
	} elseif ( ( is_account_page() || $action === 'save_account_details' ) && ! is_user_logged_in() && ! empty( $field_args['hide_in_registration'] ) ) {
		$visible = false;
	} elseif ( is_checkout() && ! empty( $field_args['hide_in_checkout'] ) ) {
		$visible = false;
	}

	return $visible;
}
This function could be used elsewhere in our code too. It will determine if a field should be visible or not based on the current page and the field arguments.
If the field is to be saved, we decide which sanitization method to use. We check if the field has one set in the main array, and if not, we use wc_clean; this works well for plain text fields. The sanitization method can be set for each field in the array, like this:
'iconic-register-text' => array(
	'type'     => 'text',
	'label'    => __( 'Text Field', 'iconic' ),
	'sanitize' => 'wc_clean',
),
We then run the value through the sanitization function and assign it to the $value variable.
Next we run the key through iconic_is_userdata(). This function is going to determine whether this field is one that WordPress has predefined (like user_url).
/**
 * Is this field core user data.
 *
 * @param $key
 *
 * @return bool
 */
function iconic_is_userdata( $key ) {
	$userdata = array(
		'user_pass',
		'user_login',
		'user_nicename',
		'user_url',
		'user_email',
		'display_name',
		'nickname',
		'first_name',
		'last_name',
		'description',
		'rich_editing',
		'user_registered',
		'role',
		'jabber',
		'aim',
		'yim',
		'show_admin_bar_front',
	);

	return in_array( $key, $userdata );
}
In iconic_is_userdata() I’ve defined an array of field keys which WordPress has predefined. The function checks whether our $key is in that array and returns true or false.
If the $key was found in that array, we add it to the $sanitized_data array and use continue to proceed to the next field.
If the $key was not found, we use update_user_meta to assign that custom data to the user.
After the loop we check if our $sanitized_data array has any data. If it does, we assign the user ID and then use wp_update_user() to update the predefined user fields with our new values.
Validate Frontend Submission
It’s common to want some fields to be required fields. Or we may want to ensure a field meets a specific format. As such, we want to hook in just before the fields are saved and validate them.
Firstly, let’s add a required parameter to our fields array. We’ll use iconic-register-text as an example.
'iconic-register-text' => array(
	'type'     => 'text',
	'label'    => __( 'Text Field', 'iconic' ),
	'required' => true,
),
Now we can check against this before the field is saved. WooCommerce gives us 2 filters we can use; woocommerce_registration_errors and woocommerce_save_account_details_errors.
We’ll use woocommerce_registration_errors for the registration form and the checkout registration process. Then we’ll use woocommerce_save_account_details_errors for the WooCommerce “My Account” area.
Again, we can use the same function for both filters.
/**
 * Validate fields on frontend.
 *
 * @param WP_Error $errors
 *
 * @return WP_Error
 *
 * @see https://iconicwp.com/blog/the-ultimate-guide-to-adding-custom-woocommerce-user-account-fields/
 */
function iconic_validate_user_frontend_fields( $errors ) {
	$fields = iconic_get_account_fields();

	foreach ( $fields as $key => $field_args ) {
		if ( empty( $field_args['required'] ) ) {
			continue;
		}

		if ( ! isset( $_POST['register'] ) && ! empty( $field_args['hide_in_account'] ) ) {
			continue;
		}

		if ( isset( $_POST['register'] ) && ! empty( $field_args['hide_in_registration'] ) ) {
			continue;
		}

		if ( empty( $_POST[ $key ] ) ) {
			$message = sprintf( __( '%s is a required field.', 'iconic' ), '<strong>' . $field_args['label'] . '</strong>' );
			$errors->add( $key, $message );
		}
	}

	return $errors;
}

add_filter( 'woocommerce_registration_errors', 'iconic_validate_user_frontend_fields', 10 );
add_filter( 'woocommerce_save_account_details_errors', 'iconic_validate_user_frontend_fields', 10 );
As usual, we start by fetching our fields array.
We loop through the array and then check whether required is empty. If it is, we skip it with continue as it requires no validation.
We also check if register isn’t set in the posted values and if hide_in_account is true for the specific field. Again, if this evaluates to true we skip it. When register isn’t set it means we’re saving our account fields, and if hide_in_account is true, it means that particular field should not be validated as the field wasn’t visible for us to enter any information in to.
Then, we run the same check as above but check if hide_in_registration is true when registering. We’d skip it for the same reasons as above.
If we get past all of these “stoppers” then the field is required and should contain some posted data. If it is empty, we add an error to the $errors object and carry on with the loop.
We then return our new $errors object, which may or may not contain validation errors, depending on the data that has been posted.
If there is an error, the user will be taken back to the form and the error message we added will be displayed. No data will have been saved.
Set Default Values for the Fields
There’s 2 scenarios when we would want to display a default value for the fields; when viewing the user profile (admin or WooCommerce account area), and when you submit the form but an error occurs.
Default Values for Saved Fields
When we display the fields in the WooCommerce account area, or in the WordPress admin when editing a user profile, we’ll want to populate the field with the submitted data. As such, we need to edit the iconic_print_user_frontend_fields() and iconic_print_user_admin_fields() functions.
/**
 * Add fields to registration form and account area.
 *
 * @see https://iconicwp.com/blog/the-ultimate-guide-to-adding-custom-woocommerce-user-account-fields/
 */
function iconic_print_user_frontend_fields() {
	$fields            = iconic_get_account_fields();
	$is_user_logged_in = is_user_logged_in();

	foreach ( $fields as $key => $field_args ) {
		$value = null;

		if ( $is_user_logged_in && ! empty( $field_args['hide_in_account'] ) ) {
			continue;
		}

		if ( ! $is_user_logged_in && ! empty( $field_args['hide_in_registration'] ) ) {
			continue;
		}

		if ( $is_user_logged_in ) {
			$user_id = iconic_get_edit_user_id();
			$value   = iconic_get_userdata( $user_id, $key );
		}

		$value = isset( $field_args['value'] ) ? $field_args['value'] : $value;

		woocommerce_form_field( $key, $field_args, $value );
	}
}

/**
 * Add fields to admin area.
 *
 * @see https://iconicwp.com/blog/the-ultimate-guide-to-adding-custom-woocommerce-user-account-fields/
 */
function iconic_print_user_admin_fields() {
	$fields = iconic_get_account_fields();
	?>
	<h2><?php _e( 'Additional Information', 'iconic' ); ?></h2>
	<table class="form-table" id="iconic-additional-information">
		<tbody>
		<?php foreach ( $fields as $key => $field_args ) { ?>
			<?php
			if ( ! empty( $field_args['hide_in_admin'] ) ) {
				continue;
			}

			$user_id = iconic_get_edit_user_id();
			$value   = iconic_get_userdata( $user_id, $key );
			?>
			<tr>
				<th>
					<label for="<?php echo $key; ?>"><?php echo $field_args['label']; ?></label>
				</th>
				<td>
					<?php $field_args['label'] = false; ?>
					<?php woocommerce_form_field( $key, $field_args, $value ); ?>
				</td>
			</tr>
		<?php } ?>
		</tbody>
	</table>
	<?php
}

/**
 * Get currently editing user ID (frontend account/edit profile/edit other user).
 *
 * @see https://iconicwp.com/blog/the-ultimate-guide-to-adding-custom-woocommerce-user-account-fields/
 *
 * @return int
 */
function iconic_get_edit_user_id() {
	return isset( $_GET['user_id'] ) ? (int) $_GET['user_id'] : get_current_user_id();
}
We’ve added a check to iconic_print_user_frontend_fields(). If the user is logged in then we get their user ID and fetch the field value using iconic_get_userdata() (described in the section “Accessing the Saved user Data”).
In iconic_print_admin_user_fields() we’re doing the same; fetch the ID of the user we’re currently editing and fetch the data for that field.
We’re also now using the third parameter of woocommerce_form_field() which allows us to pass in the default value for the field.
You’ll notice I’m using a function named iconic_get_edit_user_id(). This function (shown above) will return the user ID if it exists as a URL parameter, or the currently logged in user ID. This means we can use the same function for all scenarios above.
See “Accessing the Saved User Data” for information on the `iconic_get_userdata()` function.
Default Values after Submission Errors
When we initially set up our fields array, we also ran them through a filter named iconic_account_fields. Well, this is the perfect scenario for us to use that filter.
After a submission error occurs, the user is redirected back to the form. The posted data is still accessible at this point, so it makes sense for us to re-populate the fields with the data they entered.
Let’s hook in to our filter and populate the field values.
/**
 * Add post values to account fields if set.
 *
 * @see https://iconicwp.com/blog/the-ultimate-guide-to-adding-custom-woocommerce-user-account-fields/
 *
 * @param array $fields
 *
 * @return array
 */
function iconic_add_post_data_to_account_fields( $fields ) {
	if ( empty( $_POST ) ) {
		return $fields;
	}

	foreach ( $fields as $key => $field_args ) {
		if ( empty( $_POST[ $key ] ) ) {
			$fields[ $key ]['value'] = '';
			continue;
		}

		$fields[ $key ]['value'] = $_POST[ $key ];
	}

	return $fields;
}

add_filter( 'iconic_account_fields', 'iconic_add_post_data_to_account_fields', 10, 1 );
First, if the $_POST object is empty we just return the fields as normal.
Otherwise, we loop through each field. If the $_POST value for that key is empty, we set the fields value to empty then skip to the next field using continue;.
If the $_POST value is set, we set it as the field’s value.
In the modified version of iconic_print_user_frontend_fields() above, at line 26 we’re checking if value is set in the $field_args. If it is, we use that, otherwise we use the saved value (if present), or null.
Accessing the Saved User Data
Now that you’ve saved this data to the user, you will want to access it and, most likely, display it or use it somewhere on your WooCommerce store.
Our data can come from 2 places; our custom metadata, or the predefined WordPress data. As such, here’s a function to get the appropriate value:
/**
 * Get user data.
 *
 * @param $user_id
 * @param $key
 *
 * @return mixed|string
 */
function iconic_get_userdata( $user_id, $key ) {
	if ( ! iconic_is_userdata( $key ) ) {
		return get_user_meta( $user_id, $key, true );
	}

	$userdata = get_userdata( $user_id );

	if ( ! $userdata || ! isset( $userdata->{$key} ) ) {
		return '';
	}

	return $userdata->{$key};
}
You can use this function like so: echo iconic_get_userdata( 1, 'user_url' );, where 1 is the user ID and user_url is the field key.
The function checks if the field is a predefined WordPress field using iconic_is_userdata(). If it is not, it fetches the value using get_user_meta(), a function that will fetch our custom user metadata.
If it is a predefined field, we fetch the user data using get_userdata() and pass in our user ID.
We then check if the key is set and return its value.
[content_upgrade id=”853581″ title=”Want to download the code from this tutorial as an example plugin?” content=”Simply enter your name and email to receive the complete and formatted version of this code as a feature plugin for FREE.”]
Conclusion
There we have it! I said it’d be a long post.
To recap, we’ve discussed how to add custom WooCommerce registration fields to the registration form, checkout registration, account area, and admin user profiles through the WordPress back-end.
We’ve then worked out how to save this data and validate it when submitted.
Let me know in the comments if you have any questions about your WooCommerce registration fields, or with the code provided.