- Details
- Reviews
- Installation
- Development
This plugin sends you an email notification whenever a fatal error (or other error level, configurably) is detected on your site.
Unlike traditional uptime monitoring services, which will only notify you if your entire site is down, this plugin can notify you when an error is detected on any page or process on your site.
Automatic plugin and theme updates often introduce problems that you aren’t aware of until they’re reported by your visitors. Fatal Error Notify lets you address these issues as they occur and before they cause significant problems.
Install it just like any other WordPress plugin:
Either: Upload the plugin files to the /wp-content/plugins/fatal-error-notify directory.
Or: Install the plugin through the WordPress plugins screen directly.
Then:
1. Activate the plugin through the ‘Plugins’ screen in WordPress
2. Use the Settings->Fatal Error Notify screen to configure notification settings
-
How does the plugin send error notifications if my site is down?
-
Fatal Error Notify hooks into PHP’s “shutdown” function to send notifications right before the page stops loading. Even the dreaded “500 – Internal Server Error” still triggers PHP’s shutdown actions. Even if your site is completely offline, in most cases this plugin will be able to detect the error and notify you.
-
What’s in the Pro version
-
Fatal Error Notify Pro includes several additional features, like Slack notifications, the ability to hide the plugin settings, multisite support, logging of recorded errors, out of memory handling, the ability to pause individual notifications, and more.
Fatal Error Notify Pro also includes integrations with WP Fusion and Gravity Forms and can send notifications when errors are logged in those plugins.
-
Can I exclude specific errors?
-
Yes, you can use the filter
fen_ingore_error, like so:function fen_ignore_error( $ignore, $error ) { if( $error['file'] == '/home/username/public_html/wp-includes/class-phpass.php' ) { $ignore = true; } return $ignore; } add_filter( 'fen_ignore_error', 'fen_ignore_error', 10, 2 );The
$errorvariable is an array containing:$error['type']: (int) The PHP error code$error['message']: (string) The error message$error['file']: (string) The path to the file that triggered the error$error['line']: (int) The line number that triggered the error

Amazing tool when you don’t have access to backend logs to troubleshoot the issue. Great work!

Simple and useful plugin for you who managing a WordPress site. Make troubleshooting so much easier! (no more enable/disable WP_Debug mode)

just discovered this little nugget and I’m very happy with it!

Just came here to say that this is an amazing plugin and it’s extremely helpful during troubleshooting.
keep up the good work!

I came with a simple issue and they gave me a solution for the free version of this plugin!

I used Fatal Error Notify on a site that kept crashing and I couldn’t find out what was going wrong. The plugin emails the PHP error message and that helped me track down the issue.
Read all 12 reviews
“Fatal Error Notify” is open source software. The following people have contributed to this plugin.
Contributors
-

verygoodplugins
1.4.7 – 11/14/2022
- Fixed typo (misplaced parenthesis) checking
WARNINGlevel errors in v1.4.6
1.4.6 – 11/1/2022
- Tested for WordPress 6.1.0
- Improved – Moved actions to
shutdownaction priority 1, to fix cases where other plugins generate notices or warnings duringshutdownafter a fatal error - Improved – “rmdir” warnings will be ignored by default
- Fixed
unlinkwarnings still triggering notifications ifunlinkwas the first part of the error string
1.4.5 – 2/15/2022
- Tested for WordPress 5.9
- Improved – “unlink” warnings will be ignored by default (see https://wordpress.org/support/topic/wordfence-notification-error-wordfenceclass-php/#post-15187940)
- Added upgrade prompt in notification email
1.4.4 – 8/3/2021
- Tested for WordPress 5.8
- Moved upgrade nag to top of settings page to prevent layout issues on smaller screens
1.4.3 – 12/16/2020
- Tested for WordPress 5.6
- Fixed PHP notice when HTTP referrer was missing
- Added fen_use_wp_mail filter
1.4.2 – 4/3/2020
- Tested for WordPress 5.4
- Added error level descriptions
1.4.1 – 11/27/2019
- Tested for WordPress 5.3
1.4 – 4/26/2019
- Added request URI, HTTP Referrer, and current user ID to notifications
1.3 – 4/21/2018
- Added “Send Test” button
- Rate limiting so notifications are only sent once per hour
1.2 – 2/8/2018
- Added filter to ignore errors
1.1
- Updated branding
- Added link to Pro version
1.0
- Initial release
Плагин для WordPress для уведомления об ошибках
17.07.2013 — 23:12 11 1258+
размер текста
Мною уже ни один раз была затронута такая CMS как WordPress, конечно, выбор приоритета пал на неё неслучайно. Система имеет вполне сформировавшеюся популярность, благодаря которой и прогрессирует на рынке систем управления контентом.
Что привлекает пользователей?
В большинстве случаев, начинающего пользователя привлекает в WordPress, то что она достаточно разрекламирована, а с другой стороны она имеет существенный плюс – это огромный ассортимент плагинов для расширения возможностей!
- Плагин (с английского языка plug-in, от plug in «подключать») — независимо компилируемый программный модуль, динамически подключаемый к основной программе и предназначенный для расширения и/или использования её возможностей. Плагины обычно выполняются в виде разделяемых библиотек. (с) Википедия
Чтобы пояснить, рассмотрим простой пример, одним лишь плагином мы с лёгкостью сможем построить Интернет – магазин. Который в свою очередь будет иметь функционал не хуже встречавшихся Вам. Одним из таких плагинов является WooCommerce — excelling eCommerce
Ну в довершении всему сказанному стоит отметить для новичков, что всё это и немного больше, совершенно, бесплатно!
Я постараюсь, рассказывать и дальше о интересных, а главное полезных плагинах для WordPress. И первым на очереди оказался плагин из ряда уникальных – Error Notification
Извещения об Ошибках
Error Notification – плагин для WordPress, уникальность которого состоит в том что он облегчит Ваше уведомление об ошибках обнаруженных на страницах или в записях блога. С аналогами подобного функционала Вы наверное встречались на других сайтах, там обычно просят при обнаружении ошибки выделить текст и нажать Ctrl + Enter, В нашем случае сочетание: Shift + Enter.
Достаточно будет выделить опечатку и нажать сочетание клавиш, после чего Ошибка будет отправлена Администратору на почтовый ящик с описанием:
- Тема сообщения будет – название плагина, что облегчит определение письма
- Сообщение имеет краткий информационный характер:
- Заголовок страницы или записи
- Прямая активная ссылка на данную страницу
- Ошибка – выделенный фрагмент текста
Установка
Установка рассматриваемого плагина стандартная:
- скачайте архив с плагином
- скопируйте в папку отвечающую за плагины : wp-content/plugins
- зайдите в админ – панель, откройте раздел – плагины, активируйте скопированный плагин
Либо Вы можете воспользоваться добавлением плагинов из раздела «Плагины». В админ – панели, нажмите «Добавить» в строке поиска введите название рассматриваемого плагина. Установите и Активируйте!
Интерфейс плагина
Плагин имеет англоязычный интерфейс, но пусть это не пугает Вас. Простота настройки гарантирована Вам!
Ниже представлено изображение плагина как его видит Администратор:
Параметров которые следует изменять ни так уж и много, начнём с верху вниз:
- Пункт отвечающий за выведение строки с извещением посетителя об отправки найденной ошибки. Имеет два варианта:
- on – скрывает строку по умолчанию, даёт возможность выбора места отображения.
- off – выставлено по умолчанию, при данном значении строка показывается в месте по умолчанию. На страницах и в записях сразу же после основного текста материала.
- Следующий пункт отвечает за отображение визуального окна подтверждения. При нажатии сочетания клавиш или ссылки ошибка не будет отправлена сразу, а дождётся подтверждения посетителем. Смотрите на рисунке:

Так же имеет всего два варианта значения:

- on – включить
- off — отключить
- На очереди пункт отвечающий за выбор электронного ящика, который будет использован для уведомления Администратора.
По умолчанию стоит – адрес почты Администратора WordPress.
Вы можете выбрать из контекстного меню:- Администратор и Автор страницы или записи
- Администратор и Автор с почтой по выбору
- Почтовые ящики по выбору
- Далее будут настройки относящиеся к визуальному отображению. Вывод информационной панели:
- Top – сверху
- Bottom – снизу
- Цвет панели, его можно наблюдать, если включено окно подтверждения ошибки (смотрите пункт 2)
Имеет несколько стандартных цветов, выберите подходящий именно Вам! - Следующий пункт просит нас ввести текст благодарности за уведомление о найденной ошибке.
Напишите в окошке текст сообщения, которое бы выражало вашу благодарность посетителю за помощь! - Далее наблюдаем настройки информационной строки, которая отвечает за предупреждение посетителя о возможности оповещения. Первый пункт просит ввести текст ссылки или кнопки для отображения в строке – у нас это «Нажмите сюда»
Вторая часть данной настройки даёт возможность исправить отображение строки в целом. Ниже окошка для ввода текста есть примеры для вставки. Вы можете перевести пример строки, оставив неизменным два слова заключённые в квадратные скобки – это теги отвечающие за вывод сочетания клавиш и активной ссылки .
Ну и заключительный пункт в настройке инфо – строки – цвет текста, изменяйте под дизайн или оставьте без изменений. - Заключительным разделом настроек, является, пункт по внесению ID страниц или записей, которые следует исключить.
Примечание! После изменения любого из вышеуказанных пунктов, не забывайте сохранять! Для этого в конце каждой настройки имеется кнопка «Save»
Повторюсь, здесь нет кнопки для общего сохранения всех внесённых изменений, она заменена индивидуальными кнопками!
Если Вы захотите перевести информацию выводимую в окне подтверждения, например, как у нас на изображении (пункт 2), то следует:
- Зайти в раздел «Плагины»
- Найти интересующий нас плагин — » Error Notification
- Под заголовком найти несколько ссылок – нажать «Изменить»
- Откроется «Редактор», с правой стороны выберите предпоследнюю строку, как показано на рисунке ниже:

Выделенный фрагмент содержит те значения которые следует заменить на ваши, то есть на слова на русском языке. Воспользуйтесь поиском встроенным в браузер — Ctrl + F или проследите текст на рисунке, там уже указаны русские слова.
Вместо послесловия
Вот и всё! на первый взгляд всё достаточно сложно, но стоит разобраться и результат не заставит себя ждать!

With the help of the Error Reporting plugin, you can identify problems in your WordPress Blog and keep yourself aware of errors in a live blog. This Plugin will prove to be a valuable tool for the WordPress developer. With its Highly customizable settings you can locate various types of WordPress Core errors, and plugin and theme errors. Errors can be handled by logging to files and by email notification.
Error Reporting Plugins
1. Fatal Error Notify

Fatal Error Notify is a plugin that functions instantly when an error occurs or sometimes even before the actual occurrence. Which means that the plugin will not wait until the entire website shuts down, rather it alerts users at the slightest hint of a potential error.
More Info & Download
2. Error Log Monitor

Error Log Monitor is a basic plugin that detects errors in the site through adding an extension in the form of an error widget on the dashboard. The plugin will notify users with an email when detecting an error.
More Info & Download
3. 404 to 301

404 to 301 is an extremely useful plugin that deals with “404 pages” in particular. 404 are commonly found on websites, loading pages and even as search engine downloads. With this plugin these errors can be instantly detected and be managed.
More Info & Download
4. Debug

A plugin that not only detects errors but helps your website, but also corrects them right away is Debug. Side by side the plugin also notifies or alerts users by sending emails about bugs in the site.
More Info & Download
5. Code Pinch

Code Pinch ensures that your website stays error and bug free. It efficiently detects the errors and suggests solutions for removing them. Additionally, the plugin continues to monitor the website for other errors that may be dealt with before time.
More Info & Download
6. Redux Framework

Redux is a responsive plugin that handles errors within (themes and) plugins. As stated, the aim of this plugin to simplify the process of locating errors and solving them.
More Info & Download
7. Query Monitor

Query Monitor is one of the best debugging tools that helps users present data in a systematic order. The main aim of the plugin is to remove any errors, bugs and monitors the data for surety.
More Info & Download
Conclusion
No matter how well your website might be doing right now, with a single error or bug, the rating and score of your site might decline. A code error, issue optimization and other common areas might weaken the potential of the website (or business). To refrain from such issues, it is essential that you install a plugin such as mentioned in the list above to protect the vulnerability of the site.
Learn more about errors through Mistape: Best Free Error Notification Plugin for WordPress

I am a WordPress Developer and Designer, author @WPArena. I am providing Free WordPress consultation and can help you to install WordPress in a secure way to small businesses and bloggers.
Admin notices are an integral part of plugins, they allow you to show error/success/warning messages to your users, prompting them for action or simply notifying them of something that has happened.
In this article, we’ll take a look at the standard way to add admin notices and some additional options introduced in WordPress 4.2, including how to make notices dismissable.
Continue reading, or jump ahead using these links:
- What is an Admin Notice?
- The Anatomy of an Admin Notice
- Adding Notices to the Page
- Generating Notices Via User Actions
- Dismissable Notices
- The Conditional Notice
- Detecting The Click
- Updating Our Option
- Bringing the Notice Back
What is an Admin Notice?
An admin notice is a notification block consisting of a white background, a colored left border and some text. There are three types: green, orange and red. Given the class names, they should be used for update complete notices, update prompts and errors respectively. That being said, green ones are often used for general success messages, which I think is just fine.

Note that update prompts – or update nags – appear at the very top of the screen while the other two types are shown below the page title.
The Anatomy of an Admin Notice
Each notice is essentially a div with the notice class, in addition to another specific one. Green notices use the updated class, red notices use the error class, update nags use the update-nag class. Within this class you can add any content, a single line of text surrounded by a paragraph tag is the usual choice. The HTML for the notices in the screenshot above looks like this:
Adding Notices to the Page
An action is used to add update messages. This is ideal because plugin authors can overwrite default behaviors. In some instances you may want to suppress some messages – actions give you the ability to do so. The hook to use is admin_notices, the hooked function should simply echo the HTML required, something like this:
Should you need to add two notices at once, I suggest using two separate hooks instead of writing the HTML for both in the same function. This allows you or other plugin authors to suppress only one message. This kind of flexibility is the basis of WordPress’ modularity, as plugin authors it is our job to uphold this standard.
In case you are unfamiliar with the _e() function it is used for translation purposes. It is part of a family of functions you can use to make your plugin available in multiple languages. If you’d like some more info on this, take a look at our guide to translating plugins
Generating Notices Via User Actions
Generally you will have some if statements in your code since your notices are dependent on specific actions and outcomes.
Let’s look at a plugin that displays a notice if the Advanced Custom Fields plugin is not active. This is handy if we rely on it, or if it makes our plugin that much better.
Dismissable Notices
WordPress 4.2 has given us built-in dismissible notices. On the front-end all you need to do is give your notices the is-dismissable class.

The downside is that as of yet there is no standardized way to get WordPress to remember the dismissal, except in a few cases. Read all about this in core developer Helen Hou-Sandi’s update.
For now, the best method is to bind an event to the click and do whatever we need to via AJAX. The process for this is as follows:
- The notice will only display if he user has not dismissed it. Therefore we will have an option
my-acf-notice-dismissedwhich will be1if the user has dismissed the notice. - We will detect a click on the dismissal button and fire an AJAX call
- The AJAX call will update the
my-acf-notice-dismissedoption to1 - If we want to be super-thorough we can detect the presence of the
the_field()ACF function and remove the option if it exists. This will make sure that if ACF is installed, then uninstalled, the notice will come back. This requires a check for the function on each page load though, which may be a bit wasteful.
The Conditional Notice
Let’s grab the my-acf-notice-dismissed option from the database and create a notice which only shows up if the value of the option is not 1.
This is very similar to our code above, with the addition of an empty check for our option. The value of our option may well be 0, but this is still considered to be empty, so we’re all set there.
Note that I’ve added a my-acf-notice class to the notice to make sure we can bind an event to only our notice.
Detecting The Click
Before we write any Javascript, we’ll need to create a JS file and enqueue it. I’m assuming a simple plugin with the Javascript file in a js folder.
Within this JS file, we’ll need to create a click event, bound to .my-acf-notice – this click event will trigger our AJAX call.
Updating Our Option
The action parameter of our AJAX call was my_dismiss_acf_notice which gives us the template for creating the code that handles things on the server side. All that is needed is a quick update to the my-acf-notice-dismissed option, setting its value to 1.
If you haven’t used AJAX in WordPress before we have a handy guide to AJAX you can use to brush up on your skills.
At this point you should be able to load your dashboard, see the notice and dismiss it, it will not show up in the admin again.
Bringing the Notice Back
Right now our notice is not complete. If ACF is not installed it will pop up. The user may then dismiss it, but install ACF later. If ACF is then deactivated for whatever reason, the notice will remain hidden.
To get around this, we can check for the existence of the the_field() function – a prominent function used in ACF – and if it doesn’t exist, delete the option.
This is a little wasteful, but we can do it using an admin hook which fires on admin screens only, which should be okay.
Admin notices are useful and modular parts of the admin experience. They can be registered individually, allowing developers better access to your work.
New additions in WordPress 4.2 allow for dismissable notices, although we do have to work a little to make them persistent. Hopefully this will change as a framework is implemented for better notice management, perhaps in one of the next couple of versions.
If you have a great custom way to create notices or you’ve used the default methods to great effect, let us know in the comments below.
Self publishing your ideas on the web has become extremely easy. However, the biggest downside of self-publishing is that you are entirely responsible for your mistakes. There is no one checking, proof reading and editing what you publish except yourself. You might have built yourself a good editing workflow where you cross-check your facts, spell-check your articles, and polish your thoughts with revisions, but there is always a chance that you might make a mistake. A small typo, a broken link, or another minor error can happen because you are human. Though if not reported on time, your error can stay there for years. In this article, we will show you how to allow your users to notify you of error in WordPress post content using error notifications.

Why Catching Small Errors is Important?
First of all a careless typo or spelling mistake can leave a bad impression on your readers. They might think that you do not carefully craft your posts before publishing them.
You can use tools to auto-check grammar and spelling mistakes in WordPress, but there is still a chance that some mistakes may end up on your site. They can stay there for years without you noticing or correcting them.
If you are writing in a language that is not your first language, then your words can be mistaken by native speakers. Some of your users may want to help you out by pointing out those mistakes so that you can fix them.
Allowing Users to Notify You of Errors in WordPress
First thing you need to do is install and activate the Mistape plugin. Upon activation, you need to visit Settings » Mistape page to configure the plugin.

You can choose users with the administrator or editor user roles to receive notification email about errors. Alternately, you can manually enter email addresses where you want to send notifications.
You can choose the post types where this feature would appear. You must check posts if you want all your blog posts to have this feature.
The plugin can automatically add a caption below posts to inform users that they can notify you about errors. But if you don’t want to automatically display the caption, then you can enable the shortcode.
You can also customize caption shown to users about this feature. By default, the plugin will show a text message. This text will be automatically translated if you are using WordPress in languages other than English.
Don’t forget to click on the save changes button to store your settings.
You can now see the plugin in action on your website. Depending on your settings plugin will display the caption below your posts. Users can select mistakes and press CTRL+Enter (Control+Enter on Mac).
A popup will appear to inform users that their suggestion is forwarded to site admins.

We hope this article helped you allow users to notify you of errors in WordPress posts. You may also want to see our guide on how to create a blog post checklist in WordPress.
If you liked this article, then please subscribe to our YouTube Channel for WordPress video tutorials. You can also find us on Twitter and Facebook.
Disclosure: Our content is reader-supported. This means if you click on some of our links, then we may earn a commission. See how WPBeginner is funded, why it matters, and how you can support us.
Editorial Staff at WPBeginner is a team of WordPress experts led by Syed Balkhi. We have been creating WordPress tutorials since 2009, and WPBeginner has become the largest free WordPress resource site in the industry.
Reader Interactions
Администраторские уведомления – неотъемлемая часть плагинов. Уведомления позволяют вам выводить сообщения об ошибках/успешном выполнении, разные пользовательские предупреждения. С помощью таких уведомлений вы можете объяснить пользователям, что именно случилось, а также потребовать от них выполнения некоторых действий.
В данной статье мы рассмотрим стандартный способ добавления администраторских уведомлений, а также некоторых дополнительных опций, представленных в WordPress 4.2, таких как, к примеру, создание закрываемых уведомлений.
Как выглядит администраторское уведомление?
Администраторское уведомление – это специальный блок, который состоит из белого фона, цветной рамки слева и некоторого текста. Для уведомлений используются три цвета: зеленый, оранжевый и красный. Как и следует из имен классов уведомлений, они используются для вывода сообщений о завершении какого-либо процесса, для сообщений о необходимости совершения каких-либо действий, а также для сообщений об ошибках. В целом, зеленые сообщения – это сообщения об успешном выполнении каких-либо действий.

Обратите внимание на то, что сообщения с желтой рамкой – обычно это сообщения о необходимости обновления – выводятся в самом верху экрана, в то время как два других типа отображаются под заголовком страницы.
Анатомия администраторских уведомлений
Каждое уведомление по существу представляет собой блок div с классом notice, к которому добавляются и другие классы. Зеленые уведомления используют класс updated, красные уведомления – класс error, желтые уведомления – класс update-nag. Вы можете добавлять любой текст в уведомления, однако наилучшим выбором будет отдельная строка текста, окруженная тегами p. HTML-код для уведомлений со скриншота будет выглядеть следующим образом:
<div class="updated notice">
    <p>Something has been updated, awesome</p>
</div>
<div class="error notice">
    <p>There has been an error. Bummer</p>
</div>
<div class="update-nag notice">
    <p>You should really update to achieve some awesome instad of bummer</p>
</div>
Добавление уведомлений к страницам
Для добавления сообщений об обновлении используется специальный хук. Такой подход является идеальным, поскольку авторы плагинов могут перезаписать стандартное поведение. В некоторых случаях вы можете захотеть убрать определенные сообщения – хуки позволяют вам это сделать. Хук, который вам потребуется – это admin_notices, подцепляемая функция должна просто выводить через echo требуемый HTML-код. Пример:
function my_error_notice() {
    ?>
    <div class="error notice">
        <p><?php _e( 'There has been an error. Bummer!', 'my_plugin_textdomain' ); ?></p>
    </div>
    <?php
}
add_action( 'admin_notices', 'my_error_notice' );
Если вам надо добавить два уведомления сразу, я предлагаю вам использовать два отдельных хука вместо написания HTML для обоих уведомлений в одной и той же функции. Это позволит вам и другим авторам плагинов убирать только одно сообщение. Такая гибкость – базовый принцип модульности WordPress, и наша задача – поддержать этот стандарт.
function my_error_notice() {
    ?>
    <div class="error notice">
        <p><?php _e( 'There has been an error. Bummer!', 'my_plugin_textdomain' ); ?></p>
    </div>
    <?php
}
add_action( 'admin_notices', 'my_error_notice' );
function my_update_notice() {
    ?>
    <div class="updated notice">
        <p><?php _e( 'The plugin has been updated, excellent!', 'my_plugin_textdomain' ); ?></p>
    </div>
    <?php
}
add_action( 'admin_notices', 'my_update_notice' );
В том случае, если вы не знакомы с функцией e() – она используется для перевода. Это – один из компонентов семейства функций, который вы можете использовать для того, чтобы сделать свой плагин доступным на разных языках.
Генерация уведомлений в зависимости от пользовательских действий
Поскольку ваши уведомления зависят от определенных действий или результатов, у вас всегда будут иметься некоторые if-операторы в коде.
Давайте рассмотрим плагин, который выводит уведомления, если плагин Advanced Custom Fields не активирован. Такой подход очень удобен, если ACF требуется нам для работы.
if( !function_exists( 'the_field' ) ) {
  add_action( 'admin_notices', 'my_acf_notice' );
}

function my_acf_notice() {
  ?>
  <div class="update-nag notice">
      <p><?php _e( 'Please install Advanced Custom Fields, it is required for this plugin to work properly!', 'my_plugin_textdomain' ); ?></p>
  </div>
  <?php
}
Закрываемые уведомления
В WordPress 4.2 появились встроенные закрываемые уведомления. Все, что нужно сделать, чтобы получить такое уведомление – добавить к нему класс is-dismissable.
![]()
Недостаток такого подхода – в WordPress нет никакого стандартизированного способа запомнить это действие (отклонение), за исключением некоторых случаев.
Самый лучший способ сделать это в данный момент – это привязать событие к щелчку и сделать то, что нам требуется, через AJAX. Процесс будет являться следующим:
- Уведомление будет выводиться на экран только для пользователя, который не закрывал его. Поэтому у нас будет опция my-acf-notice-dismissed, равная 1, если пользователь закрыл уведомление.
- Мы будем отслеживать щелчок по кнопке закрытия и делать вызов AJAX
- Вызов AJAX приведет к обновлению опции my-acf-notice-dismissed – она станет равной 1.
- Если мы хотим охватить абсолютно все аспекты, нам нужно будет также обнаружить присутствие функции the_field() плагина ACF и удалить опцию, если она существует. Это позволит нам гарантировать, что при удалении плагина ACF уведомления появятся снова. Однако для этого нам нужно будет выполнить проверку функции при загрузке каждой страницы, что может оказаться слишком ресурсоемким.
Условное уведомление
Давайте получим опцию my-acf-notice-dismissed из базы данных и создадим уведомление, которое будет выводиться только в том случае, если значение опции не равно 1.
if( !function_exists( 'the_field' ) && empty( get_option( 'my-acf-notice-dismissed' ) ) ) {
  add_action( 'admin_notices', 'my_acf_admin_notice' );
}

function my_acf_admin_notice() {
    ?>
    <div class="notice error my-acf-notice is-dismissible" >
        <p><?php _e( 'ACF is not necessary for this plugin, but it will make your experience better, install it now!', 'my-text-domain' ); ?></p>
    </div>


    <?php
}
Это очень похоже на наш код выше – мы лишь добавили проверку empty нашей опции (задана ли она).
Обратите внимание, что я добавил класс my-acf-notice к уведомлению, чтобы гарантировать, что мы привязываем событие только к нашему уведомлению.
Определяем клик
Перед тем, как мы напишем какой-либо JS-код, нам нужно сначала создать JS-файл и поставить его в очередь.
Предположим, что мы пишем простой плагин с JS-файлом в папке js:
add_action( 'wp_enqueue_scripts', 'my_plugin_assets' );

function my_plugin_assets() {
    wp_enqueue_script( 'my-notice-update', plugins_url( '/js/notice-update.js', __FILE__ ), array( 'jquery' ), '1.0', true  );
}
В этом js-файле нам надо создать событие для клика, привязав его к .my-acf-notice – это событие будет инициировать наш AJAX-вызов.
jQuery(document).on( 'click', '.my-acf-notice .notice-dismiss', function() {

    jQuery.ajax({
        url: ajaxurl,
        data: {
            action: 'my_dismiss_acf_notice'
        }
    })

})
Обновляем наши опции
Параметр action нашего AJAX-вызова был my_dismiss_acf_notice – он позволяет нам получить шаблон для создания кода, который будет обрабатывать все вещи на стороне сервера. Все, что нам нужно – это обновить опцию my-acf-notice-dismissed, установив ее значение в 1.
Если вы не работали раньше с AJAX, вы можете изучить наше руководство, представленное по ссылке.
На данный момент вы уже можете загрузить консоль, увидеть уведомление и отклонить его, и оно не будет снова выводиться.
Возвращаем уведомление обратно
Наше уведомление пока еще не готово на сто процентов. Если ACF не установлен, оно будет выводиться. Пользователь может отклонить его, однако установить ACF позже. Если ACF затем будет по каким-либо причинам деактивирован, то уведомление так и останется скрытым.
Чтобы обойти это, мы можем проверить существование функции the_field() – важной функции, используемой в ACF – и если она не существует, то удалить нашу опцию.
Это несколько ресурсоемкий подход, однако мы можем реализовать это, используя хук, который работает только для администраторских страниц, что будет вполне приемлемо.
add_action( 'admin_init', 'my_detect_acf' );
function my_detect_acf() {
    if( !function_exists( 'the_field' )) {
        delete_option( 'my-acf-notice-dismissed' );
    }
}
Администраторские уведомления – полезные и модульные части администраторского опыта взаимодействия. Они могут быть зарегистрированы на индивидуальной основе, предоставляя разработчикам лучший доступ к вашему решению.
Источник: wpmu.org
Часто на сайтах, особенно на крупных интернет-магазинах или новостных порталах, есть возможность сообщить о найденной ошибке в тексте. Обычно это выглядит следующим образом. Пользователь, найдя ошибку в тексте, выделяет этот текст и нажимает комбинацию клавиш [Ctrl]+[Enter]. В итоге перед ним появляется окно с формой, в которой просят оставить объяснительный комментарий по поводу ошибки и указать свой e-mail для связи.
Плагин Mistape
Бесплатное дополнение Mistape в полной мере решает поставленную задачу. Для этого, во-первых, плагин нужно установить и активировать. Для его настройки в админ-панели необходимо перейти Настройки -> Mistape.

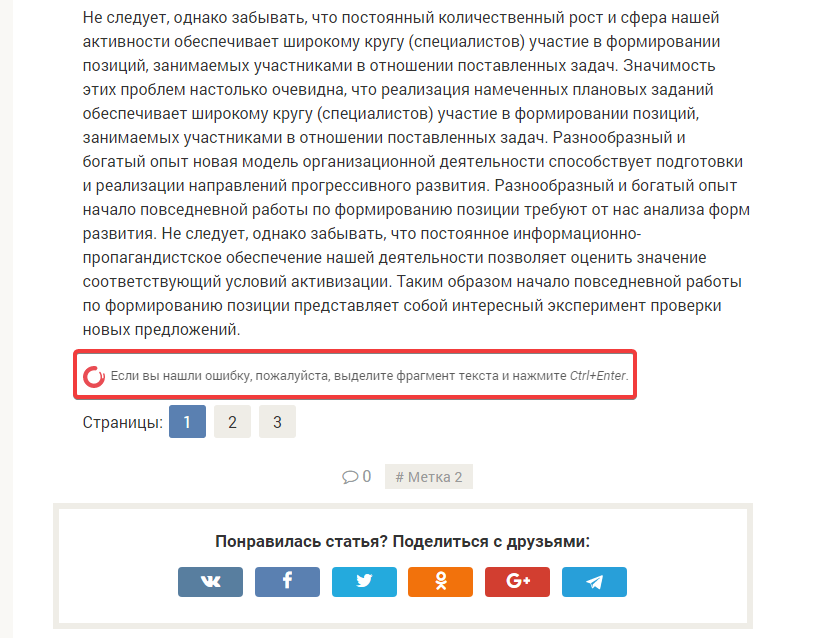
Для того, чтобы плагин начал свою работу, он нуждается в некоторых настройках. Так, на странице настроек первым делом необходимо задать, в каких разделах сайта будет срабатывать указанная комбинация клавиш. Для этого присутствует поле Типы записей, в значениях которого можно выбрать Записи, Страницы, Медиафайлы. Если отметить пункт, например, Записи, то перейдя на какую-либо запись, в самом ее конце будет отображаться надпись “Если вы нашли ошибку, пожалуйста, выделите фрагмент текста и нажмите Ctrl+Enter.”

Для сохранения изменений необходимо нажать кнопку Сохранить изменения.
Также на странице настроек плагина Вы можете задать следующие параметры:
- кто из пользователей сайта будет получать уведомления об ошибках (администратор, редактор или на произвольный e-mail);
- форма выводимой надписи (доступна в виде текста, изображения или полное скрыта);
- отображаемый текст надписи (выбор стандартного или указание произвольного);
- отображаемая иконка перед текстом надписи;
- цветовая схема;
- режим диалога с посетителем.
Для проверки работы плагина необходимо перейти на сайте в указанный выше раздел. В нашем случае – это какая-либо запись. Выделяем текст и нажимаем [Ctrl]+[Enter].
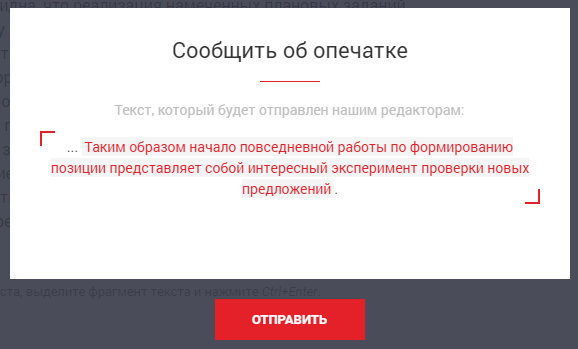
После того, как будет нажата кнопка Отправить, Вы увидите красивую анимацию с улетающим конвертом, сообщающую о том, что Ваш комментарий был успешно отправлен.
Дальше, на указанный e-mail придет письмо с уведомлением о найденной ошибке.
Нажмите, пожалуйста, на одну из кнопок, чтобы узнать понравилась статья или нет.
As you work in the WordPress Admin Area, you’ll undoubtedly encounter “admin notices” that let you know about errors, updated settings, required actions, and so forth. Most default admin notices are provided by WordPress out of the box, but it’s up to plugins and themes to provide any custom notices that may be required. This DigWP tutorial digs deep into WordPress admin notices and explains how to implement, customize, and everything in between.
Four types of admin notices
Here are screenshots showing examples of the four types of admin notices:
 Success – displayed when something good happens, like settings updated successfully
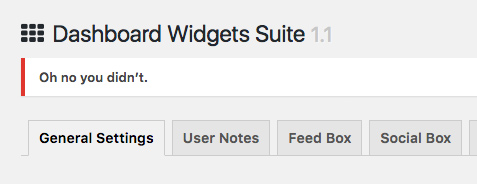 Error – displayed when an error or something bad happens
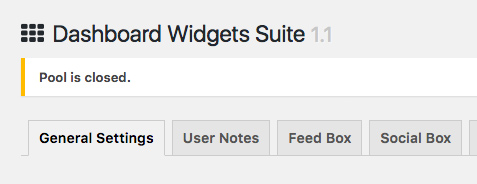 Warning – displayed when the user should be warned of something
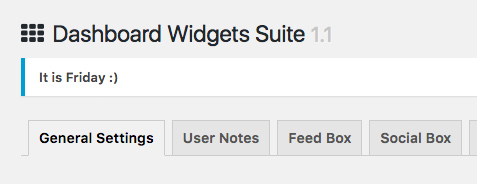 Information – displayed to communicate information to the user
Probably everyone is familiar with these notices, they help provide feedback to the user as they work with the WP Admin Area. The remainder of this article is aimed at WordPress developers who implement these notices in their plugins and themes.
Under the hood
The source code of these different types of admin notices basically is the same. The only difference are the class names and the message. For example, here is the default markup generated by WordPress when displaying a typical “Success” notice:
<div class="notice notice-success is-dismissible">
	<p><strong>Settings saved.</strong></p>
	<button type="button" class="notice-dismiss">
		<span class="screen-reader-text">Dismiss this notice.</span>
	</button>
</div>
Other notices are similar in structure, but may include different classes, such as settings-error, which WordPress automatically includes on admin notices that are displayed on Settings pages (i.e., admin pages located under the WP Settings menu). Some admin pages also include an id attribute on admin notices. For example, admin notices displayed on Settings pages include the following id:
id="setting-error-settings_updated"
Fortunately, we don’t need to worry about the id attributes and extra classes that WordPress automatically adds to admin notices. When adding our own custom admin notices, only a minimal amount of markup is required:
<div class="notice notice-success is-dismissible">
	<p><strong>Settings saved.</strong></p>
</div>
Using that basic pattern, we can create any type of admin notice by simply changing the class names and the message itself. Everything else remains the same and/or is handled automagically by WordPress.
Class dismissed
In the example markup provided in the previous section, notice the class, is-dismissible included in the outer <div> element. This class is what makes the admin notice “dismissible”, so that users can click a small “x” button to remove the message. This helps to streamline productivity and save time. When an admin notice is not dismissible, the only way to remove it is to revisit the page.
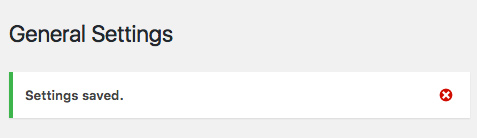 Dismissed! Click the “x” to close any dismissible admin notice without revisiting the page
When the is-dismissible class is included, WordPress automically adds the markup used to display the “x” (dismiss) button. So adding a class is all that is required to make any admin notice dismissible. To illustrate with actual code, adding is-dismissible turns this:
<div class="notice notice-success is-dismissible">
	<p><strong>Settings saved.</strong></p>
</div>
..into this:
<div class="notice notice-success is-dismissible">
	<p><strong>Settings saved.</strong></p>
	<button type="button" class="notice-dismiss">
		<span class="screen-reader-text">Dismiss this notice.</span>
	</button>
</div>
Note that WordPress also provides the CSS required to style the notice and the JavaScript required to make it all work. To check out the CSS and JavaScript, visit the WP General Settings, click the “Save Changes” button, and inspect the notice using your favorite browser (e.g., Chrome or Firefox).
Types of notices
As shown in the screenshots above, there are four types of notices:
notice-error– error message displayed with a red bordernotice-warning– warning message displayed with a yellow bordernotice-success– success message displayed with a green bordernotice-info– info message displayed with a blue border
Here are some examples to give you a better idea:
<div class="notice notice-error is-dismissible">
    <p>There has been an error.</p>
</div>

<div class="notice notice-warning is-dismissible">
    <p>This is a warning message.</p>
</div>

<div class="notice notice-success is-dismissible">
    <p>This is a success message.</p>
</div>

<div class="notice notice-info is-dismissible">
    <p>This is some information.</p>
</div>
In your WordPress travels, instead of the previous four recommended classes, you may encounter the following:
updated– displays message with a green bordererror– displays message with a red borderupdate-nag– displays message with a yellow border
These are relics from previous versions of WordPress and should NOT be used for admin notices. Yes they still work, sort of, but they should be considered deprecated in favor of the four classes described above.
Adding default admin notices
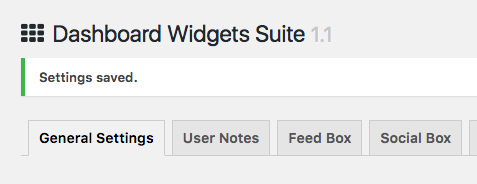
For settings pages located in the Settings Menu, WordPress automatically displays “error” and “updated” messages. So if the settings page for your plugin or theme is located under the Settings Menu, default admin notices are handled automatically by WordPress. For example, in the following screenshot we see that my plugin Dashboard Widgets Suite is located under the Settings Menu, so WordPress takes care of the plugin’s default admin notices.
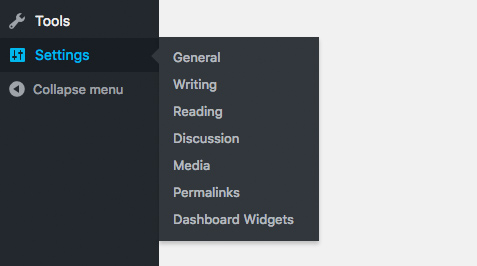 The one and only, WordPress Settings Menu
For settings pages that are located in any other location, default admin notices are NOT displayed automatically. So if your plugin or theme page is located in its own menu, or in a submenu of any menu other than Settings, WordPress does not automatically display default admin notices. In such case, you need to invoke settings_errors() to display the default “error” and “updated” messages. Here are two ways to make it happen.
Method 1
The quickest method is to add settings_errors() explicitly to your displayed settings, for example:
<div class="wrap">
	<h1>My Plugin Title</h1>

	<?php settings_errors(); ?>

	<form method="post" action="options.php">

		.
		.
		.

	</form>
</div>
With that in place, you’re all set. WordPress will display default admin notices when settings are updated successfully or when there is an error.
Method 2
A cleaner method is to add settings_errors() via admin_notices hook, for example:
// display default admin notice
function shapeSpace_add_settings_errors() {

    settings_errors();

}
add_action('admin_notices', 'shapeSpace_add_settings_errors');
This accomplishes the same thing as the previous method, as WordPress runs admin_notices automatically and displays the results beneath the page’s <h1> tag. This method is recommend because it is more flexible/extensible.
Incidentally, have you ever encountered a situation where a settings page is diplaying duplicate admin notices? If so, most likely it is because the settings page is located under the Settings menu AND settings_errors() is included in the plugin code. So you get the notice displayed automatically by WordPress and also the notice displayed by settings_errors(). So to resolve this issue, remove the explicit call to settings_errors() and call it a day.
Adding custom admin notices
So far we’ve seen how to implement default admin notices, but what if we want to add our own custom notices? Well I’m glad you asked, because that’s what this section is all about. As with most everything with WordPress, there are multiple ways of doing things. And adding custom admin notices is no exception.
To add custom admin notices, you can either hook into admin_notices or use add_settings_error(). Let’s look at example of each of these methods.
Method 1: admin_notices hook
The most straightforward way to display custom admin notices is to create a function and hook it into admin_notices, for example:
// display custom admin notice
function shapeSpace_custom_admin_notice() { ?>

	<div class="notice notice-success is-dismissible">
		<p><?php _e('Congratulations, you did it!', 'shapeSpace'); ?></p>
	</div>

<?php }
add_action('admin_notices', 'shapeSpace_custom_admin_notice');
Here, “shapeSpace” is the name of my example plugin or theme, so we use it as the text-domain value of _e(), and also as the prefix of the function name. The function itself outputs our custom admin notice, which is hooked into admin_notices to be displayed by WordPress. And remember, we can change the appearance of the notice by using whichever class makes sense (i.e., notice-error, notice-warning, notice-success, or notice-info).
Real-world example
This method of adding notices is very flexible, enabling you to hook up custom messages just about anytime, anywhere. For example, my bad bots plugin provides an option for the user to restore the plugin’s default settings. So when the user clicks the “restore settings” button, the following events happen:
- The settings form is submitted
- A function attempts to restore the default settings
- If the settings are restored successfully,
reset-options=trueis passed via GET parameter - Or, if the settings are not restored successfully,
reset-options=falseis passed via GET parameter - The following function checks the value of
reset-optionsand displays the appropriate admin notice
// display custom admin notice
function blackhole_tools_admin_notice() {

	$screen = get_current_screen();

	if ($screen->id === 'toplevel_page_blackhole_settings') {

		if (isset($_GET['reset-options'])) {

			if ($_GET['reset-options'] === 'true') : ?>

				<div class="notice notice-success is-dismissible">
					<p><?php _e('Default settings restored.', 'bbb'); ?></p>
				</div>

			<?php else : ?>

				<div class="notice notice-error is-dismissible">
					<p><?php _e('No changes made.', 'bbb'); ?></p>
				</div>

			<?php endif;

		}
	}
}
add_action('admin_notices', 'blackhole_tools_admin_notice');
This function checks the current screen and the GET variable, and then displays the appropriate admin notice, depending on whether or not the default settings were restored successfully. This example illustrates the sheer utility of the admin_notices hook, which can be used to display virtually any custom admin notice to the user.
Method 2: add_settings_error()
Another prescribed method for displaying custom admin notices is to use add_settings_error(), which can be used directly in your settings validation function. So for example, let’s say that our plugin registers the following setting:
// register_setting( $option_group, $option_name, $sanitize_callback );
register_setting('my_option_group', 'my_option_group', 'my_option_group_validate');
Notice that this setting calls my_option_group_validate as the $sanitize_callback parameter. So let’s say that my_option_group_validate looks like this:
// my $sanitize_callback function
function my_option_group_validate($input) {

	if (null != $input) {

		if (false === get_option('my_option')) {

			add_option('my_option', $input);

		} else {

			update_option('my_option', $input);

		}

	}

	return $input;

}
This validation function checks/sanitizes as needed all of the input for the my_option_group setting. This is standard stuff; registering a setting with a validation callback function is a technique used by many WordPress plugins.
Now with this code in place, let’s say that we want to display a custom admin notice based on whether or not a specific setting meets certain criteria. So instead of displaying the default “Settings saved” notice, which applies to the entire group of settings, we want to display a notice that applies to a specific setting. This is where add_settings_error() comes into play. We can display the custom error by including add_settings_error() in our validation function, for example:
// my $sanitize_callback function
function my_option_group_validate($input) {

	message = null;
	$type = null;

	if (null != $input) {

		if (false === get_option('my_option')) {

			add_option('my_option', $input);
			$message = __('Option added! Congrats man.');
			$type = 'updated';

		} else {

			update_option('my_option', $input);
			$message = __('Option updated! Miller time.');
			$type = 'updated';

		}

	} else {

		$message = __('Oh noes! There was a problem.');
		$type = 'error';

	}

	// add_settings_error( $setting, $code, $message, $type )
	add_settings_error('my_option_notice', 'my_option_notice', $message, $type);

	return $input;

}
Here we have fleshed out our original validation function with some conditional code. The code now keeps track of $message and $type variables, which can be used by add_settings_error() to display a custom notice based on what happened with my_option. This technique is useful because it gives us granular control over specific settings errors, and thereby enables us to display precise information to the user. And it’s extra nice because there are no hooks required to implement. Simply include add_settings_error() in the validation callback, and WordPress automatically displays the appropriate notice.
Bonus! Method 3: Quick fix
While either of the previous methods are considered best-practice, they may not be feasible or practical in all scenarios. So to help anyone out who may be in a pinch to get things done, here is a third, alternate method that can be used to quickly add custom admin notices just about anywhere. Here is the magic bullet:
<?php if (isset($_GET['settings-updated'])) : ?>
	<div class="notice notice-success is-dismissible"><p><?php _e('Something happened!'); ?>.</p></div>
<?php endif; ?>
This code snippet grabs the global $_GET variable, checks if settings-updated is set, and then displays the basic markup required to display an admin notice.
The key to making this work is checking the relevant variable and including the classes required to display whichever type of notice is required.
Again, this technique is meant as a “quick fix” for tight spots. It is much better to use one of the prescribed techniques above for adding your admin notices.
Wrap up
This article attempts to cover all possible cases for adding admin notices. If anything is missing, please leave a comment or drop a line.
As always, thanks for reading 
References & more infos
To learn more about the code and techniques presented in this tutorial, check out the following resources at the WordPress Codex.
- WP Codex: admin_notices
- WP Codex: settings_errors()
- WP Codex: add_settings_error()
- WP Codex: register_setting()
- WP Codex: Settings API
Здравствуйте, друзья! Нашли ошибку? Выделите ее и нажмите Ctrl+Enter. Знакомая фраза? Думаю да. Все чаще на различных сайтах встречаю орфографические ошибки и опечатки. В последнее время этим грешат почти все новостные издания (и не только) где, по правилам, должны быть грамотные редакторы. Давайте бороться за грамотность на своих веб-ресурсах, я тоже ненавижу ошибки в статьях. Пусть ваши читатели сообщают вам об орфографических ошибках в тексте, с которыми они могут столкнуться, а вы, как можно скорее её исправите.

Орфографические ошибки и опечатки не любят, как читатели, так и поисковые системы. Наличие ошибок в тексте — это большой риск, что страница не будет проиндексирована Яндекс и Google. Из правил Яндекса:
«Текст должен быть написан грамотно и аккуратно оформлен.
Яндекс
Руководствуясь принципом «Лучше поздно, чем никогда» предлагаю вам воспользоваться простым бесплатным плагином для исправления посетителями ошибок в тексте с помощью сочетаний клавиш Ctrl+Enter. И это будет не система Orphus, а более лучше. Плагин Mistape для исправление ошибок в тексте посетителями сайта ВордПресс. Mistape позволяет читателям легко уведомлять персонал сайта о найденных орфографических ошибках.
Как уведомить / информировать владельца WordPress сайта об ошибке в тексте? Нашли ошибку? Выделите ее и нажмите Ctrl+Enter. Бесплатный плагин под WordPress для исправления ошибок в тексте через Ctrl+Enter. Модуль WP, который позволяет посетителям вашего сайта уведомлять вас о любых ошибках в написании сообщений или страниц.

Бесплатный плагин Mistape для WordPress, который позволяет посетителям вашего сайта сообщать вам о любых ошибках найденных в ваших сообщениях или страницах сайта, блога. Подключаясь легко, в несколько кликов, он уже готов быть вашим любимым помощником в работе над ошибками. Основной плюс плагина — это простота в использовании. Никаких дополнительных изображений и внешних ссылок. Плюс, модуль защищен от спам-атак и приятный минималистичный дизайн порадует даже самого притязательного пользователя.
Минимум настроек, красивое оформление и, что очень важно, всё работает, как швейцарские часики.
Плагин позволяет посетителям блога/сайта сообщать об ошибке/опечатке, воспользовавшись сочетанием клавиш Ctrl+Enter. Вебмастер незамедлительно получит уведомление на почту и исправит ошибку.

Выделив ошибку, у посетителя появится модальное окно, где можно дописать комментарий к выделенной ошибке и выслать его владельцу вебресурса WordPress. У вас есть возможность выбирать типы постов под которыми будет выводиться надпись с предупреждением (можно вставить в любом месте с помощью короткого кода).
Для того, чтобы отправить сообщение об ошибке, необходимо выделить текст на странице сайта, где замечена ошибка, и нажать сочетание клавиш Ctrl+Enter. Появится диалоговое окно, в котором пользователь сможет написать комментарий и отправить сообщение об ошибке.
Почему не система Orphus
Orphus не имеет своего собственного плагина для WordPress. Система устанавливается вручную, и для установки вам нужно будет вставлять код скрипта в файлы сайта. В итоге, на странице сайта появляется графическое изображение.
Еще один любопытный момент: при генерации кода, ваш e-mail попадает в стороннюю систему, которая, к слову сказать, никак не защищена от спама.
Установка и настройка Mistape плагина WordPress
Установить плагин можно через админку WP. Найдите Mistape и установите его из раздела плагинов в админ панели вашего сайта. Плагины — Добавить новый. Вводите название его и нажимаете Установить.

После этого активируйте его и перейдите по ссылке настроек в уведомлении, которое вы увидите вверху:

Плагин на русском языке и поэтому всё предельно просто и понятно. Установите нужные флажки, сохраните и все!
Например, вкладка Конфигурация позволяет вам установить получателя электронной почты:

Отправлять их можно не только владельцу сайта, но и автору конкретного поста или задать несколько получателей, разделив адреса E-mail запятой. Если хотите, то можно использовать шорткоды для размещения надписи в любом месте. Формат надписи будет отображаться в текстовом виде или в виде картинки. Вы можете легко настроить плагин в своих цветах и выбрать один из значков рядом с подписью под записью:

Вот в принципе и вся настройка. Да, есть предпросмотр, проверьте:

После нажатия кнопки Отправить, появится анимация с улетающим конвертиком (смотрите гифку выше), которая сообщает об успешном отправлении вашего комментария. Сохраняйте изменения и смотрим, что получится у нас. Исправление ошибок в тексте посетителями сайта готово. У меня выглядит после текста вот так:

Или так, с текстом по умолчанию:

Заголовок «нажмите Ctrl + Enter…» (или ваш текст) можно настроить так, чтобы он автоматически добавлялся к выбранным типам сообщений или вставлялся в любом месте с помощью шорткода. Например, вывод в футере сайта с помощью короткого кода [mistape]:

Как написано выше, плагин позволяет посетителям сайта сообщать об ошибке или текстовой опечатке, воспользовавшись сочетанием клавиш Ctrl+Enter. Проверяем работает ли наш помощник по грамотности. Выделяем любое слово, нажимаем Ctrl+Enter и опля:

Работает плагин отлично, даже в такой сложной теме, как Newspaper. Можно сразу отправлять сообщение об ошибке и показывать диалог «Спасибо» независимо от результата:

Через пару секунд на указанную почту придет уведомление об ошибке с комментарием от внимательного посетителя, в данном случае от меня:

Все настройки хранятся в одной записи базы данных и стираются при удалении плагина, поэтому вы можете быть уверены, что ваша установка WP не будет засорена, если вы решите, что вам больше не нужен Mistape (а я уверен, что вы этого не сделаете).
В заключение
Надеюсь, дамы и господа, сегодняшний пост — как разрешить пользователям уведомлять вас об орфографических и грамматических ошибках в записях WordPress, был вам полезен. Стремитесь сохранить безупречный контент? Mistape поможет! Используйте плагин WordPress, который позволит посетителям вашего сайта уведомлять вас о любых ошибках в написании ваших сообщений или страниц.
Позвольте с вами не надолго попрощаться, удачи вам всем и до новых встреч на страницах моего блога для новичков. Пока, пока.
Опубликовано: ADv
Дата 19.12.2015
в рубрике Плагины WP
Комментировать
Публикация собственных идей в сети интернет стала действительно простой. Однако, основной проблемой в этом случае является то, что исключительно вы остаетесь ответственными за свои ошибки. Никто не будет проверять, вычитывать и редактировать то, что вы публикуете, кроме вас самих. У вас, возможно, выстроена схема подготовки к публикации записи (проверка фактов, вычитывание своих статей, а также «оттачивание» своих мыслей), но всегда существует шанс допустить ошибку. Допустить небольшую опечатку, проставить битую ссылку, или любую другую небольшую ошибку вы можете, потому как вы — человек. Не будучи замеченной вовремя, ошибка может содержаться в статье годами. В сегодняшней статье мы покажем вам как разрешить вашим пользователям уведомлять вас об ошибках в контенте записей WordPress.
Первым делом вам необходимо установить и активировать плагин Error Notification для WordPress. Этот плагин отобразит сообщение внизу ваших страниц и записей, с призывом к пользователям сообщать о любых ошибках путем их выделения и нажатия комбинации клавиш Shift+E на клавиатуре или же используя специальную ссылку.
![error-notification[1]](https://wpincode.com/wp-content/uploads/2015/07/error-notification1.jpeg)
Когда посетители отправят вам сообщение об ошибке, оно сразу же придет на вашу почту, отображая подсвеченную ошибку, запись или ссылку на страницу, наряду с датой/временем отчета. После того, как пользователь сообщит об ошибке, он увидит благодарственное сообщение внизу страницы. У вас есть возможность настроить это сообщение и его внешний вид со страницы настроек плагина.
![error-notification-settings[1]](https://wpincode.com/wp-content/uploads/2015/07/error-notification-settings1.jpeg)
Идея Error Notification не уникальна, однако многие до сих пор пользуются формой контактов для этих целей. Напрашивается вопрос «Зачем?», если есть более удобный способ сообщить о проблеме. И еще: вряд ли пользователь станет проделывать дополнительные действия для того, чтобы найти контактную форму.
Мы надеемся, что эта статья помогла вам разрешить пользователям уведомлять вас об ошибках на вашем WordPress сайте.
По всем вопросам и отзывам просьба писать в комментарии ниже.
Не забывайте, по возможности, оценивать понравившиеся записи количеством звездочек на ваше усмотрение.
Rating: 0.0/5 (0 votes cast)
Теги: wordpress записи ошибка плагин
Об авторе ADv

Занимаюсь разработкой сайтов и магазинов на WordPress. Оказываю платные помощь и консультации.
Skype: advokat_b