Темы
- Настройка параметров базы данных
- Стандартный wp-config-sample.php
- Изменение имени базы данных
- Изменение пользователя базы данных
- Изменение пароля базы данных
- Изменение хоста базы данных
- Альтернативный порт MySQL
- Сокеты или конвееры MySQL
- Возможные значения DB_HOST
- Кодировка базы
- Сопоставление базы данных
- Ключи безопасности
- Стандартный wp-config-sample.php
- Расширенные настройки
- table_prefix
- WP_SITEURL
- Адрес сайта (URL)
- Перемещение каталога wp-content
- Перемещение каталога плагинов
- Перемещение каталога тем
- Перемещение каталога загрузок
- Изменить интервал автосохранения
- Редакции записей
- Отключить редакции записей
- Укажите количество редакций записи
- Установить домен для cookie
- Установка сети (Мультисайт)
- Редирект несуществующих блогов
- WP_DISABLE_FATAL_ERROR_HANDLER
- WP_DEBUG
- SCRIPT_DEBUG
- Отключить объединение Javascript
- Настройка журналирования ошибок
- Увеличение памяти, выделенной PHP
- Кэш
- Настраиваемые таблицы User и Usermeta
- Язык и папка языковых файлов
- WordPress v3.9.6 и ниже
- Сохранение запросов SQL для анализа
- Отмена разрешений для файлов по умолчанию
- Константы обновления WordPress
- Включение доступа к обновлению по SSH
- Альтернативный Cron
- Отключить Cron и Cron Timeout
- Дополнительные определяемые константы
- Очистить корзину
- Автоматическая оптимизация базы данных
- DO_NOT_UPGRADE_GLOBAL_TABLES
- Просмотр всех определенных констант
- Отключение редактора плагинов и тем
- Отключить обновление и установку плагинов и тем
- Требовать SSL для администратора и входа в систему
- Блокировать внешние URL-запросы
- Отключить автообновления WordPress
- Отключить обновления ядра WordPress
- Очистка при редактировании изображений
- Дважды проверьте перед сохранением
Один из самых важных файлов в вашей установке WordPress — это файл wp-config.php. Этот файл находится в корневом каталоге вашего WordPress (или на 1 уровень выше, в некоторых случаях) и содержит основные данные конфигурации вашего веб-сайта, например информацию о подключении к базе данных.
Когда вы впервые загружаете архив WordPress, файл wp-config.php в нём отсутствует. В процессе установки WordPress будет создан файл wp-config.php на основе предоставленной вами информации.
Вы можете вручную создать файл wp-config.php, найдя образец файла с именем wp-config-sample.php (расположенный в корневом каталоге установки), отредактировав его по мере необходимости, а затем сохранив как wp-config.php.
Внимание: содержимое файла wp-config-sample.php находится в строго определенном порядке. Порядок имеет значение. Если у вас уже есть файл wp-config.php, изменение его содержимого может привести к ошибкам в вашем блоге.
Чтобы изменить файл wp-config.php для вашей установки, вам понадобится следующая информация:
- Database Name – Имя базы данных, используемое WordPress
- Database Username – Имя пользователя, используемое для доступа к базе данных
- Database Password – Пароль, используемый именем пользователя для доступа к базе данных
- Database Host – Адрес хоста вашего сервера базы данных. Также может потребоваться номер порта, путь к файлу сокета Unix или конвееру.
Если ваш хостинг-провайдер установил для вас WordPress, получите информацию от него. Если вы управляете своим собственным веб-сервером или учетной записью хостинга, эта информация будет у вас в результате создания базы данных и пользователя.
Настройка параметров базы данных
Важно: никогда не используйте текстовый редактор, например Microsoft Word, для редактирования файлов WordPress!
Найдите файл wp-config-sample.php в базовом каталоге вашего каталога WordPress и откройте его в текстовом редакторе.
Наверх ↑
Стандартный wp-config-sample.php
Примечание. Это пример стандартного wp-config-sample.php. Значения здесь являются примерами, чтобы показать вам, что делать.
// ** MySQL settings - You can get this info from your web host ** //
/** The name of the database for WordPress */
define( 'DB_NAME', 'database_name_here' );
/** MySQL database username */
define( 'DB_USER', 'username_here' );
/** MySQL database password */
define( 'DB_PASSWORD', 'password_here' );
/** MySQL hostname */
define( 'DB_HOST', 'localhost' );
Внимание: Текст внутри /* */ являеться комментариями, только в информационных целях.
Наверх ↑
Изменение имени базы данных
Замените «database_name_here» именем своей базы данных, например MyDatabaseName.
define( 'DB_NAME', 'MyDatabaseName' ); // Example MySQL database name
Наверх ↑
Изменение пользователя базы данных
Замените «username_here» на имя вашего имени пользователя, например MyUserName.
define( 'DB_USER', 'MyUserName' ); // Example MySQL username
Наверх ↑
Изменение пароля базы данных
Замените «password_here» своим паролем, например MyPassWord.
define( 'DB_PASSWORD', 'MyPassWord' ); // Example MySQL password
Наверх ↑
Изменение хоста базы данных
Замените «localhost» именем хоста вашей базы данных, например MyDatabaseHost. Также может потребоваться номер порта или путь к файлу сокета Unix.
define( 'DB_HOST', 'MyDatabaseHost' ); // Example MySQL Database host
Примечание. Вполне вероятно, что вам НЕ придется его менять. Если вы не уверены, попробуйте установить со значением по умолчанию «localhost» и посмотрите, работает ли это. Если установка не удалась, обратитесь к своему провайдеру веб-хостинга.
Наверх ↑
Альтернативный порт MySQL
Если ваш хост использует альтернативный номер порта для вашей базы данных, вам необходимо изменить значение DB_HOST в файле wp-config.php, чтобы отразить альтернативный порт, предоставленный вашим хостом.
Для localhost:
define( 'DB_HOST', 'localhost:3307' );
Для указанного сервера:
define( 'DB_HOST', 'mysql.example.com:3307' );
Замените 3307 любым номером порта, который вам дает ваш хост.
Наверх ↑
Сокеты или конвееры MySQL
Если ваш хост использует сокеты или конвееры Unix, соответственно измените значение DB_HOST в файле wp-config.php.
define( 'DB_HOST', '127.0.0.1:/var/run/mysqld/mysqld.sock' );
// or define( 'DB_HOST', 'localhost:/var/run/mysqld/mysqld.sock' );
// or define( 'DB_HOST', 'example.tld:/var/run/mysqld/mysqld.sock' );
Замените /var/run/mysqld/mysqld.sock информацией о сокете или конвеере, предоставленной вашим хостом.
Наверх ↑
Возможные значения DB_HOST
Разные хостинговые компании используют разные сетевые настройки для своих баз данных mysql. Обратитесь в службу технической поддержки и/или выполните поиск в документации по вашей хостинг-компании в Интернете.
Наверх ↑
Кодировка базы
DB_CHARSET был сделан доступным для обозначения набора символов базы данных (например, tis620 для TIS620 Thai), который будет использоваться при определении таблиц базы данных MySQL.
Значение по умолчанию utf8 (Unicode UTF-8) почти всегда является лучшим вариантом. UTF-8 поддерживает любой язык, поэтому вы обычно оставляете DB_CHARSET на utf8 и вместо этого используете значение DB_COLLATE для вашего языка.
В этом примере показана кодировка utf8, которая считается значением WordPress по умолчанию:
define( 'DB_CHARSET', 'utf8' );
Обычно не должно быть причин для изменения значения DB_CHARSET по умолчанию. Если вашему блогу нужен другой набор символов, прочтите, пожалуйста, «Наборы символов и сопоставления, поддерживаемые MySQL», чтобы узнать допустимые значения DB_CHARSET. ВНИМАНИЕ: Это требует обновления.
Если DB_CHARSET и DB_COLLATE не существуют в вашем файле wp-config.php, НЕ ДОБАВЛЯЙТЕ какое-либо определение в файл wp-config.php, если вы не прочитали и не поняли преобразование наборов символов базы данных. Добавление DB_CHARSET и DB_COLLATE в файл wp-config.php для существующего блога может вызвать серьезные проблемы.
Наверх ↑
Сопоставление базы данных
DB_COLLATE стал доступным для обозначения параметров cопоставления кодировки базы данных (то есть порядка кодировки набора символов). В большинстве случаев это значение следует оставить пустым (нулевым), чтобы кодировка базы данных была автоматически назначена MySQL на основе набора символов базы данных, указанного в DB_CHARSET. Примером того, когда вам может потребоваться установить «DB_COLLATE» в одно из значений UTF-8, определенных в наборах символов UTF-8 для большинства западноевропейских языков, может быть другой язык, на котором введенные вами символы не являются то же самое, что отображается. (См. также Наборы символов Unicode в Руководстве по SQL)
Значение DB_COLLATE по умолчанию WordPress:
define( 'DB_COLLATE', '' );
UTF-8 Unicode Общие параметры кодировки
define( 'DB_COLLATE', 'utf8_general_ci' );
UTF-8 Unicode турецкая кодировка
define( 'DB_COLLATE', 'utf8_turkish_ci' );
Обычно не должно быть причин для изменения значения DB_COLLATE по умолчанию. Если оставить значение пустым (null), MySQL автоматически назначит сопоставление при создании таблиц базы данных. ВНИМАНИЕ: Это требует обновления
Если DB_COLLATE и DB_CHARSET не существуют в вашем файле wp-config.php, НЕ добавляйте ни одно определение в ваш файл wp-config.php, если вы не прочитали и не поняли преобразование наборов символов базы данных. И вам может потребоваться обновление WordPress.
Наверх ↑
Ключи безопасности
Вам не нужно запоминать ключи, просто сделайте их длинными, случайными и сложными — а еще лучше — используйте онлайн-генератор. Вы можете изменить их в любой момент, чтобы аннулировать все существующие файлы cookie. Это означает, что всем пользователям придется снова войти в систему.
Пример (не используйте их!):
define( 'AUTH_KEY',         't`DK%X:>xy|e-Z(BXb/f(Ur`8#~UzUQG-^_Cs_GHs5U-&Wb?pgn^p8(2@}IcnCa|' );
define( 'SECURE_AUTH_KEY',  'D&ovlU#|CvJ##uNq}bel+^MFtT&.b9{UvR]g%ixsXhGlRJ7q!h}XWdEC[BOKXssj' );
define( 'LOGGED_IN_KEY',    'MGKi8Br(&{H*~&0s;{k0<S(O:+f#WM+q|npJ-+P;RDKT:~jrmgj#/-,[hOBk!ry^' );
define( 'NONCE_KEY',        'FIsAsXJKL5ZlQo)iD-pt??eUbdc{_Cn<4!d~yqz))&B D?AwK%)+)F2aNwI|siOe' );
define( 'AUTH_SALT',        '7T-!^i!0,w)L#JK@pc2{8XE[DenYI^BVf{L:jvF,hf}zBf883td6D;Vcy8,S)-&G' );
define( 'SECURE_AUTH_SALT', 'I6`V|mDZq21-J|ihb u^q0F }F_NUcy`l,=obGtq*p#Ybe4a31R,r=|n#=]@]c #' );
define( 'LOGGED_IN_SALT',   'w<$4c$Hmd%/*]`Oom>(hdXW|0M=X={we6;Mpvtg+V.o<$|#_}qG(GaVDEsn,~*4i' );
define( 'NONCE_SALT',       'a|#h{c5|P &xWs4IZ20c2&%4!c(/uG}W:mAvy<I44`jAbup]t=]V<`}.py(wTP%%' );
Секретный ключ усложняет успешную атаку на ваш сайт, добавляя случайные элементы к паролю.
Проще говоря, секретный ключ — это пароль с элементами, которые затрудняют создание достаточного количества параметров для преодоления ваших барьеров безопасности. Пароль типа «пароль» или «тест» прост и легко взломан. Для взлома случайного длинного пароля без словарных слов, например «88a7da62429ba6ad3cb3c76a09641fc», злоумышленнику могут потребоваться миллионы часов. «Соль» используется для дальнейшего повышения надежности полученного результата.
Четыре ключа необходимы для повышенной безопасности. Четыре соли рекомендуются, но не требуются, потому что WordPress будет генерировать соли для вас, если они не предоставлены. Они включены в wp-config.php по умолчанию.
Дополнительные сведения о технических характеристиках и структуре секретных ключей и безопасных паролей смотрите:
- Райан Борен — SSL и файлы cookie в WordPress 2.6
- Объяснение взлома паролей из Википедии
- Лорель ВанФоссен — Защитите свой блог надежным паролем
- Instructables — Советы по безопасному паролю
- Huffington Post — 17 советов, которые вы можете сделать сегодня, чтобы защитить свои пароли в Интернете
Наверх ↑
Расширенные настройки
Следующие разделы могут содержать дополнительную информацию, и некоторые изменения могут привести к непредвиденным проблемам. Перед изменением этих настроек убедитесь, что вы регулярно выполняете резервное копирование и знаете, как их восстановить.
Наверх ↑
table_prefix
$table_prefix — это значение, помещаемое перед таблицами базы данных. Измените значение, если вы хотите использовать что-то другое, кроме wp_ для префикса вашей базы данных. Обычно это изменяется, если вы устанавливаете несколько сайтов WordPress в одной базе данных, как это делается с функцией работы с несколькими сайтами.
Можно сделать несколько установок в одной базе данных, если вы дадите каждой из них уникальный префикс. Помните о безопасности, если решите это сделать.
$table_prefix = 'r235_'; // Only numbers, letters, and underscores please!
Наверх ↑
WP_SITEURL
WP_SITEURL позволяет определить адрес (URL) WordPress. Определенное значение — это адрес, по которому находятся ваши файлы ядра WordPress. Он также должен включать часть http://. Не ставьте в конце косую черту «/». Установка этого значения в wp-config.php переопределяет значение таблицы wp_options для siteurl. Добавление этого может уменьшить количество обращений к базе данных при загрузке вашего сайта. Примечание: это не изменит сохраненное значение базы данных. URL вернется к старому значению базы данных, если эта строка когда-либо будет удалена из wp-config.php. Используйте константу RELOCATE, чтобы изменить значение siteurl в базе данных.
Если WordPress установлен в каталог с именем «wordpress» для домена example.com, определите WP_SITEURL следующим образом:
define( 'WP_SITEURL', 'http://example.com/wordpress' );
Динамически установить WP_SITEURL на основе $ _SERVER [‘HTTP_HOST’]
define( 'WP_SITEURL', 'http://' . $_SERVER['HTTP_HOST'] . '/path/to/wordpress' );
Примечание. HTTP_HOST создается PHP динамически на основе значения заголовка HTTP HOST в запросе, что, возможно, допускает уязвимости включения файлов. SERVER_NAME также может быть создан динамически. Однако, когда Apache настроен как UseCanonicalName «on», SERVER_NAME устанавливается конфигурацией сервера, а не динамически. В этом случае для пользователя SERVER_NAME безопаснее, чем HTTP_HOST.
Динамически установить WP_SITEURL на основе $ _SERVER [‘SERVER_NAME’]
define( 'WP_SITEURL', 'http://' . $_SERVER['SERVER_NAME'] . '/path/to/wordpress' );
Наверх ↑
Адрес сайта (URL)
Подобно WP_SITEURL, WP_HOME переопределяет значение таблицы wp_options для главной, но не изменяет его в базе данных. главная — это адрес, который вы хотите, чтобы люди вводили в своем браузере, чтобы попасть в ваш сайт WordPress. Он должен включать часть http:// и не иметь косой черты «/» в конце. Добавление этого может уменьшить количество обращений к базе данных при загрузке вашего сайта.
define( ‘WP_HOME’, ‘http://example.com/wordpress’ );
Если вы используете технику, описанную в разделе «Создание собственного каталога WordPress», следуйте приведенному ниже примеру. Помните, что вы также разместите index.php в своем корневом веб-каталоге, если вы используете такую настройку.
define( 'WP_HOME', 'http://example.com' );
Динамически установить WP_HOME на основе $ _SERVER [‘HTTP_HOST’]
define( 'WP_HOME', 'http://' . $_SERVER['HTTP_HOST'] . '/path/to/wordpress' );
Наверх ↑
Перемещение каталога wp-content
Вы можете переместить каталог wp-content, в котором хранятся ваши темы, плагины и загрузки, за пределы каталога приложений WordPress.
Установите WP_CONTENT_DIR на полный локальный путь к этому каталогу (без косой черты в конце), например
define( 'WP_CONTENT_DIR', dirname(__FILE__) . '/blog/wp-content' );
Установите WP_CONTENT_URL на полный URL-адрес этого каталога (без косой черты в конце), например
define( 'WP_CONTENT_URL', 'http://example/blog/wp-content' );
Наверх ↑
Перемещение каталога плагинов
Установите WP_PLUGIN_DIR на полный локальный путь к этому каталогу (без косой черты), например
define( 'WP_PLUGIN_DIR', dirname(__FILE__) . '/blog/wp-content/plugins' );
Установите WP_PLUGIN_URL на полный URI этого каталога (без косой черты в конце), например
define( 'WP_PLUGIN_URL', 'http://example/blog/wp-content/plugins' );
Если у вас есть проблемы с совместимостью плагинов, установите PLUGINDIR на полный локальный путь к этому каталогу (без косой черты в конце), например
define( 'PLUGINDIR', dirname(__FILE__) . '/blog/wp-content/plugins' );
Наверх ↑
Перемещение каталога тем
Вы не можете переместить папку тем, потому что ее путь жестко задан относительно папки wp-content:
$theme_root = WP_CONTENT_DIR . '/themes';
Однако вы можете зарегистрировать дополнительные каталоги тем с помощью register_theme_directory.
Посмотрите, как переместить папку wp-content. Подробнее о том, как определяется папка тем, см. wp-includes/theme.php.
Наверх ↑
Перемещение каталога загрузок
Установить каталог загрузок
define( 'UPLOADS', 'blog/wp-content/uploads' );
Этот путь не может быть абсолютным. Он всегда относительно ABSPATH, поэтому не требует косой черты в начале.
Наверх ↑
Изменить интервал автосохранения
При редактировании сообщения WordPress использует Ajax для автоматического сохранения изменений в публикации во время редактирования. Вы можете увеличить эту настройку, чтобы увеличить задержки между автосохранениями, или уменьшить ее, чтобы не потерять изменения. По умолчанию 60 секунд.
define( 'AUTOSAVE_INTERVAL', 160 ); // Seconds
Наверх ↑
Редакции записей
WordPress по умолчанию сохраняет копии каждого изменения, внесенного в сообщение или страницу, что дает возможность вернуться к предыдущей версии этого сообщения или страницы. Сохранение редакций можно отключить или указать максимальное количество редакций для каждой записи или страницы.
Наверх ↑
Отключить редакции записей
Если вы не устанавливаете это значение, WordPress по умолчанию устанавливает для WP_POST_REVISIONS значение true (разрешить редактирование сообщений). Если вы хотите отключить функцию ревизий, используйте этот параметр:
define( 'WP_POST_REVISIONS', false );
Примечание. Иногда это не работает, пока команда не будет перемещена в первую строку под комментарием начального блока в wp-config.php.
Наверх ↑
Укажите количество редакций записи
Если вы хотите указать максимальное количество редакций, которые хранит WordPress, измените false на целое число (например, 3 или 12).
define( 'WP_POST_REVISIONS', 3 );
Примечание. Иногда это не работает, пока команда не будет перемещена в первую строку под комментарием начального блока в wp-config.php.
Наверх ↑
Установить домен для cookie
Домен, установленный в файлах cookie для WordPress, может быть указан для пользователей с необычными настройками домена. Например, если субдомены используются для обслуживания статического содержимого, вы можете установить в качестве домена cookie только ваш нестатический домен, чтобы предотвратить отправку cookie WordPress с каждым запросом к статическому содержимому на вашем субдомене.
define( 'COOKIE_DOMAIN', 'www.example.com' );
Наверх ↑
Установка сети (Мультисайт)
WP_ALLOW_MULTISITE — это функция, позволяющая работать с несколькими сайтами. Если этот параметр отсутствует в wp-config.php, по умолчанию используется значение false.
define( 'WP_ALLOW_MULTISITE', true );
Наверх ↑
Редирект несуществующих блогов
NOBLOGREDIRECT может использоваться для перенаправления браузера, если посетитель пытается получить доступ к несуществующему поддомену или каталогу.
define( 'NOBLOGREDIRECT', 'http://example.com' );
Наверх ↑
WP_DISABLE_FATAL_ERROR_HANDLER
WordPress 5.2 представил режим восстановления, который отображает сообщение об ошибке вместо белого экрана, когда плагины или темы вызывают фатальную ошибку.
Сайт испытывает технические трудности. Пожалуйста, проверьте почтовый ящик администратора вашего сайта для получения инструкций.
Белые экраны и сообщения об ошибках PHP больше не отображаются для пользователей. Но в среде разработки, если вы хотите включить WP_DEBUG_DISPLAY, вы должны отключить режим восстановления, установив true в WP_DISABLE_FATAL_ERROR_HANDLER.
define( 'WP_DISABLE_FATAL_ERROR_HANDLER', true );   // 5.2 and later define( 'WP_DEBUG', true );
define( 'WP_DEBUG_DISPLAY', true );
Наверх ↑
WP_DEBUG
Параметр WP_DEBUG управляет отчетом о некоторых ошибках и предупреждениях и позволяет использовать настройки WP_DEBUG_DISPLAY и WP_DEBUG_LOG. Значение по умолчанию — false.
define( 'WP_DISABLE_FATAL_ERROR_HANDLER', true );   // 5.2 and later
define( 'WP_DEBUG', true );
Ошибки базы данных выводятся, только если WP_DEBUG имеет значение true. Ошибки базы данных обрабатываются классом wpdb и не зависят от настроек ошибок PHP.
Установка WP_DEBUG в значение true также повышает уровень сообщения об ошибках до E_ALL и активирует предупреждения при использовании устаревших функций или файлов; в противном случае WordPress устанавливает уровень сообщения об ошибках на E_ALL ^ E_NOTICE ^ E_USER_NOTICE.
Наверх ↑
SCRIPT_DEBUG
SCRIPT_DEBUG — это связанная константа, которая заставит WordPress использовать «dev» версии скриптов и таблиц стилей в wp-includes/js, wp-includes/css, wp-admin/js, и wp-admin/css будут загружены вместо версии .min.css и .min.js. Если вы планируете модифицировать некоторые из встроенных в WordPress таблиц JavaScript или CSS, вам следует добавить следующий код в свой файл конфигурации:
define( 'SCRIPT_DEBUG', true );
Наверх ↑
Отключить объединение Javascript
Чтобы ускорить экраны администрирования, все файлы JavaScript объединяются в один URL. Если JavaScript не работает на экране администрирования, вы можете попробовать отключить эту функцию:
define( 'CONCATENATE_SCRIPTS', false );
Наверх ↑
Настройка журналирования ошибок
Настройка журнала ошибок может быть немного сложной. Прежде всего, журнал ошибок PHP по умолчанию и настройки отображения устанавливаются в файле php.ini, к которому вы можете иметь или не иметь доступа. Если вы это сделаете, они должны быть установлены на желаемые настройки для реальных страниц PHP. Настоятельно рекомендуется не публиковать сообщения об ошибках, а направлять их в журнал ошибок. Более того, журналы ошибок не должны находиться в общедоступной части вашего сервера. Пример рекомендуемых настроек ошибок php.ini:
error_reporting = 4339
display_errors = Off
display_startup_errors = Off
log_errors = On
error_log = /home/example.com/logs/php_error.log
log_errors_max_len = 1024
ignore_repeated_errors = On
ignore_repeated_source = Off
html_errors = Off
Об отчетах об ошибках 4339 Это настраиваемое значение, которое регистрирует только проблемы, влияющие на работу вашего сайта, и игнорирует такие вещи, как уведомления, которые могут даже не быть ошибками. См. В разделе Константы ошибок PHP значение каждой двоичной позиции для 1000011110011, которое является двоичным числом, равным 4339. Крайняя левая цифра 1 означает сообщение о любой E_RECOVERABLE_ERROR. Следующий 0 означает, что не следует сообщать E_STRICT (который выдается при использовании небрежного, но функционального кодирования) и так далее. Не стесняйтесь определять свой собственный номер сообщения об ошибке, который будет использоваться вместо 4339.
Очевидно, вам понадобятся другие настройки для вашей среды разработки. Если ваша разрабатываемая копия находится на том же сервере или у вас нет доступа к php.ini, вам нужно будет изменить настройки по умолчанию во время выполнения. Это вопрос личных предпочтений, предпочитаете ли вы, чтобы ошибки записывались в файл журнала, или вы предпочитаете немедленно получать уведомления о любой ошибке, или, возможно, и то и другое. Вот пример, который немедленно сообщает обо всех ошибках, которые вы можете вставить в файл wp-config.php:
@ini_set( 'log_errors', 'Off' );
@ini_set( 'display_errors', 'On' );
define( 'WP_DISABLE_FATAL_ERROR_HANDLER', true );   // 5.2 and later
define( 'WP_DEBUG', true );
define( 'WP_DEBUG_LOG', false );
define( 'WP_DEBUG_DISPLAY', true );
Поскольку wp-config.php загружается для каждого просмотра страницы, не загруженного из файла кеша, это отличное место для установки настроек php.ini, управляющих вашей установкой PHP. Это полезно, если у вас нет доступа к файлу php.ini или вы просто хотите изменить некоторые настройки на лету. Единственное исключение — error_reporting. Если для WP_DEBUG задано значение true, для параметра error_reporting будет установлено значение E_ALL WordPress, независимо от того, что вы пытаетесь установить в wp-config.php. Если вам действительно нужно установить для параметра error_reporting что-то еще, это нужно сделать после загрузки wp-settings.php, например, в файле плагина.
Если вы включите регистрацию ошибок, не забудьте потом удалить файл, так как он часто будет находиться в общедоступном месте, где любой может получить доступ к вашему журналу.
Вот пример, который включает PHP error_logging и записывает их в определенный файл. Если для WP_DEBUG задано значение true, ошибки также будут сохраняться в этом файле. Просто поместите это над любыми командами require_once или include.
@ini_set( 'log_errors', 'On' );
@ini_set( 'display_errors', 'Off' );
@ini_set( 'error_log', '/home/example.com/logs/php_error.log' );
/* That's all, stop editing! Happy blogging. */
Другой пример регистрации ошибок, предложенный Майком Литтлом в списке рассылки wp-hackers:
/**
 * This will log all errors notices and warnings to a file called debug.log in
 * wp-content (if Apache does not have write permission, you may need to create
 * the file first and set the appropriate permissions (i.e. use 666) )
 */
define( 'WP_DEBUG', true );
define( 'WP_DEBUG_LOG', true );
define( 'WP_DEBUG_DISPLAY', false );
@ini_set( 'display_errors', 0 );
Усовершенствованная версия Майка Литтла из Манчестерской группы пользователей WordPress:
/**
 * This will log all errors notices and warnings to a file called debug.log in
 * wp-content only when WP_DEBUG is true. if Apache does not have write permission,
 * you may need to create the file first and set the appropriate permissions (i.e. use 666).
 */
define( 'WP_DEBUG', true ); // Or false
if ( WP_DEBUG ) {
    define( 'WP_DEBUG_LOG', true );
    define( 'WP_DEBUG_DISPLAY', false );
    @ini_set( 'display_errors', 0 );
}
Проблема в том, что в WordPress есть три (3) константы, которые выглядят так, как будто они могут делать одно и то же. Во-первых, помните, что если WP_DEBUG имеет значение false, он и две другие константы WordPress DEBUG ничего не делают. Директивы PHP, какими бы они ни были, будут иметь преимущественную силу. За исключением error_reporting, WordPress установит для него значение 4983, если WP_DEBUG определен как false. Во-вторых, даже если WP_DEBUG истинно, другие константы что-то делают, только если они тоже имеют значение true. Если для них установлено значение false, директивы PHP остаются неизменными. Например, если в вашем файле php.ini есть директива (‘display_errors’ = ‘On’); но у вас есть оператор define (‘WP_DEBUG_DISPLAY’, false); в вашем файле wp-config.php ошибки все равно будут отображаться на экране, даже если вы пытались предотвратить это, установив для WP_DEBUG_DISPLAY значение false, потому что это поведение, настроенное PHP. Вот почему очень важно установить в директивах PHP то, что вам нужно, если для какой-либо из связанных констант WP установлено значение false. На всякий случай явно установите / определите оба типа. Более подробные описания констант WP доступны в разделе «Отладка в WordPress».
Для обычной установки WordPress вы можете подумать о размещении следующего в файле wp-config.php, даже если он может быть частично избыточным:
@ini_set( 'log_errors', 'On' );
@ini_set( 'display_errors', 'Off' );
define( 'WP_DISABLE_FATAL_ERROR_HANDLER', false );   // 5.2 and later
define( 'WP_DEBUG', false );
define( 'WP_DEBUG_LOG', false );
define( 'WP_DEBUG_DISPLAY', false );
Файл журнала отладки по умолчанию — /wp-content/debug.log. Размещение журналов ошибок в общедоступных местах представляет собой угрозу безопасности. В идеале файлы журнала должны размещаться над общедоступным корневым каталогом вашего сайта. Если вы не можете этого сделать, по крайней мере, установите разрешения для файла журнала на 600 и добавьте эту запись в файл .htaccess в корневом каталоге вашей установки WordPress:
<Files debug.log>
    Order allow,deny
    Deny from all
</Files>
Это предотвращает доступ к файлу через HTTP. Вы всегда можете просмотреть файл журнала, загрузив его со своего сервера по FTP.
Наверх ↑
Увеличение памяти, выделенной PHP
Параметр WP_MEMORY_LIMIT позволяет указать максимальный объем памяти, который может использовать PHP. Эта настройка может потребоваться в случае, если вы получите сообщение, такое как «Допустимый размер памяти xxxxxx байт исчерпан».
Этот параметр увеличивает память PHP только для WordPress, а не для других приложений. По умолчанию WordPress будет пытаться увеличить память, выделенную для PHP, до 40 МБ (код находится в начале /wp-includes/default-constants.php) для одного сайта и 64 МБ для мультисайта, поэтому параметр в wp-config.php должен отражать что-то более 40 МБ или 64 МБ в зависимости от ваших настроек.
WordPress автоматически проверит, выделено ли PHP меньше памяти, чем введенное значение, прежде чем использовать эту функцию. Например, если PHP было выделено 64 МБ, нет необходимости устанавливать это значение на 64 МБ, так как WordPress при необходимости автоматически использует все 64 МБ.
Примечание. Некоторые хосты не позволяют автоматически увеличивать лимит памяти PHP. В этом случае обратитесь к своему хосту, чтобы увеличить лимит памяти PHP. Кроме того, многие хосты устанавливают лимит PHP на 128 МБ.
Увеличьте память PHP до 256 МБ
define( 'WP_MEMORY_LIMIT', '256M' );
Задачи администрирования требуют больше памяти, чем обычные операции. Находясь в области администрирования, память может быть увеличена или уменьшена с WP_MEMORY_LIMIT путем определения WP_MAX_MEMORY_LIMIT.
define( 'WP_MAX_MEMORY_LIMIT', '512M' );
Примечание: это должно быть указано перед включением wp-settings.php.
Наверх ↑
Кэш
Параметр WP_CACHE, если он истинен, включает сценарий wp-content/advanced-cache.php при выполнении wp-settings.php.
define( 'WP_CACHE', true );
Наверх ↑
Настраиваемые таблицы User и Usermeta
CUSTOM_USER_TABLE и CUSTOM_USER_META_TABLE используются для обозначения того, что пользовательские и пользовательские таблицы метаданных, обычно используемые WordPress, не используются, вместо этого эти значения/таблицы используются для хранения вашей пользовательской информации.
define( 'CUSTOM_USER_TABLE', $table_prefix.'my_users' );
define( 'CUSTOM_USER_META_TABLE', $table_prefix.'my_usermeta' );
Примечание. Даже если параметр «CUSTOM_USER_META_TABLE» установлен вручную, таблица пользовательских метаданных все равно создается для каждой базы данных с соответствующими разрешениями для каждого экземпляра. По умолчанию установщик WordPress добавит разрешения для первого пользователя (ID # 1). Вам также необходимо управлять разрешениями для каждого сайта с помощью плагина или настраиваемой функции. Если этого не сделать, вы столкнетесь с ошибками разрешений и проблемами со входом в систему.
CUSTOM_USER_TABLE проще всего использовать во время начальной установки вашего первого экземпляра WordPress. Операторы define файла wp-config.php в первом экземпляре указывают на то, где по умолчанию будут храниться данные wp_users. После первой настройки сайта копирование рабочего wp-config.php в следующий экземпляр потребует только изменения переменной $table_prefix. Не используйте адрес электронной почты, который уже используется в исходной установке. После завершения процесса установки войдите в систему с автоматически созданной учетной записью администратора и паролем. Затем продвиньте свою обычную учетную запись до уровня администратора и выйдите из системы администратора. Войдите в систему как вы, удалите учетную запись администратора и продвигайте другие учетные записи пользователей по мере необходимости.
Наверх ↑
Язык и папка языковых файлов
WordPress c версии 4.0 позволяет менять язык на экранах администрирования WordPress. Чтобы изменить язык в экране настроек администратора. Перейдите в Настройки — Общие и выберите Язык сайта.
Наверх ↑
WordPress v3.9.6 и ниже
WPLANG определяет имя файла языкового перевода (.mo). WP_LANG_DIR определяет, в каком каталоге находится файл WPLANG.mo. Если WP_LANG_DIR не определен, WordPress сначала ищет wp-content/languages, а затем wp-includes/languages для .mo, определенного файлом WPLANG.
define( 'WPLANG', 'de_DE' );
define( 'WP_LANG_DIR', dirname(__FILE__) . 'wordpress/languages' );
Чтобы узнать код языка WPLANG, перейдите сюда. Код в столбце WP Local — это то, что вам нужно.
Наверх ↑
Сохранение запросов SQL для анализа
Определение SAVEQUERIES сохраняет запросы к базе данных в массив, и этот массив может быть отображен, чтобы помочь проанализировать эти запросы. В этой информации сохраняется каждый запрос, какая функция его вызвала и сколько времени потребовалось для выполнения этого запроса. Примечание. Это повлияет на производительность вашего сайта, поэтому обязательно отключите эту функцию, когда не занимаетесь отладкой.
Сначала добавьте это в файл wp-config.php:
define( 'SAVEQUERIES', true );
Затем в подвал вашей темы поместите это:
<?php
if ( current_user_can( 'administrator' ) ) {
    global $wpdb;
    echo "<pre>";
    print_r( $wpdb->queries );
    echo "</pre>";
}
?>
Наверх ↑
Отмена разрешений для файлов по умолчанию
Операторы FS_CHMOD_DIR и FS_CHMOD_FILE позволяют переопределить права доступа к файлам по умолчанию. Эти две переменные были разработаны в ответ на проблему сбоя функции обновления ядра с хостами, работающими под suexec. Если хост использует ограничительные права доступа к файлам (например, 400) для всех пользовательских файлов и отказывается получить доступ к файлам, для которых установлены разрешения группы или общие, эти определения могут решить проблему.
define( 'FS_CHMOD_DIR', ( 0755 & ~ umask() ) );
define( 'FS_CHMOD_FILE', ( 0644 & ~ umask() ) );
Пример предоставления setgid:
define( 'FS_CHMOD_DIR', ( 02755 & ~umask() ) );
Примечание. «0755» и «02755» — восьмеричные значения. Восьмеричные значения должны иметь префикс 0 и не выделяться одинарными кавычками (‘). См. Также: Изменение прав доступа к файлам
Наверх ↑
Константы обновления WordPress
Примечание. Определите только необходимые константы для исправления проблем с обновлением.
Наиболее частые причины, по которым необходимо их определить:
Хост работает со специальной установкой, включающей символические ссылки. Возможно, вам потребуется определить константы, относящиеся к пути (FTP_BASE, FTP_CONTENT_DIR и FTP_PLUGIN_DIR). Часто достаточно простого определения базы.
Некоторые установки PHP поставляются с расширением PHP FTP, несовместимым с определенными FTP-серверами. В этих редких ситуациях вам может потребоваться определить FS_METHOD как «ftpsockets».
Следующие допустимые константы для обновлений WordPress:
- FS_METHOD принудительно использует метод файловой системы. Это должно быть только «direct», «ssh2», «ftpext» или «ftpsockets». Как правило, вам следует изменять это только при возникновении проблем с обновлением. Если вы измените его, и это не поможет, поменять обратно/удалить. В большинстве случаев установка ftpsockets будет работать, если автоматически выбранный метод не работает..
- (Основная настройка) “direct” принудительно устанавливает, чтобы использовать Прямые запросы ввода/вывода Файла изнутри PHP, это чревато открытием вопросов безопасности на плохо конфигурировавших серверах. Это выбирается автоматически при поддержке сервера.
- (вторая настройка) “ssh2” должен вызвать использование SSH PHP Расширение если оно установлено
- (третья настройка) “ftpext” заключается в принудительном использовании расширения FTP PHP для доступа к FTP и, наконец,
- (четвертая настройка) “ftpsockets” использует класс сокетов PHP для доступа по FTP.
- FTP_BASE — это полный путь к «корневой» (ABSPATH) папке установки WordPress.
- FTP_CONTENT_DIR — это полный путь к папке wp-content установки WordPress.
- FTP_PLUGIN_DIR — это полный путь к папке плагинов установки WordPress.
- FTP_PUBKEY — это полный путь к вашему публичному ключу SSH.
- FTP_PRIKEY — это полный путь к вашему закрытому ключу SSH.
- FTP_USER это имя пользователя FTP или SSH. Скорее всего, это одно и то же, но используйте тот, который подходит для того типа обновления, которое вы хотите сделать.
- FTP_PASS пароль для имени пользователя, введенного для FTP_USER. Если вы используете аутентификацию с открытым ключом SSH, это можно не указывать.
- FTP_HOST это комбинация имя хоста: порт для вашего SSH/FTP-сервера. Если порт FTP по умолчанию — 21, а порт SSH по умолчанию — 22. В этом нет необходимости.
- FTP_SSL TRUE для SSL-соединения если поддерживается нижележащим транспортом (доступно не на всех серверах). Это для «Безопасного FTP», а не для SSH SFTP.
define( 'FS_METHOD', 'ftpext' );
define( 'FTP_BASE', '/path/to/wordpress/' );
define( 'FTP_CONTENT_DIR', '/path/to/wordpress/wp-content/' );
define( 'FTP_PLUGIN_DIR ', '/path/to/wordpress/wp-content/plugins/' );
define( 'FTP_PUBKEY', '/home/username/.ssh/id_rsa.pub' );
define( 'FTP_PRIKEY', '/home/username/.ssh/id_rsa' );
define( 'FTP_USER', 'username' );
define( 'FTP_PASS', 'password' );
define( 'FTP_HOST', 'ftp.example.org' );
define( 'FTP_SSL', false );
Некоторые конфигурации должны устанавливать FTP_HOST на localhost, чтобы избежать проблем 503 при попытке обновить плагины или сам WP.
Наверх ↑
Включение доступа к обновлению по SSH
Есть два способа обновления с использованием SSH2.
Первый — использовать плагин SSH SFTP Updater Support. Второй — использовать встроенное средство обновления SSH2, для которого необходимо установить расширение pecl SSH2.
Чтобы установить расширение pecl SSH2, вам нужно будет ввести команду, подобную следующей, или поговорить с вашим провайдером веб-хостинга, чтобы установить его:
pecl install ssh2
После установки расширения pecl ssh2 вам нужно будет изменить конфигурацию PHP для автоматической загрузки этого расширения.
pecl предоставляется пакетом pear в большинстве дистрибутивов Linux. Чтобы установить pecl в Redhat/Fedora/CentOS:
yum -y install php-pear
Чтобы установить pecl в Debian/Ubuntu:
apt-get install php-pear
Рекомендуется использовать закрытый ключ, не защищенный парольной фразой. Было много сообщений о том, что закрытые ключи, защищенные парольной фразой, не работают должным образом. Если вы решите попробовать секретный ключ, защищенный парольной фразой, вам нужно будет ввести парольную фразу для секретного ключа как FTP_PASS или ввести ее в поле «Пароль» представленного поля учетных данных при установке обновлений.
Наверх ↑
Альтернативный Cron
Может возникнуть необходимость использовать альтернативный Cron с WP. Чаще всего это делается, если запланированные публикации не публикуются, как предполагалось. Этот альтернативный метод использует подход перенаправления. Браузер пользователей получает перенаправление, когда cron необходимо запустить, так что они сразу же возвращаются на сайт, в то время как cron продолжает работать в только что отключенном соединении. У этого метода есть определенные риски, поскольку он зависит от не родного сервиса для WordPress.
define( 'ALTERNATE_WP_CRON', true );
Наверх ↑
Отключить Cron и Cron Timeout
Полностью отключите cron, установив для DISABLE_WP_CRON значение true.
define( 'DISABLE_WP_CRON', true );
Установить ограничение на запуск процесса cron чаще одного раза в WP_CRON_LOCK_TIMEOUT секунд.
define( 'WP_CRON_LOCK_TIMEOUT', 60 );
Наверх ↑
Дополнительные определяемые константы
Вот дополнительные константы, которые можно определить. Их, вероятно, не следует устанавливать, если сначала не были опробованы другие методики. Определения файлов cookie могут быть особенно полезны, если у вас необычная настройка домена.
define( 'COOKIEPATH', preg_replace( '|https?://[^/]+|i', '', get_option( 'home' ) . '/' ) );
define( 'SITECOOKIEPATH', preg_replace( '|https?://[^/]+|i', '', get_option( 'siteurl' ) . '/' ) );
define( 'ADMIN_COOKIE_PATH', SITECOOKIEPATH . 'wp-admin' );
define( 'PLUGINS_COOKIE_PATH', preg_replace( '|https?://[^/]+|i', '', WP_PLUGIN_URL ) );
define( 'TEMPLATEPATH', get_template_directory() );
define( 'STYLESHEETPATH', get_stylesheet_directory() );
Наверх ↑
Очистить корзину
Эта константа контролирует количество дней до того, как WordPress окончательно удалит сообщения, страницы, вложения и комментарии из корзины. По умолчанию 30 дней:
define( 'EMPTY_TRASH_DAYS', 30 ); // 30 дней
Чтобы отключить корзину, установите нулевое количество дней.
define( 'EMPTY_TRASH_DAYS', 0 ); // Ноль дней
Примечание: WordPress не будет запрашивать подтверждение, когда кто-то нажимает «Удалить навсегда», используя этот параметр.
Наверх ↑
Автоматическая оптимизация базы данных
Существует поддержка автоматического восстановления базы данных, которую вы можете включить, добавив следующее определение в файл wp-config.php.
Примечание: это следует включать только при необходимости и отключать после решения проблемы. Если этот параметр включен, пользователю не нужно входить в систему для доступа к функциям, поскольку его основная цель — восстановить поврежденную базу данных, и пользователи часто не могут войти в систему, если база данных повреждена.
define( 'WP_ALLOW_REPAIR', true );
Скрипт можно найти по адресу {$your_site}/wp-admin/maint/repair.php.
Наверх ↑
DO_NOT_UPGRADE_GLOBAL_TABLES
Определение DO_NOT_UPGRADE_GLOBAL_TABLES запрещает dbDelta() и функциям обновления выполнять дорогостоящие запросы к глобальным таблицам.
Сайты с большими глобальными таблицами (в частности, пользователи и мета пользователей), а также сайты, которые используют общие таблицы пользователей с bbPress и другими установками WordPress, могут предотвратить изменение этих таблиц при обновлении, задав для DO_NOT_UPGRADE_GLOBAL_TABLES значение true. Поскольку выполнение ALTER или неограниченного DELETE или UPDATE может занять много времени, крупные сайты обычно не хотят, чтобы они выполнялись при обновлениях, чтобы они могли сделать это самостоятельно. Кроме того, если в установках используются общие таблицы пользователей между несколькими установками bbPress и WordPress, вы можете захотеть, чтобы один сайт был основным при обновлениях.
define( 'DO_NOT_UPGRADE_GLOBAL_TABLES', true );
Наверх ↑
Просмотр всех определенных констант
В PHP есть функция, которая возвращает массив всех определенных в настоящее время констант с их значениями.
print_r( @get_defined_constants() );
Наверх ↑
Отключение редактора плагинов и тем
Иногда вы можете отключить плагин или редактор тем, чтобы чрезмерно усердные пользователи не могли редактировать конфиденциальные файлы и, возможно, вывести сайт из строя. Их отключение также обеспечивает дополнительный уровень безопасности, если хакер получает доступ к учетной записи с высокими привилегиями.
define( 'DISALLOW_FILE_EDIT', true );
Примечание. На функциональность некоторых плагинов может влиять использование current_user_can('edit_plugins') в их коде. Авторам плагинов следует избегать проверки этой возможности или, по крайней мере, проверять, установлена ли эта константа, и отображать соответствующее сообщение об ошибке. Имейте в виду, что если плагин не работает, это может быть причиной.
Наверх ↑
Отключить обновление и установку плагинов и тем
Это заблокирует пользователям возможность использовать функции установки/обновления плагинов и тем из области администрирования WordPress. Установка этой константы также отключает редактор плагинов и тем (т.е. вам не нужно устанавливать DISALLOW_FILE_MODS и DISALLOW_FILE_EDIT, так как DISALLOW_FILE_MODS будет иметь тот же эффект).
define( 'DISALLOW_FILE_MODS', true );
Наверх ↑
Требовать SSL для администратора и входа в систему
Примечание. В WordPress версии 4.0 FORCE_SSL_LOGIN не рекомендуется. Пожалуйста, используйте FORCE_SSL_ADMIN
FORCE_SSL_ADMIN используется, когда вы хотите защитить логины и область администрирования, чтобы пароли и файлы cookie никогда не отправлялись в открытом виде. См. также Administration_Over_SSL для более подробной информации.
define( 'FORCE_SSL_ADMIN', true );
Наверх ↑
Блокировать внешние URL-запросы
Заблокируйте внешние URL-запросы, указав WP_HTTP_BLOCK_EXTERNAL как true, и это позволит делать запросы только localhost и вашему блогу. Константа WP_ACCESSIBLE_HOSTS позволит дополнительным хостам проходить запросы. Формат константы WP_ACCESSIBLE_HOSTS представляет собой список разрешенных имен хостов, разделенных запятыми, поддерживаются домены с подстановочными знаками, например, *.wordpress.org позволит связаться со всеми поддоменами wordpress.org.
define( 'WP_HTTP_BLOCK_EXTERNAL', true );
define( 'WP_ACCESSIBLE_HOSTS', 'api.wordpress.org,*.github.com' );
Наверх ↑
Отключить автообновления WordPress
Возможна ситуация, при которой сайт не обновляется автоматически, например настройки или обновления, предоставляемые хостом. Это также можно сделать перед основным выпуском, чтобы дать время для тестирования в среде разработки или промежуточной среде, прежде чем разрешить обновление на рабочем сайте.
define( 'AUTOMATIC_UPDATER_DISABLED', true );
Наверх ↑
Отключить обновления ядра WordPress
Самый простой способ управлять обновлениями ядра — использовать константу WP_AUTO_UPDATE_CORE:
 # Отключите все основные обновления:
 define( 'WP_AUTO_UPDATE_CORE', false );

 # Включите все основные обновления, включая незначительные и крупные:
 define( 'WP_AUTO_UPDATE_CORE', true );

 # Включить основные обновления для второстепенных выпусков (по умолчанию):
 define( 'WP_AUTO_UPDATE_CORE', 'minor' );
Ссылка: Отключение автообновлений в WordPress 3.7
Наверх ↑
Очистка при редактировании изображений
По умолчанию WordPress создает новый набор изображений каждый раз, когда вы редактируете изображение, а когда вы восстанавливаете оригинал, он оставляет все изменения на сервере. Определение IMAGE_EDIT_OVERWRITE как true меняет это поведение. Когда-либо создается только один набор изменений изображения, и когда вы восстанавливаете оригинал, изменения удаляются с сервера.
define( 'IMAGE_EDIT_OVERWRITE', true );
Наверх ↑
Дважды проверьте перед сохранением
Обязательно проверьте наличие начальных и/или конечных пробелов вокруг любого из указанных выше значений, и НЕ удаляйте одинарные кавычки!
Перед сохранением файла обязательно дважды проверьте, не удалили ли вы случайно ни одну из одинарных кавычек вокруг значений параметров. Убедитесь, что после закрывающего тега PHP в файле нет ничего. Последним в файле должно быть ?> и ничего больше. Без пробелов.
Чтобы сохранить файл, выберите File>SaveAs>wp-config.php и сохраните файл в корне установки WordPress. Загрузите файл на свой веб-сервер, и вы готовы к установке WordPress!
Topics
- Configure Database Settings
- Default wp-config-sample.php
- Set Database Name
- Set Database User
- Set Database Password
- Set Database Host
- Database character set
- Database collation
- Security Keys
- Default wp-config-sample.php
- Advanced Options
- table_prefix
- WP_SITEURL
- Blog address (URL)
- Moving wp-content folder
- Moving plugin folder
- Moving themes folder
- Moving uploads folder
- Modify AutoSave Interval
- Post Revisions
- Disable Post Revisions
- Specify the Number of Post Revisions
- Set Cookie Domain
- Enable Multisite / Network Ability
- Redirect Nonexistent Blogs
- Fatal Error Handler
- WP_DEBUG
- WP_ENVIRONMENT_TYPE
- SCRIPT_DEBUG
- Disable Javascript Concatenation
- Configure Error Logging
- Increasing memory allocated to PHP
- Cache
- Custom User and Usermeta Tables
- Language and Language Directory
- WordPress v3.9.6 and below
- Save queries for analysis
- Override of default file permissions
- WordPress Upgrade Constants
- Enabling SSH Upgrade Access
- Alternative Cron
- Disable Cron and Cron Timeout
- Additional Defined Constants
- Empty Trash
- Automatic Database Optimizing
- DO_NOT_UPGRADE_GLOBAL_TABLES
- View All Defined Constants
- Disable the Plugin and Theme File Editor
- Disable Plugin and Theme Update and Installation
- Require SSL for Admin and Logins
- Block External URL Requests
- Disable WordPress Auto Updates
- Disable WordPress Core Updates
- Cleanup Image Edits
- Double Check Before Saving
One of the most important files in your WordPress installation is the wp-config.php file. This file is located in the root of your WordPress file directory and contains your website’s base configuration details, such as database connection information.
Important: Never use a word processor like Microsoft Word for editing WordPress files!
Locate the file wp-config-sample.php in the base directory of your WordPress directory and open in a text editor.
Note: This is an example of a default wp-config-sample.php. The values here are examples to show you what to do.
// ** MySQL settings - You can get this info from your web host ** //
/** The name of the database for WordPress */
define( 'DB_NAME', 'database_name_here' );
/** MySQL database username */
define( 'DB_USER', 'username_here' );
/** MySQL database password */
define( 'DB_PASSWORD', 'password_here' );
/** MySQL hostname */
define( 'DB_HOST', 'localhost' );
Note: Text inside /* */ are comments, for information purposes only.
Replace ‘database_name_here’, with the name of your database, e.g. MyDatabaseName.
define( 'DB_NAME', 'MyDatabaseName' ); // Example MySQL database nameReplace ‘username_here’, with the name of your username e.g. MyUserName.
define( 'DB_USER', 'MyUserName' ); // Example MySQL usernameReplace ‘password_here’, with the your password, e.g. MyPassWord.
define( 'DB_PASSWORD', 'MyPassWord' ); // Example MySQL passwordReplace ‘localhost’, with the name of your database host, e.g. MyDatabaseHost. A port number or Unix socket file path may be needed as well.
define( 'DB_HOST', 'MyDatabaseHost' ); // Example MySQL Database hostNote: There is a good chance you will NOT have to change it. If you are unsure, try installing with the default value of ‘localhost’ and see if it works. If the install fails, contact your web hosting provider.
MySQL Alternate Port
If your host uses an alternate port number for your database you’ll need to change the DB_HOST value in the wp-config.php file to reflect the alternate port provided by your host.
For localhost:
define( 'DB_HOST', '127.0.0.1:<strong>3307' );
or
define( 'DB_HOST', 'localhost:<strong>3307' );
For specified server:
define( 'DB_HOST', 'mysql.example.com:<strong>3307' );Replace 3307 with whatever port number your host gives you.
MySQL Sockets or Pipes
If your host uses Unix sockets or pipes, adjust the DB_HOST value in the wp-config.php file accordingly.
define( 'DB_HOST', '127.0.0.1:<strong>/var/run/mysqld/mysqld.sock' );
// or define( 'DB_HOST', 'localhost:<strong>/var/run/mysqld/mysqld.sock' );
// or define( 'DB_HOST', 'example.tld:<strong>/var/run/mysqld/mysqld.sock' );
Replace /var/run/mysqld/mysqld.sock with the socket or pipe information provided by your host.
DB_CHARSET was made available to allow designation of the database character set (e.g. tis620 for TIS620 Thai) to be used when defining the MySQL database tables.
The default value of utf8 (Unicode UTF-8) is almost always the best option. UTF-8 supports any language, so you typically want to leave DB_CHARSET at utf8 and use the DB_COLLATE value for your language instead.
This example shows utf8 which is considered the WordPress default value:
define( 'DB_CHARSET', 'utf8' );There usually should be no reason to change the default value of DB_CHARSET. If your blog needs a different character set, please read Character Sets and Collations MySQL Supports for valid DB_CHARSET values. WARNING: Those performing upgrades.
If DB_CHARSET and DB_COLLATE do not exist in your wp-config.php file, DO NOT add either definition to your wp-config.php file unless you read and understand Converting Database Character Sets. Adding DB_CHARSET and DB_COLLATE to the wp-config.php file, for an existing blog, can cause major problems.
DB_COLLATE was made available to allow designation of the database collation (i.e. the sort order of the character set). In most cases, this value should be left blank (null) so the database collation will be automatically assigned by MySQL based on the database character set specified by DB_CHARSET. An example of when you may need to set ”’DB_COLLATE”’ to one of the UTF-8 values defined in UTF-8 character sets for most Western European languages would be when a different language in which the characters that you entered are not the same as what is being displayed. (See also Unicode Character Sets in SQL Manual)
The WordPress default DB_COLLATE value:
define( 'DB_COLLATE', '' );UTF-8 Unicode General collation
define( 'DB_COLLATE', 'utf8_general_ci' );UTF-8 Unicode Turkish collation
define( 'DB_COLLATE', 'utf8_turkish_ci' );There usually should be no reason to change the default value of DB_COLLATE. Leaving the value blank (null) will insure the collation is automatically assigned by MySQL when the database tables are created. WARNING: Those performing upgrades
If DB_COLLATE and DB_CHARSET do not exist in your wp-config.php file, DO NOT add either definition to your wp-config.php file unless you read and understand Converting Database Character Sets. And you may be in need of a WordPress upgrade.
You don’t have to remember the keys, just make them long, random and complicated — or better yet, use the online generator. You can change these at any point in time to invalidate all existing cookies. This does mean that all users will have to login again.
Example (don’t use these!):
define( 'AUTH_KEY',         't`DK%X:>xy|e-Z(BXb/f(Ur`8#~UzUQG-^_Cs_GHs5U-&Wb?pgn^p8(2@}IcnCa|' );
define( 'SECURE_AUTH_KEY',  'D&ovlU#|CvJ##uNq}bel+^MFtT&.b9{UvR]g%ixsXhGlRJ7q!h}XWdEC[BOKXssj' );
define( 'LOGGED_IN_KEY',    'MGKi8Br(&{H*~&0s;{k0<S(O:+f#WM+q|npJ-+P;RDKT:~jrmgj#/-,[hOBk!ry^' );
define( 'NONCE_KEY',        'FIsAsXJKL5ZlQo)iD-pt??eUbdc{_Cn<4!d~yqz))&B D?AwK%)+)F2aNwI|siOe' );
define( 'AUTH_SALT',        '7T-!^i!0,w)L#JK@pc2{8XE[DenYI^BVf{L:jvF,hf}zBf883td6D;Vcy8,S)-&G' );
define( 'SECURE_AUTH_SALT', 'I6`V|mDZq21-J|ihb u^q0F }F_NUcy`l,=obGtq*p#Ybe4a31R,r=|n#=]@]c #' );
define( 'LOGGED_IN_SALT',   'w<$4c$Hmd%/*]`Oom>(hdXW|0M=X={we6;Mpvtg+V.o<$|#_}qG(GaVDEsn,~*4i' );
define( 'NONCE_SALT',       'a|#h{c5|P &xWs4IZ20c2&%4!c(/uG}W:mAvy<I44`jAbup]t=]V<`}.py(wTP%%' );
A secret key makes your site harder to successfully attack by adding random elements to the password.
In simple terms, a secret key is a password with elements that make it harder to generate enough options to break through your security barriers. A password like “password” or “test” is simple and easily broken. A random, long password which uses no dictionary words, such as “88a7da62429ba6ad3cb3c76a09641fc” would take a brute force attacker millions of hours to crack. A ‘salt is used to further enhance the security of the generated result.
The four keys are required for the enhanced security. The four salts are recommended, but are not required, because WordPress will generate salts for you if none are provided. They are included in wp-config.php by default for inclusiveness.
For more information on the technical background and breakdown of secret keys and secure passwords, see:
- Ryan Boren – SSL and Cookies in WordPress 2.6
- Wikipedia’s explanation of Password Cracking
- Lorelle VanFossen – Protect Your Blog With a Solid Password
- Instructables – Security Password Tips
- Huffington Post – 17 Tips You Can Do Today to Protect Your Online Passwords
The following sections may contain advanced information and some changes might result in unforeseen issues. Please make sure you practice regular backups and know how to restore them before modifying these settings.
The $table_prefix is the value placed in the front of your database tables. Change the value if you want to use something other than wp_ for your database prefix. Typically this is changed if you are installing multiple WordPress blogs in the same database, as is done with the multisite feature.
It is possible to have multiple installations in one database if you give each a unique prefix. Keep security in mind if you choose to do this.
$table_prefix = 'r235_'; // Only numbers, letters, and underscores please!WP_SITEURL allows the WordPress address (URL) to be defined. The value defined is the address where your WordPress core files reside. It should include the http:// part too. Do not put a slash “/” at the end. Setting this value in wp-config.php overrides the wp_options table value for siteurl. Adding this in can reduce the number of database calls when loading your site. Note: This will not change the database stored value. The URL will revert to the old database value if this line is ever removed from wp-config. Use the RELOCATE constant to change the siteurl value in the database.
If WordPress is installed into a directory called “wordpress” for the domain example.com, define WP_SITEURL like this:
define( 'WP_SITEURL', 'http://example.com/wordpress' );Dynamically set WP_SITEURL based on $_SERVER[‘HTTP_HOST’]
define( 'WP_SITEURL', 'http://' . $_SERVER['HTTP_HOST'] . '/path/to/wordpress' );Note: HTTP_HOST is created dynamically by PHP based on the value of the HTTP HOST Header in the request, thus possibly allowing for file inclusion vulnerabilities. SERVER_NAME may also be created dynamically. However, when Apache is configured as UseCanonicalName “on”, SERVER_NAME is set by the server configuration, instead of dynamically. In that case, it is safer to user SERVER_NAME than HTTP_HOST.
Dynamically set WP_SITEURL based on $_SERVER[‘SERVER_NAME’]
define( 'WP_SITEURL', 'http://' . $_SERVER['SERVER_NAME'] . '/path/to/wordpress' );Similar to WP_SITEURL, WP_HOME overrides the wp_options table value for home but does not change it in the database. home is the address you want people to type in their browser to reach your WordPress blog. It should include the http:// part and should not have a slash “/” at the end. Adding this in can reduce the number of database calls when loading your site.
define( 'WP_HOME', 'http://example.com/wordpress' );If you are using the technique described in Giving WordPress Its Own Directory then follow the example below. Remember, you will also be placing an index.php in your web-root directory if you use a setting like this.
define( 'WP_HOME', 'http://example.com' );Dynamically set WP_HOME based on $_SERVER[‘HTTP_HOST’]
define( 'WP_HOME', 'http://' . $_SERVER['HTTP_HOST'] . '/path/to/wordpress' );You can move the wp-content directory, which holds your themes, plugins, and uploads, outside of the WordPress application directory.
Set WP_CONTENT_DIR to the full local path of this directory (no trailing slash), e.g.
define( 'WP_CONTENT_DIR', dirname(__FILE__) . '/blog/wp-content' );Set WP_CONTENT_URL to the full URL of this directory (no trailing slash), e.g.
define( 'WP_CONTENT_URL', 'http://example/blog/wp-content' );Set WP_PLUGIN_DIR to the full local path of this directory (no trailing slash), e.g.
define( 'WP_PLUGIN_DIR', dirname(__FILE__) . '/blog/wp-content/plugins' );Set WP_PLUGIN_URL to the full URI of this directory (no trailing slash), e.g.
define( 'WP_PLUGIN_URL', 'http://example/blog/wp-content/plugins' );If you have compability issues with plugins Set PLUGINDIR to the full local path of this directory (no trailing slash), e.g.
define( 'PLUGINDIR', dirname(__FILE__) . '/blog/wp-content/plugins' );You cannot move the themes folder because its path is hardcoded relative to the wp-content folder:
$theme_root = WP_CONTENT_DIR . ‘/themes’;
However, you can register additional theme directories using register_theme_directory.
See how to move the wp-content folder. For more details how the themes folder is determined, see wp-includes/theme.php.
Set UPLOADS to :
define( 'UPLOADS', 'blog/wp-content/uploads' );This path can not be absolute. It is always relative to ABSPATH, therefore does not require a leading slash.
When editing a post, WordPress uses Ajax to auto-save revisions to the post as you edit. You may want to increase this setting for longer delays in between auto-saves, or decrease the setting to make sure you never lose changes. The default is 60 seconds.
define( 'AUTOSAVE_INTERVAL', 160 ); // SecondsWordPress, by default, will save copies of each edit made to a post or page, allowing the possibility of reverting to a previous version of that post or page. The saving of revisions can be disabled, or a maximum number of revisions per post or page can be specified.
If you do not set this value, WordPress defaults WP_POST_REVISIONS to true (enable post revisions). If you want to disable the awesome revisions feature, use this setting:
define( 'WP_POST_REVISIONS', false );Note: Some users could not get this to function until moving the command to the first line under the initial block comment in wp-config.php.
If you want to specify a maximum number of revisions that WordPress stores, change false to an integer/number (e.g., 3 or 12).
define( 'WP_POST_REVISIONS', 3 );Note: Some users could not get this to function until moving the command to the first line under the initial block comment in wp-config.php.
The domain set in the cookies for WordPress can be specified for those with unusual domain setups. For example, if subdomains are used to serve static content, you can set the cookie domain to only your non-static domain to prevent WordPress cookies from being sent with each request to static content on your subdomain .
define( 'COOKIE_DOMAIN', 'www.example.com' );WP_ALLOW_MULTISITE is a feature enable multisite functionality. If this setting is absent from wp-config.php it defaults to false.
define( 'WP_ALLOW_MULTISITE', true );NOBLOGREDIRECT can be used to redirect the browser if the visitor tries to access a nonexistent subdomain or a subfolder.
define( 'NOBLOGREDIRECT', 'http://example.com' );WordPress 5.2 introduced Recovery Mode which displays error message instead of white screen when plugins causes fatal error.
The site is experiencing technical difficulties. Please check your site admin email inbox for instructions.
White screens and PHP error messages are not displayed to users any more. But in a development environment, if you want to enable WP_DEBUG_DISPLAY, you have to disable recovery mode by set true to WP_DISABLE_FATAL_ERROR_HANDLER.
define( 'WP_DISABLE_FATAL_ERROR_HANDLER', true );   // 5.2 and later define( 'WP_DEBUG', true );
define( 'WP_DEBUG_DISPLAY', true );
The WP_DEBUG option controls the reporting of some errors and warnings and enables use of the WP_DEBUG_DISPLAY and WP_DEBUG_LOG settings. The default boolean value is false.
define( 'WP_DISABLE_FATAL_ERROR_HANDLER', true );   // 5.2 and later
define( 'WP_DEBUG', true );
Database errors are printed only if WP_DEBUG is set to true. Database errors are handled by the wpdb class and are not affected by PHP’s error settings.
Setting WP_DEBUG to true also raises the error reporting level to E_ALL and activates warnings when deprecated functions or files are used; otherwise, WordPress sets the error reporting level to E_ALL ^ E_NOTICE ^ E_USER_NOTICE.
The WP_ENVIRONMENT_TYPE option controls the environment type for a site: local, development, staging, and production.
The values of environment types are processed in the following order with each sequential method overriding any previous values: the WP_ENVIRONMENT_TYPE PHP environment variable and the WP_ENVIRONMENT_TYPE constant.
For both methods, if the value of an environment type provided is not in the list of allowed environment types, the default production value will be returned.
The simplest way to set the value is probably through defining the constant:
define( 'WP_ENVIRONMENT_TYPE', 'staging' );Note: When development is returned by wp_get_environment_type() , WP_DEBUG will be set to true if it is not defined in the wp-config.php file of the site.
SCRIPT_DEBUG is a related constant that will force WordPress to use the “dev” versions of scripts and stylesheets in wp-includes/js, wp-includes/css, wp-admin/js, and wp-admin/css will be loaded instead of the .min.css and .min.js versions.. If you are planning on modifying some of WordPress’ built-in JavaScript or Cascading Style Sheets, you should add the following code to your config file:
define( 'SCRIPT_DEBUG', true );To result in faster administration screens, all JavaScript files are concatenated into one URL. If JavaScript is failing to work in an administration screen, you can try disabling this feature:
define( 'CONCATENATE_SCRIPTS', false );Configuring error logging can be a bit tricky. First of all, default PHP error log and display settings are set in the php.ini file, which you may or may not have access to. If you do, they should be set to the desired settings for live PHP pages served to the public. It’s strongly recommended that no error messages are displayed to the public and instead routed to an error log. Further more, error logs should not be located in the publicly accessible portion of your server. Sample recommended php.ini error settings:
error_reporting = 4339
display_errors = Off
display_startup_errors = Off
log_errors = On
error_log = /home/example.com/logs/php_error.log
log_errors_max_len = 1024
ignore_repeated_errors = On
ignore_repeated_source = Off
html_errors = Off
About Error Reporting 4339
This is a custom value that only logs issues that affect the functioning of your site, and ignores things like notices that may not even be errors. See PHP Error Constants for the meaning of each binary position for 1000011110011, which is the binary number equal to 4339. The far left 1 means report any E_RECOVERABLE_ERROR. The next 0 means do not report E_STRICT, (which is thrown when sloppy but functional coding is used) and so on. Feel free to determine your own custom error reporting number to use in place of 4339.
Obviously, you will want different settings for your development environment. If your staging copy is on the same server, or you don’t have access to php.ini, you will need to override the default settings at run time. It’s a matter of personal preference whether you prefer errors to go to a log file, or you prefer to be notified immediately of any error, or perhaps both. Here’s an example that reports all errors immediately that you could insert into your wp-config.php file:
@ini_set( 'log_errors', 'Off' );
@ini_set( 'display_errors', 'On' );
define( 'WP_DISABLE_FATAL_ERROR_HANDLER', true );   // 5.2 and later
define( 'WP_DEBUG', true );
define( 'WP_DEBUG_LOG', false );
define( 'WP_DEBUG_DISPLAY', true );
Because wp-config.php is loaded for every page view not loaded from a cache file, it is an excellent location to set php.ini settings that control your PHP installation. This is useful if you don’t have access to a php.ini file, or if you just want to change some settings on the fly. One exception is ‘error_reporting’. When WP_DEBUG is defined as true, ‘error_reporting’ will be set to E_ALL by WordPress regardless of anything you try to set in wp-config.php. If you really have a need to set ‘error_reporting’ to something else, it must be done after wp-settings.php is loaded, such as in a plugin file.
If you turn on error logging, remember to delete the file afterwards, as it will often be in a publicly accessible location, where anyone could gain access to your log.
Here is an example that turns PHP error_logging on and logs them to a specific file. If WP_DEBUG is defined to true, the errors will also be saved to this file. Just place this above any require_once or include commands.
@ini_set( 'log_errors', 'On' );
@ini_set( 'display_errors', 'Off' );
@ini_set( 'error_log', '/home/example.com/logs/php_error.log' );
/* That's all, stop editing! Happy blogging. */
Another example of logging errors, as suggested by Mike Little on the wp-hackers email list:
/**
 * This will log all errors notices and warnings to a file called debug.log in
 * wp-content (if Apache does not have write permission, you may need to create
 * the file first and set the appropriate permissions (i.e. use 666) )
 */
define( 'WP_DEBUG', true );
define( 'WP_DEBUG_LOG', true );
define( 'WP_DEBUG_DISPLAY', false );
@ini_set( 'display_errors', 0 );
A refined version from Mike Little on the Manchester WordPress User Group:
/**
 * This will log all errors notices and warnings to a file called debug.log in
 * wp-content only when WP_DEBUG is true. if Apache does not have write permission,
 * you may need to create the file first and set the appropriate permissions (i.e. use 666).
 */
define( 'WP_DEBUG', true ); // Or false
if ( WP_DEBUG ) {
    define( 'WP_DEBUG_LOG', true );
    define( 'WP_DEBUG_DISPLAY', false );
    @ini_set( 'display_errors', 0 );
}
Confusing the issue is that WordPress has three (3) constants that look like they could do the same thing. First off, remember that if WP_DEBUG is false, it and the other two WordPress DEBUG constants do not do anything. The PHP directives, whatever they are, will prevail. Except for ‘error_reporting’, WordPress will set this to 4983 if WP_DEBUG is defined as false. Second, even if WP_DEBUG is true, the other constants only do something if they too are set to true. If they are set to false, the PHP directives remain unchanged. For example, if your php.ini file has the directive (‘display_errors’ = ‘On’); but you have the statement define( ‘WP_DEBUG_DISPLAY’, false ); in your wp-config.php file, errors will still be displayed on screen even though you tried to prevent it by setting WP_DEBUG_DISPLAY to false because that is the PHP configured behavior. This is why it’s very important to set the PHP directives to what you need in case any of the related WP constants are set to false. To be safe, explicitly set/define both types. More detailed descriptions of the WP constants is available at Debugging in WordPress.
For your public, production WordPress installation, you might consider placing the following in your wp-config.php file, even though it may be partly redundant:
@ini_set( 'log_errors', 'On' );
@ini_set( 'display_errors', 'Off' );
define( 'WP_DISABLE_FATAL_ERROR_HANDLER', false );   // 5.2 and later
define( 'WP_DEBUG', false );
define( 'WP_DEBUG_LOG', false );
define( 'WP_DEBUG_DISPLAY', false );
The default debug log file is /wp-content/debug.log. Placing error logs in publicly accessible locations is a security risk. Ideally, your log files should be placed above you site’s public root directory. If you can’t do this, at the very least, set the log file permissions to 600 and add this entry to the .htaccess file in the root directory of your WordPress installation:
<Files debug.log>
    Order allow,deny
    Deny from all
</Files>
This prevents anyone from accessing the file via HTTP. You can always view the log file by retrieving it from your server via FTP.
WP_MEMORY_LIMIT option allows you to specify the maximum amount of memory that can be consumed by PHP. This setting may be necessary in the event you receive a message such as “Allowed memory size of xxxxxx bytes exhausted”.
This setting increases PHP Memory only for WordPress, not other applications. By default, WordPress will attempt to increase memory allocated to PHP to 40MB (code is at the beginning of /wp-includes/default-constants.php) for single site and 64MB for multisite, so the setting in wp-config.php should reflect something higher than 40MB or 64MB depending on your setup.
WordPress will automatically check if PHP has been allocated less memory than the entered value before utilizing this function. For example, if PHP has been allocated 64MB, there is no need to set this value to 64M as WordPress will automatically use all 64MB if need be.
Note: Some hosts do not allow for increasing the PHP memory limit automatically. In that event, contact your host to increase the PHP memory limit. Also, many hosts set the PHP limit at 8MB.
Adjusting the WordPress memory limit potentially creates problems as well. You might end up hiding the root of the issue for it to happen later down the line as you add in more plugins or functionalities.
If you are facing Out of Memory issues even with an elevated memory limit, you should properly debug your installation. Chances are you have too many memory intensive functions tied to a specific action and should move these functions to a cronjob.
Increase PHP Memory to 64MB
define( 'WP_MEMORY_LIMIT', '64M' );Increase PHP Memory to 96MB
define( 'WP_MEMORY_LIMIT', '96M' );Administration tasks require may require memory than usual operation. When in the administration area, the memory can be increased or decreased from the WP_MEMORY_LIMIT by defining WP_MAX_MEMORY_LIMIT.
define( 'WP_MAX_MEMORY_LIMIT', '128M' );Note: this has to be put before wp-settings.php inclusion.
The WP_CACHE setting, if true, includes the wp-content/advanced-cache.php script, when executing wp-settings.php.
define( 'WP_CACHE', true );CUSTOM_USER_TABLE and CUSTOM_USER_META_TABLE are used to designate that the user and usermeta tables normally utilized by WordPress are not used, instead these values/tables are used to store your user information.
define( 'CUSTOM_USER_TABLE', $table_prefix.'my_users' );
define( 'CUSTOM_USER_META_TABLE', $table_prefix.'my_usermeta' );
Note: Even if ‘CUSTOM_USER_META_TABLE’ is manually set, a usermeta table is still created for each database with the corresponding permissions for each instance. By default, the WordPress installer will add permissions for the first user (ID #1). You also need to manage permissions to each of the site via a plugin or custom function. If this isn’t setup you will experience permission errors and log-in issues.
CUSTOM_USER_TABLE is easiest to adopt during initial Setup your first instance of WordPress. The define statements of the wp-config.php on the first instance point to where wp_users data will be stored by default. After the first site setup, copying the working wp-config.php to your next instance will only require a change the $table_prefix variable. Do not use an e-mail address that is already in use by your original install. Once you have finished the setup process log in with the auto generated admin account and password. Next, promote your normal account to the administrator level and Log out of admin. Log back in as yourself, delete the admin account and promote the other user accounts as is needed.
WordPress Version 4.0 allows you to change the language in your WordPress Administration Screens. To change the language in the admin settings screen. Go to Settings > General and select Site Language.
WPLANG defines the name of the language translation (.mo) file. WP_LANG_DIR defines what directory the WPLANG .mo file resides. If WP_LANG_DIR is not defined WordPress looks first to wp-content/languages and then wp-includes/languages for the .mo defined by WPLANG file.
define( 'WPLANG', 'de_DE' );
define( 'WP_LANG_DIR', dirname(__FILE__) . 'wordpress/languages' );
To find out the WPLANG language code, please refer here. The code in WP Local column is what you need.
The SAVEQUERIES definition saves the database queries to an array and that array can be displayed to help analyze those queries. The information saves each query, what function called it, and how long that query took to execute. Note: This will have a performance impact on your site, so make sure to turn this off when you aren’t debugging.
First, add this to the wp-config.php file:
define( 'SAVEQUERIES', true );Then in the footer of your theme put this:
if ( current_user_can( 'administrator' ) ) {
    global $wpdb;
    echo "<pre>";
    print_r( $wpdb->queries );
    echo "</pre>";
}
?>
Alternatively, consider using Query Monitor
The FS_CHMOD_DIR and FS_CHMOD_FILE define statements allow override of default file permissions. These two variables were developed in response to the problem of the core update function failing with hosts running under suexec. If a host uses restrictive file permissions (e.g. 400) for all user files, and refuses to access files which have group or world permissions set, these definitions could solve the problem.
define( 'FS_CHMOD_DIR', ( 0755 & ~ umask() ) );
define( 'FS_CHMOD_FILE', ( 0644 & ~ umask() ) );
Example to provide setgid:
define( 'FS_CHMOD_DIR', ( 02755 & ~umask() ) );Note: ‘0755′ and ‘02755‘ are octal values. Octal values must be prefixed with a 0 and are not delineated with single quotes (‘). See Also: Changing File Permissions
Note: Define as few of the below constants as needed to correct your update issues.
The most common causes of needing to define these are:
Host running with a special installation setup involving symlinks. You may need to define the path-related constants (FTP_BASE, FTP_CONTENT_DIR, and FTP_PLUGIN_DIR). Often defining simply the base will be enough.
Certain PHP installations shipped with a PHP FTP extension which is incompatible with certain FTP servers. Under these rare situations, you may need to define FS_METHOD to “ftpsockets”.
The following are valid constants for WordPress updates:
- FS_METHOD forces the filesystem method. It should only be “direct”, “ssh2”, “ftpext”, or “ftpsockets”. Generally, you should only change this if you are experiencing update problems. If you change it and it doesn’t help, change it back/remove it. Under most circumstances, setting it to ‘ftpsockets’ will work if the automatically chosen method does not.
- (Primary Preference) “direct” forces it to use Direct File I/O requests from within PHP, this is fraught with opening up security issues on poorly configured hosts, This is chosen automatically when appropriate.
- (Secondary Preference) “ssh2” is to force the usage of the SSH PHP Extension if installed
- (3rd Preference) “ftpext” is to force the usage of the FTP PHP Extension for FTP Access, and finally
- (4th Preference) “ftpsockets” utilises the PHP Sockets Class for FTP Access.
- FTP_BASE is the full path to the “base”(ABSPATH) folder of the WordPress installation.
- FTP_CONTENT_DIR is the full path to the wp-content folder of the WordPress installation.
- FTP_PLUGIN_DIR is the full path to the plugins folder of the WordPress installation.
- FTP_PUBKEY is the full path to your SSH public key.
- FTP_PRIKEY is the full path to your SSH private key.
- FTP_USER is either user FTP or SSH username. Most likely these are the same, but use the appropriate one for the type of update you wish to do.
- FTP_PASS is the password for the username entered for FTP_USER. If you are using SSH public key authentication this can be omitted.
- FTP_HOST is the hostname:port combination for your SSH/FTP server. The default FTP port is 21 and the default SSH port is 22. These do not need to be mentioned.
- FTP_SSL TRUE for SSL-connection if supported by the underlying transport (not available on all servers). This is for “Secure FTP” not for SSH SFTP.
define( 'FS_METHOD', 'ftpext' );
define( 'FTP_BASE', '/path/to/wordpress/' );
define( 'FTP_CONTENT_DIR', '/path/to/wordpress/wp-content/' );
define( 'FTP_PLUGIN_DIR ', '/path/to/wordpress/wp-content/plugins/' );
define( 'FTP_PUBKEY', '/home/username/.ssh/id_rsa.pub' );
define( 'FTP_PRIKEY', '/home/username/.ssh/id_rsa' );
define( 'FTP_USER', 'username' );
define( 'FTP_PASS', 'password' );
define( 'FTP_HOST', 'ftp.example.org' );
define( 'FTP_SSL', false );
Some configurations should set FTP_HOST to localhost to avoid 503 problems when trying to update plugins or WP itself.
There are two ways to upgrade using SSH2.
The first is to use the SSH SFTP Updater Support plugin. The second is to use the built-in SSH2 upgrader, which requires the pecl SSH2 extension be installed.
To install the pecl SSH2 extension you will need to issue a command similar to the following or talk to your web hosting provider to get this installed:
pecl install ssh2After installing the pecl ssh2 extension you will need to modify your PHP configuration to automatically load this extension.
pecl is provided by the pear package in most linux distributions. To install pecl in Redhat/Fedora/CentOS:
yum -y install php-pearTo install pecl in Debian/Ubuntu:
apt-get install php-pearIt is recommended to use a private key that is not pass-phrase protected. There have been numerous reports that pass phrase protected private keys do not work properly. If you decide to try a pass phrase protected private key you will need to enter the pass phrase for the private key as FTP_PASS, or entering it in the “Password” field in the presented credential field when installing updates.
There might be reason to use an alternative Cron with WP. Most commonly this is done if scheduled posts are not getting published as predicted. This alternative method uses a redirection approach. The users’ browser get a redirect when the cron needs to run, so that they come back to the site immediately while cron continues to run in the connection they just dropped. This method has certain risks, since it depends on a non-native WordPress service.
define( 'ALTERNATE_WP_CRON', true );Disable cron entirely by setting DISABLE_WP_CRON to true.
define( 'DISABLE_WP_CRON', true );Make sure a cron process cannot run more than once every WP_CRON_LOCK_TIMEOUT seconds.
define( 'WP_CRON_LOCK_TIMEOUT', 60 );Here are additional constants that can be defined. These probably shouldn’t be set unless other methodologies have been attempted first. The Cookie definitions can be particularly useful if you have an unusual domain setup.
define( 'COOKIEPATH', preg_replace( '|https?://[^/]+|i', '', get_option( 'home' ) . '/' ) );
define( 'SITECOOKIEPATH', preg_replace( '|https?://[^/]+|i', '', get_option( 'siteurl' ) . '/' ) );
define( 'ADMIN_COOKIE_PATH', SITECOOKIEPATH . 'wp-admin' );
define( 'PLUGINS_COOKIE_PATH', preg_replace( '|https?://[^/]+|i', '', WP_PLUGIN_URL ) );
define( 'TEMPLATEPATH', get_template_directory() );
define( 'STYLESHEETPATH', get_stylesheet_directory() );
This constant controls the number of days before WordPress permanently deletes posts, pages, attachments, and comments, from the trash bin. The default is 30 days:
define( 'EMPTY_TRASH_DAYS', 30 ); // 30 daysTo disable trash set the number of days to zero.
define( 'EMPTY_TRASH_DAYS', 0 ); // Zero daysNote: WordPress will not ask for confirmation when someone clicks on “Delete Permanently” using this setting.
There is automatic database repair support, which you can enable by adding the following define to your wp-config.php file.
Note: This should only be enabled if needed and disabled once the issue is solved. When enabled, a user does not need to be logged in to access the functionality, since its main intent is to repair a corrupted database and users can often not login when the database is corrupt.
define( 'WP_ALLOW_REPAIR', true );The script can be found at {$your_site}/wp-admin/maint/repair.php.
A DO_NOT_UPGRADE_GLOBAL_TABLES define prevents dbDelta() and the upgrade functions from doing expensive queries against global tables.
Sites that have large global tables (particularly users and usermeta), as well as sites that share user tables with bbPress and other WordPress installs, can prevent the upgrade from changing those tables during upgrade by defining DO_NOT_UPGRADE_GLOBAL_TABLES to true. Since an ALTER, or an unbounded DELETE or UPDATE, can take a long time to complete, large sites usually want to avoid these being run as part of the upgrade so they can handle it themselves. Further, if installations are sharing user tables between multiple bbPress and WordPress installs you may to want one site to be the upgrade master.
define( 'DO_NOT_UPGRADE_GLOBAL_TABLES', true );PHP has a function that returns an array of all the currently defined constants with their values.
print_r( @get_defined_constants() );Occasionally you may wish to disable the plugin or theme file editor to prevent overzealous users from being able to edit sensitive files and potentially crash the site. Disabling these also provides an additional layer of security if a hacker gains access to a well-privileged user account.
define( 'DISALLOW_FILE_EDIT', true );Note: The functionality of some plugins may be affected by the use of current_user_can('edit_plugins') in their code. Plugin authors should avoid checking for this capability, or at least check if this constant is set and display an appropriate error message. Be aware that if a plugin is not working this may be the cause.
This will block users being able to use the plugin and theme installation/update functionality from the WordPress admin area. Setting this constant also disables the Plugin and Theme File editor (i.e. you don’t need to set DISALLOW_FILE_MODS and DISALLOW_FILE_EDIT, as on its own DISALLOW_FILE_MODS will have the same effect).
define( 'DISALLOW_FILE_MODS', true );Note: WordPress Version 4.0 deprecated FORCE_SSL_LOGIN. Please use FORCE_SSL_ADMIN.
FORCE_SSL_ADMIN is for when you want to secure logins and the admin area so that both passwords and cookies are never sent in the clear. See also Administration_Over_SSL for more details.
define( 'FORCE_SSL_ADMIN', true );Block external URL requests by defining WP_HTTP_BLOCK_EXTERNAL as true and this will only allow localhost and your blog to make requests. The constant WP_ACCESSIBLE_HOSTS will allow additional hosts to go through for requests. The format of the WP_ACCESSIBLE_HOSTS constant is a comma separated list of hostnames to allow, wildcard domains are supported, eg *.wordpress.org will allow for all subdomains of wordpress.org to be contacted.
define( 'WP_HTTP_BLOCK_EXTERNAL', true );
define( 'WP_ACCESSIBLE_HOSTS', 'api.wordpress.org,*.github.com' );
There might be reason for a site to not auto-update, such as customizations or host supplied updates. It can also be done before a major release to allow time for testing on a development or staging environment before allowing the update on a production site.
define( 'AUTOMATIC_UPDATER_DISABLED', true );The easiest way to manipulate core updates is with the WP_AUTO_UPDATE_CORE constant:
 # Disable all core updates:
 define( 'WP_AUTO_UPDATE_CORE', false );
 # Enable all core updates, including minor and major:
 define( 'WP_AUTO_UPDATE_CORE', true );
 # Enable core updates for minor releases (default):
 define( 'WP_AUTO_UPDATE_CORE', 'minor' );
Reference: Disabling Auto Updates in WordPress 3.7
By default, WordPress creates a new set of images every time you edit an image and when you restore the original, it leaves all the edits on the server. Defining IMAGE_EDIT_OVERWRITE as true changes this behaviour. Only one set of image edits are ever created and when you restore the original, the edits are removed from the server.
define( 'IMAGE_EDIT_OVERWRITE', true );Be sure to check for leading and/or trailing spaces around any of the above values you entered, and DON’T delete the single quotes!
Before you save the file, be sure to double-check that you have not accidentally deleted any of the single quotes around the parameter values. Be sure there is nothing after the closing PHP tag in the file. The last thing in the file should be ?> and nothing else. No spaces.
To save the file, choose File > Save As > wp-config.php and save the file in the root of your WordPress install. Upload the file to your web server and you’re ready to install WordPress!
wp-config.php — это файл конфигурации, который является обязательным для всех сайтов WordPress. Этот файл генерируется в процессе установки WordPress . Здесь хранится информация о вашей БД(базе данных) и несколько других дополнительных настроек. Без этого файла сайт на WordPress работать не будет.
С учетом того, что файл содержит крайне важную информацию вносить в него изменения без крайней на то необходимости не рекомендую. Если все же вам понадобилось это сделать,внимательно изучите информацию ниже.
Начало работы
Перед началом работы обязательно сделайте резервную копию сайта WordPress, ведь даже небольшая ошибка сделает его недоступным.
Затем подключитесь к сайту с помощью FTP-клиента.
WP-config.php находится в корневой папке, там же где размещаются основные папки (wp-admin и т.д.).
Наведите мышью на название файла, нажмите правой кнопкой и выберите Просмотр/Правка, чтобы открыть wp-config.php-файл на вашем компьютере. Вы можете редактировать его с помощью редактора, например notepad++, VSC или Sublime.
Вот так выглядит наш файл:

Рассмотрим подробнее каждый раздел.
Настройки MySQL в wp-config.php
В самом начале отображаются настройки подключения к базе данных WordPress в разделе MySQL settings. Вы должны внести имя базы данных, имя пользователя базы данных и пароль, чтобы заполнить этот раздел.

Все эти данные вы моете найти в учетной записи вашего хостинга.
Ключи аутентификации
Эти ключи безопасности необходимы для того, чтобы повысить безопасность вашего сайта WordPress. Ключи обеспечивают надежное шифрование пользовательских сеансов и файлов cookie, создаваемых WordPress. Их можно сгенерировать самостоятельно и вставить в файл.

Префикс Таблицы БД
WordPress всегда добавляет префикс wp_ ко всем таблицам, созданным WordPress. Желательно заменить его собственным префиксом, чтобы затруднить работу взломщикам. Это можно сделать с помощью плагина WP Security.

Режим Отладки WordPress
Эта настройка особенно полезна для разработчиков. WordPress не показывает уведомления об ошибках, генерируемые PHP при выполнении кода. Чтобы включить такую возможность и видеть что и когда пошло не так, нужно заменить false на true. Это предоставляет разработчикам важную информацию для поиска ошибок.
define(‘WP_DEBUG’, false);
define(‘WP_DEBUG’,true);
Параметры Абсолютного Пути
Абсолютный путь используется для установки WordPress переменных и включенных файлов. Здесь лучше ничего не менять.

Другие wp-config.php хаки
Это еще не все настройки wp-config. php, рассмотрим некоторые другие возможности этого файла.
Изменение url WordPress с помощью wp-config.php
Возможно, вам понадобится поменять URL в случае перемещения сайта WordPress на новое доменное имя или новый веб-узел. Это можно сделать из админ-панели, Настройки>Общие.

Это же можно сделать с помощью wp-config.php. Вот что нужно добавить в этот файл:
define(‘WP_HOME’,’http://ваш_домен.com’);
define(‘WP_SITEURL’,’http://ваш_домен.com’);
ваш_домен.com — доменное имя вашего сайта. Запомните, что поисковики считают www.ваш_домен.com и ваш_домен.com двумя разными адресами. Если ваш сайт индексируется с префиксом www, то вам необходимо добавить это доменное имя.
Меняем каталог загрузки
WordPress сохраняет все загрузки мультимедиа в директории /wp-content/uploads/. Если вас не устраивает эта папка и вы хотите, чтобы данные сохранялись в любой другой новой папке, внесите в wp-config. php следующие строки:
define( ‘UPLOADS’, ‘wp-content/ваша папка’ );
Отключить автоматическое обновление в WordPress
Не смотря на то, что автоматические обновления необходимы для безопасности, бывают ситуации, что такие обновления ломали сайт и делали его недоступным.
Чтобы отключить все автоматические обновления на вашем WordPress сайте добавьте в код следующие строки:
define( ‘WP_AUTO_UPDATE_CORE’, false );
Чтобы включить автоматическое обновление всех основных обновлений, включая основные и второстепенные, добавьте следующую строку:
define( ‘WP_AUTO_UPDATE_CORE’, true );
Ограничить изменения записей в WordPress
Добавьте эту строку кода в WP-config.php-файл для ограничения количества ревизий, хранящихся для записи.
define( ‘WP_POST_REVISIONS’, 3 );
Замените 3 числом ревизий, которые требуется сохранить. WordPress теперь автоматически откажется от старых версий. Тем не менее, старые версии записей по-прежнему хранятся в базе данных.
wp-config.php является самым главным конфигурационным файлом на сайте WordPress. В нем хранятся секретные ключи безопасности, данные для подключения к базе данных, вызовы библиотек и прочая важная информация, необходимая для стабильной работы сайта.
В арсенале файла wp-config.php имеется большое количество разных настроек, которые позволяют гибко управлять конфигурацией вашей копией WordPress. С ними можно ознакомится в официальной документации.
В этом материале мы рассмотрим некоторые полезные, особенно для новичков, настройки файла, которые помогут вам устранить неполадки, а также оптимизировать и защитить ваш WordPress-сайт.
Файл wp-config.php является мощным инструментом, и даже маленькая ошибка в его коде может сделать ваш сайт недоступным. Вы должны редактировать этот файл только при необходимости и всегда создавать полную резервную копию, прежде чем вносить в него какие-либо изменения. Иначе может возникнуть ошибка на wordpress: error establishing a database connection.
1. Основные настройки конфигурации WordPress
Во время первой установки копии WordPress система предложит заполнить настройки базы данных. Если файл wp-config.php отсутствует, вам будет предложено создать его, указав необходимую информацию о базе (название базы, имя пользователя и пароль, хост, а также префикс таблиц).
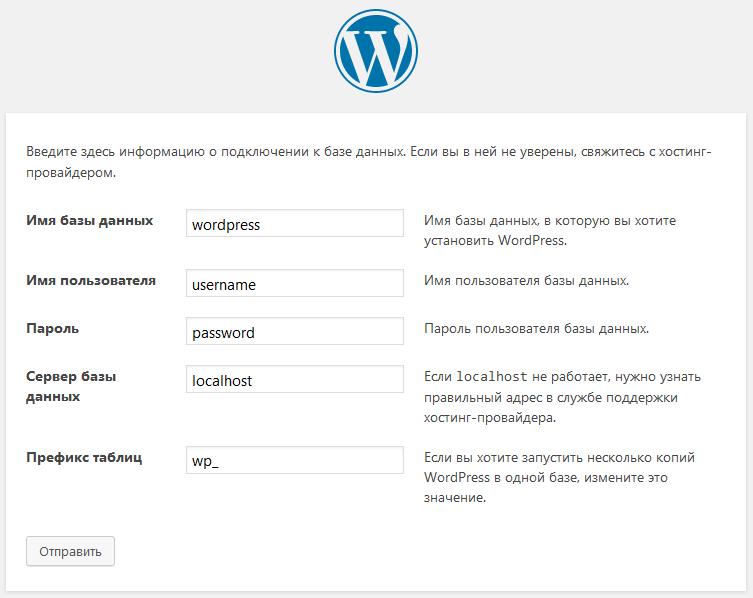
WordPress попытается автоматически сохранить эти настройки, создав файл wp-config.php. Однако, если по каким-то причинам это не удастся, вам необходимо будет добавить их вручную.
Для этого вам нужно будет подключиться к вашему сайту с помощью FTP-клиента (подробно об этом мы писали в статье: Как подключиться к ftp). После подключения вам нужно будет переименовать файл wp-config-sample.php в wp-config.php.

После этого вы можете продолжить редактирование созданного файла wp-config.php. Вам нужно будет добавить информацию о своей базе данных, изменив следующие строки:
// ** Параметры MySQL: Эту информацию можно получить у вашего хостинг-провайдера ** //

/** Имя базы данных для WordPress */
define('DB_NAME', 'database_name_here');

/** Имя пользователя MySQL */
define('DB_USER', 'username_here');

/** Пароль к базе данных MySQL */
define('DB_PASSWORD', 'password_here');

/** Имя сервера MySQL */
define('DB_HOST', 'localhost');
После того, как данные были внесены, необходимо сохранить все изменения и загрузить файл обратно на сервер.
Узнайте, как перенести базу данных плагином All-in-One WP Migration.
2. Добавление ключей безопасности в WordPress
Установка WordPress по умолчанию автоматически добавляет ключи безопасности в файл конфигурации. Они используются для обеспечения дополнительного уровня безопасности для аутентификации в WordPress и проверки файлов cookie. Более подробно о них описано в нашей статье. Отметим, что их вы всегда сможете изменить, добавив новые в файл wp-config.php.
3. Изменение префикса таблиц WordPress
Типичная установка новой копии WordPress по умолчанию добавляет префикс “wp_” ко всем названиям таблиц базы данных WordPress. Некоторые эксперты по безопасности считают, что изменение префикса может сделать вашу базу данных WordPress более безопасной.
Для этого вам нужно найти и изменить следующую строку в файле wp-config.php:
$table_prefix = 'wp_';
Нужно заметить, что если вы делаете это для уже действующего веб-сайта, то вам также потребуется изменить префикс таблиц в базе данных. Это подробно описано в нашей статье.
4. Включение отладки
В WordPress встроена очень полезная функция отладки, которая позволяет видеть или скрывать ошибки WordPress. Чтобы ее задействовать, необходимо в wp-config.php добавить следующую директиву:
define ('WP_DEBUG', true);
Кроме того, также можно включить отладку, скрывая ошибки на своем веб-сайте, но сохраняя их в файле журнала. Для этого нужно добавить следующие строки:
define ('WP_DEBUG', true);
define ('WP_DEBUG_LOG', true);
define ('WP_DEBUG_DISPLAY', false);
Это создаст файл debug.log внутри папки wp-content вашего сайта, в котором будут содержаться все ошибки и уведомления об ошибках.
5. Изменение сайта
Как правило, вы можете настроить URL-адрес своего сайта в админ-разделе Настройки -> Общие. Однако бывают ситуации, когда у вас нет возможности этого сделать.
В этом случае вы можете изменить URL-адрес своего сайта через файл wp-config.php, добавив туда следующие строки:
define ('WP_HOME', 'http://www.site.ru');
define ('WP_SITEURL', 'http://www.site.ru');
Не забудьте заменить site.ru своим доменным именем.
6. Переопределение прав доступа
WordPress позволяет переопределять права доступа к файлам, если ваш хостинг имеет какие-либо ограничения.
define ('FS_CHMOD_FILE', 0644);
define ('FS_CHMOD_DIR', 0755);
7. Настройка автосохранения и ревизий
WordPress имеет очень полезную функцию ревизий постов, которая позволяет отменить изменения ваших постов и страниц, возвращаясь к предыдущей версии или автосохранению.
Вы можете отключить или изменить настройки ревизий через файл конфигурации wp-config.php. Здесь можно использовать различные настройки для публикаций. Вы можете изменить, как часто WordPress будет выполнять автосохранение как ревизию, добавляя следующую строку:
define ('AUTOSAVE_INTERVAL', 120); // в секундах
Для ограничения количества ревизий существует конструкция:
define ('WP_POST_REVISIONS', 10); // 10 - количество ревизий записи или страницы
Также возможно полное отключение ревизий:
define ('WP_POST_REVISIONS', false);
8. Настройка корзины WordPress
WordPress имеет довольно полезную функцию корзины. Когда пользователь отправляет пост или страницу в корзину, они по-прежнему сохраняются на сайте в течение 30 дней. После этого система автоматически удаляет их навсегда.
Вы можете изменить это поведение, указав количество дней, в течение которых вы хотите сохранить “мусор”. Все детали настройки корзины были описаны в одном из наших руководств.
9. Добавление констант FTP/SSH в конфигурацию WordPress
По умолчанию WordPress позволяет вам обновить ядро “движка”, а также темы и плагины, на панели управления администратора. Есть несколько хостов, к которым требуется подключение по FTP или SSH каждый раз при попытке обновления или установки нового плагина.
Используя приведенные ниже инструкции, вы можете установить константы FTP или SSH.
// методы файловой системы: «direct», «ssh», «ftpext» или «ftpsockets»
define ('FS_METHOD', 'ftpext');
// абсолютный путь к корневой директории WordPress
define ('FTP_BASE', '/path/to/wordpress/');
// абсолютный путь к каталогу «wp-content»
define ('FTP_CONTENT_DIR', '/path/to/wordpress/wp-content/');
// абсолютный путь к директории "wp-plugins"
define ('FTP_PLUGIN_DIR', '/path/to/wordpress/wp-content/plugins/');
// абсолютный путь к вашему открытому ключу SSH
define ('FTP_PUBKEY', '/home/username/.ssh/id_rsa.pub');
// абсолютный путь к вашему закрытому ключу SSH
define ('FTP_PRIVKEY', '/home/username/.ssh/id_rsa');
// имя пользователя FTP или SSH
define ('FTP_USER', 'username');
// пароль для имени пользователя FTP_USER
define ('FTP_PASS', 'password');
// имя хоста для SSH/FTP-сервера
define ('FTP_HOST', 'ftp.example.org:21');
10. Управление автоматическим восстановлением базы данных
WordPress поставляется со встроенной функцией автоматической оптимизации и восстановления базы данных WordPress. Однако эта функция отключена по умолчанию.
Чтобы включить эту функцию, вам нужно добавить следующую строку в файл wp-config.php:
define ('WP_ALLOW_REPAIR', true);
После этого вы должны открыть следующую страницу на своем сайте:
http://site.ru/wp-admin/maint/repair.php
Не забудьте заменить site.ru собственным доменным именем. Вы увидите простую страницу с параметрами восстановления или оптимизации базы данных. Чтобы получить доступ к этой странице, вам не нужно авторизоваться в системе.
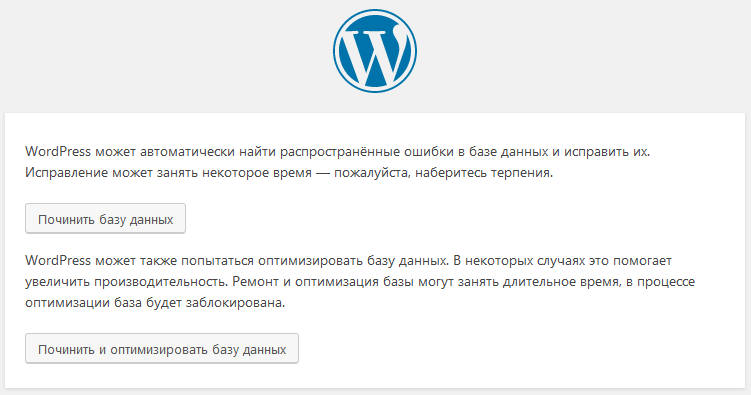
11. Управление лимитом памяти PHP
Многие ошибки на WordPress-сайте возникают вследствие исчерпания ресурсов памяти для PHP-скриптов. Вы можете увеличить ограничение памяти PHP через файл wp-config.php. Для этого нужно просто вставьте следующий код:
define ('WP_MEMORY_LIMIT', '128M');
12. Перемещение каталога wp-content
WordPress позволяет вам перемещать каталог wp-content, в котором содержатся загруженные фото и документы, установленные плагины и темы. Некоторые эксперты считают, что изменение местоположения этого каталога повысит безопасность WordPress.
Для этого нужно будет добавить следующий код в файл wp-config.php:
define ('WP_CONTENT_DIR', $ _SERVER ['DOCUMENT_ROOT']. '/blog/wp-content');
define ('WP_CONTENT_URL', 'http://site.ru/blog/wp-content');
define ('WP_PLUGIN_DIR', $ _SERVER ['DOCUMENT_ROOT']. '/blog/wp-content/plugins');
define ('WP_PLUGIN_URL', 'http://site.ru/blog/wp-content/plugins');
Не забудьте заменить site.ru собственным доменным именем.
13. Использование собственных таблиц пользователей
По умолчанию WordPress сохраняет все пользовательские данные в таблицах wp_users и wp_usermeta. Используя приведенную ниже функцию, вы можете указать таблицу, в которой вы хотите сохранить свою пользовательскую информацию.
define ('CUSTOM_USER_TABLE', $table_prefix.'my_users ');
define ('CUSTOM_USER_META_TABLE', $table_prefix.'my_usermeta ');
14. Включение многопользовательской сети
Каждый сайт WordPress поставляется со встроенной функцией мультисайта, которая позволяет вам создавать несколько сайтов WordPress с использованием одной и той же установки. По умолчанию, она выключена.
Чтобы ее включить, следует добавить следующую строку в файл конфигурации WordPress:
define ('WP_ALLOW_MULTISITE', true);
15. Защита файла wp-config.php
Еще раз отметим, что файл wp-config.php содержит действительно важные настройки WordPress-сайта. По умолчанию он находится в корневом каталоге WordPress, но вы можете переместить его. Система позволяет перемещать его куда-угодно в пределах корневой папки.
Вы также можете добавить следующий код в ваш файл .htaccess, чтобы ограничить доступ к этому файлу конфигурации. Для этого следует добавить следующие строки:
# Защита wp-config.php
<Files wp-config.php>
    order allow,deny
    deny from all
</Files>
Еще раз стоит повторить, что wp-config.php должен редактироваться исключительно при необходимости. Перед внесением в него каких-либо изменений следует создать полную резервную копию WordPress.
Нажмите, пожалуйста, на одну из кнопок, чтобы узнать понравилась статья или нет.
 Файл wp-config.php находится в корневой папке сайта и является главным конфигурационным файлом Вордпресс.
Основной фунционал файла — подключение базы данных, хранение секретных ключей для шифрования информации (ключи и соли), установка префикса базы данных, включение режима debug и указание пути к папке Вордпресс.
Это стандартный функционал файла, но в него можно добавить свои команды для включения дополнительных функций. Например, увеличение лимита памяти, ограничение ревизий постов или автоматическая очистка корзины.
В этой статье вы узнаете о стандартных функциях wp-config.php и о том, какие дополнительные функции можно в него добавить.
Содержание:
Что такое wp-config.php
Константы Вордпресс
- Стандартное содержание файла wp-config.php
- Ключи и соли
- Префикс базы данных
- Режим debug
- Дополнительный функционал wp-config.php
- URL сайта
- Изменение файловой структуры Вордпресс
- Тема по умолчанию
- Ревизии постов, автосохранение и корзина
- Собственные таблицы user и usermeta
- Увеличение лимита PHP памяти
- Мультисайт
- Отключение редактирования файлов в админке Вордпресс
- Настройки режима отладки
- Настройки cron расписания
- Использование SSL на странице логина и в админке
- Автообновление Вордпресс
- Оптимизация базы данных
Заключение
WP-config.php — главный файл сайта, который используется для
- настройки соединения с базой данных
- настройки производительности сайта
- усиления безопасности сайта
По умолчанию в свежей установке Вордпресс нет файла wp-config. Вместо него есть пустой шаблон wp-config-sample.php, в котором находятся незаполненные поля установки соединения с базой данных, ключей, префикс БД и так далее.
Актуальную версию файла wp-config-sample.php вы можете посмотреть / скачать из гитхаб репозитория WordPress:
Обычно его не заполняют вручную, Вордпресс делает это автоматически во время установки сайта.
Константы Вордпресс
В файле wp-config можно использовать php константы для выполнения определенных задач. У Вордпресса есть множество констант, которые можно использовать.
В документации PHP константа описывается так:
«Константа — это идентификатор (имя) для простого значения. Как следует из названия, их значение не может измениться в ходе выполнения скрипта (кроме магических констант, которые на самом деле не являются константами). Имена констант по умолчанию чувствительны к регистру. По принятому соглашению, имена констант всегда пишутся в верхнем регистре.»
То есть, вы можете дать имя какому-то параметру. Этот параметр может быть использован глобально на всем сайте нужное количество раз. Константа должна начинаться с буквы, должна быть написана заглавными буквами и может иметь символ подчеркивания.
Константа WP_DEBUG, — начинается с буквы, написана заглавными буквами и имеет символ подчеркивания.
Константы обернуты в функцию define():
Файл wp-config.php загружается до файлов ядра Вордпресс, то есть если вы измените значение какой-то константы, то изменения коснутся всего сайта. Вы можете включить или выключить какую-то функцию, изменив ее значение с true на false, или наоборот.
Документация по файлу wp-config.php в Кодексе Вордпресс. Большинство функций из документации описаны в этой статье.
Сделайте бэкап wp-config перед изменениями.
I. Стандартное содержание файла wp-config.php
Если вы устанавливаете Вордпресс через FTP, то Вордпресс просит заполнить эти поля:

Замените префикс таблиц базы данных на какой-нибудь свой, например, az13kn_.
Если вы заполняете файл вручную, заполните эти строки:
Кодировка нужна для использования Вордпресс на другом языке. Используйте UTF8, потому что эта кодировка поддерживает все языки и имеет специальные символы, например á или ≥.
Сопоставление определяет как строки сравниваются в базе данных, некоторые сопоставления могут быть чувствительны к реестру. Оставьте как есть.
1. Ключи и соли
Ключи безопасности — это набор случайных символов, которые используются для шифрования информации, хранящейся в кукис браузера.
Соли — еще один набор случайных символов, которые используются для хеширования паролей.
Вы можете использовать генератор ключей Вордпресс для заполнения этих полей.
Для увеличения безопасности можно 1-2 раза в год менять эти ключи.
- Ключи и соли Вордпресс
2. Префикс базы данных
В мастере установки Вордпресс можно изменить префикс базы данных, то же самое можно сделать вручную в wp-config.php.
Замените wp_ на что-нибудь уникальное. После изменения префикса базы данных нужно будет сделать несколько изменений в базе данных.
- Как изменить префикс базы данных
3. Режим debug
По умолчанию режим debug выключен, оставьте его выключенным:
Если вы работаете над сайтом и ищите ошибку или получили белый экран, включите режим debug, заменив false на true. Выключите режим отладки после того, как закончите работу, потому что некоторая информация о сайте будет отображаться во фронт-энде или сохраняться в файл.
- Режим отладки Вордпресс
II. Дополнительный функционал wp-config.php
Как и в другие php файлы, вы можете добавить свой код в wp-config. Добавляйте аккуратно, потому что одна ошибка может положить сайт.
В начале каждого снипета стоит тег <?php, его можно убрать, так как он уже есть в wp-config.php.
Добавляйте свой код до строки:
1. URL сайта
В настройках Вордпресс вы указываете адрес Вордпресс и адрес сайта.

Эти данные хранятся в базе данных, и каждый раз, когда кто-то запрашивает страницу сайта, создается запрос к базе данных. В Вордпресс 2.2 были добавлены функции WP_HOME и WP_SITEURL. Эти функции имеют приоритет перед записями в базе данных.
Замените http://ваш-сайт.ru на ваш URL. Добавьте «s» в http, если у вас https.
Если вы добавите этот код в wp-config, это уменьшит количество запросов к базе данных на 1, сайт будет работать немного быстрее. При создании страницы обычно создается несколько десятков запросов к базе данных.
2. Изменение файловой структуры Вордпресс
Вы можете изменить стандартное расположение папок wp-content, plugins и uploads и создать новую папку для тем. Это делается для того, чтобы не использовать стандартную структуру папок Вордпресс, информация о которой находится в открытом доступе. Если вы перенесете эти папки в другие места, это повысит безопасность сайта.
Для папок wp-content и plugins нужно указать абсолютный путь и полный URL. Для plugins нужно указать PLUGINDIR, чтобы не было проблем с совместимостью.
Папка uploads всегда привязана к ABSPATH, поэтому слеш перед extensions/uploads не требуется. Эту папку нельзя перенести из папки wp-content (extensions), но можно переименовать. Подробнее читайте в статье про изменение файловой структуры Вордпресс.
Папка themes привязана к папке wp-content, но можно создать еще одну папку для тем. В этом примере папка называется wprs-themes и находится в корневой директории.
Если Вордпресс расположен в папке public_html, то новая структура будет выглядеть так:
- ваш-сайт.ru
- wp-admin
- wp-content
- plugins
- themes
- uploads
- wp-includes
- ваш-сайт.ru
- extensions
- plugins
- themes
- wprs-themes
- uploads
- wordpress
- wp-admin
- wp-includes
- extensions
Стандартная структура WP слева и структура из примера справа
Кроме этих папок есть еще одна стандартная папка, которая называется mu-plugins, Must Use Plugins, то есть плагины обязательные для использования.
Если у вас есть эта папка, вы можете ее перенести с помощью этого кода:
Замените название папки impmu-plug на свое название.
- Как изменить структуру файлов и папок.
3. Тема по умолчанию
В Вордпресс тема по умолчанию — 20ХХ. Если что-то случится с вашей активной темой, то загрузится тема по умолчанию. Чтобы сменить тему по умолчанию, добавьте эти строки в wp-config:
4. Ревизии постов, автосохранение и корзина
В Вордпрессе 2.6 появилась функция ревизии постов, которая делает авто-сохранение постов на тот случай, если зависнет браузер или компьютер. Или если вы хотите загрузить предыдущую версию контента.
Укажите количество ревизий, которое вы хотите хранить в базе данных:
Если вы хотите полностью отключить ревизии, замените 5 на false:
По умолчанию Вордпресс делает авто-сохранение каждые 60 секунд, если вы хотите изменить интервал автосохранения, укажите свое время в секундах:
После того, как вы удалили статью в Корзину, она будет находиться там по умолчанию 30 дней, после этого она будет полностью удалена из базы данных. Вы можете изменить интервал очистки корзины, например, до 5 дней:
Если вы хотите полностью отключить Корзину — поставьте 0, тогда контент будет удаляться сразу без помещения в Корзину.
5. Собственные таблицы user и usermeta
По умолчанию Вордпресс сохраняет все данные пользователей в таблицы wp_users и wp_usermeta. Для увеличения безопасности можно использовать таблицы с произвольным именем, вы можете их создать с помощью этого кода:
Измените clients и clientsmeta на свое название. Перед тем как делать изменения, прочитайте описание функций в кодексе Вордпресс.
6. Увеличение лимита PHP памяти
Вы могли получить ошибку лимита php памяти. Чтобы увеличить лимит памяти, добавьте эту строку:
7. Вордпресс Мультисайт
Мультисайт позволяет создавать отдельные сайты, которые используют одну и ту же установку Вордпресс. Это используется, когда владельцы сайтов хотят, чтобы магазин, блог или сайт компании находились на субдоменах или в разных подпапках. Некоторые сайты создают субдомены для каждого пользователя, и так далее.
Чтобы создать мультисайт, добавьте эту константу в wp-config:
После того, как вы добавили этот код, в разделе Инструменты в админке Вордпресс появится новая строка Мультисайт. Следуйте инструкциям на этой странице. Вордпресс попросит добавить настройки в файл wp-config и .htaccess. После этого выйдите из админки и зайдите снова, вы должны увидеть админку мультисайта. Подробнее о Мультисайте читайте в кодексе Вордпресс.
Настройки мультисайт установки позволяют делать редирект пользователей, которые пытаются попасть на несуществующий субдомен. Чтобы перенаправлять этих пользователей на главный сайт, добавьте это правило:
8. Отключение редактирования файлов в админке Вордпресс
В обычной или Мультисайт установке можно отключить возможность редактировать файлы тем и плагинов:
Или отключить возможность пользователям устанавливать или обновлять темы и плагины:
Функция DISALLOW_FILE_MODS также отключает редактирование файлов в админке.
9. Настройки режима отладки
В wp-config.php есть несколько настроек, которые помогают находить ошибки. Основная функция — WP_DEBUG, которая находится в этом файле по умолчанию.
Если вы планируете модифицировать css или js, включите эти режимы:
По умолчанию скрипты объединены в один файл и минифицированы. Файлы объединяются для ускорения загрузки, — один объединенный файл скачается быстрее, чем 20 по отдельности. При минификации из кода страницы убираются пробелы, переносы строк и комментарии. Как это выглядит можно посмотреть здесь. Эти два метода ускоряют загрузку страниц.
Чтобы найти нужный файл, который вызывает проблему, сначала нужно отключить минификацию и объединение. Эта функция включает отладку скриптов и отключает минификацию и объединение.
Иногда ошибки появляются при определенных обстоятельствах, тогда в режиме отладки можно не найти ошибку. В этом случае надо смотреть логи событий. Включите логи событий:
Логи событий будут сохраняться в файл debug.log в папке wp-content.
Также вы можете включить сохранение sql запросов, которые Вордпресс делает к базе данных. Добавьте эту функцию в wp-config.php:
и этот код в футер вашей темы:
- Режим отладки Вордпресс
10. Настройки cron расписания
Cron — это расписание заданий, которые запускаются в определенное время или с определенной периодичностью. Вордпресс запускает определенные задачи согласно своему расписанию, например, публикует страницы в назначенное время, проверяет обновления, сбрасывает кеш и так далее.
В Вордпрессе некоторые задачи в крон расписании выполняются не в точно назначенное время, а в зависимости от посещений сайта. Например, если какая-то задача назначена на 12.00, то она выполнится когда на сайт зайдет первый посетитель, например, в 12.30.
Если у вас появилась проблема с cron заданиями, например, сайт не проверяет обновления, попробуйте использовать альтернативный крон метод:
Если нужно, вы можете полностью отключить крон:
Или изменить интервал между назначенными работами:
11. Использование SSL на странице логина и в админке
В документации wp-config.php есть 2 функции, которые позволяют использовать SSL. FORCE_SSL_LOGIN включает использование SSL на страницах авторизации, но не в админке Вордпресс. Это добавляет защиты и не замедляет работу в админке.
FORCE_SSL_ADMIN включает SSL на страницах логина и в админке Вордпресс.
Если вы будете использовать FORCE_SSL_ADMIN, то FORCE_SSL_LOGIN можно удалить из правила.
12. Автообновление Вордпресс
Начиная с версии Вордпресс 3.7 минорные обновления устанавливаются автоматически. Для безопасности рекомендуется оставить автообновление ядра включенным.
Если вы хотите выключить автообновление, добавьте эту строку:
Или используйте функцию WP_AUTO_UPDATE_CORE:
- Ручное и Автоматическое обновление Вордпресс, плагинов, тем и переводов
- Почему у вас должна быть последняя версия Вордпресс
13. Оптимизация базы данных
В Вордпресе 2.9 появилась функция оптимизации и восстановления базы данных. Добавьте:
Сохраните файл и наберите адрес:
http://www.ваш-сайт.ru/wp-admin/maint/repair.php

Если ваша база данных повредилась, и вы не можете войти на сайт, попробуйте восстановить ее этой опцией и зайдите на сайт еще раз. После получения отчета о восстановлении базы данных удалите эту функцию из wp-config, чтобы посторонние не видели информацию с этой страницы, например, не могли узнать префикс базы данных.
Кроме этого способа, вы можете попытаться восстановить базу данных на хостинге в phpMyAdmin, результат будет такой же, потому что они используют одну и ту же функцию.
Заключение
WP-config.php — главный конфигурационный файл сайта, в котором находятся основные настройки сайта.
Для защиты этого файла от хакеров дайте ему права доступа 400. Если сайт стал недоступен, дайте 440. Это зависит от настроек сервера.
- Права доступа к файлам и папкам
Для усиления защиты вы можете перенести wp-config на один уровень вверх. Никаких настроек делать не нужно.
Или вы можете запретить доступ к этому файлу, если добавите это правило в .htaccess:
- Редактирование .htaccess для безопасности Вордпресс
***
По этой ссылке находится крутейший генератор снипетов для wp-config.php.
Читайте также:
- Настройки wp-config.php для безопасности Вордпресс
- Файл functions.php
Надеюсь, статья была полезна. Оставляйте комментарии.
И снова я вас приветствую!
Все, у кого есть свой сайт на WordPress, знают о таком файле как wp-config.php, но не все знают как правильно его настроить. 90% пользователей вписывают в него только данные для подключения к базе.
Сегодня я бы хотел вам рассказать что в этот файл можно очень много интересного прописать для безопасности вашего сайта, и не только. Поехали!

Одним из наиболее важных файлов установки WordPress является файл конфигурации. Он находится в корневом каталоге и содержит постоянные определения и инструкции PHP, которые заставляют WordPress работать так, как вы хотите.
Ко мне часто поступают вопросы про хостинг, которым я пользуюсь и поэтому решил указать хостинг в статье https://sprinthost.ru. Вы можете попробовать попользоваться хостингом 30 дней бесплатно. Чтобы понять, как будет работать Ваш сайт на этом хостинге просто перенести свой сайт (в этом поможет поддержка хостинга бесплатно) и и таким образом сможете понять подходит хостинг Вам или нет. На этом хостинге находятся сайты с 20 000 тысяч посещаемость и сайты чувствуют себя отлично. Рекомендую! Да, если делать оплату на 1 год то получаете скидку 25%. И что мне нравится — тех. поддержка всегда помогает в технических вопросах, за что им спасибо. Как Вы понимаете не всегда проходит всё гладко и нет желания, чтобы сайт не был доступен тем самым страдал трафик и доход.
В файле wp-config.php хранятся такие данные, как сведения о подключении к базе данных, префикс таблицы, пути к определенным каталогам и множество настроек, связанных с конкретными функциями, которые мы с вами собираемся подробно рассмотреть в этом посте.
Оглавление
- Базовый файл wp-config.php
- Базовая конфигурация: редактирование файловой системы
- Возможности для разработчиков: режим отладки и сохранение запросов
- Настройки, связанные с контентом
- Разрешенный объем памяти
- Автоматические обновления
- Настройки безопасности
- Другие дополнительные настройки
- Блокировка wp-config.php
Базовый файл wp-config.php
Когда вы впервые устанавливаете WordPress, вас просят ввести необходимую информацию, такую как сведения о базе данных и префикс таблицы. Иногда ваш хостер настроит WordPress для вас, и вам не нужно будет запускать настройку вручную. Но когда вы запускаете 5-минутную установку вручную, вам будет предложено ввести некоторые наиболее важные данные, хранящиеся в wp-config.

Когда вы запустите установку, вам потребуется ввести данные, которые хранятся в файле wp-config.php
Вот основной файл wp-config.php:
    //** Настройки MySQL - вы можете получить эту информацию у вашего хостера **//
    /** Название базы данных для WordPress */
    define('DB_NAME', 'database_name_here');

    /** Имя пользователя базы данных MySQL */
    define('DB_USER', 'username_here');

    /** Пароль базы данных MySQL */
    define('DB_PASSWORD', 'password_here');

    /** Имя хоста MySQL */
    define('DB_HOST', 'localhost');

    /** Кодировка базы данных для использования при создании таблиц базы данных. */
    define('DB_CHARSET', 'utf8');

    /** Тип сортировки базы данных. Не меняйте это, если сомневаетесь. */
    define('DB_COLLATE', '');

    define('AUTH_KEY',		'поместите свою уникальную фразу здесь');
    define('SECURE_AUTH_KEY',	'поместите свою уникальную фразу здесь');
    define('LOGGED_IN_KEY',		'поместите свою уникальную фразу здесь');
    define('NONCE_KEY',		'поместите свою уникальную фразу здесь');
    define('AUTH_SALT',		'поместите свою уникальную фразу здесь');
    define('SECURE_AUTH_SALT',	'поместите свою уникальную фразу здесь');
    define('LOGGED_IN_SALT',	'поместите свою уникальную фразу здесь');
    define('NONCE_SALT',		'поместите свою уникальную фразу здесь');

    $table_prefix  = 'wp_';

    /* Вот и все, дальше не редактировать! Счастливого ведения блога. */
Обычно этот файл генерируется автоматически при запуске установки, но иногда WordPress не имеет прав для записи в папку установки. В этой ситуации вы должны создать пустой файл wp-config.php, скопировать и вставить содержимое из wp-config-sample.php и установить правильные значения для всех определенных констант. Когда вы закончите, загрузите ваш файл в корневую папку и запустите установку WordPress.
Примечание: определения констант и инструкции PHP приходят в определенном порядке, который мы никогда не должны менять. И мы никогда не должны добавлять содержимое под следующей строкой комментария:
/* Вот и все, дальше не редактировать! Счастливого ведения блога. */
Сначала приведу определения констант базы данных, которые вы должны были получить от своего хостера:
- DB_NAME
- DB_USER
- DB_PASSWORD
- DB_HOST
- DB_CHARSET
- DB_COLLATE
Следуя данным базы данных, восемь ключей безопасности сделают сайт более защищенным от хакеров. При запуске установки WordPress автоматически генерирует ключи безопасности и соли, но вы можете изменить их в любое время, добавив любую произвольную строку. Для большей безопасности рассмотрите возможность использования онлайн-генератора.
Переменная «$table_prefix» хранит префикс всех таблиц WordPress. К сожалению, любой знает его значение по умолчанию, и это может открыть базу данных WordPress для уязвимости, которую можно легко исправить, установив пользовательское значение «$table_prefix» при запуске установки.
Чтобы изменить префикс таблицы на работающем веб-сайте, необходимо выполнить несколько запросов к базе данных, а затем вручную отредактировать файл wp-config.php. Если у вас нет доступа к базе данных или вы не обладаете необходимыми знаниями для создания пользовательских запросов, вы можете установить плагин, такой как Change Table Prefix (правда он давно не обновлялся), который будет переименовывать таблицы базы данных и имена полей, а также обновлять файл конфигурации без риска.
Примечание. Рекомендуется создавать резервные копии файлов WordPress и базы данных, даже если вы измените префикс таблицы с помощью плагина.
До сих пор анализ был ограничен базовой конфигурацией. Но у нас есть много констант, которые мы можем определить, чтобы включить функции, настроить и защитить установку.
Базовая конфигурация: редактирование файловой системы
Файловая система WordPress хорошо известна пользователям и хакерам. По этой причине вы можете рассмотреть возможность изменения встроенной файловой структуры путем перемещения определенных папок в произвольных местах и установки соответствующих URL-адресов и путей в файле wp-config.
Во-первых, мы можем переместить папку содержимого, определив две константы. Первый устанавливает полный путь к каталогу:
define( 'WP_CONTENT_DIR', dirname(__FILE__) . '/site/wp-content' );
Второй устанавливает новый URL каталога:
define( 'WP_CONTENT_URL', 'http://example.com/site/wp-content' );
Мы можем переместить только папку плагинов, определив следующие константы:
    define( 'WP_PLUGIN_DIR', dirname(__FILE__) . '/wp-content/mydir/plugins' );
    define( 'WP_PLUGIN_URL', 'http://example.com/wp-content/mydir/plugins' );
Таким же образом мы можем переместить папку загрузки, установив новый путь к каталогу:
define( 'UPLOADS', 'wp-content/mydir/uploads' );
Примечание: все пути относятся к «ABSPATH», и они не должны содержать начальный слеш.
Когда закончите, расставьте папки и перезагрузите WordPress.

Изображение показывает встроенную файловую структуру по сравнению с настроенной структурой
Невозможно переместить папку /wp-content/themes из файла wp-config, но мы можем зарегистрировать новый каталог темы в плагине или файле functions.php темы.
Возможности для разработчиков: режим отладки и сохранение запросов
Если вы разработчик (как и я), вы можете заставить WordPress отображать ошибки и предупреждения, которые помогут вам в отладке тем и плагинов. Чтобы включить режим отладки, вам просто нужно установить «WP_DEBUG» в значение «true», как показано ниже:
define( 'WP_DEBUG', true );
«WP_DEBUG» по умолчанию имеет значение «false». Если вам нужно отключить режим отладки, вы можете просто удалить определение или установить значение константы в «false».
Когда вы работаете на живом сайте, вы должны отключить режим отладки. Ошибки и предупреждения никогда не должны показываться зрителям сайта, поскольку они могут предоставить хакерам ценную информацию. Но что делать, если вам все равно придется отлаживать?
В таких ситуациях вы можете заставить WordPress вести таблицу ошибок и предупреждений в файле «debug.log», расположенном в папке /wp-content. Чтобы включить эту функцию, скопируйте и вставьте следующий код в файл wp-config.php:
    define( 'WP_DEBUG', true );
    define( 'WP_DEBUG_LOG', true );
    define( 'WP_DEBUG_DISPLAY', false );
    @ini_set( 'display_errors', 0 );
Чтобы эта функция работала, сначала нужно включить режим отладки. Затем, установив «WP_DEBUG_LOG» в значение «true», мы заставляем WordPress хранить сообщения в файле «debug.log», а при определении «WP_DEBUG_DISPLAY» в «false» скрываем их с экрана. Наконец, мы устанавливаем в 0 значение переменной PHP — «display_errors» чтобы сообщения об ошибках не выводились на экран. Wp-config никогда не загружается из кеша. По этой причине это хорошее место для переопределения настроек «php.ini».
Примечание. Это отличная функция, которой вы можете воспользоваться, чтобы регистрировать сообщения, которые WordPress не печатал бы на экране. Например, когда «publish_post» запускает действие, WordPress загружает скрипт, который сохраняет данные, а затем перенаправляет пользователя на страницу редактирования сообщения. В этой ситуации вы можете регистрировать сообщения, но не распечатывать их на экране.
Другая константа отладки определяет версии скриптов и стилей для загрузки. Установите «SCRIPT_DEBUG» в значение «true», если вы хотите загружать несжатые версии:
define( 'SCRIPT_DEBUG', true );
Если ваша тема или плагин показывает данные, полученные из базы данных, вы можете сохранить сведения о запросе для последующего просмотра. Константа «SAVEQUERIES» заставляет WordPress хранить информацию о запросах в массиве «$wpdb->queries». Эти сведения будут напечатаны, добавив следующий код в шаблон подвала вашего сайта:
    if ( current_user_can( 'administrator' ) ) {
        global $wpdb;
        echo '<pre>';
        print_r( $wpdb->queries );
        echo '</pre>';
    }
Настройки, связанные с контентом
Когда ваш сайт вырастет, вы можете захотеть уменьшить количество пост-редакций. По умолчанию WordPress автоматически сохраняет изменения каждые 60 секунд. Мы можем изменить это значение, установив пользовательский интервал в wp-config следующим образом:
define( 'AUTOSAVE_INTERVAL', 160 );
Конечно, вы также можете уменьшить интервал автосохранения.
Каждый раз, когда мы сохраняем наши изменения, WordPress добавляет строку в таблицу сообщений, чтобы мы могли восстановить предыдущие версии сообщений и страниц. Это полезный функционал, который может стать проблемой, когда наш сайт станет больше. К счастью, мы можем уменьшить максимальное количество сохраняемых пост-ревизий или вообще отключить эту функцию.
Если вы хотите отключить публикацию ревизий, определите следующую константу:
define( 'WP_POST_REVISIONS', false );
Если вы хотите ограничить максимальное количество ревизий, добавьте следующую строку:
define( 'WP_POST_REVISIONS', 10 );
По умолчанию WordPress хранит удаленные сообщения, страницы, вложения и комментарии в течение 30 дней, а затем удаляет их навсегда. Мы можем изменить это значение с помощью следующей константы:
define( 'EMPTY_TRASH_DAYS', 10 );
Мы даже можем отключить корзину, установив для нее значение 0, но учтите, что WordPress больше не позволит вам восстанавливать содержимое.
Разрешенный объем памяти
Иногда вы можете получить сообщение, подобное следующему:
Fatal error: Allowed memory size of xxx bytes exhausted …
Максимальный объем памяти зависит от конфигурации сервера. Если у вас нет доступа к файлу php.ini, вы можете увеличить ограничение памяти только для WordPress, установив константу «WP_MEMORY_LIMIT» в файле wp-config. По умолчанию WordPress пытается выделить 40 МБ для PHP для отдельных сайтов и 64 МБ для многосайтовой установки. Конечно, если выделенная PHP память превышает 40 МБ (или 64 МБ), WordPress примет максимальное значение.
При этом, вы можете установить пользовательское значение с помощью следующей строки:
define( 'WP_MEMORY_LIMIT', '128M' );
При необходимости вы также можете установить максимальный предел памяти с помощью следующего оператора:
define( 'WP_MAX_MEMORY_LIMIT', '256M' );
Автоматические обновления
Начиная с версии 3.7, WordPress поддерживает автоматические обновления для выпусков безопасности. Это важная функция, которая позволяет администраторам сайтов постоянно поддерживать безопасность своего сайта.
Вы можете отключить все автоматические обновления, определив следующую константу:
define( 'AUTOMATIC_UPDATER_DISABLED', true );
Возможно, не стоит отключать обновления безопасности, но это ваш выбор.
По умолчанию автоматические обновления не работают с основными выпусками, но вы можете включить любые основные обновления, определяя их «WP_AUTO_UPDATE_CORE» следующим образом:
    # Отключает все основные обновления:
    define( 'WP_AUTO_UPDATE_CORE', false );

    # Включает все обновления, включая основные и второстепенные:
    define( 'WP_AUTO_UPDATE_CORE', true );
Значение по умолчанию «minor»:
define( 'WP_AUTO_UPDATE_CORE', 'minor' );
Дополнительная константа отключает автообновления (и любое обновление или изменение любого файла). Если вы установите «DISALLOW_FILE_MODS» в значение «true», все изменения файлов будут отключены, даже установки и обновления тем и плагинов. По этой причине его использование не рекомендуется.
Настройки безопасности
Мы можем использовать файл wp-config для повышения безопасности сайта. В дополнение к изменениям в файловой структуре, которые мы рассмотрели выше, мы можем заблокировать некоторые функции, которые могут открыть ненужные уязвимости. Прежде всего, мы можем отключить редактор файлов, представленный в панели администратора. Следующая константа скроет экран «Appearance Editor»:
define( 'DISALLOW_FILE_EDIT', true );
Примечание: учтите, что некоторые плагины не смогут работать должным образом, если эта константа определена как «true».

Функцией безопасности является администрирование через SSL. Если вы приобрели сертификат SSL и он правильно настроен, вы можете заставить WordPress передавать данные через SSL при любом входе в систему и сеансе администратора. Используйте следующую константу:
define( 'FORCE_SSL_ADMIN', true );
Проверьте Кодекс, если вам нужна дополнительная информация об администрировании через SSL.
Две другие константы позволяют блокировать внешние запросы и выводить список разрешенных хостов.
    define( 'WP_HTTP_BLOCK_EXTERNAL', true );
    define( 'WP_ACCESSIBLE_HOSTS', 'example.com,*.anotherexample.com' );
В этом примере мы сначала отключили все обращения с внешних хостов, затем перечислили разрешенные хосты, разделенные запятыми (подстановочные знаки разрешены).
Другие дополнительные настройки
«WP_CACHE» — значение «true» включает скрипт wp-content/advanced-cache.php. Эта константа действует только если вы устанавливаете постоянный плагин кэширования.
«CUSTOM_USER_TABLE» и «CUSTOM_USER_META_TABLE» используются для установки пользовательских таблиц, отличных от таблиц «wp_users» и «wp_usermeta» по умолчанию. Эти константы включают полезную функцию, которая позволяет пользователям сайта получать доступ к нескольким веб-сайтам только с одной учетной записью. Чтобы эта функция работала, все установки должны совместно использовать одну и ту же базу данных.
Начиная с версии 2.9, WordPress поддерживает автоматическую оптимизацию базы данных. Благодаря этой функции, установив «WP_ALLOW_REPAIR» в значение «true», WordPress автоматически восстановит поврежденную базу данных.
WordPress создает новый набор изображений каждый раз, когда вы редактируете изображение. Если вы восстановите исходное изображение, все созданные наборы останутся на сервере. Вы можете перезаписать это поведение, установив «IMAGE_EDIT_OVERWRITE» значение в «true», чтобы при восстановлении исходного изображения все изменения были удалены с сервера.
Блокировка wp-config.php
Теперь мы знаем, почему wp-config.php является одним из наиболее важных файлов WordPress. Итак, почему мы не скрываем это от хакеров? Прежде всего, мы можем переместить wp-config на один уровень выше корневой папки WordPress (всего на один уровень). Однако этот метод немного противоречив, поэтому я бы предложил принять другие решения для защиты файла. Если ваш сайт работает на веб-сервере Apache, вы можете добавить следующие директивы в файл .htaccess:
    <files wp-config.php>
    order allow,deny
    deny from all
    </files>
Если сайт работает на Nginx, вы можете добавить следующую директиву в файл конфигурации:
location ~* wp-config.php { deny all; }
Примечание. Эти инструкции следует добавлять только после завершения настройки.
Если ваш сайт прошел несколько миграций или вы приобрели его у кого-то другого, рекомендуется создать новый набор ключей безопасности WordPress. Эти ключи представляют собой набор случайных величин, которые улучшают шифрование информации, хранящейся в файлах «cookie» пользователя. Начиная с WordPress 2.7, было 4 разных ключа: «AUTH_KEY», «SECURE_AUTH_KEY», «LOGGED_IN_KEY» и «NONCE_KEY».
По умолчанию они генерируются случайным образом для вас. Но на самом деле WordPress имеет бесплатный инструмент, который вы можете использовать для генерации новых случайных ключей. Затем вы можете просто обновить ваши текущие ключи, которые хранятся в вашем файле wp-config.php.

Ключи безопасности WordPress
И наконец, вы должны дважды проверить и убедиться, что ваши права доступа усилены в вашем файле wp-config.php. Обычно для файлов в корневом каталоге сайта WordPress устанавливается значение 644, что означает, что файлы доступны для чтения и записи для владельца файла и для чтения пользователями в группе, владеющей этим файлом, и для чтения всеми остальными. Согласно документации WordPress, разрешения для файла wp-config.php должны быть установлены на 440 или 400, чтобы другие пользователи на сервере не могли его прочитать. Вы можете легко изменить это с вашим FTP-клиентом.

Права доступа для wp-config.php
Резюме
В этом посте я перечислил много констант WordPress, которые мы можем определить в файле wp-config. Некоторые из этих констант имеют общее использование, и их функции легко понять. Другие константы включают расширенные функции, которые требуют глубоких знаний WordPress и администрирования сайта.
Я перечислил наиболее распространенные функции, оставляя в стороне некоторые дополнительные функции, которые мы можем обсудить в будущих публикациях. Если вы хотите изучить функции и константы не перечисленные здесь, начните разговор в комментариях ниже, и мы углубимся в подробности.
До скорых встреч!

Юрич:
Занимаюсь созданием сайтов на WordPress более 6 лет. Ранее работал в нескольких веб-студиях и решил делиться своим опытом на данном сайте. Пишите комментарии, буду рад общению.
The wp-config file is a powerful core WordPress file that can be used for a range of purposes. While it’s vital for running your website, you will also need to edit it.
That’s what this post is all about.
For example, you may need to change the default configuration of your site to add an extra layer of security. If you get the common “error establishing database connection” error message, you’ll also need to modify the wp-config.php file.
Whatever your reason for wanting to learn more about the wp-config.php file, this article is the perfect place to get started.
Before we get started, take note: editing the wp-config file is delicate work. A single error can break your website.
But don’t worry, if you follow all the steps we’ll show you, you’ll be a pro by the end!
Table Of Contents
- What Is the wp-config File in WordPress?
- Where Is the wp-config File in WordPress?
- Locating wp-config Using cPanel
- Locating wp-config Using FTP
- How to Edit the wp-config File Safely
- MySQL
- Authentication Keys and Salts
- WordPress Database Table Prefix
- WordPress Debugging Mode
- Absolute Path Settings
- Creating Your Own wp-config File
- Using a Plugin to Edit the wp-config File
- You’re Ready to Edit Your wp-config File Like a Pro!
What Is the wp-config File in WordPress?
Every WordPress installation consists of a series of files that determine how it works. The wp-config file is one of the most important of these files.
The wp-config file includes core configuration settings essential for the functioning of WordPress. That includes where to find the database, login credentials and other essential information.
The file can also store essential information for plugins.
When a user takes any action on a WordPress website, WordPress must communicate with the website’s database in order to process the request.
It uses the wp-config file to do that.
For example, if you use web caching, the cache plugin will store essential information in wp-config. If you use encryption, the file contains the default security keys for your WordPress website.
While most important WordPress files are created by default once a new WordPress installation is created, the wp-config file is not.
Instead, a fresh WordPress installation will come with a file named wp-config-sample.php.
As you set up your fresh WordPress installation, the data you provide will be used to create the wp-config.php file. Alternatively, you can skip this step by creating your wp-config file manually.
To do this, you will need to locate the wp-config-sample.php file and paste in the relevant details.
We’ll show you how to do that in a little while.
Where Is the wp-config File in WordPress?
To make changes to your wp-config.php or wp-config-sample.php file, you need to find it first!
This is easy to do using either cPanel or File Transfer Protocol (FTP).
We’ll walk you through both methods.
Before you begin, you must do what every professional WordPress user should. Create a backup!
Regularly updated backups of your website and its contents means that even if you inadvertently break your website, you can bring it back to life with the click of a button.
There are several ways to create a backup, which we have covered in detail previously.
As we are only modifying a single file, it makes sense to back up that file rather than your entire website.

Hello! My name is Sujay and I’m CEO of Astra.
We’re on a mission to help small businesses grow online with affordable software products and the education you need to succeed.
Leave a comment below if you want to join the conversation, or click here if you would like personal help or to engage with our team privately.
Locating wp-config Using cPanel
If you would like to do this using cPanel, your web hosting service will likely have sent you a link to your cPanel in your welcome email.
Log into cPanel and then navigate to File Manager and then to the public_html folder. You will see a series of files.
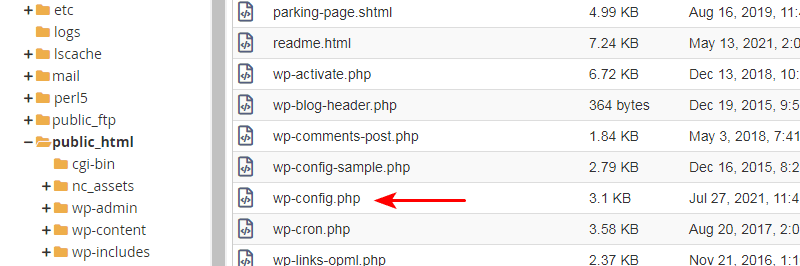
Look for wp-config.php and click on it. The file won’t open when you click on it, but you can open it by navigating to the menu bar and clicking edit or right clicking the file.
Before you make any changes to wp-config, make a copy.
- Right click the file and select Copy
- Name it wp-config.bak and save the file
- Select your original wp-config file again
- Once you have clicked on edit from the menu bar, a popup should appear with yet another Edit button. Click on this to get started.
Now that you know how to find the wp-config.php file using cPanel, we’ll walk you through another method of finding it, and then we’ll show you how to edit it safely.
If anything goes wrong, delete the edited wp-config file and rename wp-config.bak to wp-config. Your website should begin working again right away.
Locating wp-config Using FTP
FTP is the other way for webmasters to upload content onto their web server.
WordPress and other Content Management Systems have made content management much simpler, completely bypassing the need for FTP in uploading or downloading content from your website.
That said, there are still some occasions when FTP comes in handy.
A good example is when you’re faced with a need to edit your wp-config.php file. To use FTP for this, you’re going to need to download an FTP client. This is a simple piece of software designed specifically for it.
The most popular FTP client, and one that we recommend, is Filezilla.
Begin by installing Filezilla on your computer.
To connect with your server, you will need your server’s IP address, as well as your FTP username and password. Your hosting service provider will usually provide you with these details.
Once you have Filezilla installed, click on Site Manager > New Site > My Website Name.
Here, you will enter the name of your website.
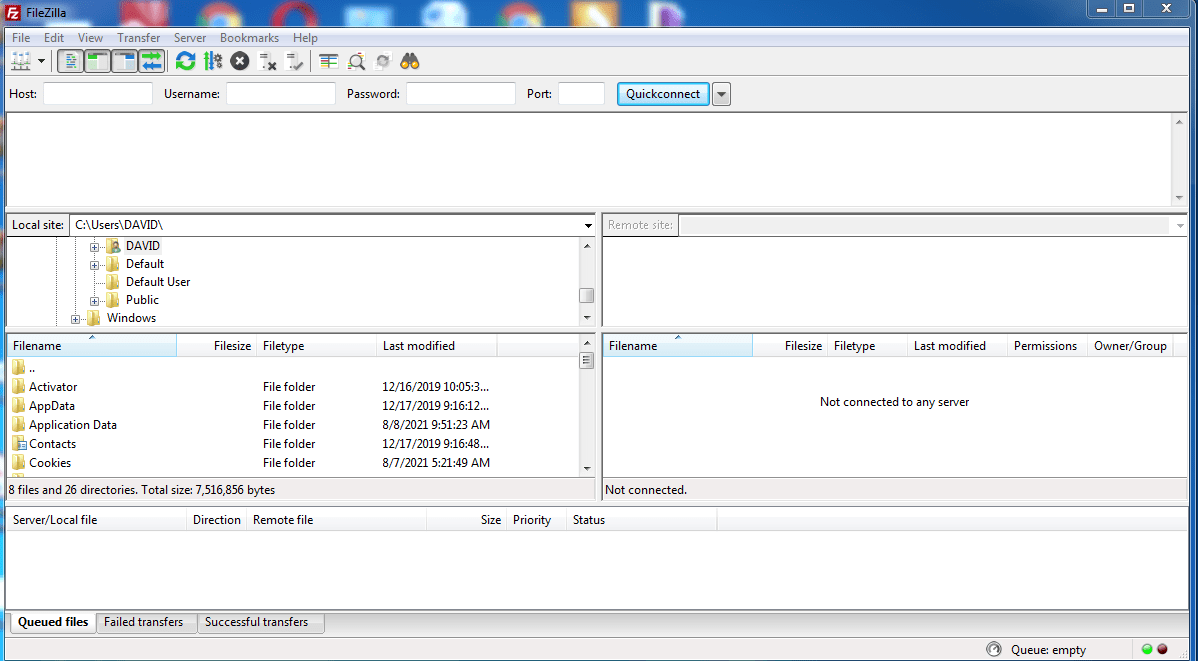
Once this is done, you will need to enter the following details:
- Host: Your server IP address
- Port: 21
- User: your cPanel username
You won’t need to bother with the other settings. Go ahead and click Connect.
Then enter your password and click Ok.
You should then connect with your server where you will find your wp-config file in the public_html folder.
How to Edit the wp-config File Safely
Once you have found wp-config using either cPanel or FTP, your next step will be safely editing it.
As we pointed out previously, even a slight error in the wp-config file can lead to a broken website so be careful.
Here’s what the wp-config file should look like ordinarily:
<?php
/**
 * The base configuration for WordPress
 *
 * The wp-config.php creation script uses this file during the
 * installation. You don't have to use the web site, you can
 * copy this file to "wp-config.php" and fill in the values.
 *
 * This file contains the following configurations:
 *
 * * MySQL settings
 * * Secret keys
 * * Database table prefix
 * * ABSPATH
 *
 * @link https://codex.wordpress.org/Editing_wp-config.php
 *
 * @package WordPress
 */

// ** MySQL settings - You can get this info from your web host ** //
/** The name of the database for WordPress */
define('DB_NAME', 'database_name_here');

/** MySQL database username */
define('DB_USER', 'username_here');

/** MySQL database password */
define('DB_PASSWORD', 'password_here');

/** MySQL hostname */
define('DB_HOST', 'localhost');

/** Database Charset to use in creating database tables. */
define('DB_CHARSET', 'utf8');

/** The Database Collate type. Don't change this if in doubt. */
define('DB_COLLATE', '');

/**#@+
 * Authentication Unique Keys and Salts.
 *
 * Change these to different unique phrases!
 * You can generate these using the {@link https://api.wordpress.org/secret-key/1.1/salt/ WordPress.org secret-key service}
 * You can change these at any point in time to invalidate all existing cookies. This will force all users to have to log in again.
 *
 * @since 2.6.0
 */
define('AUTH_KEY',         'put your unique phrase here');
define('SECURE_AUTH_KEY',  'put your unique phrase here');
define('LOGGED_IN_KEY',    'put your unique phrase here');
define('NONCE_KEY',        'put your unique phrase here');
define('AUTH_SALT',        'put your unique phrase here');
define('SECURE_AUTH_SALT', 'put your unique phrase here');
define('LOGGED_IN_SALT',   'put your unique phrase here');
define('NONCE_SALT',       'put your unique phrase here');

/**#@-*/

/**
 * WordPress Database Table prefix.
 *
 * You can have multiple installations in one database if you give each
 * a unique prefix. Only numbers, letters, and underscores please!
 */
$table_prefix  = 'wp_';

/**
 * For developers: WordPress debugging mode.
 *
 * Change this to true to enable the display of notices during development.
 * It is strongly recommended that plugin and theme developers use WP_DEBUG
 * in their development environments.
 *
 * For information on other constants that can be used for debugging,
 * visit the Codex.
 *
 * @link https://codex.wordpress.org/Debugging_in_WordPress
 */
define('WP_DEBUG', false);

/* That's all, stop editing! Happy blogging. */

/** Absolute path to the WordPress directory. */
if ( !defined('ABSPATH') )
    define('ABSPATH', dirname(__FILE__) . '/');

/** Sets up WordPress vars and included files. */
require_once(ABSPATH . 'wp-settings.php');
If you look closely, you’ll see that the wp-config file is made up of several sections. These are:
MySQL
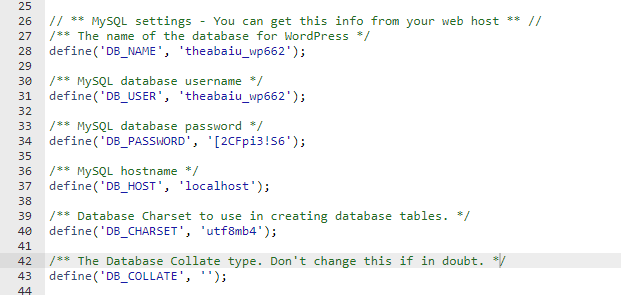
MySQL is a database administration system that uses Structured Query Language (SQL) to manage databases. One of the main uses of the wp-config file is for configuring the database connection. These details will be configured in the MySQL portion of the wp-config file.
// ** MySQL settings - You can get this info from your web host ** //
/** The name of the database for WordPress */
define( 'DB_NAME', 'database_name_here' );
/** MySQL database username */
define( 'DB_USER', 'username_here' );
/** MySQL database password */
define( 'DB_PASSWORD', 'password_here' );
/** MySQL hostname */
define( 'DB_HOST', 'localhost' );
/** Database charset to use in creating database tables. */
define( 'DB_CHARSET', 'utf8' );
/** The database collate type. Don't change this if in doubt. */
define( 'DB_COLLATE', '' );
Authentication Keys and Salts
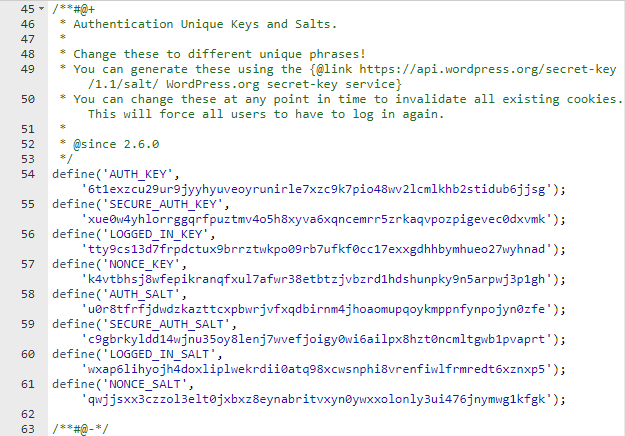
Authentication keys and Salts can be used by WordPress to provide layers of encryption. They ensure the integrity of user sessions and WordPress-generated cookies.
/**#@+
* Authentication unique keys and salts.
*
* Change these to different unique phrases! You can generate these using
* the {@link https://api.wordpress.org/secret-key/1.1/salt/ WordPress.org secret-key service}.
*
* You can change these at any point in time to invalidate all existing cookies.
* This will force all users to have to log in again.
*
* @since 2.6.0
*/
define( 'AUTH_KEY',         'put your unique phrase here' );
define( 'SECURE_AUTH_KEY',  'put your unique phrase here' );
define( 'LOGGED_IN_KEY',    'put your unique phrase here' );
define( 'NONCE_KEY',        'put your unique phrase here' );
define( 'AUTH_SALT',        'put your unique phrase here' );
define( 'SECURE_AUTH_SALT', 'put your unique phrase here' );
define( 'LOGGED_IN_SALT',   'put your unique phrase here' );
define( 'NONCE_SALT',       'put your unique phrase here' );
WordPress Database Table Prefix
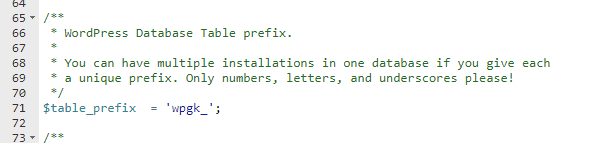
This section of the wp-config file provides additional security options. One way hackers commonly target WordPress websites is by injecting malicious code into exposed WordPress databases.
You can make your database harder to attack by changing the default wp_prefix in the wp-config file to something random.
/**
* WordPress database table prefix.
*
* You can have multiple installations in one database if you give each
* a unique prefix. Only numbers, letters, and underscores please!
*/
$table_prefix = 'wp_';
WordPress Debugging Mode
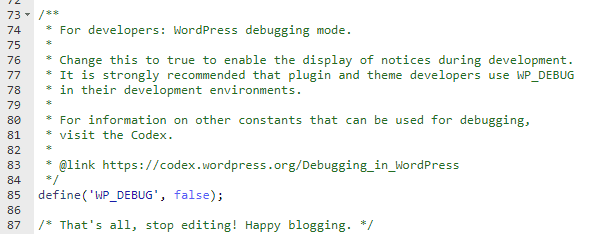
WordPress debugging mode is a useful feature that helps with troubleshooting common WordPress errors. By default, PHP, the core language that powers WordPress, provides detailed error messages, but these are silenced in the wp-config.php file.
To turn them back on, you can do this in numerous ways such as by using a plugin, by manually editing the wp-config file in cPanel, or through FTP.
/**
* For developers: WordPress debugging mode.
*
* Change this to true to enable the display of notices during development.
* It is strongly recommended that plugin and theme developers use WP_DEBUG
* in their development environments.
*
* For information on other constants that can be used for debugging,
* visit the documentation.
*
* @link https://wordpress.org/support/article/debugging-in-wordpress/
*/
define( 'WP_DEBUG', false );
To turn WordPress debugging mode on, simply add this line of code to the wp-config file:
define(‘WP_DEBUG’, true);Once you are done with troubleshooting, you can switch debugging mode off with the following line of code:
define(‘WP_DEBUG’, false);Absolute Path Settings

An absolute path is simply the place on a computer or server where a particular directory or folder is stored. You typically shouldn’t edit this portion of your wp-config file.
Creating Your Own wp-config File
Now that you know how to get into the wp-config file and what to expect when you get there, your next steps depend on your objectives.
For users trying to manually create the wp-config file, one of the most important things to do is configure the database settings in the MySQL section of the wp-config file.
You’ll need certain details. These will be unique to your website and hosting provider.
They are:
- Database Name
- Database Username
- Database Password
- Database Host
These details can be provided by your hosting service. You can also find them in cPanel.
To do this, log into cPanel using the steps we previously described.
Navigate to Databases and then click on MySQL Databases. You should find the relevant database values within.
Once you have these details ready, navigate to your wp-config file and take these steps:
Set Database Name
Using the details collected from your hosting service provider, find ‘database_name_here’ and replace it with the name of the database. You will do something similar for the other three values as shown below.
Set Database User
Replace ‘username_here’ with the username provided by your hosting service.
Set Database Password
Replace ‘password_here’ with the username provided by your hosting service.
Set Database Host
Replace ‘localhost’ with the username provided by your hosting service.
There is one additional step to take when editing or creating the database host name. If your hosting provider uses alternate ports, you need to specify the port number or the Unix socket file path in use.
Ports and file paths are really just what their names imply. They are channels that allow for the flow of traffic over the internet.
Each port is assigned a number and is dedicated to specific types of information.
If your hosting service uses an alternate port, you will want to edit the Database Host value like this:
define( 'DB_HOST', 'mysql.example.com.3307’);Replace 3307 with the number provided by your hosting service.
If your hosting service uses Unix sockets or pipes, edit this line like so:
define( 'DB_HOST', '127.0.0.1:/var/run/mysqld/mysqld.sock' );
// or define( 'DB_HOST', 'localhost:/var/run/mysqld/mysqld.sock' );
// or define( 'DB_HOST', 'example.tld:/var/run/mysqld/mysqld.sock'
You will need to replace /var/run/mysqld/mysqld.sock with the information provided by your hosting service
Using a Plugin to Edit the wp-config File
If you would rather avoid the hassle of editing the wp-config file manually, there is a simpler way to get the job done.
You can use a plugin like Wp Config File Editor. This plugin will allow you to edit all the sections of the wp-config file from your WordPress backend.
To begin, download and install the plugin from the WordPress repository.
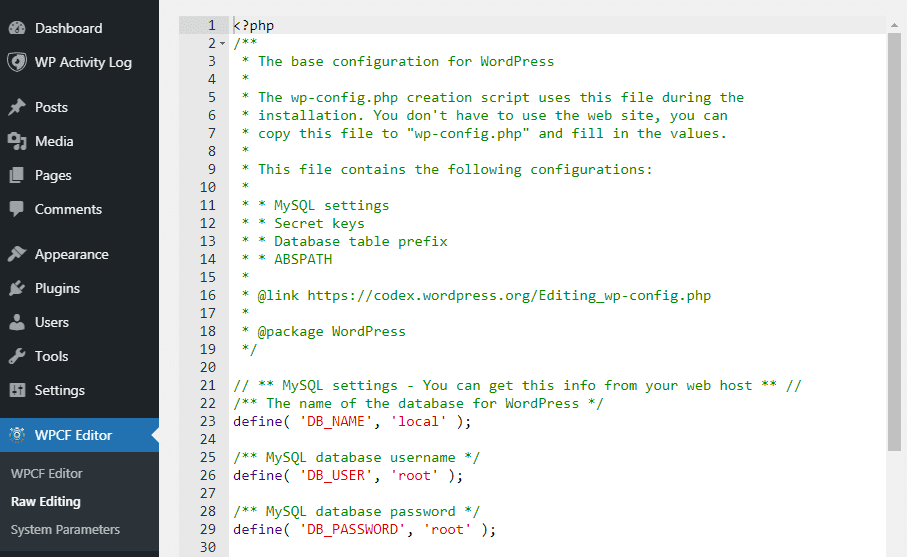
Once installed, you can access the plugin from the side menu on the dashboard.
Hover over WPCF Editor and select Raw Editing to access the wp-config file.
You’re Ready to Edit Your wp-config File Like a Pro!
There you have it! If you follow these instructions carefully, you will be able to find and edit the wp-config file of your WordPress website.
If you have to modify the file to make changes or correct anything, you now have everything you need to safely edit the file.
As long as you always take a copy of the file before you begin, any change you make to wp-config can be undone in seconds. We would always recommend making changes on a test site first but if you need to change it on live, you can.
Now you’re well on your way to mastering WordPress! Don’t forget to back your website up before you begin!
Have you tried editing the wp-config file of your WordPress website in the past? If you did, we’d love to hear what method you used, and how it all worked out!
Did you read a tutorial that asks you to edit your wp-config file, and you have no idea what it is? Well we’ve got you covered. In this article, we will show you how to properly edit the wp-config.php file in WordPress.
What is wp-config.php File?
As the name suggests, it is a configuration file that is part of all self-hosted WordPress sites.
Unlike other files, wp-config.php file does not come built-in with WordPress rather it’s generated specifically for your site during the installation process.

WordPress stores your database information in the wp-config.php file. Without this information your WordPress website will not work, and you will get the ‘error establishing database connection‘ error.
Apart from database information, wp-config.php file also contains several other high-level settings. We will explain them later in this article.
Since this file contains a lot of sensitive information, it is recommended that you don’t mess with this file unless you have absolutely no other choice.
But since you’re reading this article, it means that you have to edit wp-config.php file. Below are the steps to do it without messing things up.
Video Tutorial
Subscribe to WPBeginner
If you don’t like the video or need more instructions, then continue reading.
Getting Started
First thing you need to do is to create a complete WordPress backup. The wp-config.php file is so crucial to a WordPress site that a tiny mistake will make your site inaccessible.
You will need an FTP client to connect to your website. Windows users can install WinSCP or SmartFTP and Mac users can try Transmit or CyberDuck. An FTP client allows you to transfer files between a server and your computer.
Connect to your website using the FTP client. You will need FTP login information which you can get from your web host. If you don’t know your FTP login information, then you can ask your web host for support.
The wp-config.php file is usually located in the root folder of your website with other folders like /wp-content/.

Simply right click on the file and then select download from the menu. Your FTP client will now download wp-config.php file to your computer. You can open and edit it using a plain text editor program like Notepad or Text Edit.
Understanding wp-config.php file
Before you start, let’s take a look at the full code of the default wp-config.php file. You can also see a sample of this file here.
<?php
/**
 * The base configuration for WordPress
 *
 * The wp-config.php creation script uses this file during the
 * installation. You don't have to use the web site, you can
 * copy this file to "wp-config.php" and fill in the values.
 *
 * This file contains the following configurations:
 *
 * * MySQL settings
 * * Secret keys
 * * Database table prefix
 * * ABSPATH
 *
 * @link https://codex.wordpress.org/Editing_wp-config.php
 *
 * @package WordPress
 */

// ** MySQL settings - You can get this info from your web host ** //
/** The name of the database for WordPress */
define('DB_NAME', 'database_name_here');

/** MySQL database username */
define('DB_USER', 'username_here');

/** MySQL database password */
define('DB_PASSWORD', 'password_here');

/** MySQL hostname */
define('DB_HOST', 'localhost');

/** Database Charset to use in creating database tables. */
define('DB_CHARSET', 'utf8');

/** The Database Collate type. Don't change this if in doubt. */
define('DB_COLLATE', '');

/**#@+
 * Authentication Unique Keys and Salts.
 *
 * Change these to different unique phrases!
 * You can generate these using the {@link https://api.wordpress.org/secret-key/1.1/salt/ WordPress.org secret-key service}
 * You can change these at any point in time to invalidate all existing cookies. This will force all users to have to log in again.
 *
 * @since 2.6.0
 */
define('AUTH_KEY',         'put your unique phrase here');
define('SECURE_AUTH_KEY',  'put your unique phrase here');
define('LOGGED_IN_KEY',    'put your unique phrase here');
define('NONCE_KEY',        'put your unique phrase here');
define('AUTH_SALT',        'put your unique phrase here');
define('SECURE_AUTH_SALT', 'put your unique phrase here');
define('LOGGED_IN_SALT',   'put your unique phrase here');
define('NONCE_SALT',       'put your unique phrase here');

/**#@-*/

/**
 * WordPress Database Table prefix.
 *
 * You can have multiple installations in one database if you give each
 * a unique prefix. Only numbers, letters, and underscores please!
 */
$table_prefix  = 'wp_';

/**
 * For developers: WordPress debugging mode.
 *
 * Change this to true to enable the display of notices during development.
 * It is strongly recommended that plugin and theme developers use WP_DEBUG
 * in their development environments.
 *
 * For information on other constants that can be used for debugging,
 * visit the Codex.
 *
 * @link https://codex.wordpress.org/Debugging_in_WordPress
 */
define('WP_DEBUG', false);

/* That's all, stop editing! Happy blogging. */

/** Absolute path to the WordPress directory. */
if ( !defined('ABSPATH') )
	define('ABSPATH', dirname(__FILE__) . '/');

/** Sets up WordPress vars and included files. */
require_once(ABSPATH . 'wp-settings.php');
Each section of wp-config.php file is well documented in the file itself. Almost all settings here are defined using PHP Constants.
define( 'constant_name' , 'value');
Let’s take a closer look at each section in wp-config.php file.
MySQL Settings in wp-config.php File
Your WordPress database connection settings appear under ‘MySQL Settings’ section of the wp-config.php file. You will need your MySQL host, database name, database username and password to fill in this section.
// ** MySQL settings - You can get this info from your web host ** //
/** The name of the database for WordPress */
define('DB_NAME', 'database_name_here');

/** MySQL database username */
define('DB_USER', 'username_here');

/** MySQL database password */
define('DB_PASSWORD', 'password_here');

/** MySQL hostname */
define('DB_HOST', 'localhost');

/** Database Charset to use in creating database tables. */
define('DB_CHARSET', 'utf8');

/** The Database Collate type. Don't change this if in doubt. */
define('DB_COLLATE', '');
You can get your database information from your web hosting account’s cPanel under the section labeled databases.

If you cannot find your WordPress database or MySQL username and password, then you need to contact your web host.
Authentication Keys and Salts
Authentication unique keys and salts are security keys that help improve security of your WordPress site. These keys provide a strong encryption for user sessions and cookies generated by WordPress. See our guide on WordPress Security Keys for more information.
/**#@+
 * Authentication Unique Keys and Salts.
 *
 * Change these to different unique phrases!
 * You can generate these using the {@link https://api.wordpress.org/secret-key/1.1/salt/ WordPress.org secret-key service}
 * You can change these at any point in time to invalidate all existing cookies. This will force all users to have to log in again.
 *
 * @since 2.6.0
 */
define('AUTH_KEY',         'put your unique phrase here');
define('SECURE_AUTH_KEY',  'put your unique phrase here');
define('LOGGED_IN_KEY',    'put your unique phrase here');
define('NONCE_KEY',        'put your unique phrase here');
define('AUTH_SALT',        'put your unique phrase here');
define('SECURE_AUTH_SALT', 'put your unique phrase here');
define('LOGGED_IN_SALT',   'put your unique phrase here');
define('NONCE_SALT',       'put your unique phrase here');

/**#@-*/
You can generate WordPress security keys and paste them here. This is particularly useful if you suspect your WordPress site may have been compromised. Changing security keys will logout all currently logged in users on your WordPress site forcing them to login again.
WordPress Database Table Prefix
By default WordPress adds wp_ prefix to all the tables created by WordPress. It is recommended that you change your WordPress database table prefix to something random. This will make it difficult for hackers to guess your WordPress tables and will save you from some common SQL injection attacks.
/**
 * WordPress Database Table prefix.
 *
 * You can have multiple installations in one database if you give each
 * a unique prefix. Only numbers, letters, and underscores please!
 */
$table_prefix  = 'wp_';
Please note that you cannot change this value for an existing WordPress site. Follow the instructions in our how to change the WordPress database prefix article to change these settings on an existing WordPress site.
WordPress Debugging Mode
This setting is particularly useful for users trying to learn WordPress development, and users trying experimental features. By default WordPress hides notices generated by PHP when executing code. Simply setting the debug mode to true will show you these notices. This provides crucial information to developers to find bugs.
define('WP_DEBUG', false);
Absolute Path Settings
The last part of wp-config file defines the absolute path which is then used to setup WordPress vars and included files. You don’t need to change anything here at all.
/** Absolute path to the WordPress directory. */
if ( !defined('ABSPATH') )
	define('ABSPATH', dirname(__FILE__) . '/');
/** Sets up WordPress vars and included files. */
require_once(ABSPATH . 'wp-settings.php');
Useful wp-config.php Hacks and Settings
There are some other wp-config.php settings that can help you troubleshoot errors and solve many common WordPress errors.
Changing MySQL Port and Sockets in WordPress
If your WordPress hosting provider uses alternate ports for MySQL host, then you will need to change your DB_HOST value to include the port number. Note, that this is not a new line but you need to edit the existing DB_HOST value.
define( 'DB_HOST', 'localhost:5067' );
Don’t forget to change the port number 5067 to whatever port number is provided by your web host.
If your host uses sockets and pipes for MySQL, then you will need to add it like this:
define( 'DB_HOST', 'localhost:/var/run/mysqld/mysqld.sock' );
Changing WordPress URLs Using wp-config.php File
You may need to change WordPress URLs when moving a WordPress site to a new domain name or a new web host. You can change these URLs by visiting Settings » General page.

You can also change these URLs using wp-config.php file. This comes handy if you are unable to access the WordPress admin area due to error too many directs issue. Simply add these two lines to your wp-config.php file:
define('WP_HOME','http://example.com');
define('WP_SITEURL','http://example.com');
Don’t forget to replace example.com with your own domain name. You also need to keep in mind that search engines treat www.example.com and example.com as two different locations (See www vs non-www – Which one is better for SEO?). If your site is indexed with www prefix then you need to add your domain name accordingly.
Change Uploads Directory Using wp-config.php
By default WordPress stores all your media uploads in /wp-content/uploads/ directory. If you want to store your media files in someother location then you can do so by adding this line of code in your wp-config.php file.
define( 'UPLOADS', 'wp-content/media' );
Note that the uploads directory path is relative to the ABSPATH automatically set in WordPress. Adding an absolute path here will not work. See out detailed guide on how to change default media upload location in WordPress for more information.
Disable Automatic Updates in WordPress
WordPress introduced automatic updates in WordPress 3.7. It allowed WordPress sites to automatically update when there is a minor update available. While automatic updates are great for security, but in some cases they can break a WordPress site making it inaccessible.
Adding this single line of code to your wp-config.php file will disable all automatic updates on your WordPress site.
define( 'WP_AUTO_UPDATE_CORE', false );
See our tutorial on how to disable automatic updates in WordPress for more information.
Limit Post Revisions in WordPress
WordPress comes with built-in autosave and revisions. See our tutorial on how to undo changes in WordPress with post revisions. However, if you run a large site revisions can increase your WordPress database backup size.
Add this line of code to your wp-config.php file to limit the number of revisions stored for a post.
define( 'WP_POST_REVISIONS', 3 );
Replace 3 with the number of revisions you want to store. WordPress will now automatically discard older revisions. However, your older post revisions are still stored in your database. See our tutorial on how to delete old post revisions in WordPress.
We hope this article helped you learn how to edit wp-config.php file in WordPress and all the cool things you can do with it. You may also want to see our article on 25+ extremely useful tricks for WordPress functions file.
If you liked this article, then please subscribe to our YouTube Channel for WordPress video tutorials. You can also find us on Twitter and Facebook.
Disclosure: Our content is reader-supported. This means if you click on some of our links, then we may earn a commission. See how WPBeginner is funded, why it matters, and how you can support us.
Editorial Staff at WPBeginner is a team of WordPress experts led by Syed Balkhi. We have been creating WordPress tutorials since 2009, and WPBeginner has become the largest free WordPress resource site in the industry.
One of the most important files of a WordPress installation is the configuration file. It resides in the root directory and contains constant definitions and PHP instructions that make WordPress work the way you want.
The wp-config.php file stores data like database connection details, table prefix, paths to specific directories and a lot of settings related to specific features we’re going to dive into in this post.
- The Basic wp-config.php File
- Over Basic Configuration: Editing the File System
- Features for Developers: Debug Mode and Saving Queries
- Content Related Settings
- Allowed Memory Size
- Automatic Updates
- Security Settings
- Other Advanced Settings
- Lockdown wp-config.php
The Basic wp-config.php File
When you first install WordPress, you’re asked to input required information like database details and table prefix. Sometimes your host will set up WordPress for you, and you won’t be required to manually run the set-up. But when you’re manually running the 5-minute install, you will be asked to input some of the most relevant data stored into wp-config.
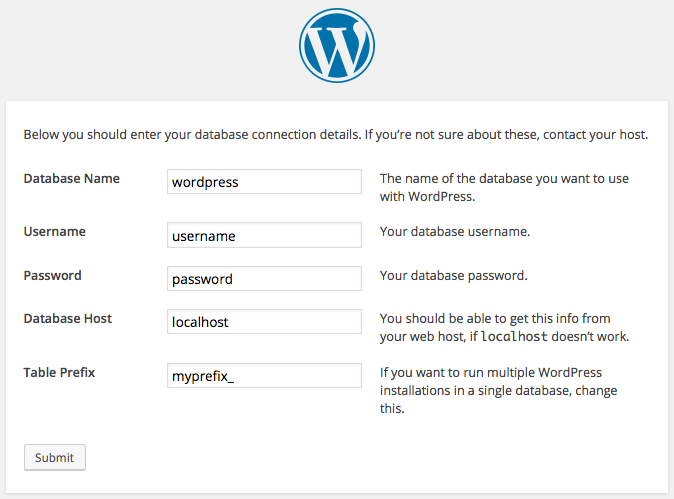
Here is a basic wp-config.php file:
// ** MySQL settings - You can get this info from your web host ** //
/** The name of the database for WordPress */
define('DB_NAME', 'database_name_here');

/** MySQL database username */
define('DB_USER', 'username_here');

/** MySQL database password */
define('DB_PASSWORD', 'password_here');

/** MySQL hostname */
define('DB_HOST', 'localhost');

/** Database Charset to use in creating database tables. */
define('DB_CHARSET', 'utf8');

/** The Database Collate type. Don't change this if in doubt. */
define('DB_COLLATE', '');

define('AUTH_KEY',		'put your unique phrase here');
define('SECURE_AUTH_KEY',	'put your unique phrase here');
define('LOGGED_IN_KEY',		'put your unique phrase here');
define('NONCE_KEY',		'put your unique phrase here');
define('AUTH_SALT',		'put your unique phrase here');
define('SECURE_AUTH_SALT',	'put your unique phrase here');
define('LOGGED_IN_SALT',	'put your unique phrase here');
define('NONCE_SALT',		'put your unique phrase here');

$table_prefix  = 'wp_';

/* That's all, stop editing! Happy blogging. */
Usually, this file is automatically generated when you run the set-up, but occasionally WordPress does not have privileges to write in the installation folder. In this situation, you should create an empty wp-config.php file, copy and paste content from wp-config-sample.php, and set the proper values to all defined constants. When you’re done, upload your file into the root folder and run WordPress.
Note: constant definitions and PHP instructions come in a specific order we should never change. And we should never add contents under the following comment line:
/* That's all, stop editing! Happy blogging. */First, come the definitions of database constants you should have received from your host:
DB_NAMEDB_USERDB_PASSWORDDB_HOSTDB_CHARSETDB_COLLATE
Following database details, eight security keys will make the site more secure against hackers. When you run the installation WordPress will automatically generate security and salt keys, but you can change them anytime, adding any arbitrary string. For better security, consider to use the online generator.
$table_prefix variable stores the prefix of all WordPress tables. Unfortunately, anyone knows its default value and this could open WordPress database to a vulnerability, which can be easily fixed by setting a custom value for $table_prefix when running the set-up.
To change table prefix in a working website, you should run several queries against the database, then manually edit the wp-config.php file. If you don’t have access to the database or you don’t have the required knowledge to build custom queries, then you can install a plugin like Change Table Prefix that will rename database tables and field names, and update the config file with no risk.
Note: it’s a good practice to backup WordPress files and database even if you will change the table prefix with a plugin.
So far the analysis has been limited to the basic configuration. But we have at our disposal many constants we can define to enable features, customize and secure the installation.
Over Basic Configuration: Editing the File System
WordPress file system is well known by users and hackers. For this reason, you may consider changing the built-in file structure by moving specific folders in arbitrary locations and setting the corresponding URLs and paths in wp-config file.
First, we can move the content folder by defining two constants. The first one sets the full directory path:
define( 'WP_CONTENT_DIR', dirname(__FILE__) . '/site/wp-content' );The second sets the new directory URL:
define( 'WP_CONTENT_URL', 'http://example.com/site/wp-content' );We can move just the plugin folder by defining the following constants:
define( 'WP_PLUGIN_DIR', dirname(__FILE__) . '/wp-content/mydir/plugins' );
define( 'WP_PLUGIN_URL', 'http://example.com/wp-content/mydir/plugins' );
The same way, we can move the uploads folder, by setting the new directory path:
define( 'UPLOADS', 'wp-content/mydir/uploads' );Note: All paths are relative to
ABSPATH, and they should not contain a leading slash.
When done, arrange the folders and reload WordPress.
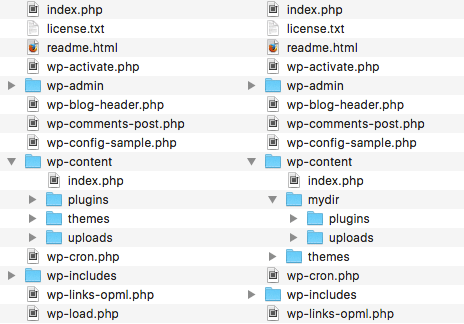
It’s not possible to move /wp-content/themes folder from the wp-config file, but we can register a new theme directory in a plugin or a theme’s functions file.
Features for Developers: Debug Mode and Saving Queries
If you are a developer you can force WordPress to show errors and warnings that will help you in theme and plugin debugging. To enable debug mode you just have to set WP_DEBUG value to true, as shown below:
define( 'WP_DEBUG', true );WP_DEBUG is set to false by default. If you need to disable debug mode, you can just remove the definition, or set the constant’s value to false.
When you’re working on a living site, you should disable debug mode. Errors and warnings should never be shown to site viewers because it can provide valuable information to hackers. But what if you have to debug anyway?
In such situations, you can force WordPress to keep memory of errors and warning in debug.log file, placed in /wp-content folder. To enable this feature, copy and paste the following code in your wp-config.php file:
define( 'WP_DEBUG', true );
define( 'WP_DEBUG_LOG', true );
define( 'WP_DEBUG_DISPLAY', false );
@ini_set( 'display_errors', 0 );
To make this feature work we first need to enable debug mode. Then, setting WP_DEBUG_LOG to true we force WordPress to store messages into debug.log file, while defining WP_DEBUG_DISPLAY to false we hide them from the screen. Finally, we set to 0 the value of PHP variable display_errors so that error messages won’t be printed to the screen. wp-config is never loaded from the cache. For this reason, it is a good place to override php.ini settings.
Note: This is a great feature you can take advantage of to register messages that WordPress would not print on the screen. As an example, when the
publish_postaction is triggered WordPress loads a script that saves data, then redirects the user to the post editing page. In this situation you can register messages, but not print them on the screen.
Another debugging constant determines the versions of scripts and styles to be loaded. Set SCRIPT_DEBUG to true if you want to load uncompressed versions:
define( 'SCRIPT_DEBUG', true );If your theme or plugin shows data retrieved from the database, you may want to store query details for subsequent review. The SAVEQUERIES constant forces WordPress to store query information into $wpdb->queries array. These details would be printed adding the following code to the footer template:
if ( current_user_can( 'administrator' ) ) {
        global $wpdb;
        echo '<pre>';
        print_r( $wpdb->queries );
        echo '</pre>';
}
For a deeper analysis of this feature, refer to How to Build Efficient Queries in WordPress.
Content Related Settings
When your website grows up, you may want to reduce the number of post revisions. By default, WordPress automatically saves revisions each 60 seconds. We can change this value by setting a custom interval in wp-config as follows:
define( 'AUTOSAVE_INTERVAL', 160 );Of course, you can decrease the auto-save interval, as well.
Each time we save our edits, WordPress adds a row to the posts table, so that we could restore previous revisions of posts and pages. This is a useful functionality that could turn into a problem when our site grows big. Fortunately, we can decrease the maximum number of post revisions to be stored, or disable the functionality at all.
If you’d want to disable post revisions, define the following constant:
define( 'WP_POST_REVISIONS', false );If you’d want to limit the maximum number of revisions, instead, add the following line:
define( 'WP_POST_REVISIONS', 10 );By default, WordPress stores trashed posts, pages, attachments and comments for 30 days, then deletes them permanently. We can change this value with the following constant:
define( 'EMPTY_TRASH_DAYS', 10 );We can even disable trash, setting its value to 0, but consider that WordPress will not allow you to restore contents anymore.
Allowed Memory Size
Occasionally you may receive a message like the following:
Fatal error: Allowed memory size of xxx bytes exhausted …
The maximum memory size depends on the server configuration. In case you didn’t have access to php.ini file, you can increase memory limit just for WordPress by setting the WP_MEMORY_LIMIT constant in wp-config file. By default, WordPress try to allocate 40Mb to PHP for single sites and 64MB for multisite installations. Of course, if PHP allocated memory is greater than 40Mb (or 64Mb), WordPress will adopt the maximum value.
That being said, you can set a custom value with the following line:
define( 'WP_MEMORY_LIMIT', '128M' );If needed, you can set a maximum memory limit, as well, with the following statement:
define( 'WP_MAX_MEMORY_LIMIT', '256M' );
Suggested reading: How to Improve PHP Memory Limit in WordPress.
Automatic Updates
Starting from version 3.7, WordPress supports automatic updates for security releases. This is an important feature that allows site admins to keep their website secure all the time.
You can disable all automatic updates by defining the following constant:
define( 'AUTOMATIC_UPDATER_DISABLED', true );Maybe it’s not a good idea to disable security updates, but it’s your choice.
By default, automatic updates do not work with major releases, but you can enable any core updates defining WP_AUTO_UPDATE_CORE as follows:
# Disables all core updates:
define( 'WP_AUTO_UPDATE_CORE', false );

# Enables all core updates, including minor and major:
define( 'WP_AUTO_UPDATE_CORE', true );
Default value is minor:
define( 'WP_AUTO_UPDATE_CORE', 'minor' );An additional constant disables auto-updates (and any update or change to any file). If you set DISALLOW_FILE_MODS to true, all file edits will be disabled, even theme and plugin installations and updates. For this reason, its usage is not recommended.
Security Settings
We can use wp-config file to increase site security. In addition to changes to the file structure we’ve looked at above, we can lock down some features that could open unnecessary vulnerabilities. First of all, we can disable the file editor provided in the admin panel. The following constant will hide the Appearance Editor screen:
define( 'DISALLOW_FILE_EDIT', true );Note: consider that some plugins could not work properly if this constant is defined to true.

A security feature is Administration over SSL. If you’ve purchased an SSL certificate, and it’s properly configured, you can force WordPress to transfer data over SSL at any login and admin session. Use the following constant:
define( 'FORCE_SSL_ADMIN', true );Check the Codex if you need more information about Administration over SSL.
Other two constants allow to block external requests and list admitted hosts.
define( 'WP_HTTP_BLOCK_EXTERNAL', true );
define( 'WP_ACCESSIBLE_HOSTS', 'example.com,*.anotherexample.com' );
In this example, we have first disabled all accesses from external hosts, then listed allowed hosts, separated by commas (wildcards are allowed).
Other Advanced Settings
WP_CACHE set to true includes wp-content/advanced-cache.php script. This constant has effect only if you install a persistent caching plugin.
CUSTOM_USER_TABLE and CUSTOM_USER_META_TABLE are used to set custom user tables other than default wp_users and wp_usermeta tables. These constants enable a useful feature that allows site users to access several websites with just one account. For this feature to work, all installations should share the same database.
Starting from version 2.9, WordPress support Automatic Database Optimizing. Thanks to this feature, setting WP_ALLOW_REPAIR to true, WordPress will automatically repair a corrupted database.
WordPress creates a new set of images each time you edit an image. If you’d restore the original image, all generated sets will remain on the server. You can overwrite this behavior by setting IMAGE_EDIT_OVERWRITE to true, so that, when you restore the original image, all edits will be deleted from the server.
Lockdown wp-config.php
Now we know why wp-config.php is one of the most important WordPress files. So, why don’t we hide it to hackers? First of all, we can move wp-config one level above WordPress root folder (just one level). However, this technique is a bit controversial, so I would suggest adopting other solutions to protect the file. If your website is running on Apache Web Server, you can add the following directives to .htaccess file:
<files wp-config.php>
order allow,deny
deny from all
</files>
If the website is running on Nginx, you can add the following directive to the configuration file:
location ~* wp-config.php { deny all; }Note: these instructions should be added only after the set-up is complete.
If your website has gone through multiple migrations or you purchased it from someone else, it is recommended that you create a fresh set of WordPress security keys. These keys are a set of random variables that improve encryption of information stored in the user’s cookies. Since WordPress 2.7 there have been 4 different keys: AUTH_KEY, SECURE_AUTH_KEY, LOGGED_IN_KEY, and NONCE_KEY.
By default, they are randomly generated for you. But WordPress actually has a free tool which you can use to generate new random keys. You can then simply update your current keys which are stored in your wp-config.php file.
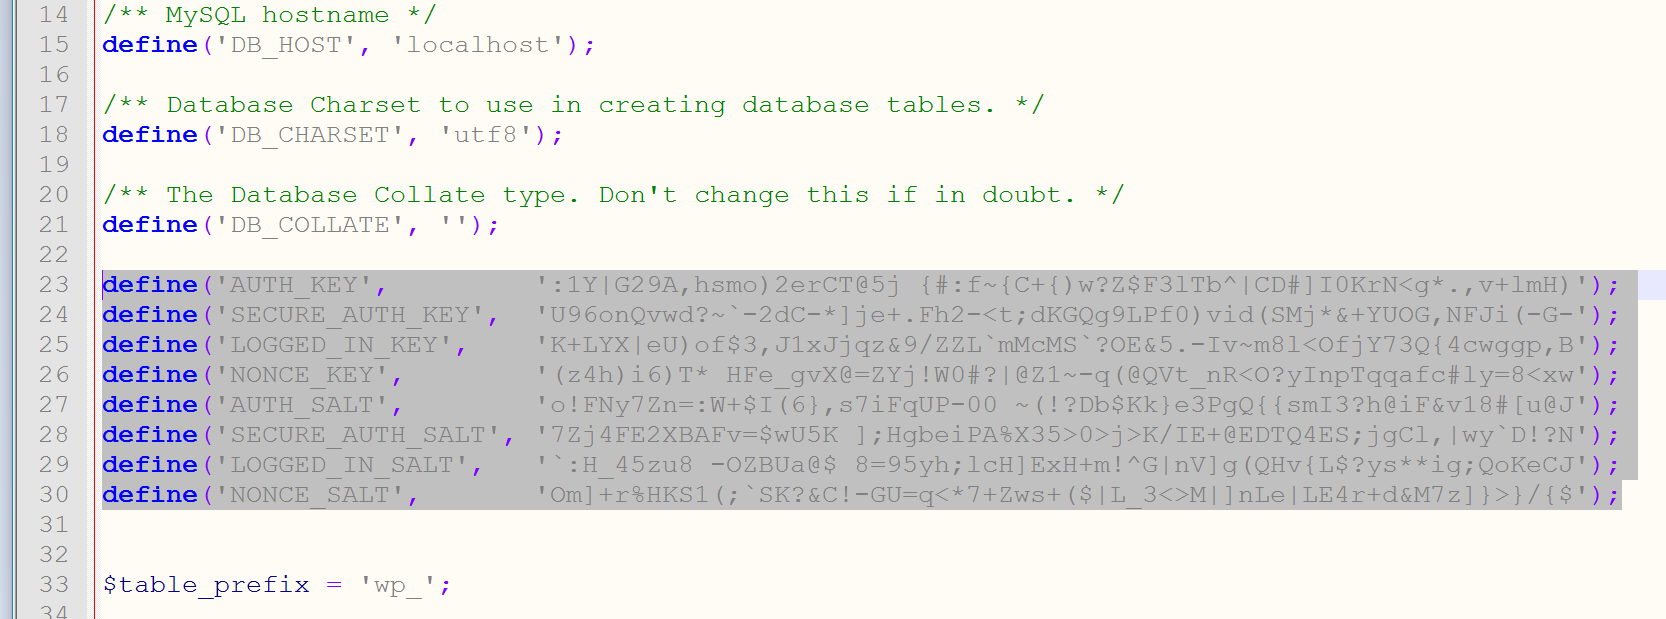
Read more about WordPress security keys.
And finally, you should double check and ensure your permissions are hardened on your wp-config.php file. Typically files in the root directory of a WordPress site will be set to 644, which means that files are readable and writeable by the owner of the file and readable by users in the group owner of that file and readable by everyone else. According to the WordPress documentation, the permissions on the wp-config.php file should be set to 440 or 400 to prevent other users on the server from reading it. You can easily change this with your FTP client.
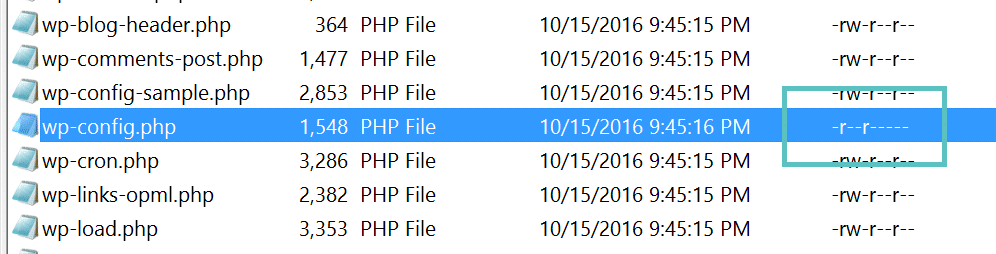
Summary
In this post, I’ve listed a lot of WordPress constant that we can define into wp-config file. Some of these constants are of common usage, and their functions are easy to understand. Other constants enables advanced features that require a deep knowledge of WordPress and site administration.
I’ve listed the most common features, leaving apart some advanced features we may discuss in future posts. If you’d want to explore features and constants not listed here, feel free to start a conversation in the comments below and we’ll dive deep.
Get all your applications, databases and WordPress sites online and under one roof. Our feature-packed, high-performance cloud platform includes:
- Easy setup and management in the MyKinsta dashboard
- 24/7 expert support
- The best Google Cloud Platform hardware and network, powered by Kubernetes for maximum scalability
- An enterprise-level Cloudflare integration for speed and security
- Global audience reach with up to 35 data centers and 275 PoPs worldwide
Test it yourself with $20 off your first month of Application Hosting or Database Hosting. Explore our plans or talk to sales to find your best fit.